Loading...
Loading...
Loading...
Loading...
Loading...
Loading...
Loading...
Loading...
Loading...
Loading...
Loading...
Loading...
Loading...
Loading...
Loading...
Loading...
Loading...
Loading...
Loading...
Loading...
Loading...
Loading...
Loading...
Loading...
Loading...
Loading...
Loading...
Loading...
Loading...
Loading...
Loading...
Loading...
Loading...
Loading...
Loading...
Get started with Launchpad by Energy Web
Energy Web's Launchpad is a Software-as-a-Service (SaaS) platform designed to seamlessly integrate blockchain solutions within the energy sector. It bridges the gap between the crypto and enterprise communities by simplifying complex processes and reducing overhead.
User-Friendly: No-code interface with easy UI-based configuration, allowing rapid deployment of enterprise solutions without requiring blockchain expertise.
SaaS Experience: Supports FIAT payment, making it accessible to organizations not familiar with cryptocurrencies.
Interconnection: Facilitates collaboration between various stakeholders in the energy and blockchain sectors.
Enterprise-Grade: Provides a robust infrastructure for developing and launching Energy Web technology solutions suitable for enterprise use.
Lower Complexity: Reduces entry-level barriers with user-friendly wizards.
Quick Deployment: Enables rapid solution configuration and deployment for energy companies and developers.
Economic Efficiency: Offers cost-effective access to blockchain and energy solutions.
Launchpad makes Energy Web technology easily deployable, encouraging wider adoption and innovation in the energy sector.
Launchpad offers 3 main types of services:
: this offering is unique to Energy Web and allows any organization or individual to implement solutions and business logics, supported by Worker nodes also available for deployment on Launchpad, in a no-code and scalable manner.
: allows users to spin up blockchain infrastructure elements in minutes. This includes RPC nodes, Validator nodes supporting the Energy Web Chain and Collator nodes supporting the Energy Web X Chain.
: pre-configured and ready to launch solutions for the Energy sector. Launchpad allows you to develop and will soon allow to spin up Digital Spine solutions.
"My Account" is where you can update your and your organizations contact and billing details & view your account details.
You access and update "My Account":
In SaaS: by clicking "Settings" at the bottom left of the page OR by clicking on your account email and icon on the top right of the page.
In VaaS: your account details are only available via the account email and icon at the top right of the page.
"My Profile" is the first item under "My Account". From "My Profile", you can view and update:
You personal data: first and last names, email address, phone number, website URL
Your addresses: billing and shipping address ⚠ Please note that the Shipping address will determine tax exceptions
Your cards: payment cards used for your subscriptions. You can add and remove credits cards from here.
"My Cloud" is where you can set and update your Cloud data. The following Cloud solutions are compatible with Launchpad:
AWS
Cloud Ocean
Head to "Subscription" for an overview of all your and your organization's current subscriptions. You can directly update subscriptions from here and verify your corresponding payment data.
You "Activity Logs" contain all login and network activities that happened on your and your organization's account.
Please note that Organizations are not fully set-up in Launchpad yet.
The concept of Organizations within Launchpad allows multiple users to share common solutions and products. It means that users will be added under the same Organization umbrella and have a variety of access based on roles. Organizations will allow a common view for users that belong to it.
You can choose to use Launchpad as an individual, but if you need to work as an organization that will soon be directly accessible via your Account settings.
Until you can readily create an Organization in Launchpad, we invite to create a with this request if you wish to add additional users.
You need to have an account to use Launchpad. If you are part of a Member organization, you can sign in with the login and password provided by the Energy Web team.Otherwise, you will need to create a new account.
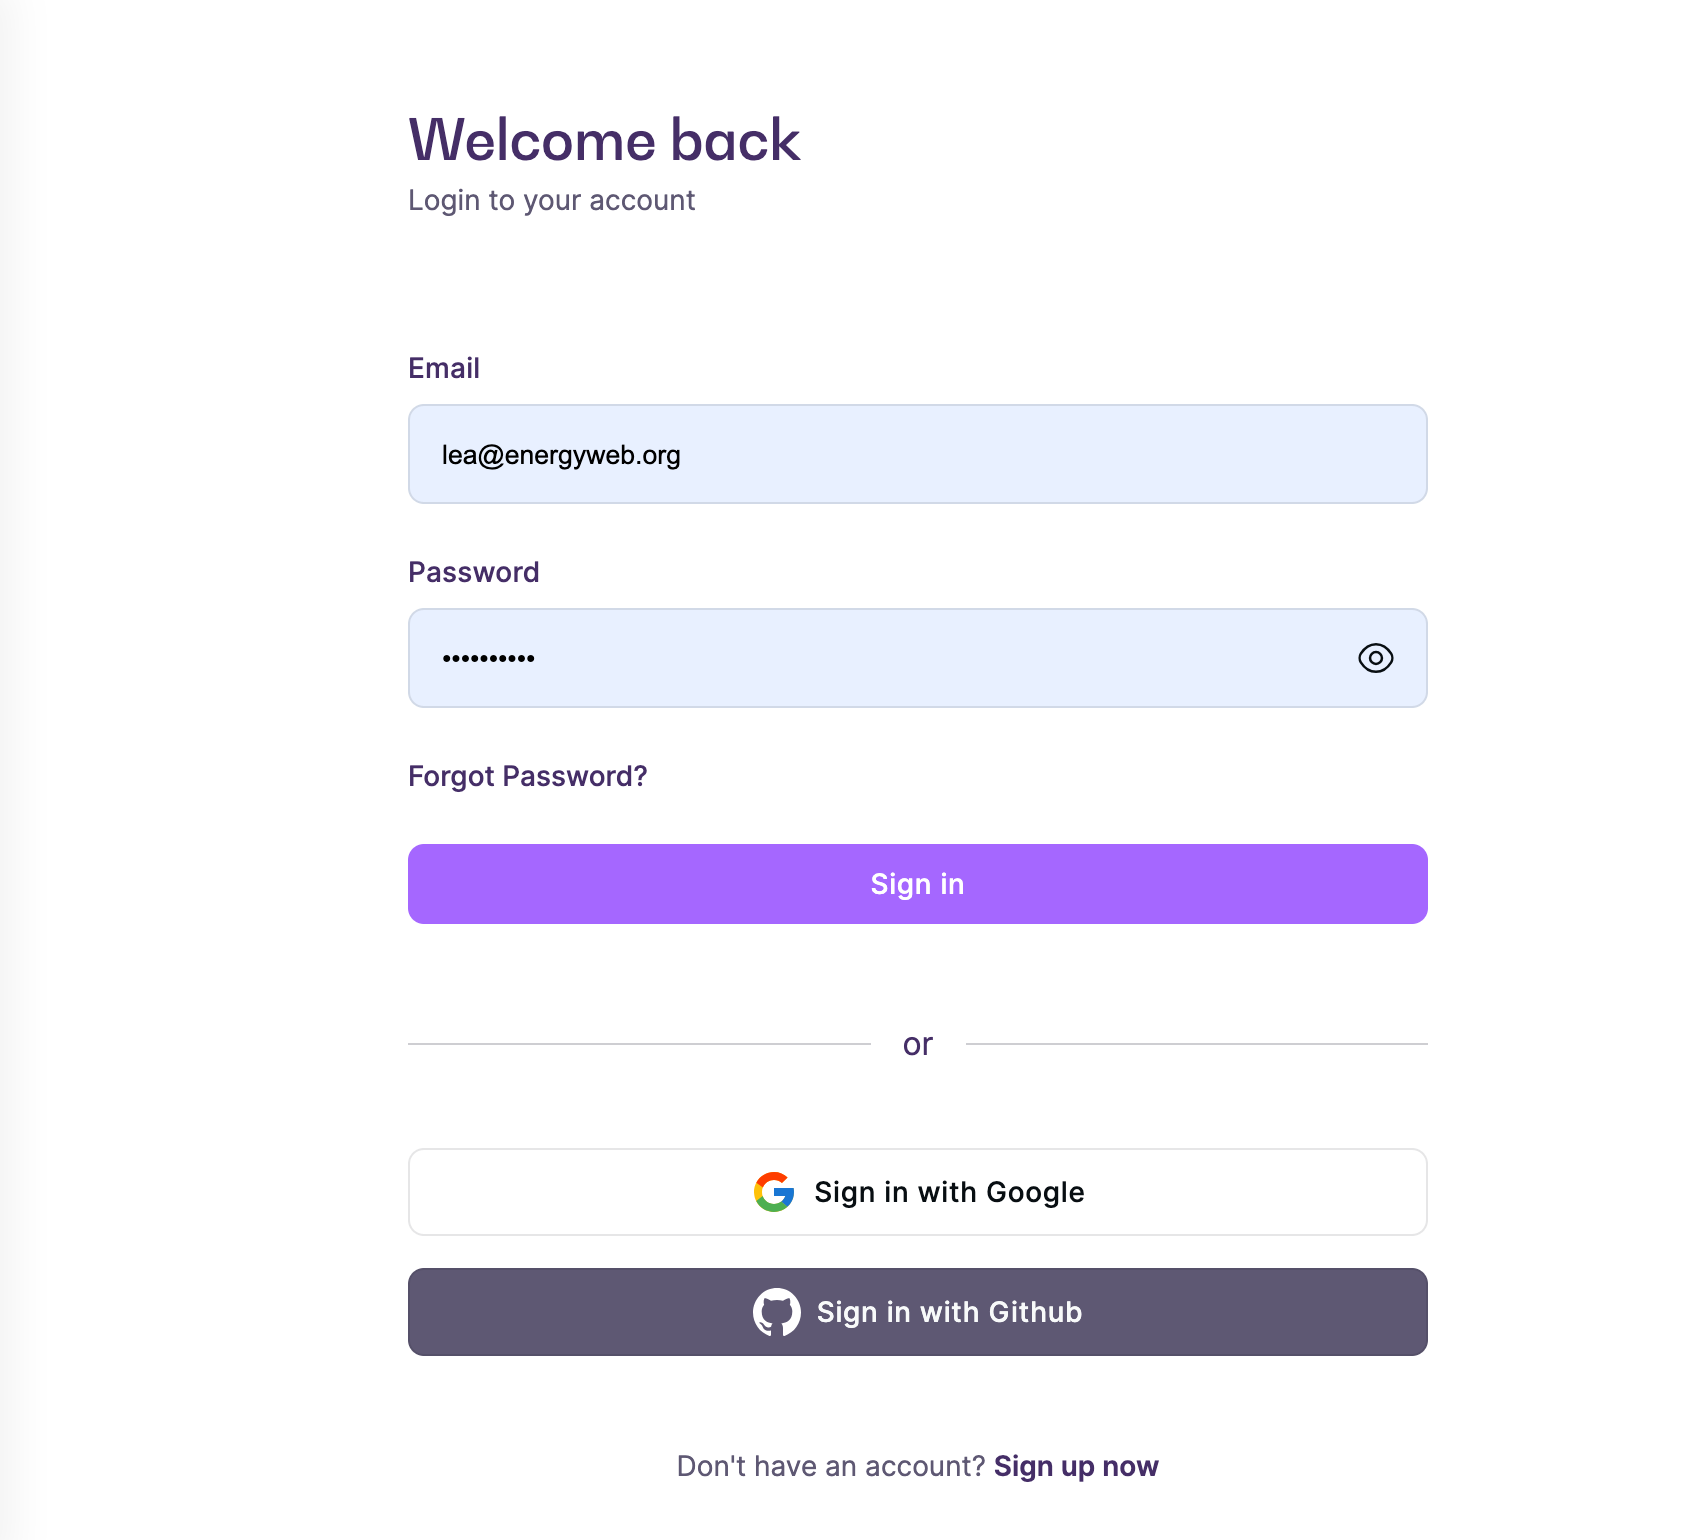
There are multiple ways to create an account from the Launchpad start screen at https://launchpad.energyweb.org/login:
Create an account with email and password by clicking "Sign up now" at the bottom of the start screen
Create an account using social logins. You can do that using Google, Apple or Github. Once the account is created with social login, you can always add a password in the future by using the forgot password option.
Once your account is created and you have logged in, you will be asked to add your organization name, this will allow you to add additional users to your account. If you are using Launchpad as an individual user, you can enter any name as Organization name. This will have no impact on your account or its features.
This documentation is here to help you get started with Launchpad and make the best of its various products.
Pricing per product available on Launchpad
You can view here the current pricing in place for all Launchpad products. For Members specific pricing, please view the .
The Green Proofs offering is based on a fully customized offer and pricing. Contact Energy Web to get a demo of Green Proofs solutions and receive an offer.
Hosted: 1200E/month for Volta node + EWC node package
Hosted: 350E/month
Bring your own cloud: 200E/month
600E/month, only hosted
Hosted: 29.99E/month
Bring your own cloud: 9.99E/month, free for members

To use products on Launchpad, users must have an active subscription. There are different subscription options for each product and two main payment methods.
IMPORTANT: Only Organization owners can subscribe and access payment information on Launchpad.
Before any purchase is done on Launchpad - and regardless of your payment method -, you will need to enter your billing (address connected to your payment) and shipping addresses (address of your activities) in your profile. You can also review your cards information here if you have paid or are planning to pay in Fiat for some of your subscriptions.
You can review and update all your subscriptions under Settings > Subscription.
Launchpad offers two general types of subscription across the platform:
Plan-based subscriptions are available for the following products:
SmartFlow
Blockchain API
Green Proofs
These subscriptions are a monthly payment giving access to the product. The payment is fixed and will give access to specific numbers of deployments and features based on the chosen plan. The plans are product-specific.
When available, the EW Member plan is only accessible to Energy Web Member organizations. .
Per-item subscriptions are available for the following products:
Validator nodes
RPC nodes
Collator nodes
Worker nodes
For these subscriptions, the monthly payment is not based on a pre-selected plan but on the number of items purchased.
Note: for validator nodes, the package contains 1 Volta node + 1 Validator node.
Organization owners can choose between 2 payment methods:
These payments methods are available for all products and can be used simultaneously for different subscriptions. For example, it's possible to have purchased 1 Worker node in Fiat, another in EWT and a Green Proof registries subscription in EWT.
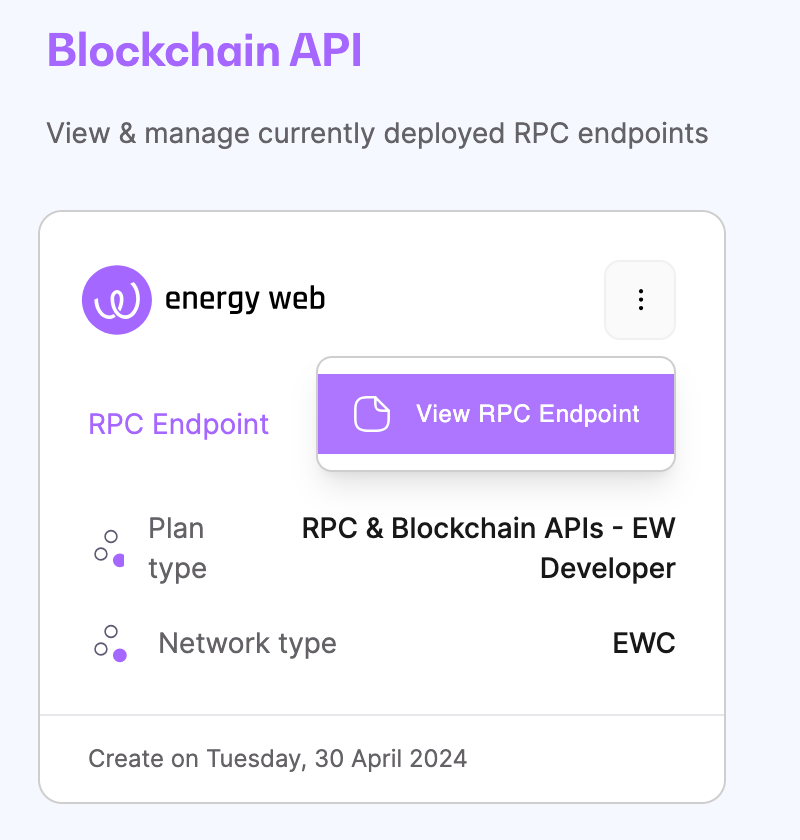
The Blockain API is a highly reliable blockchain API RPC gateway allowing you to easily access Energy Web networks.
Various plans are available, allowing cost-adjustment tailored for your needs.
The following networks are supported:
EWC
EWX
An RPC Node is a robust EWC RPC node set-up suitable for heavy programmatic loads.
It can be set-up with both managed and bring your own cloud (BYOC) options.
RPC Nodes can be deployed on the Energy Web Chain (EWC) or on Volta.
Collators maintain parachains by collecting parachain transactions from users and producing state transition proofs for relay chain validators. Collators are similar to validators on any other blockchain but they do not need to provide security guarantees because the relay chain provides those. If a parachain block is invalid, it will get rejected by validators.
Collators within the Energy Web are linked to the Energy Web X parachain.
Page describes what is a EWX Collator Node
A Collator node is a Polkadot Substrate–based node on Energy Web X responsible for block production and participation in consensus. Collators author blocks, validate state transitions, and finalize on-chain activity, including workloads and economic settlement related to the Verified Compute Cloud.
Collators secure the network through a combination of self-stake and delegated stake, aligning economic incentives with correct operation and high availability. Rewards and penalties are determined by relative stake and block-authoring performance.
The Collator Node offering in Launchpad provides a Collator-as-a-Service (CaaS) experience, allowing operators to deploy and manage a production-grade collator without deep infrastructure or protocol expertise. Launchpad abstracts node provisioning, configuration, and upgrades, while enforcing secure defaults and best-practice operational parameters. This enables operators to focus on staking, monitoring, and participation in the network, rather than low-level node maintenance.
Energy Web Member Organizations receive specific benefits on Launchpad included in their yearly membership with Energy Web. Learn more about the Energy Web community and becoming a Member.
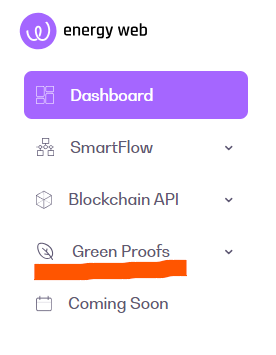
The Membership status is visible on the Launchpad Dashboard:
Below is a summary of the perks granted to Member Organizations on Launchpad. These perks and special access are granted at registration:
SmartFlow: free members only subscription. SmartFlow allows you to create business logics called SmartFlows in a no-code fashion using a NodeRed editor.
Blockchain API: free members only subscription. The Blockchain API is a highly reliable blockchain API RPC gateway allowing you to easily access Energy Web networks.
Worker Node Server: free with a Bring Your Own Cloud subscription, which means you are only paying for hosting. Worker Nodes (server) are applications which enable users to construct distributed computing networks which securely execute useful business logic.
Validator node: Validator nodes are only available for EW Members. You can use launchpad to deploy and maintain your Validator node on the Volta Chain and EWC for more ease of use.
Worker Node health checking system showcases 3 different statuses that determines various lifecycle phases for given Worker Node.
All Launchpad products subscriptions, plan-based or per-item, can be purchase in Fiat.
You can pay in Fiat by clicking "Subscribe" after selecting a plan or number of items. Do not click the "Pay in EWT" box.
You will be asked to provide address information, contact information and payment information. Fiat payments are made with Credit card.
This information can be reviewed and updated in the Settings under "".
IMPORTANT: When purchasing any item or subscription, make sure you use the same email address as the one of your account. In some cases, using a different email address will result in the unability to access your purchased product.
You will receive an invoice for each purchase. The invoice will show VAT information when applicable.
A worker node is application which enables users to construct distributed computing networks which securely execute useful business logic. Each worker node can execute multiple solutions at the same time; subject to the limits of each solution group.
The Launchpad Worker Node Offering enables to configure, launch, as well as maintain Worker Nodes Server and to connect them to the so they can execute solutions.

This status can mean several things: the Worker Node crashed, the health check system failed or the Worker Node is still being provisioned (for newly set-up workers) If your Worker Node remains in the "Stopped" state for longer than 16 hours, please contact support.
Running
The Worker is healthy and running without any errors. The Worker Account configured for that Worker Node is linked to an Operator Account on EWX.
Running - Waiting for Subscription
The Worker is healthy and running, but the Worker Account configured for that Worker Node is not yet linked to any Operator Account on EWX.
Stopped
The Business logic is the file capturing the executable work logic that is stored in IPFS.
The number of Business logics you can create is dependent on your subscription. Make sure to select the right subscription level for your needs.
You can create a Business logic via the Create new menu or under the Business logic option of the Manage menu with the "+ Create New Business logic" button.
Under the creation flow, you can either use a template or start from scratch.
After choosing a name and description, you will be redirected to a Node-Red editor where you will be building your business logic that offers pre-defined actions. Using a template will mean that you have a pre-built flow that you can edit as needed.
Once you are done, you can either publish your Business logic or save it as a draft. Note that only published Business logics count towards your subscription restrictions.
You can manage your group and open the Node-Red editor at any time under the Manage menu > Business logic.
You can delete Business logics of all statuses at any time.
Important information before you purchase Collator Node subscribtion
At present, Energy Web X collator slots are permissioned and limited to pre-approved operators. Before purchasing a Collator Node via Launchpad, prospective operators must first secure approval.
To initiate the process, please contact support-launchpad@energyweb.org with supporting information about your organization, operational readiness, and intended participation. Once approved, a collator slot will be reserved for you and you may proceed with deployment via Launchpad.
A Collator node participates in protocol operations that span three interconnected chains:
Energy Web Chain (EWC)
Energy Web X (EWX)
Ethereum
For the Launchpad Collator-as-a-Service (CaaS) offering, the initial EWC-side token allocation is handled automatically as part of the managed setup. However, operators are responsible for ensuring that the EWX and Ethereum accounts are correctly funded at all times.
This includes:
Maintaining the minimum required self-stake and operational balance on EWX
Maintaining sufficient ETH on the collator’s Ethereum (EVM) address to cover bridge-related and cross-chain operational costs
Detailed and up-to-date token requirements for each chain are documented here:
While Launchpad may provide alerts when balances fall below recommended thresholds, ongoing balance management, particularly on Ethereum, remains the operator’s responsibility, and timely top-ups are required to ensure uninterrupted operation.
A Worker Node is an offchain runner that allows you to execute custom logic in a form of a NodeRed Flows that details and lifecycle parameters are specified within the EnergyWebX worker node pallet solution and solution groups definitions.
Worker Node have EWX account called Worker Account assigned to be able to perform work. Later, this worker account can be assigned to an EWX Operator Account. Via this Operator<>Worker account link, the Worker Node is monitoring on-chain actions and therefore responds to the Operator Account on-chain actions related to subscribing/unsubscribing from solution groups. The Launchpad SmartFlow offering allows to create and control the lifecycle of the Solutions ran by the Worker Nodes.
SmartFlow therefore provides a once-stop-shop toolkit that:
Vastly reduces operational overhead
Allows for blockchain-integrated creation of distributed networks & applications
Provides enterprise-level support, reliability and user experience
The Worker Node offering on Launchpad provides a full SaaS experience and should be considered as an alternative to Marketplace Desktop App based Worker node.
You should go for Worker Node Launchpad Offering if:
You don't want to keep your laptop running 24/7
You don't have possibility to use your hardware for reliably running desktop app
You want a reliable server version that comes with full technical support
Every registry that you will spin out will have a minimum amount of functionalities that are available for you to use.
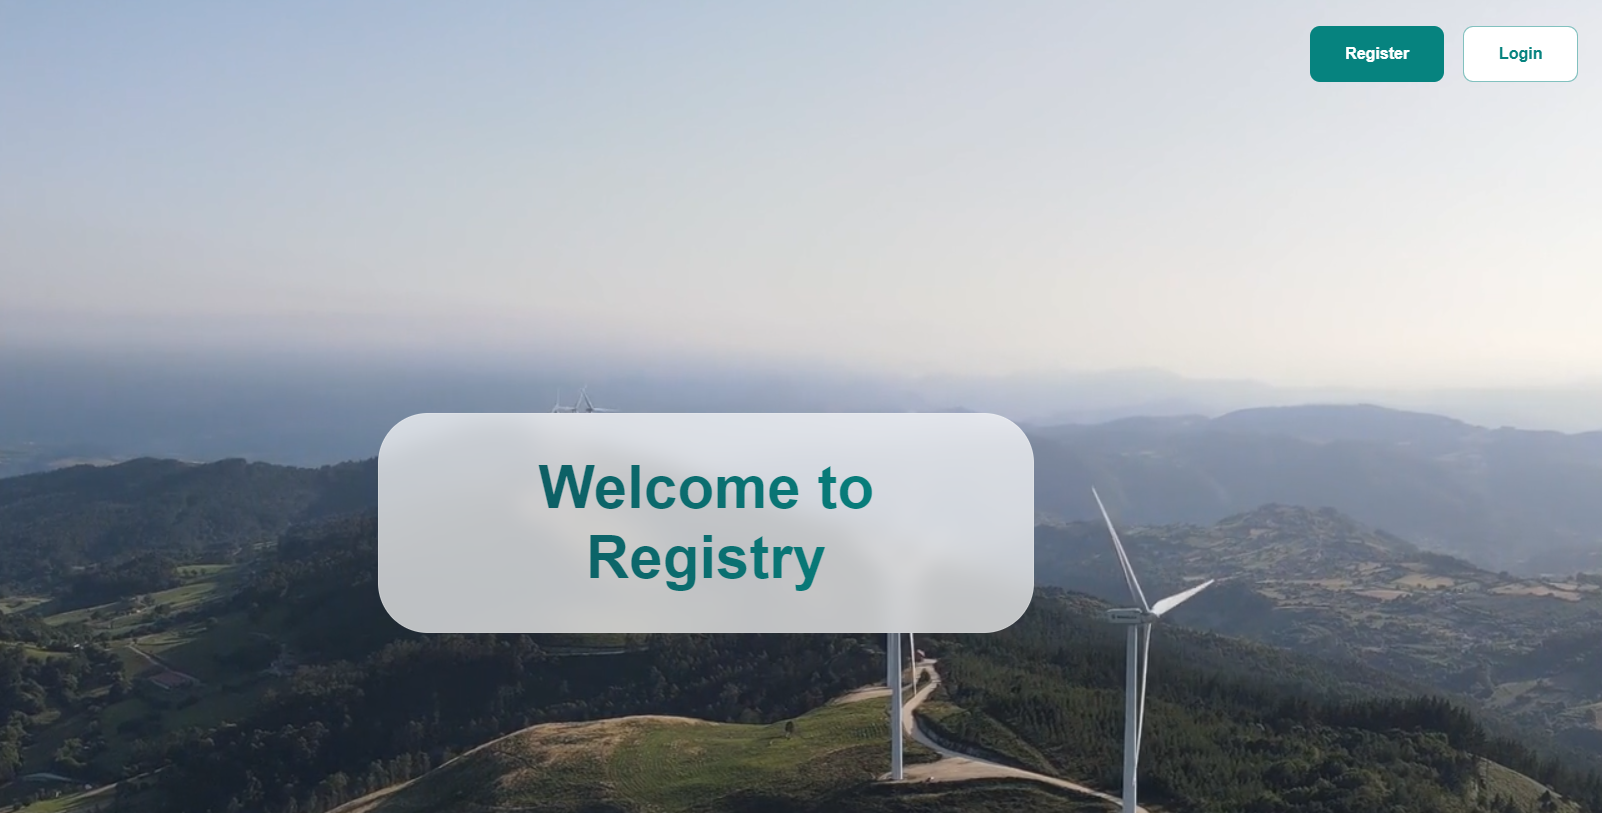
Congratulations, now that you have created your registry, you can benefit from the functionalities already available on the platform, so that you can start testing your idea.
From this point on you have two options that you can take registering and login. You can start by logging in on the platform with the designated email address for the registry admin role.
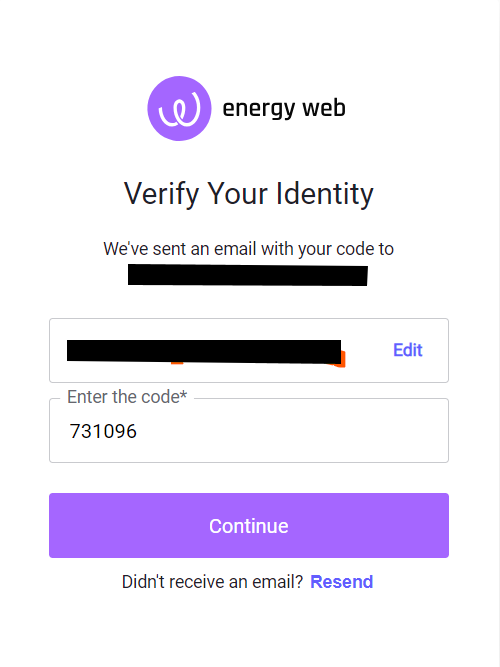
The login is using the email and a code is generated via your email to allow you to log in onto the platform.
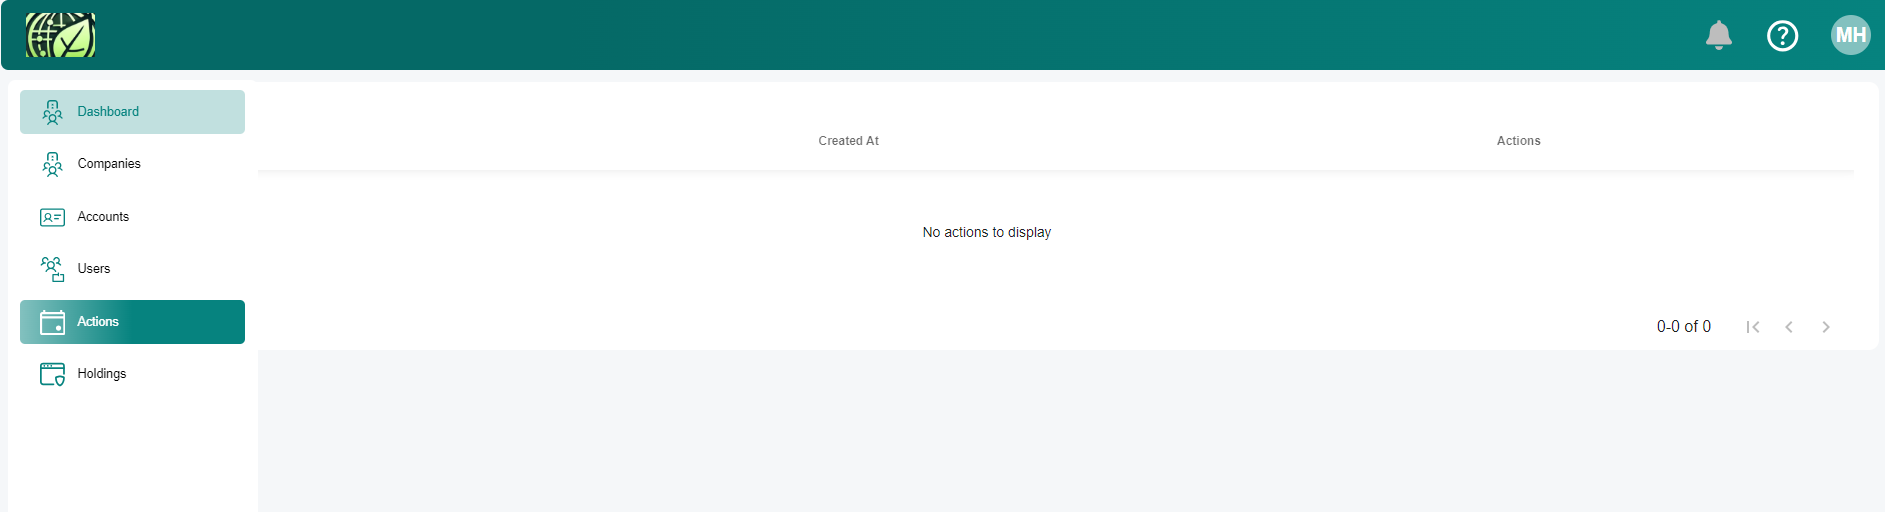
After logging in, you can see the full registry in motion with the following categories:
Dashboard: Main companies and accounts view
Companies: The list of all the companies registered on the platform
Account: Each company can have multiple accounts and account types (soon), which can be differentiated based on the functionalities available for each of them
Users: People who are using the platform. They can be part of accounts - Account Representatives or Company Representatives.
For the top navigation bar, you can see the following elements:
The logo that was chosen for the customization part
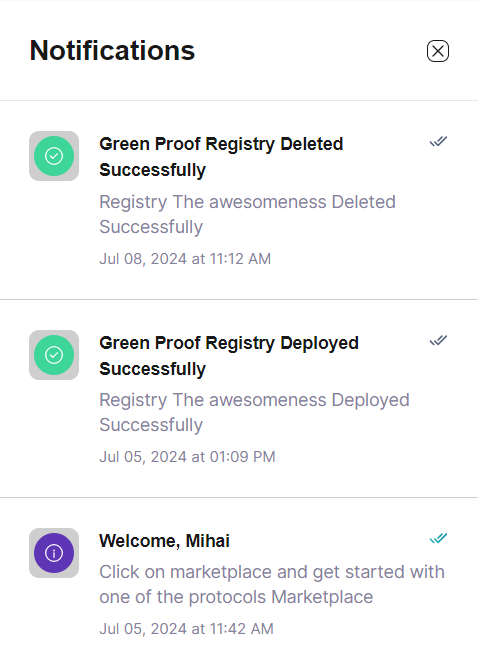
The bell shows notifications of the actions that are pending
The question mark: is the customer support feature for the end users, if they encounter an issue or have a suggestion
Dashboard
As a Registry Admin, you can have multiple invite people on the platform based on what type of user do you want on the platform.
Add a user to the company: this allows the Registry Admin to create a user from scratch for the company that he has selected. (In this case, the user only needs to log in afterwards with the email)
Invite user to account: this provides an invitation for a user to sign up and be assigned to an existed account on the platform
Invite user to company: Adds an existing user or a new user (that needs to onboard) to become the company representative of that company
Add user to account: Adds an existing user or a new user (that needs to onboard) as an account representative for an account that we choose.
Invite registry admin: Invites another user to become the registry admin as well.
In the top left corner, when you click on the 3 dots, you can also "edit" and "delete" a company as long as it is not the Registry Admin company.
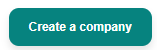
Companies
You can create a new company by pressing the "create a company" button on the top right corner. . After creating a new company, you will need to asign user to it and at least a Company Representative, using the functionalities from the "Dashboard", which are detailed above.
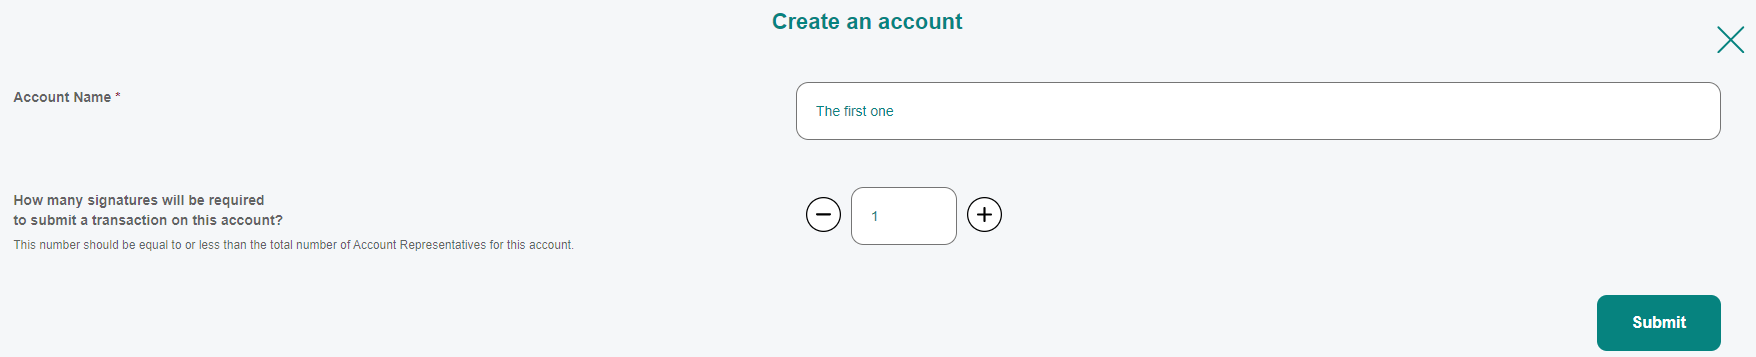
Accounts
Every company needs to have at least one account. This can have multiple forms and various access to data and functionalities, but for now you can only create one type of account with no restrictions.
The account creation allows you to determine the amount of Account Representatives required for the processes from the platform.
This is the project to enable the creation of certificates on the platform based on your specifications
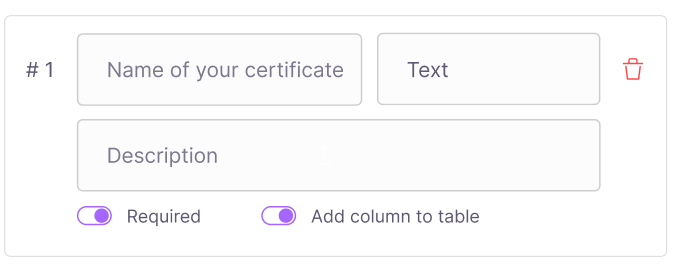
For starters, there are 20 fields available to be used. There are some which are predetermined, and predefined and some which are user-generated. So let's dive into each of them:
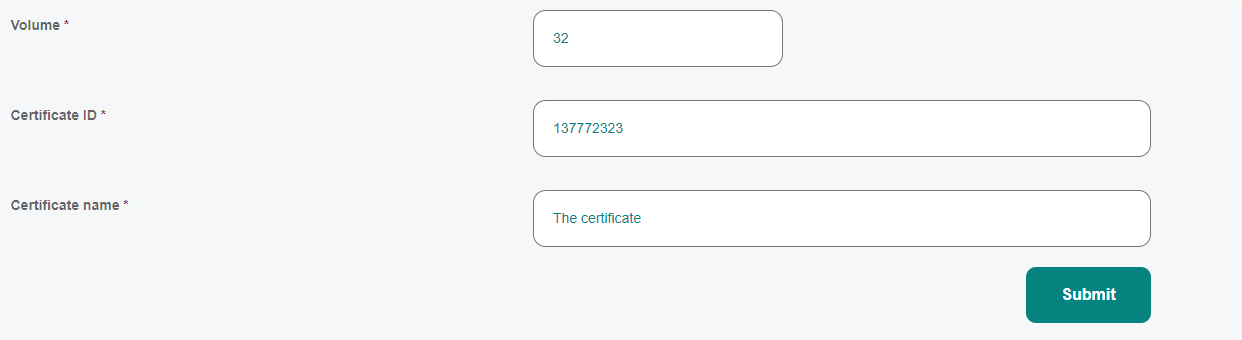
Name the certificate: Naming your certificate is the first process. The name is a "text" field which will stay the same on the platform for all certificates (Editing your registries is on our current roadmap)
The ID number: this is a predefined field, which the system provides for each creation (issuance) of a certificate to give it a unique identifier.
Date of issuance: the last predefined field, it is given by the system to asses the date that the issuance occurred. It is very useful to see which certificates have been issued more recently or not.
There are 17 more fields which you can create, with the following types: string/text/number/date/email/upload file.
Each of the 20 fields has an extra box for description.
You can also define if the field in the end will be "required" or not by triggering the boolean value.
Also, there are 4 values that can be part of the "Table". Which means that they will be shown front and centre on the table. The rest will be displayed only on the unit.
Green Proofs as a Service allows green start-ups and enterprises alike to create Proof of Concepts for demonstrating emission reduction savings through the creation of ready-to-go registries.
You can configure your registry to accommodate your requirements and you don't have to be a developer to do it.
Examples of emission savings products include:
Sustainable Aviation Fuel ( marking the difference between regular fuel and low emissions fuel)
Maritime Sustainable Fuel ( marking the difference between regular fuel and low emissions fuel)
Green Proofs for Bitcoin ( demonstrating the use of renewables vs fossil fuel energy)
Your next project can be showcased here.
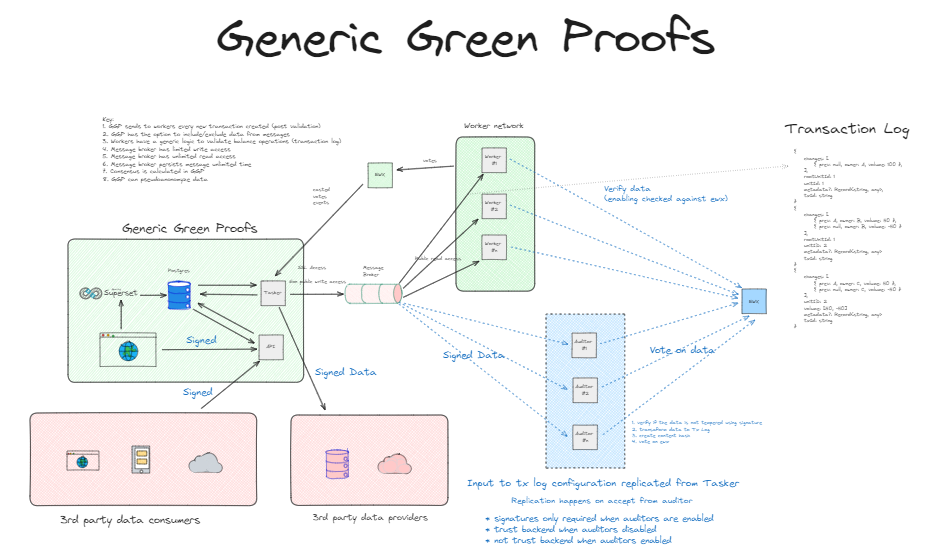
To see how it works you can go here or see the of all functionalities (both configurable and inside the platform) or consult the technical diagram below.
Issue Unit
The first functionality for the end-user, after the company, account, users have been onboarded, is to create units. You can do this by going to the "Holdings Page" and pay attention to the top right corner with the "Issue Unit" Functionality
You can define the certificate in the most basic form at this stage, with more configuration available in the near future
Transfer Unit
The transfer functionality allows you to move a unit from one account to another. You need to select an account for the transfer to happen and the volume of units. Once you have confirmed the transfer the units will show in the "holdings tab" of the other account.
Split Unit
If you wish to break down the unit into smaller units, you can use the split functionality. For example, if you have 30 units, you can split them into 15 units and 15 units on two blocks.
Claim (Retire) Unit
The "Claim" functionality allows for the certificate to be taken out of circulation, as the information from it will be used further to be reported (eg. the sustainability report of the company that had the certificate on the platform).
Export Unit
The export functionality allows the user to get the data from the unit, from the platform to a CSV file. The file can then be used further for sustainability purposes or the data can be integrate onto a different company report.
Holdings Tabs:
There are three holdings tabs:
Current: shows active units (that can still circulate, or that other actions can be performed on them)
Pending: any issuance, transfer or other process that requires a bigger number of signatures (more participants involved) will be shown here
History: past data about units will be shown here, such as issuances, retirements etc.
Solutions are the EWX wrapper for the Business logic that define the lifecycle & governance parameters for that logic.
To function fully, they need to be added to a Solution group.
The number and type of Solutions you can create is dependent on your subscription. Make sure to select the right subscription level for your needs.
You can create a Solution via the Create new menu or under the Solutions option of the Manage menu using the "+ Create New Solution" button.
The creation flow contains the following steps:
Once you are logged in to , Energy Web's SaaS platform, you will be able to set up your RPC Node. To do so, follow the steps below.
Before you can create a new Full Node, you will need a subscription.
To subscribe:
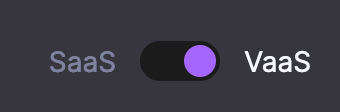
Verify that you are in the VaaS environment of Launchpad by checking the toggle button on the top right. You will easily recognize the VaaS environment by its dark theme
Once you are logged in to Launchpad, you will be able to set up your Blockchain API. To do so, follow the steps below.
Before you can create a new RPC endpoint, you will need a subscription.
To subscribe:
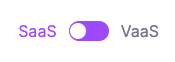
Verify that you are in the SaaS environment of Launchpad by checking the toggle button on the top right. You will easily recognize the SaaS environment by its light theme.
Under
You can purchase Launchpad subscriptions with Energy Web Tokens (EWT) based on .
All created accounts on Launchpad automatically receive an EWX address, allowing you to deposit EWT and use them to pay for your subscriptions.
SmartFlow is a tool enabling trustless, decentralized business operations. It offers the following benefits when facing comparable solutions:
Decentralized & trustless: Built with Worker Node technology
Ease of use: No-code, drag & drop editor
Page describes how to effectively manage your Worker Node.
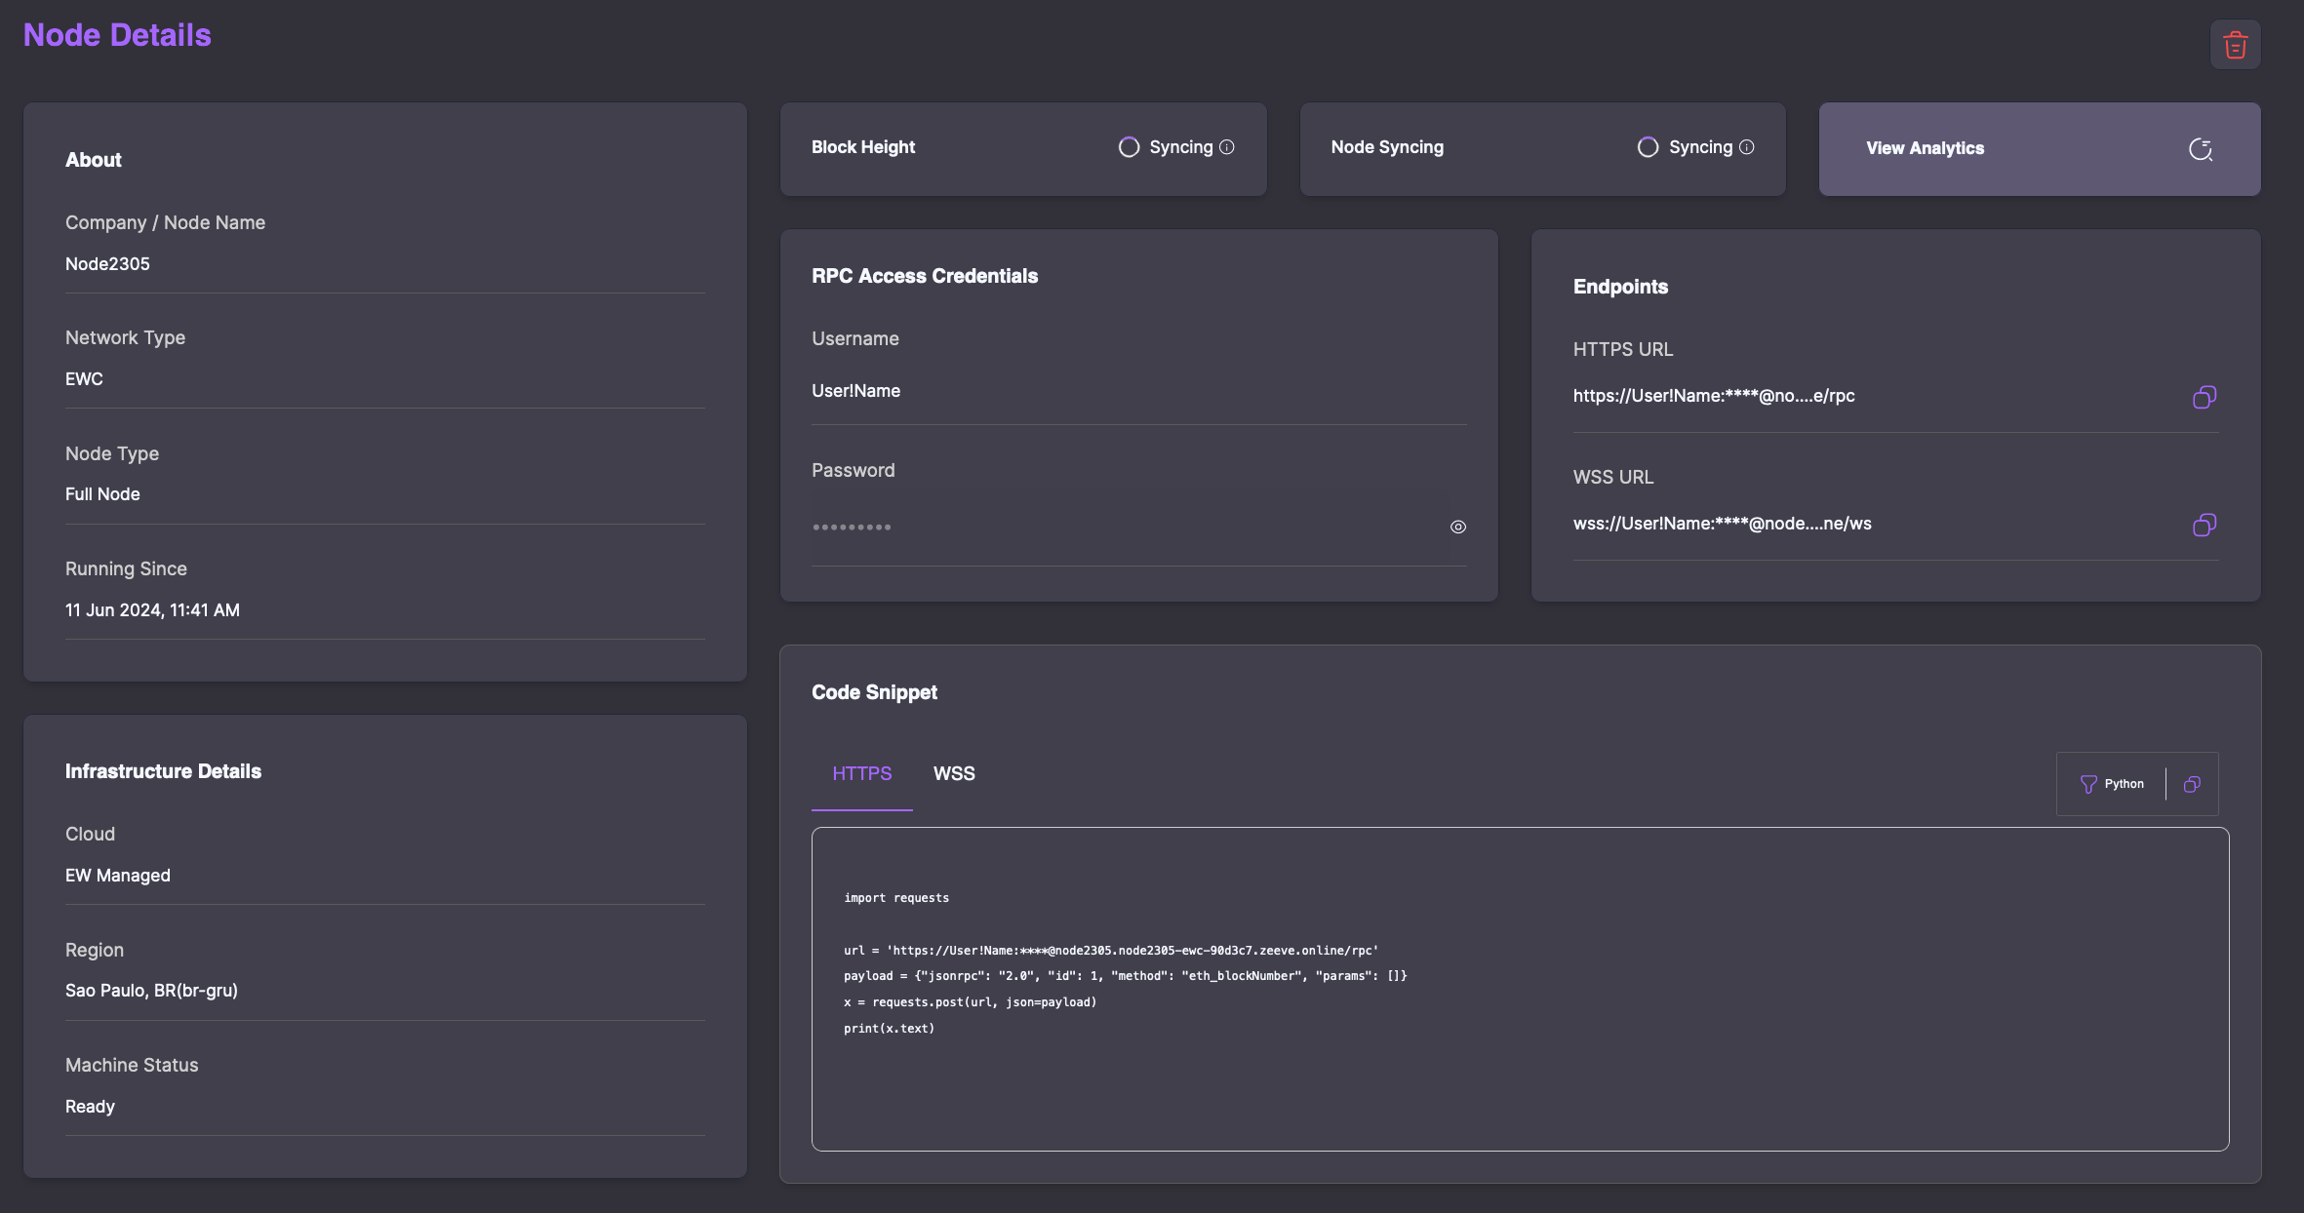
To learn more about your node and update any details post-deployment, head to the details via the "i" button on your node overview under the Manage screen.
Note that you can always delete your node from the details or from the overview. All deleted node will reappear in your Manage screen under pending deployment.
Please remember that for your changes to go live you always need to click "Save" to confirm each operation and restart your node with new configuration.
Let's review each element of your node details:
The Node Health Status indicates whether your node is running. Until the node's machine status is "Ready", your node health status will always be stopped. Once your node is Ready on a machine level, it will move to the "Running" health status.
Once you are logged in to Launchpad, you will be able to us GPSaaS to set up your Green Proofs registry. To do so, follow the steps below.
Before you can create a new registry, you will need a subscription. To Subscribe to Green Proofs on Launchpad, you need to get in touch with the Energy Web team and receive a customized offer that fits your needs.
To create a GPSaaS supported registry, select "Create New" under Green Proofs in the left hand menu.
This will open the creation form.
The first step under the Master Configurations is to enter your Registry's general details:
Green Proofs as a Service is now available for companies of all sizes to use. The main benefit and goal for it is to have an independent platform assessing emission reductions that happen through a product, a service or process. So far we have built use cases for the aviation industry in alternative fuel usage, as well as the emission savings caused by the usage of low-emission fuel in the maritime industry. You can check out more information related to that
The main advantage of using GPSaaS is that you can test proof of concept at a fraction of the cost and time of what would otherwise take, and brings you closer to a decision in terms of a full-fledged platform.
It takes less than 10 minutes to create a registry using the customization flow!
You can use the GP SaaS solution, by going to the launchpad application and click on the Green Proofs button on the sidebar
There are two major areas that you need to have in mind when creating the Green Proof Registry using our service which we will dive into separately:


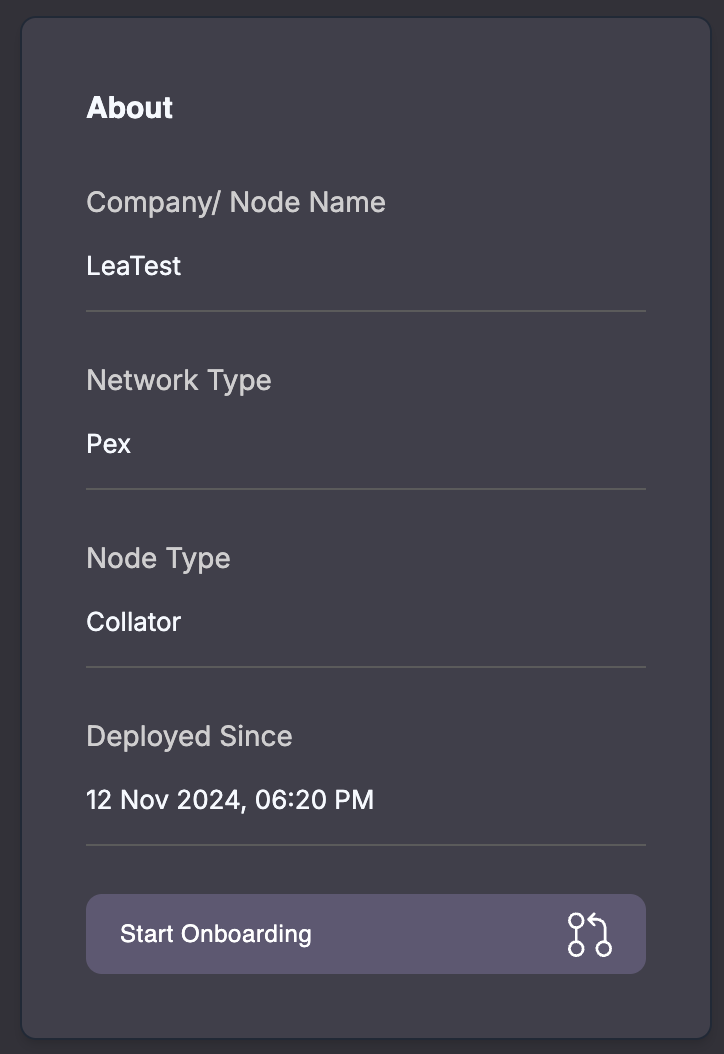
The About section contains basic information about your node such as its name, network type, node type and its deployment date and time.
It also contains the link to the Operator console. The operator console is where you can manage your operator account actions. View our devoted guide for details.
The infrastructure details contains cloud information, your node's region as indicated during deployment and the machine status which is the status you can also see in your node overview in the Manage screen.
The worker node section contains the Public key and Seed phrase for your node. From this section you can:
View and copy your existing data
Download your existing data
Import new data: this means importing an existing seed
Create new: this means re-generating a new public key and seed combo
Please note that importing creating and importing new data will erase your current data, it is therefore recommended you proceed carefully with those two actions.
IPFS is place where Solutions NodeRed work logic files created by SmartFlow are stored. The IPFS gateway section allows you to switch between IPFS credential options currently supported.
Normally your worker start to run all active solutions that are in solution groups your operator account is subscribed to. Solutions whitelist let you explicitly define of subset of solutions that should be run (that still falls into above condition)
You should specify one or more desired solution namespaces and save to enable this feature.
Please note, that once this option is enabled, any non-whitlisted solutions will not be runnable.
To get back to default state, remove whitelisted solution namespaces.
Holdings: This is the main table, where you can see the certificates in various states (active, pending, history tabs).
Solution details: basic solution details such as name, description, logo..
Expiration block: this will define the lifecycle of the solution. Launchpad will pre-fill the current block height to help you define this item. You need to Remember that the Solution groups also have an end block defining when they will expire. Keep this in mind when filling in your Solution's expiration block.
Business logic selection: you can either select a Business logic you previously created or create one from scratch directly in the solution creation flow.
Group selection: you have a few options at the group selection step:
Save without a group: this allows you to add the Solution to a group later. You can do that by going to the Solution OR the Solution group details.
Add to one of your own groups: you will see under "My Assets" all the groups you created. Choosing a Solution group that was subject to audit will lead to an audit on the Solution to confirm whether it can be added to the Solution Group.
Add to an open group: Under "Open groups" you will see open groups that you can add your solutions to. This will lead to an audit.
You can save your solution as a draft at any point in the creation process.
Solutions will be audited in two cases:
The Solution was added to a group submitted to audit owned by the Solution owner
The Solution was added to an open group, not owned by the Solution owner
Until the audit is finalized, your Solution will remain in Playground - a group giving no rewards created by Energy Web.
Both the auditor and the submitter can use the Auditor console to review submission details and take any required actions.
You can review your request and add/respond to comments by clicking under Action > "Details" in the requests table.
You will be notified in-app if you receive a comment from the Auditor.
The Auditor can approve or reject your request. You will receive an in-app notification in both cases.
Once your request is approved, your Solution will be added to the group you selected. You can always remove it from the group and move it to a different one later, which may lead to another auditing process.
You will receive the decision and reasoning as a comment. You Solution will remain in Playground. You can add it to another group or to the same group, the auditing process will be the same as with a first attempt.
You can manage your Solution under the Manage menu > Solutions.
You can change your Solution status or view its details and change its group assignment via the 3-dots menu.
The expiry for your Solution is defined by the Expiration block you set. If your Solution is still valid but was added to a Solution group that has since expired, you are able to add it to a different group that is still active.
You can delete your own Solutions at any time.

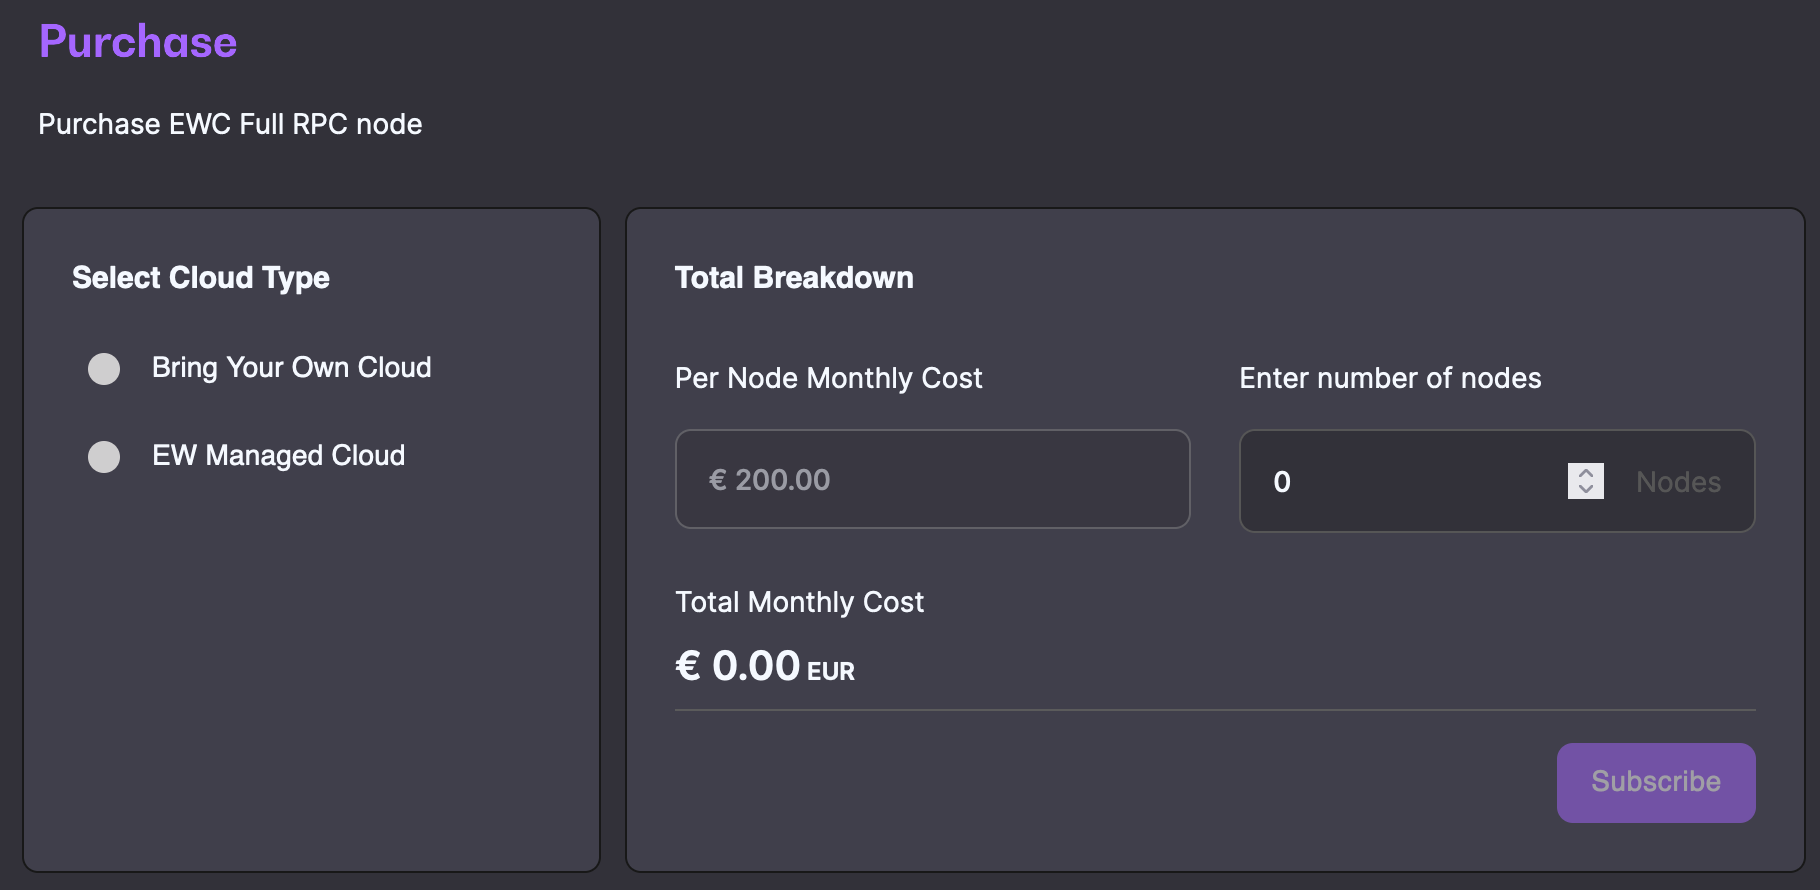
You can chose between the Bring Your Own Cloud option or chose for a managed cloud
Click on the "Subscribe" button. You will be redirected to the payment page.
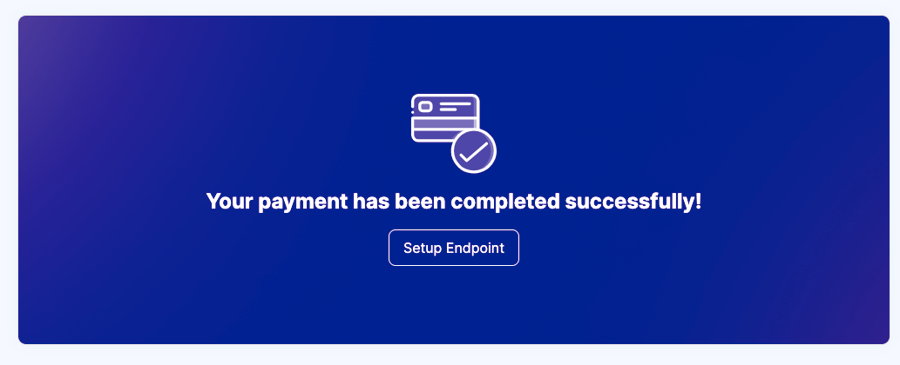
Once the payment is completed, you are ready to set-up your Full Node.
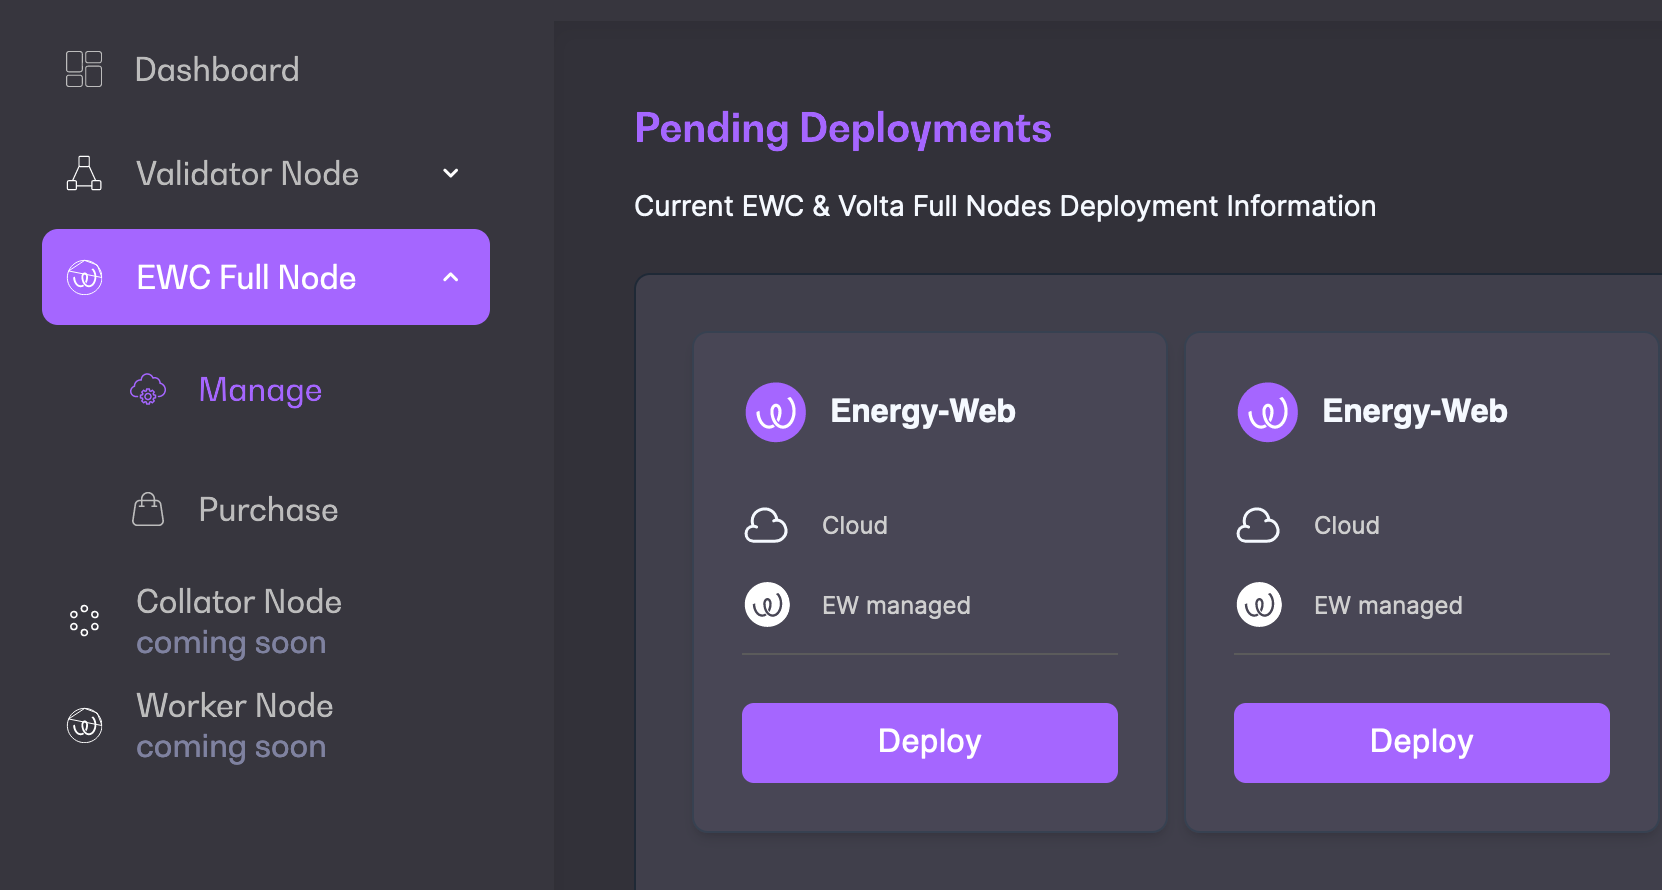
Once you have purchase one or mode Full Nodes, you are ready to deploy them.
Under EWC Full Node > "Manage", look for "Pending deployments" at the top of the page. You will find all newly purchased Full Nodes that have not yet been deployed.
Click the "Deploy" button for the Full Node you want to start deploying
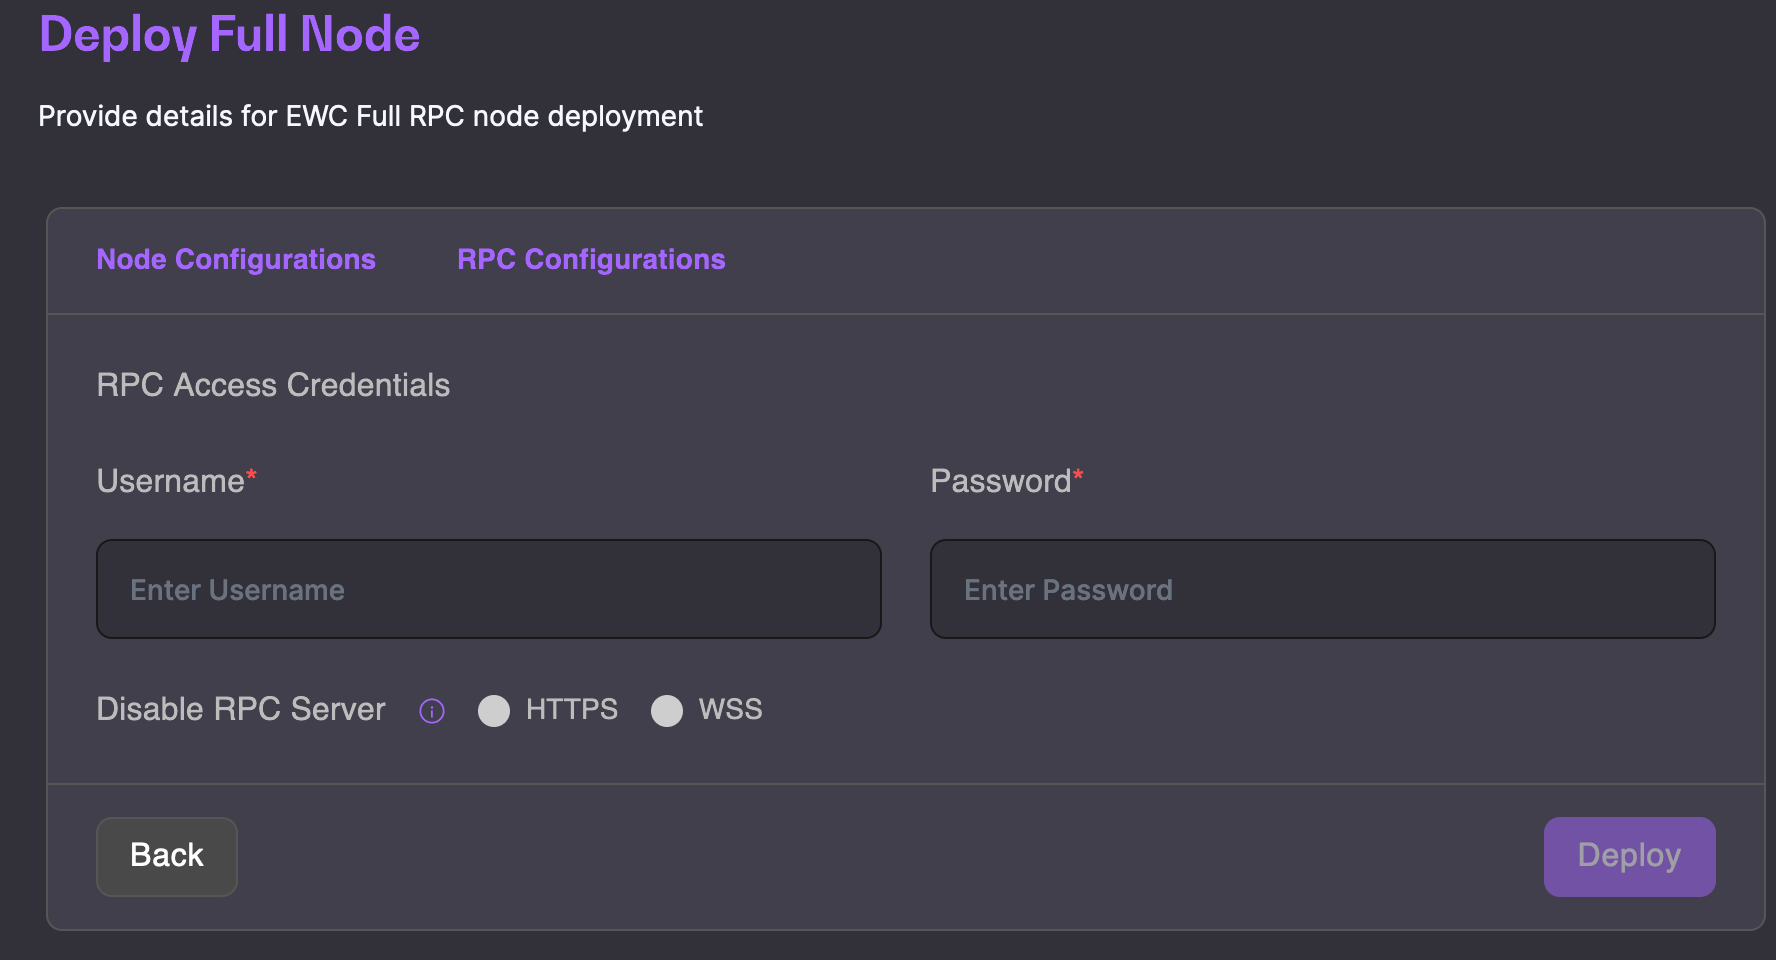
Enter all the Node and RPC configuration information required. On the RPC configuration page, select HTTPS or WSS only if you wish to disable one of these RPC servers. By default, they are both enabled.
Once you have pushed the "Deploy" button, your Full Node will appear under EWC Full Node > "Manage" in the "Full Nodes" list. It will first show with "Requested" as Node Status and "Syncing" as Sync Status. Several minutes later, the Node status will move to "Provisioning".
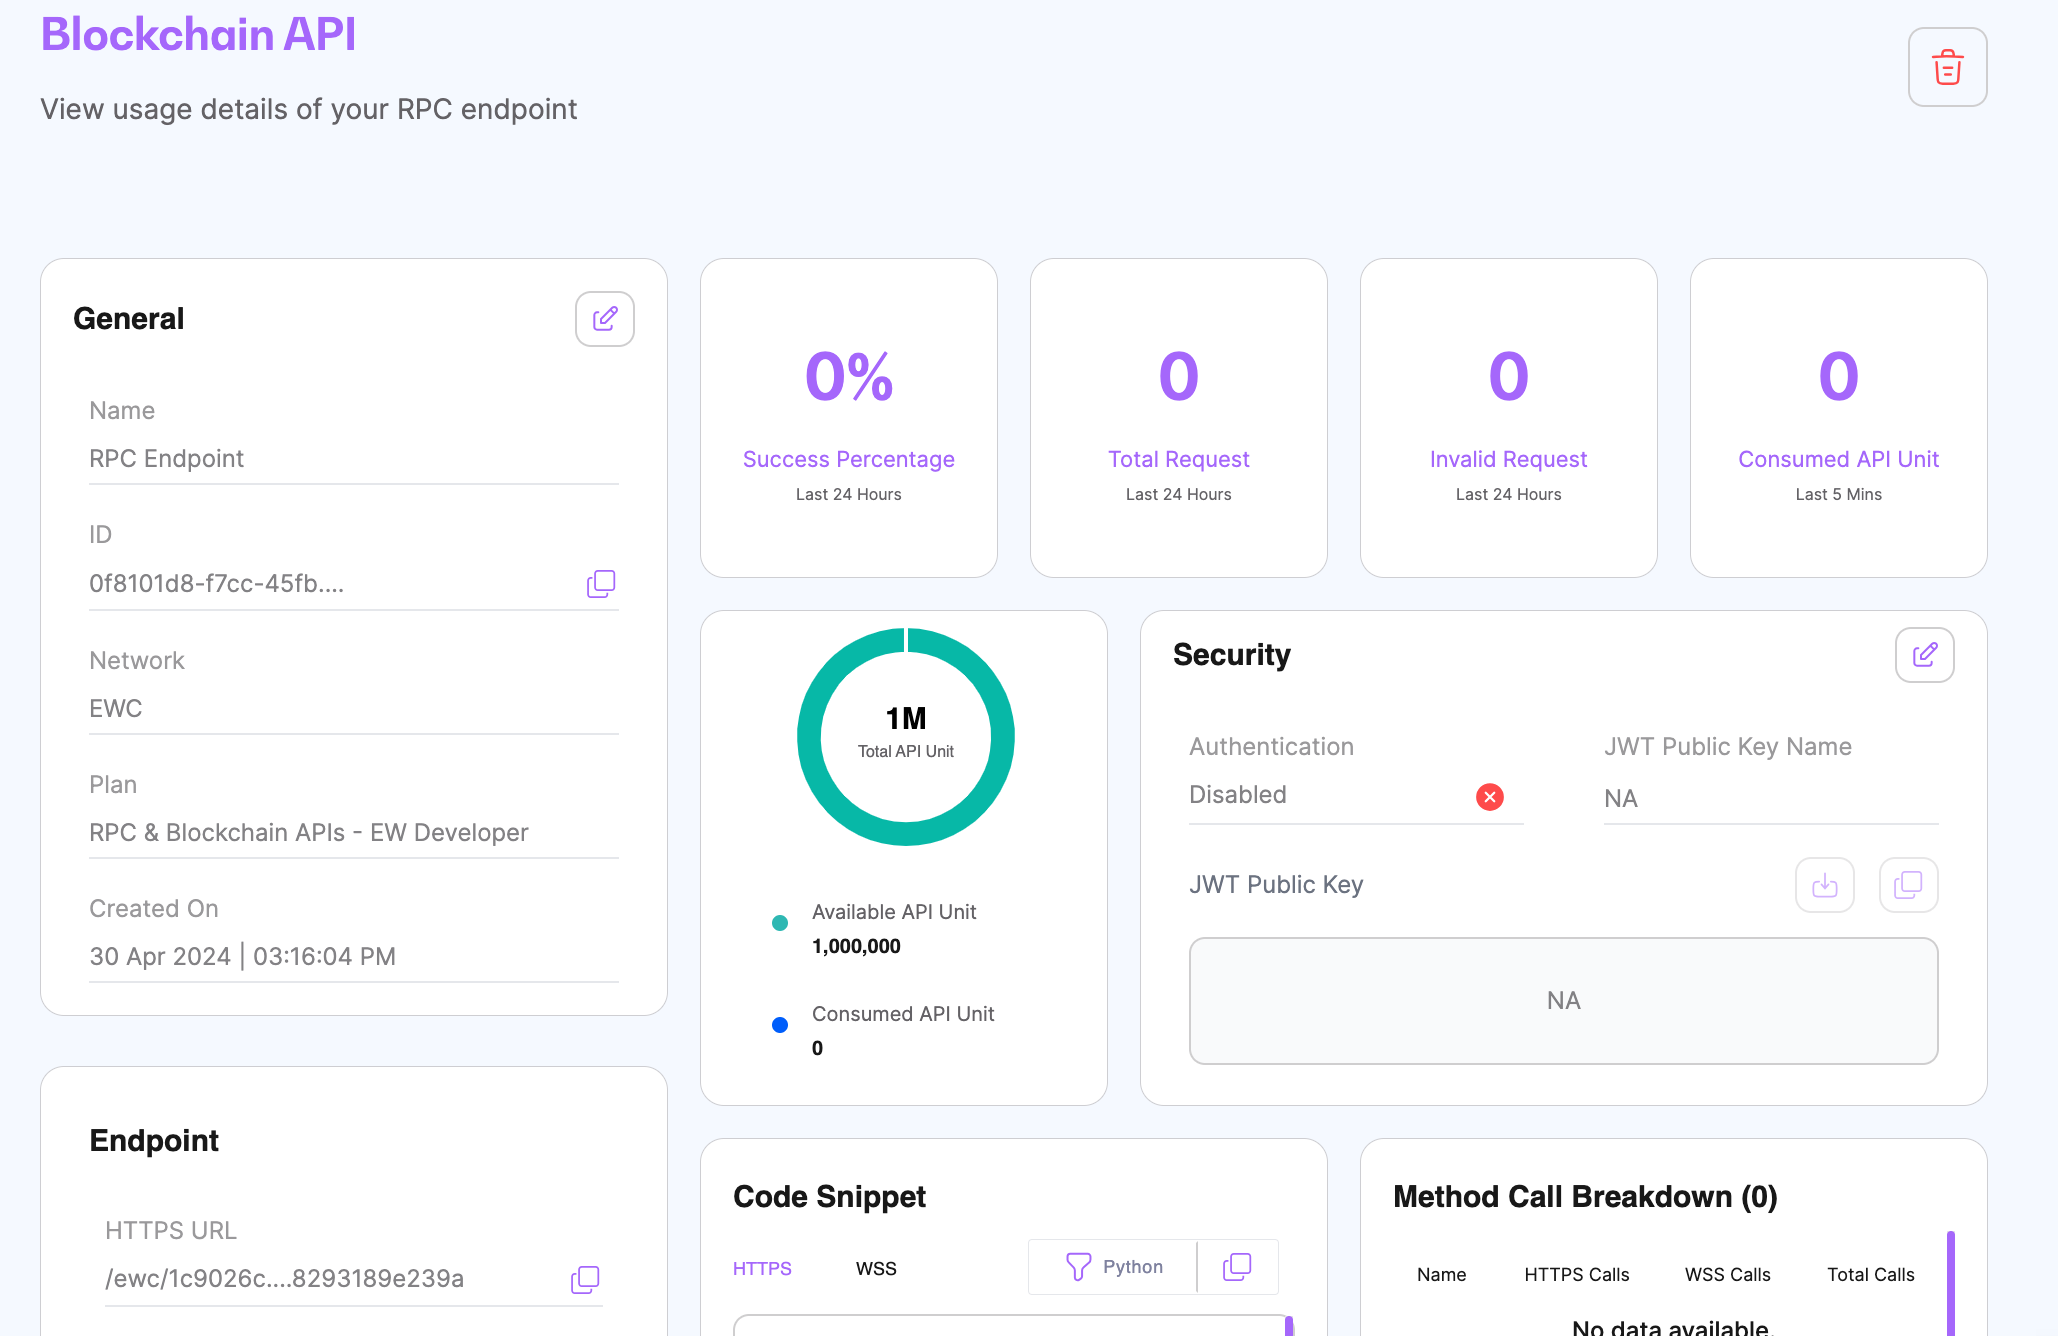
Within a few minutes to a couple of hours, the Node Status will switch to Ready, which means that the blockchain provisioning for the Full Node was completed. Once the Full Node is ready, you can access the Full Node details by clicking on the ℹ️ button. In the Node Details, you can see the Access credentials, copy the Endpoints URLs, copy the code snippets and review all your Node data. Note that all Endpoints data will depend on what you selected during deployment.
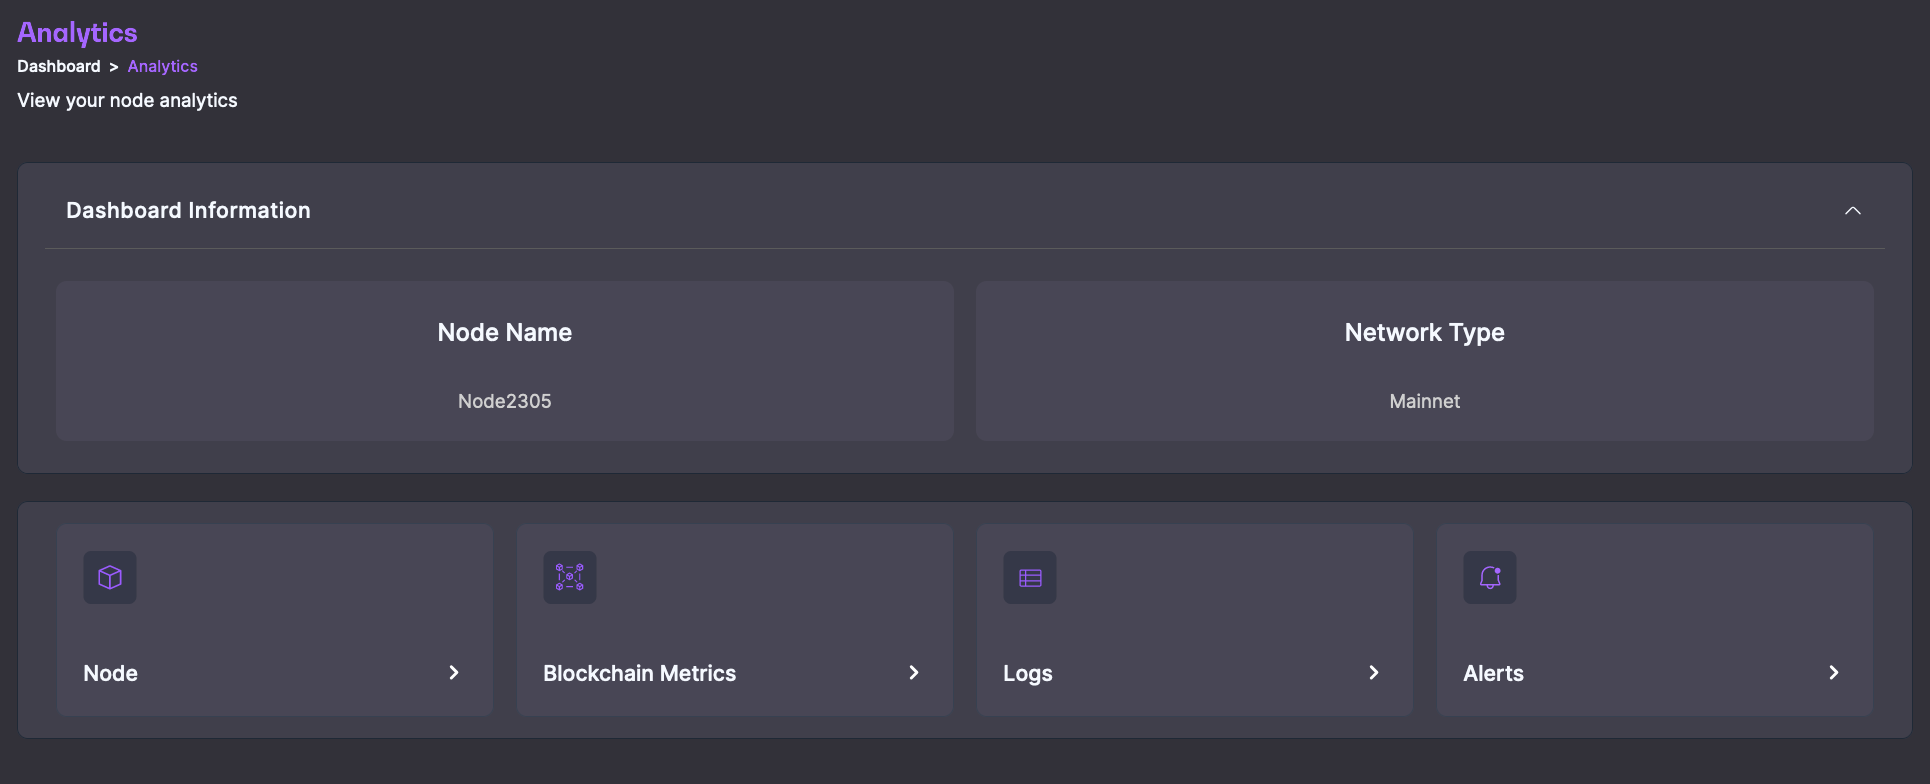
It will take around 24 Hours for the Node to be synced. You can track that change under the "Syncing status" of your Node. Upon Syncing, the Analytics become available. The analytics of your Node can be access under EWC Full Node > "Manage" by clicking the screen icon for your Node in the Full Nodes list or by clicking "View Analytics" in the Node Details.
You can navigate between 4 different kinds of analytics: Node analytics, Blockchain Metrics, Logs and Alerts. Navigate through the different analytics tabs to review all of it.
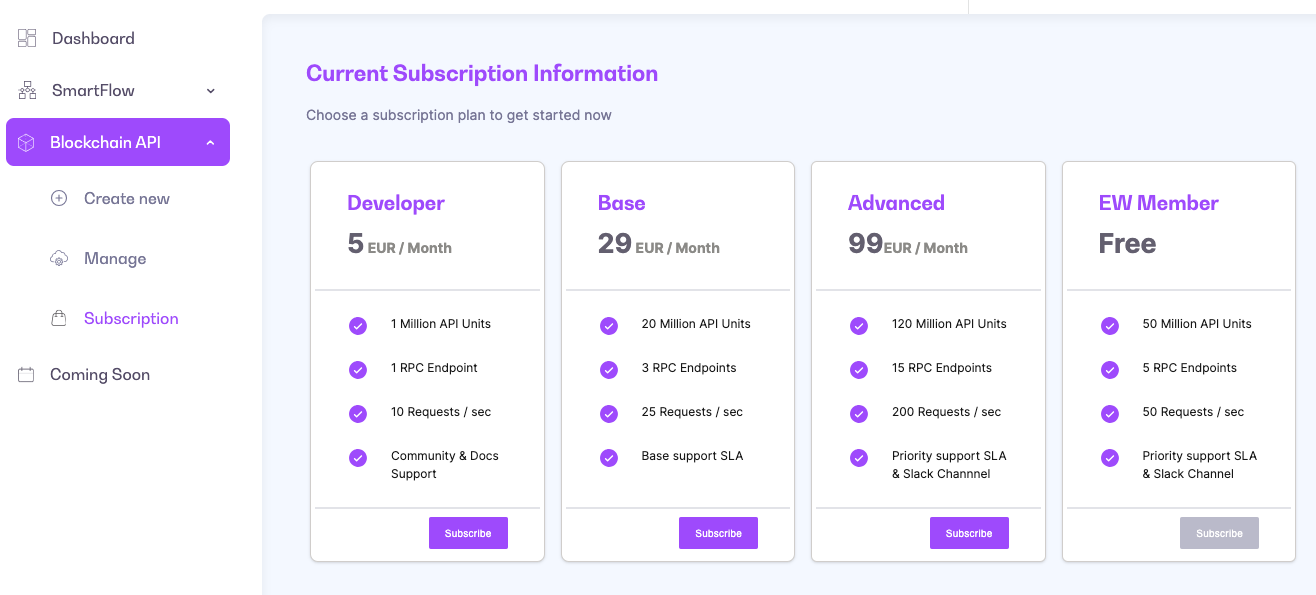
In the subscription page, select the plan that fits your need. The "EW Member" plan is only available for enterprises that are .
Proceed to the payment screens and complete the payment. Once your payment is completed, you subscription is active.
Once you have subscribed, you are ready to create your first RPC endpoint. Proceed as per the instructions below.
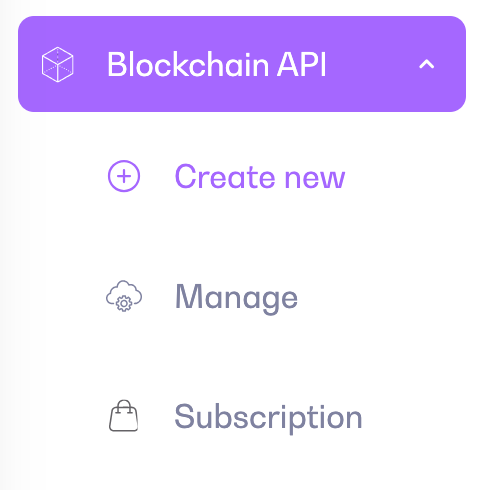
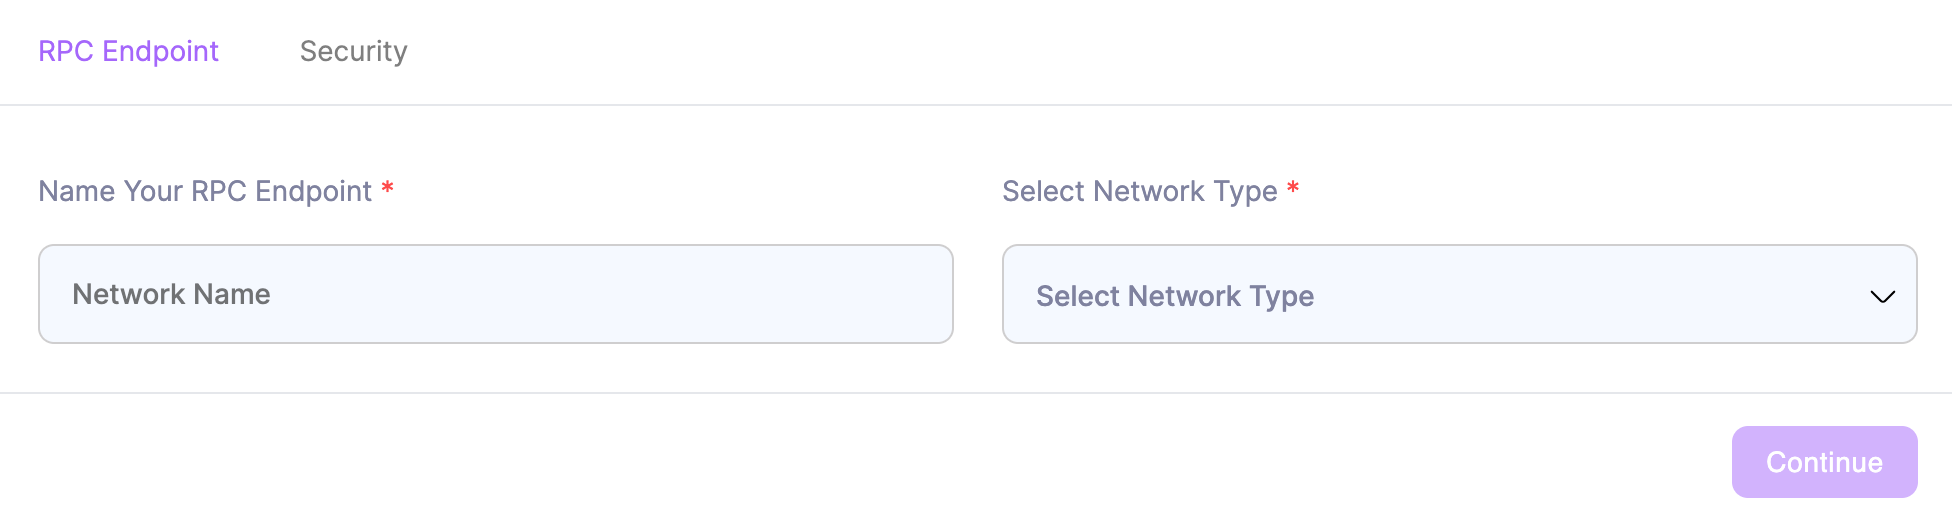
In the left hand bar menu, under Blockchain API, click on "Create new". This will direct you to the endpoint creation page.
In the creation page, enter a name for your RPC endpoint and select the network that makes sense for your use case. The available networks are: EWC, EWX.
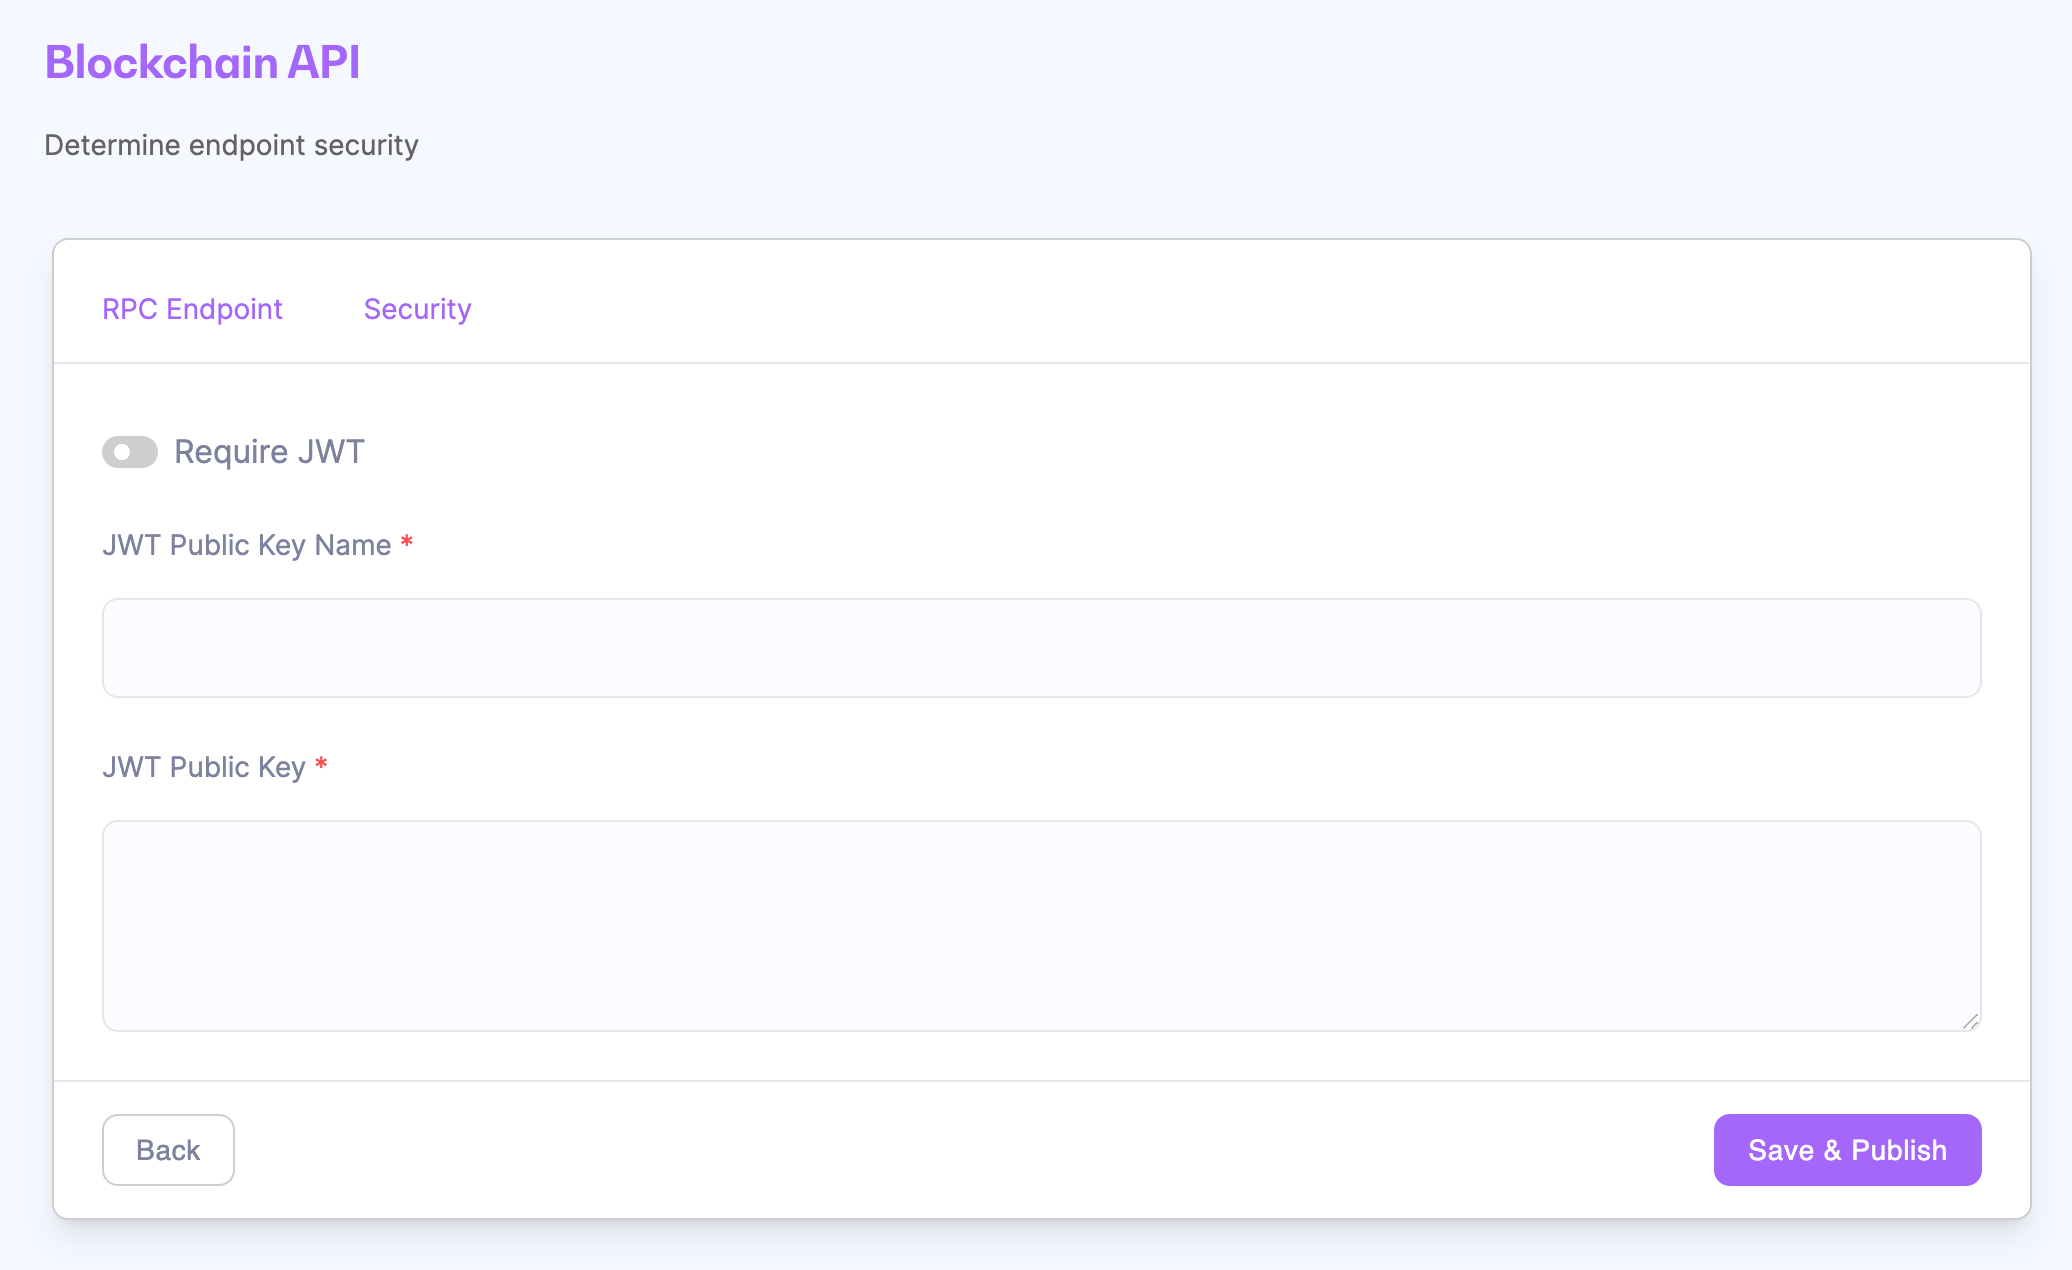
At the next step, under "Security" you can choose whether you want to set up JWT based security for your RPC endpoint. Please note that you can require or disable this form of security at creation or later when managing your existing endpoints.
If you choose JWT as a requirement, these are the steps to find the Token and Public Key you will need:
a. Go to
b. Select Algorithm as "RS256"
c. You will see the following two sections: and
d. You will find JWT token under Encoded and Public Key under Decoded
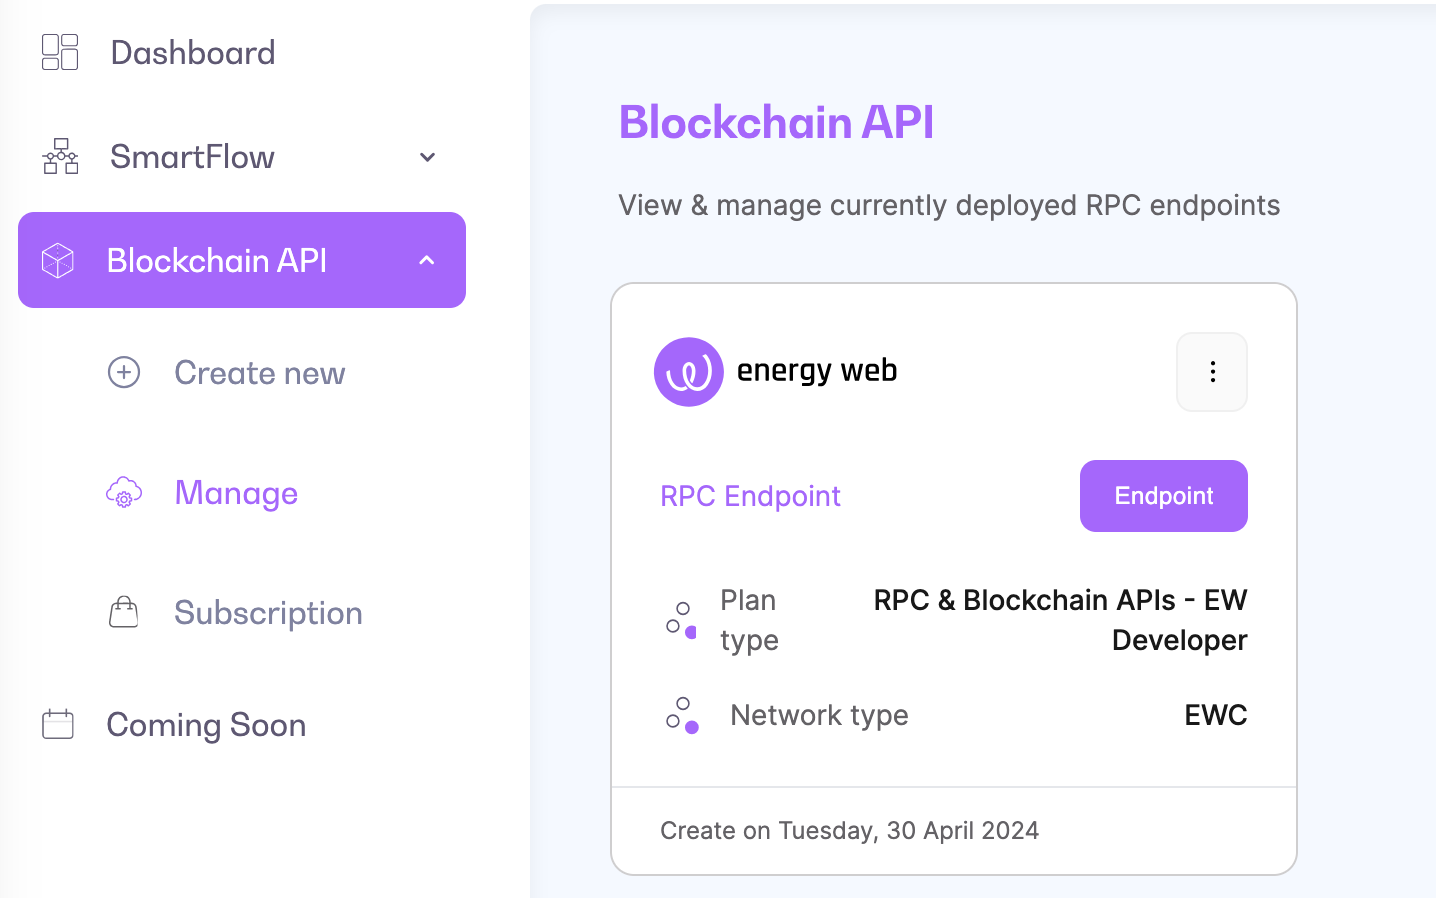
Your RPC endpoint is ready! You can view and manage it by accessing "Manage" under Blockchain API in the left hand bar menu.
By clicking on the three dots on the top right of the RPC endpoint, you can access all details and update the JWT requirement if you so wish.
You can view and manage your or your organization's EWT balance in Settings > "My Profile":
IMPORTANT: Only organization owners can access the "Manage" menu. If you are a 1-person account, you will always be able to access it.
The "Manage" menu allows you to view, top up and withdraw your EWT. It also lets you access your EWX address on the Explorer and your transaction history on Launchpad.
To top up your account, copy the address entered in the "Manage" menu and send the desired amount of tokens via your wallet.
The EWT Balance will refresh every minute, allowing you to quickly view your new balance.
You can top-up via the "Manage" menu in your profile, or directly at purchase.
You can withdraw EWT from your account using the "Withdraw" tab of the "Manage" menu under My Profile.
You need to enter the address that will receive the funds under "Withdraw to" as well as the amount you want to withdraw.
Be sure that you are entering the right address, your funds cannot be recovered if you made a mistake.
Once you click "Confirm", a new screen will appear asking you to enter the One-Time Password received via email. The OTP will be sent to your account email.
Once you have verified your withdrawal, you will quickly see your Balance updated and receive the funds on the requested address.
Reminder: only organization owners or 1-user account owners can withdraw EWT.
To pay using EWT instead of Fiat, make sure to tick the "Pay in EWT" tick box before clicking "Subscribe".
You will see a screen showing you your EWT Balance (which you can still top up at this point), the amount of tokens you will pay and the fiat equivalent, as well as the current EWT price. The current EWT price is auto-updated every 30 seconds.
Your payment will be processed as soon as you click the "Subscribe" button. You will receive an invoice in your account email and your EWT Balance will be updated. The invoice will show the amount in FIAT and VAT information when applicable.
Please note that your address used for payment is an EWX address. If you have tokens in an EWC based wallet, you will need to lift them before you can deposit them in the EWX address. . This is crucial, transferring tokens directly from EWC to EWX will result in their loss.
Ecosystem fit: Direct connection between creators (enterprises creating the business logics and solutions) and operators (worker nodes)
SmartFlow is based on 3 core components:
A Solution Group defines the lifecycle & governance parameters for the pool of solutions assigned to them.
Once they are published, Solution groups are added to the EW Marketplace app, allowing the subscription of Worker Nodes that will run the solution contained in the group.
The Business logic is the file capturing the executable work logic that is stored in IPFS.
Solutions are the EWX wrapper for the Business logic that define the lifecycle & governance parameters for that logic.
SmartFlow allows users to:
Create Business logics in a no-code NodeRed editor with the help of predefined templates
Deploy Solutions on EWX that encapsulates the business logic
Publish Solution Groups to EWX
Add Solutions to public or owned Solutions Groups
Once the Solutions are live in a Solution group, Worker Nodes take over on EWX:
The Worker Node Operators select a Solution Group to stake EWTs in.
The Worker Nodes execute all active solutions within the chosen Solution Group by downloading and implementing the business logic.
Create a name for your registry
Provide a small description of it
Generate your subdomain
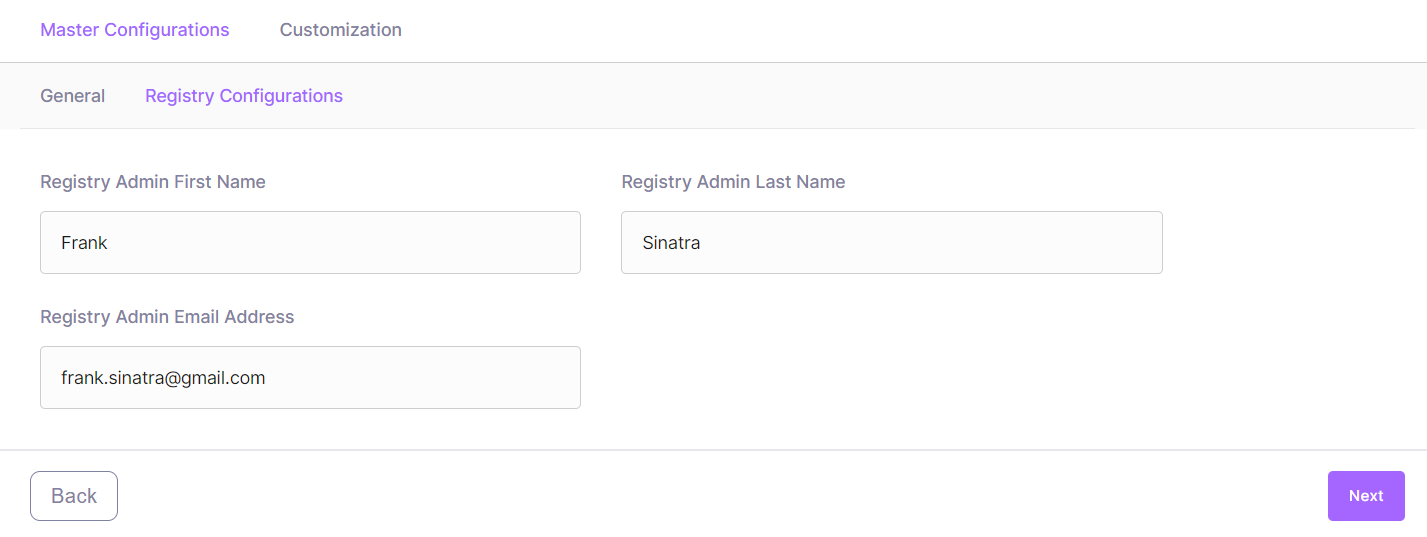
The next step contains the Registry Configurations.
It allows you to designate someone to be your registry admin, the first person who will administer the platform and use the registry in the beginning.
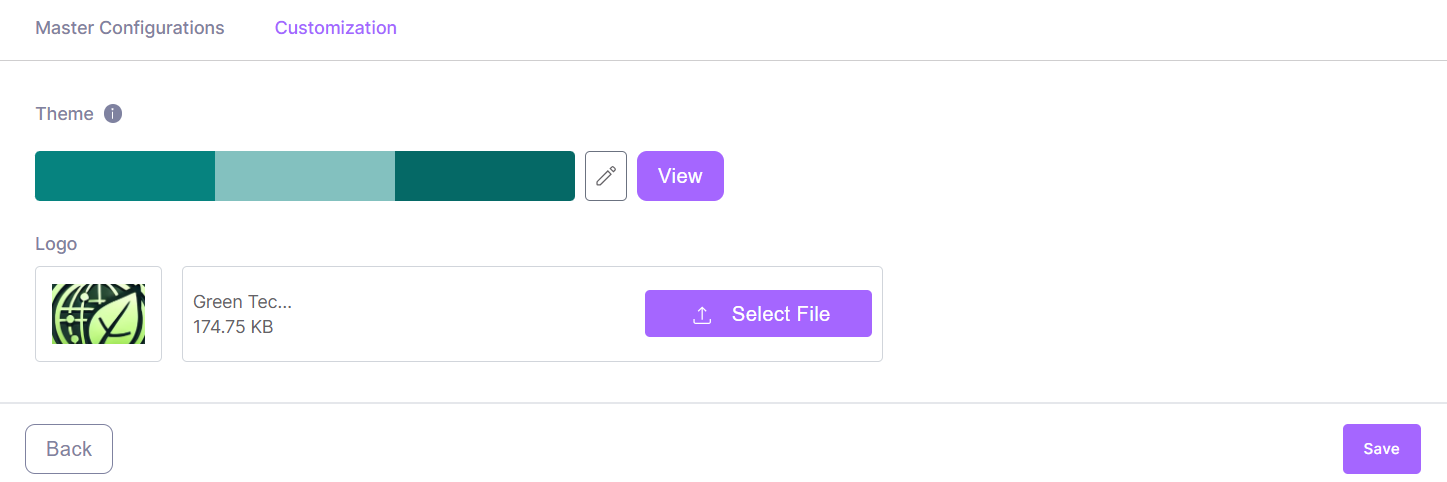
The last step is the customization layer
It involves adding and changing your colour theme and providing a logo for the platform, which will be displayed on the registry once it's been launched.
When you are ready, you can save your progress with the "Save" button. Your registry is now saved as a Draft. You can keep your registry as a Draft as long as you need. In this case, it will show as draft in the "Manage" menu. You can go back to editing your draft at any point.
Once you are set on the customization, you can Deploy your registry. It will take a few minutes for your registry to be deployed and running. .
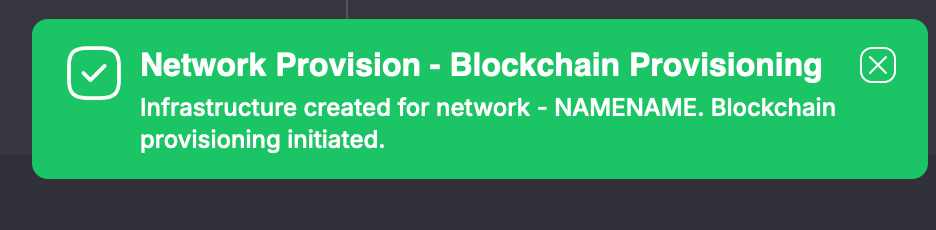
The notifications will keep you informed of all status changes for your registries.
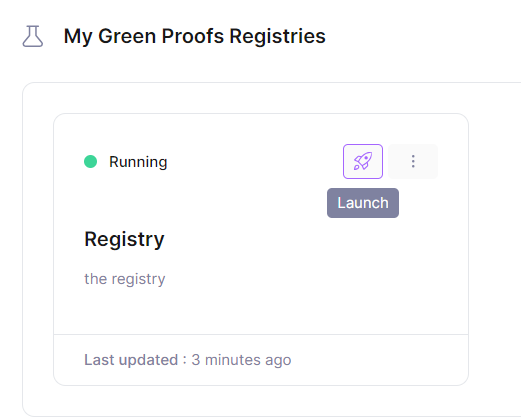
You can view all draft and deployed registries in "Manage" under Green Proofs in the left hand menu.
Once your registry is deployed and running, you will be able to click on the "Launch" button and dive into your newly created registry. See the next section to understand the functionalities you can take advantage of.
You can delete registries at any point as long as their status is not "In Progress". To delete a registry, click the 3 dots menu on the registry you want to delete and select "Delete". You will be asked for confirmation.
The functionalities that any registry that you create offers
Customization of the registry through the service itself (with more and more of the registry becoming customizable in the future)
To access the registry creation you will first need to subscribe to one of our tier subscriptions. If you are a member, this service is free for the first 2 months, and if want to have a demo of the platform before subscribing, we are more than happy to provide you one by writing a request here.
Feel free to provide any suggestions or feedback at with the title "GPSaaS Feedback/Suggestions".

New user quick start guide on how to use basic functionalities of SmartFlow.
Before you can start using SmartFlow, you will need a subscription.
To subscribe:
Go to https://launchpad.energyweb.org/ and login using your existing credentials if you are an Energy Web Member, or the social login options (Google, Apple and Github).
Ensure you are in the SaaS environment of Launchpad by checking the toggle button on the top right. You will easily recognize the SaaS environment by its white theme.
On the left hand side menu, click on SmartFlow and then "Subscription"
Select the subscription that fits your needs or request a special offer by contacting commercial@energyweb.org.
You can . Once your payment is completed, you subscription is active.
Below is a brief overview of the different menu options under SmartFlow. View details in the next guides.
Clicking on Create new will open a window allowing you to create one of the SmartFlow components.
Although all can be created independently, they function together. Note that you can also create a Business logic directly within the Solution creation process.
The Manage menu allows you to manage your assets and view assets that are public created by others.
The Auditor console is where both Auditor and Requester can review and take action on audit requests for Solution Groups and Solutions. Note that as a requester, you will only see you own request.
It also hosts the EWT wallet automatically created on EWX for SmartFlow subscribers. This wallet and its funds are used exclusively for Solution group rewards payments.
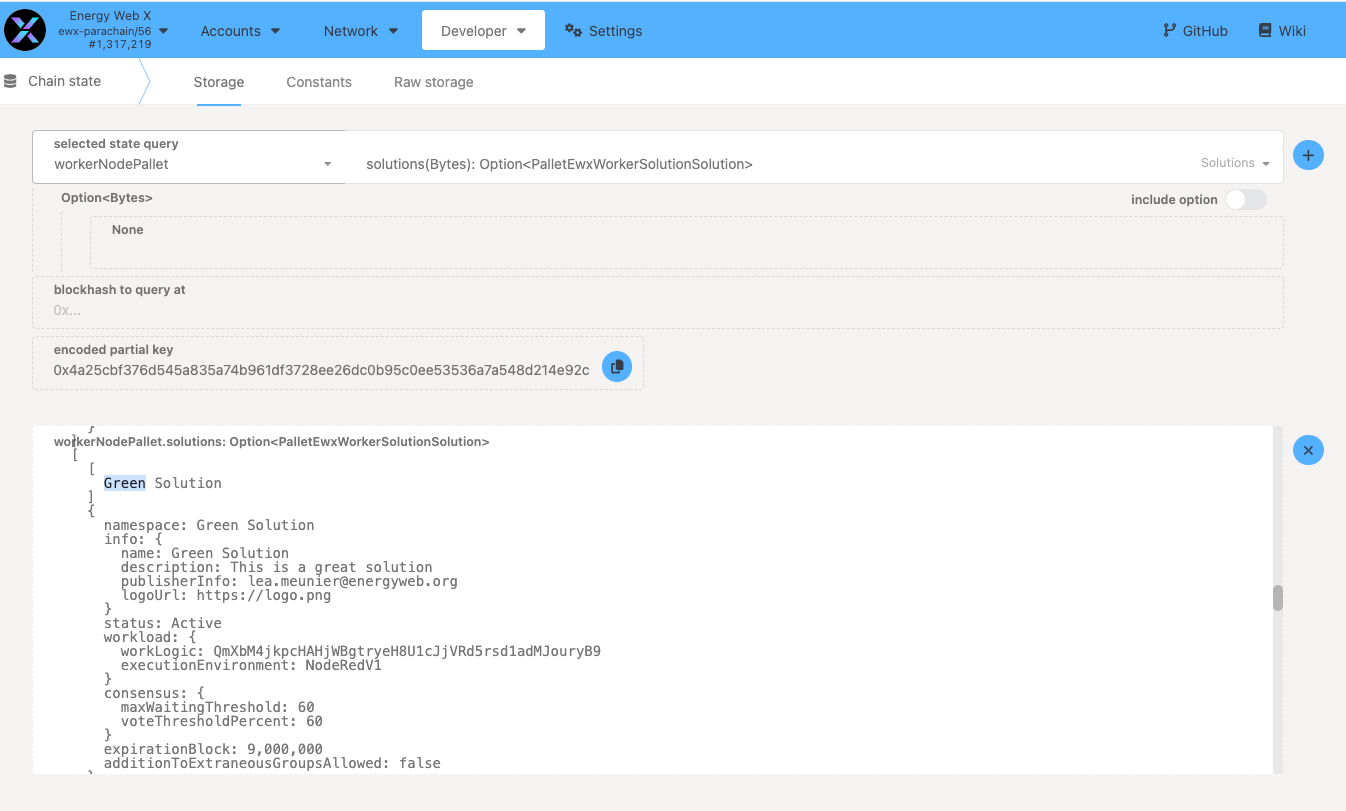
If you want to verify that your actions were correctly recorded on the blockchain: Go to choose workerNodePallet & either solutions or solution groups as shown below. On the top right, disable "include option" and click on the "+" symbol. You can then search for your Solution using the namespace and Solution group name that you have chosen at registration.
This section outlines the technical prerequisites and responsibilities for operating a Collator node on Energy Web X. It is intended as a reference and should be read alongside the Quick Start guide.
Note Procedural, step-by-step instructions for deployment and onboarding are intentionally excluded here and are covered elsewhere.
Energy Web X supports two collator deployment models, each with different technical responsibilities.
Energy Web Managed Cloud (CaaS)
When using the Launchpad Collator-as-a-Service (CaaS) offering:
Infrastructure provisioning, OS configuration, binaries, and networking are managed by Energy Web
Operators are not required to provision hardware, install node software, or manage session keys manually
Operators remain responsible for:
Token balances
Governance and staking actions
Ongoing operational monitoring and responsiveness
This model is recommended for operators who want a production-ready collator without maintaining low-level infrastructure.
Self-Hosted Collator
When operating a self-hosted collator, the operator assumes full technical responsibility for infrastructure, software, keys, and uptime.
Self-hosted collators must meet minimum infrastructure requirements, including:
Operating system: Ubuntu LTS
Compute & storage: Sufficient CPU cores, memory, and SSD capacity to maintain a full archival node
Network: Reliable, low-latency connectivity with required P2P ports open for:
These requirements ensure timely block production, synchronization, and network participation.
All collator operators must manage the following cryptographic identities:
One Substrate collator address (EWX)
One Ethereum (EVM) address, including its compressed public key
Four distinct session keys, used to separate node responsibilities (best practice):
Secure key storage and separation of operational keys are mandatory to reduce the impact of compromise.
Collator operation depends on reliable access to external network endpoints, including:
EWX bootnodes for parachain connectivity
Ethereum mainnet RPC for bridge-related operations
Energy Web Chain RPC for EWC interactions
Operators are encouraged to use dedicated RPC providers for production deployments to avoid rate limits and service degradation.
Before a collator can participate fully in network operations:
The minimum required self-stake must be bonded on EWX
Session keys must be registered on-chain
Inclusion in the active collator set depends on total stake (self-stake plus delegation)
Meeting the minimum bond alone does not guarantee active participation if the active set threshold is not met, see for details.
A Solution group defines the lifecycle & governance parameters for the pool of solutions assigned to them. Once created on EWX, Solution groups will appear on the EW Marketplace app.
Solutions groups come in different settings:
Groups subject to audit: Audited groups will be labeled as such in the EW Marketplace app, offering them better visibility and attractiveness to subscribers.
No audit groups: These Solutions groups can be published immediately without audit.
This guide will take you through the steps of purchasing, setting up and deploying Worker Nodes (WNS).
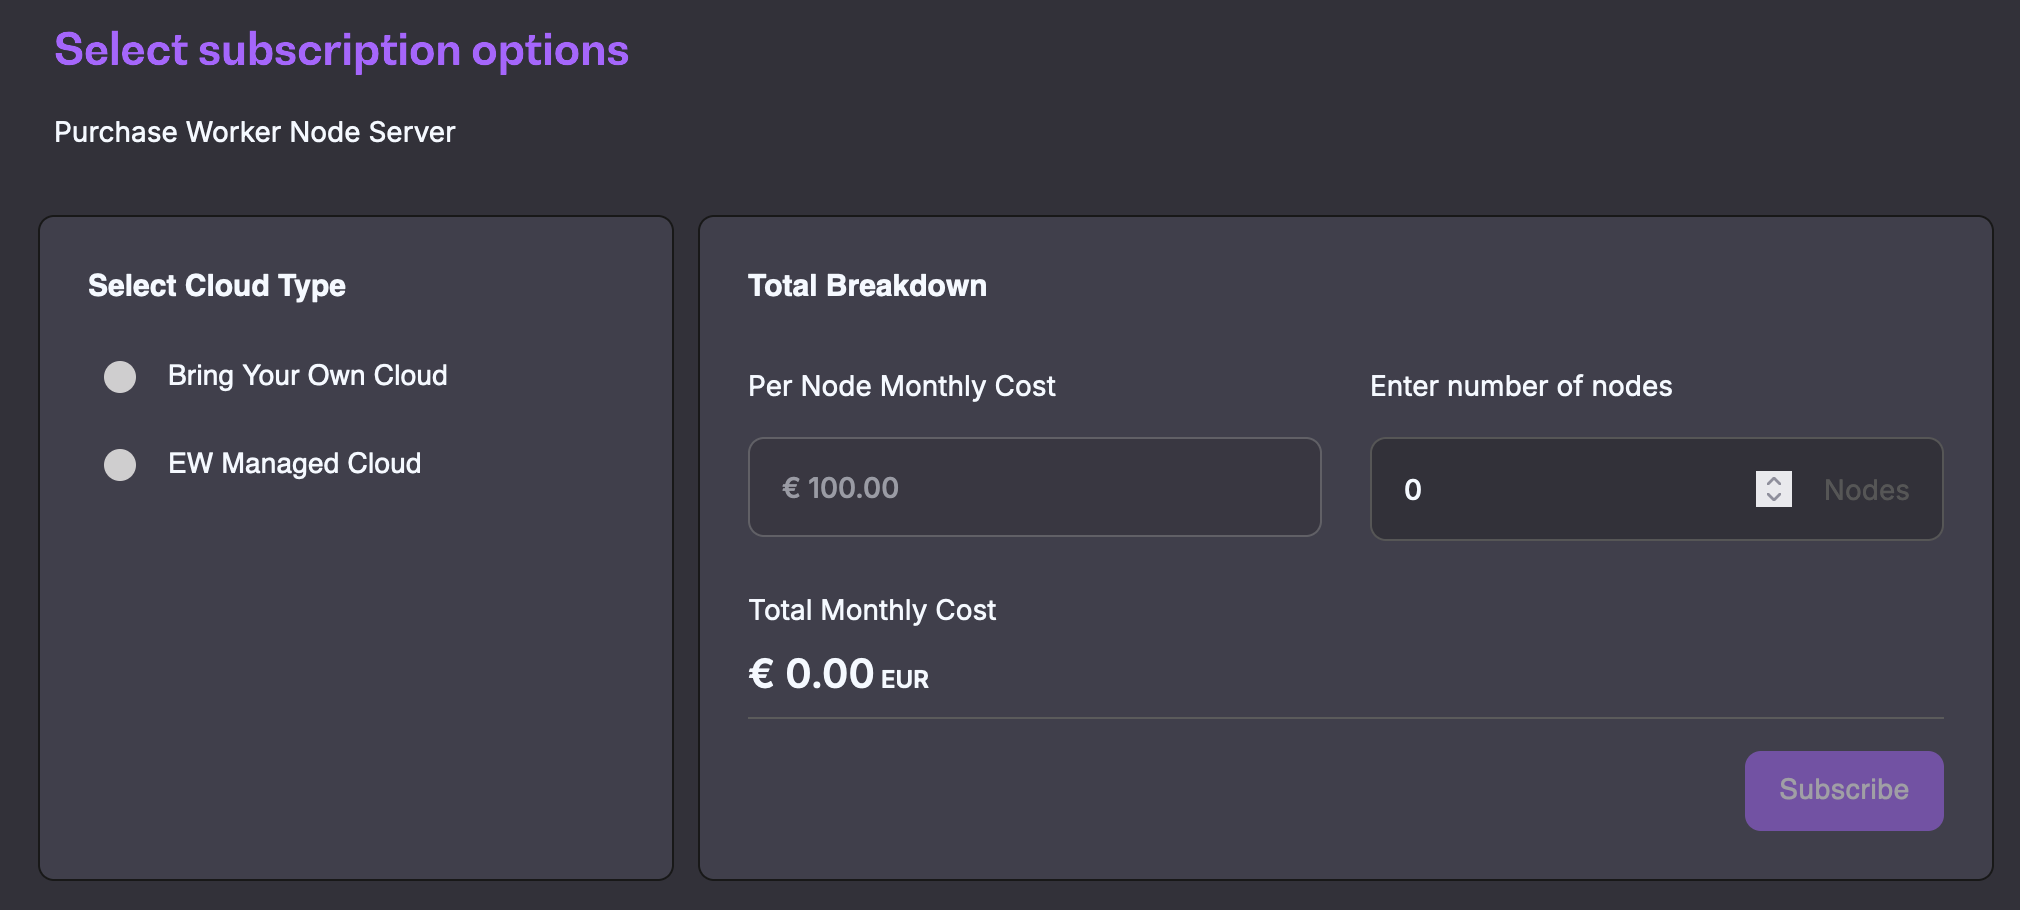
To set up a new Worker node, you will need to purchase a subscription.
To subscribe:
Verify that you are in the VaaS environment of Launchpad by checking the toggle button on the top right. You will easily recognize the VaaS environment by its dark theme
Under Worker Node
Polkadot relay chain communication
aura
audi
imon
avnk


Open: Any user can request to add their solution to these Solution groups. This will lead to an audit by the Solution group owner. Currently, only Energy Web can publish Open groups.
The number and type of groups you can create is dependent on your subscription. Make sure to select the right subscription level for your needs.
You can create a Solution group via the Create new menu or under Manage with the "+ Create New Solution Group" button.
You will enter all of your Solution group details during the creation process, including whether it's subject to audit or not and if subscribing to the group is limited by whitelisting of the Worker Node Operator account. What you fill in will define the lifecycle & governance parameters for the pool of solutions assigned to your group, as well as the group reward information.
These details cannot be edited later, it is therefore essential that you enter them carefully.
The group is created on chain after the rewards are paid, using the EWX address created for your organization. Please note that to create a Solution group you must have a minimum of 5 EWT in the EWX address, regardless of the actual amount of the rewards to be paid.
The audit process brings value as if passed, it grants Solution group the "Audited" label on Marketplace and therefore offers better visibility.
Both the auditor and the submitter can use the Auditor console to review submission details and take any required actions.
The Auditor console showcases the requests as well as the user's EWT wallet console for reward payments.
You can review your request and add/respond to comments by clicking under Action > "Details" in the requests table.
You will be notified in-app if you receive a comment from the Auditor.
The Auditor can approve or reject your request. You will receive an in-app notification in both cases.
Once your request is approved, you can go back to the "Details" under the submission in the Operator Console to make the payment for the group rewards. This will create the Solution group on EWX and you will be able to manage it under the Manage menu.
You will receive the decision and reasoning as a comment. You Solution group is not created on chain. You cannot submit your group again, but the rejected group will not count towards your account's subscription limits.
You can manage your group and review which solutions are added to it under the Manage menu > Solution Group.
Solution groups will expiry when they have reached the Operation end block defined in the Solution Group Reward Details page of the group creation flow.
The Operation end block is calculated by adding the block duration (defined by the user during group creation) to the operation start block (calculated as the block height at group creation + the length of a reward period which is 7200 blocks).
After expiration, the Solution group becomes inactive. Solutions cannot be added to it and Worker nodes cannot be subscribed.
After creation, a Solution group can only be deleted under the following conditions:
The group is expired
The groups is active but has no subscribers and no external solutions added to it
Solution groups subject to audit will not be created at submission but only after the audit is passed and the group rewards are paid.
The wallet shown in the Auditor console is a wallet created for you on EWX, specifically for Subscription groups rewards payment. It is separate from your EWC based wallet that can be used to purchase subscriptions on Launchpad.
Click on the "Subscribe" button. You will be redirected to the payment page.
Once the payment is completed, you are ready to set-up your Worker Node.
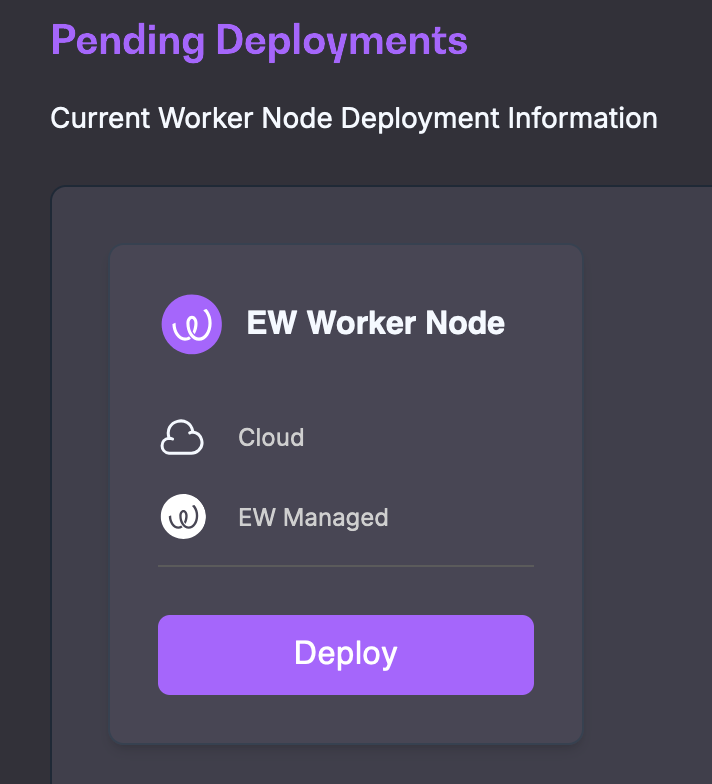
Once you have purchase one or more Worker Nodes, you are ready to deploy them.
Under Worker Node > "Manage", look for "Pending deployments" at the top of the page. You will find all newly purchased Worker Nodes that have not yet been deployed. Previously deployed nodes that were deleted will also show up here.
Click on "Deploy" to start setting up your Worker node
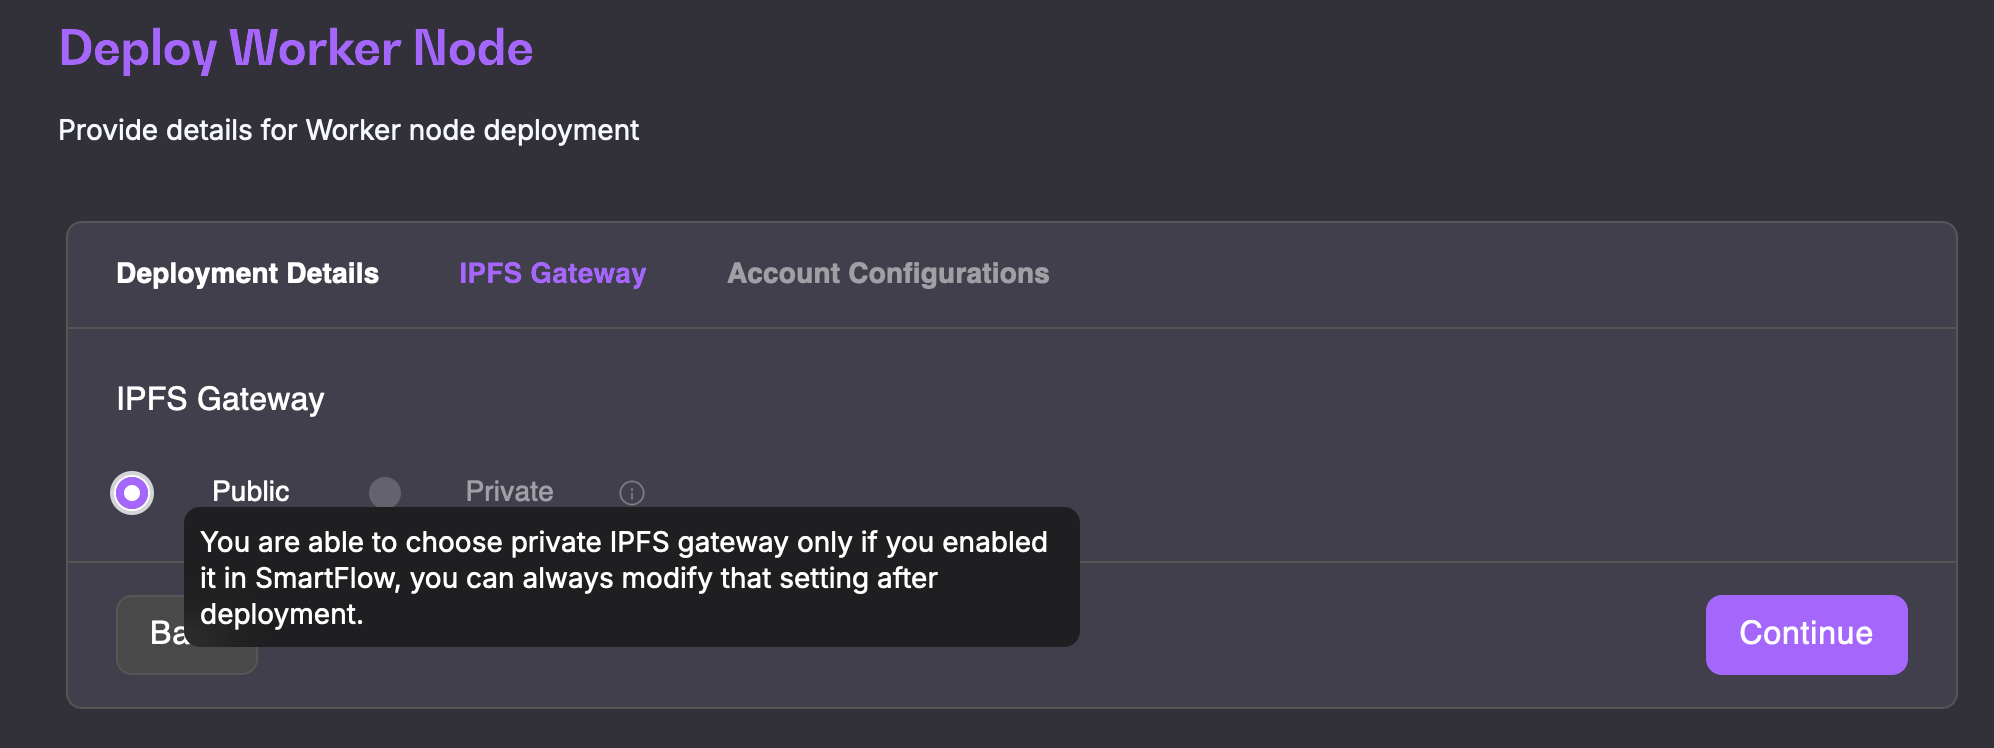
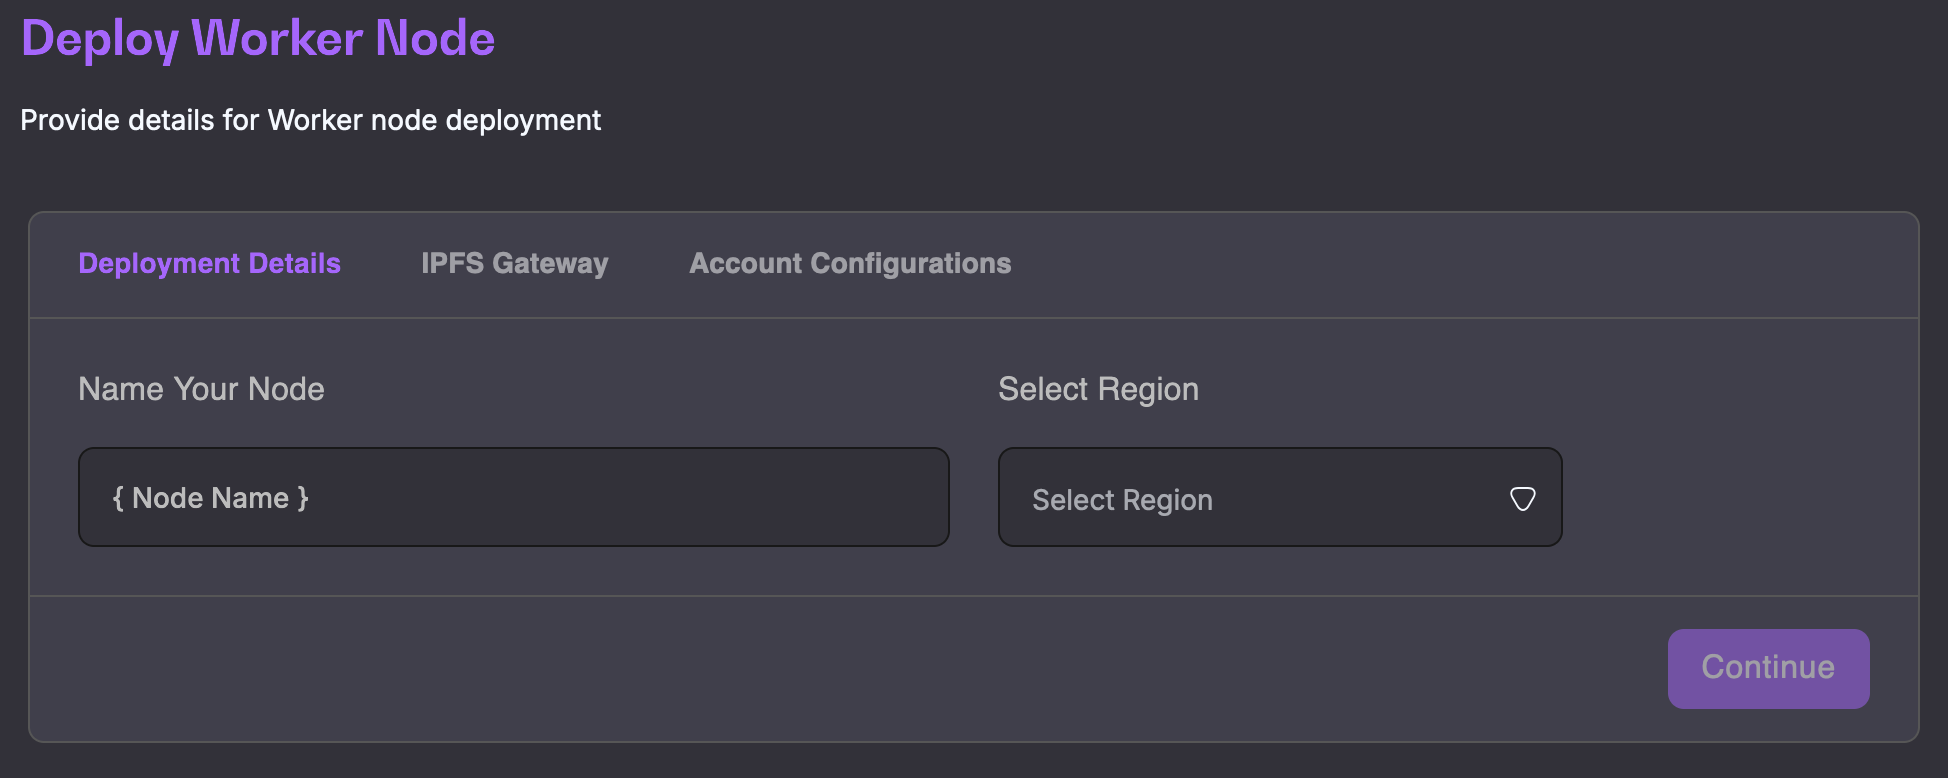
The first step required is to fill in the basic Node details: Name and Region. The name should have a minimum of 6 characters and can contain spaces.
The second step is the IPFS Gateway. By default, you are always able to choose a Public IPFS gateway. Private and BYOC (bring your own credentials) for IPFS support will come in near future. Note that you can deploy your node with a Public gateway and change that setting in the future.
The third and last steps asks you to configure your Account. You can do that by either bringing your own keys should you already have an account you wish to use, or generate new keys. To bring your own keys, you will need the 12 words seed phrase. The account keys can be re-generated or imported even after deployment. ****** Side note - if you already have a running worker node behind marketplace desktop app, you can use the same Worker Account here as the one that you use on your local environment. Just remember to pause your Marketplace app worker engine after the set-up here is completed. You can always remove Launchpad Worker Node and re-enable Marketplace app worker at any time. Both workers can be enabled at the same time temporarily, but it will cause them to compete against each other and might cause unpredictable voting behaviour, hence this is not recommended. ******
Click Continue, you will be offered to be redirected to your Manage page.
Your newly deployed node will show in the Worker Nodes table with the status "Requested"
After several minutes, you will receive a notification regarding the provisioning of your Worker node, and its status will change to "Provisioning". You can already access your node details via the "i" icon on the right of your node overview.
Within 15 minutes, your node will switch to the "Ready" status and you will be notified
After your node is properly set-up & provisioned, in details page you should see green "Running - waiting for Subscribtion" - which indicates that Worker Account configured for that worker should be still linked to Operator Account. If you have used Worker Account that was previously linked to an Operator Account you should see "Running" status.
Once your node provisioning is completed the remaining actions should be conducted either by Marketplace App/WebApp or directly with chain interactions.
To innitiate Marketplace App/WebApp based Worker Account <> Operator Account linking, go to Worker Node details page, and click "Open Operators Console".
Once oppened, choose desired option and proceed with accounts linkage.
Full instruction on how to Link Operator and Worker account Using above options is provided here . This concludes necessary actions that should be taken on Launchpad side, the remaining operations should be conducted with Operators Account using any of the available Marketplace app options.
Creating and publishing a Business logic, Solution group or Solution involves that some data will be publicly available on Chain. This includes but isn't limited to: organization name, Solution groups & Solutions input data, Business logics nodered flows etc.


This page will guide you through the steps of purchasing a Collator node subscription and setting up your node. You cannot set-up nodes on Launchpad without an active subscription.
Purchasing a subscription is the first step to setting up your Collator node(s) on the Energy Web X Parachain. Follow the steps below to subscribe.
Login to Launchpad with your account or create an account
Switch to the VaaS environment of Launchpad using the toggle on the top right of the Launchpad screen.
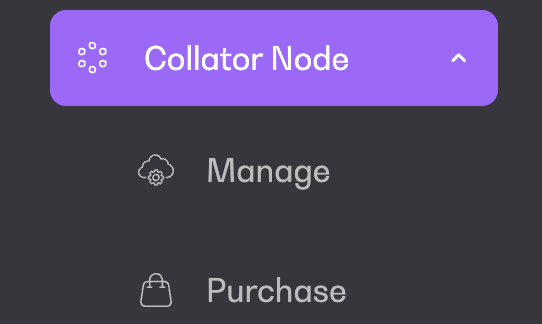
Under Node in the left hand bar menu, go to "Purchase"
Currently, you can only purchase a Collator node with EW managed cloud. Chose the number of nodes you would like to purchase.
Validate your choice by clicking on "Subscribe". This will take you to the payment screen.
Once your payment is validated, your subscription is active and you can start setting up your nodes.
Once your subscription is active, follow the steps below to set-up and manage your nodes.
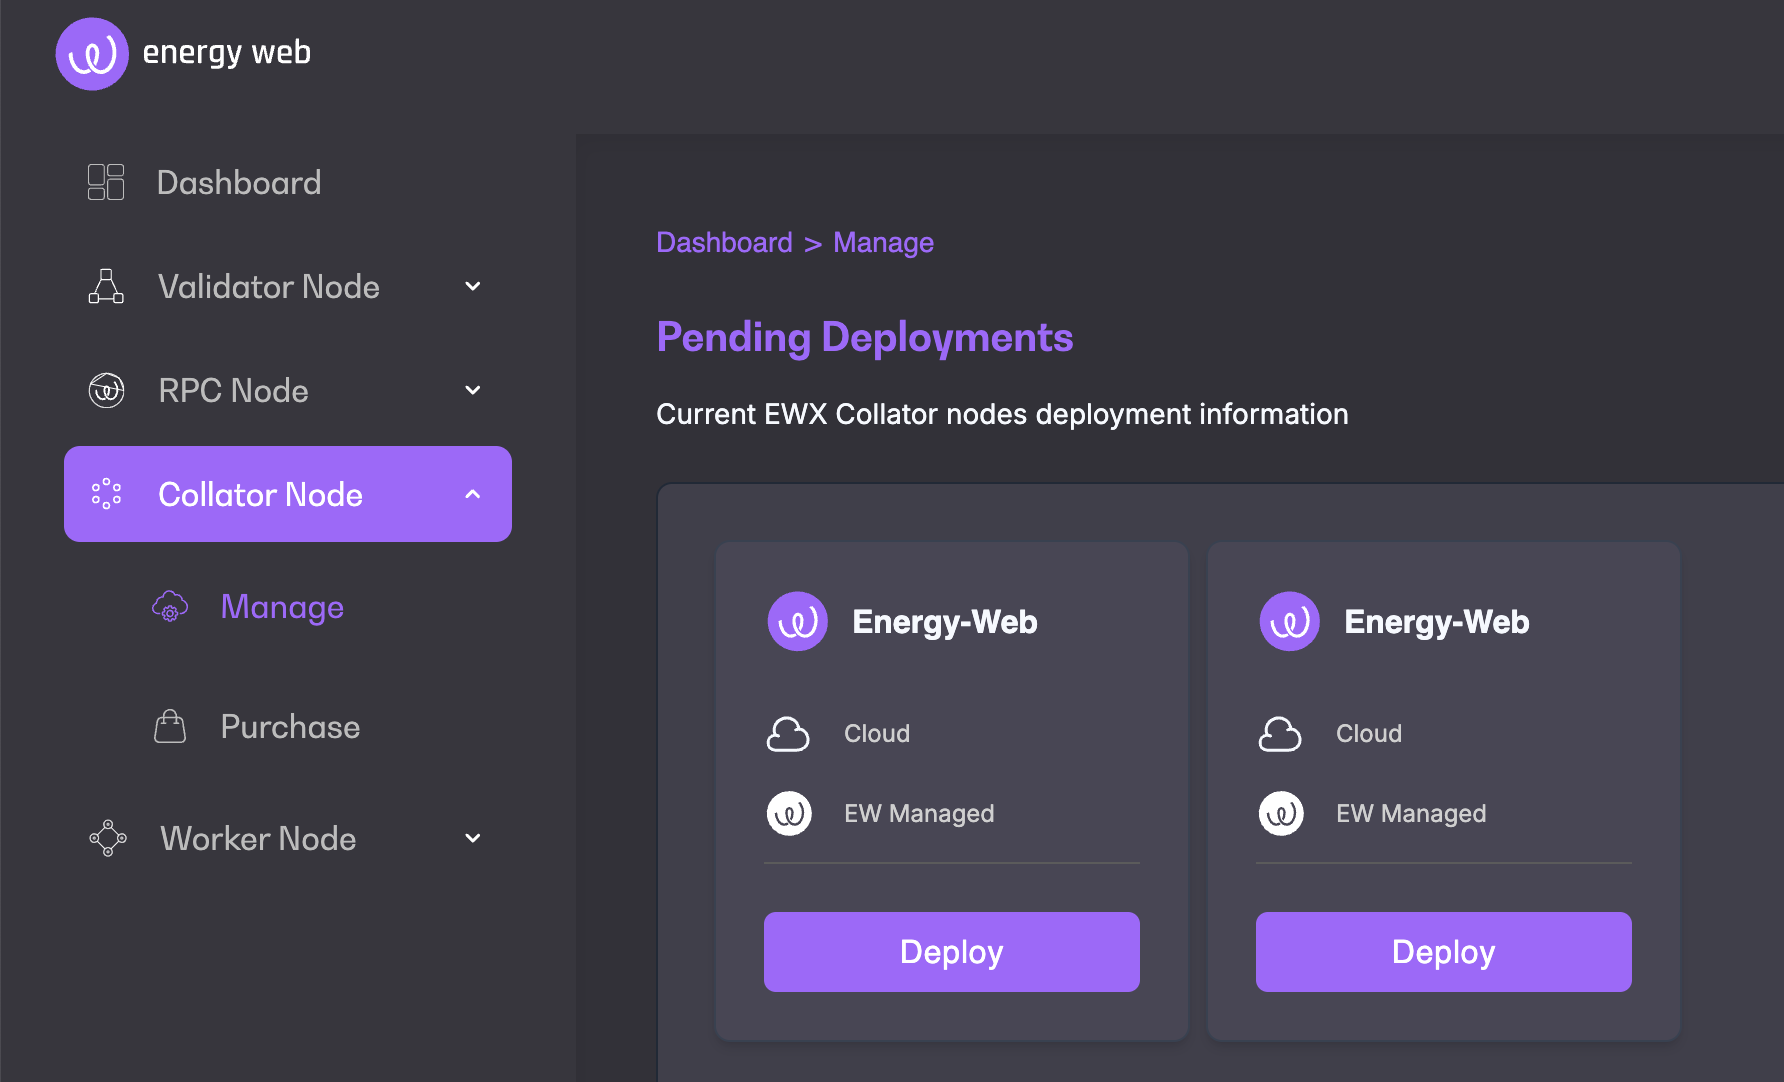
Under Collator Node, go to "Manage". You will see your purchased bundle of nodes that are ready for deployment.
Click Deploy
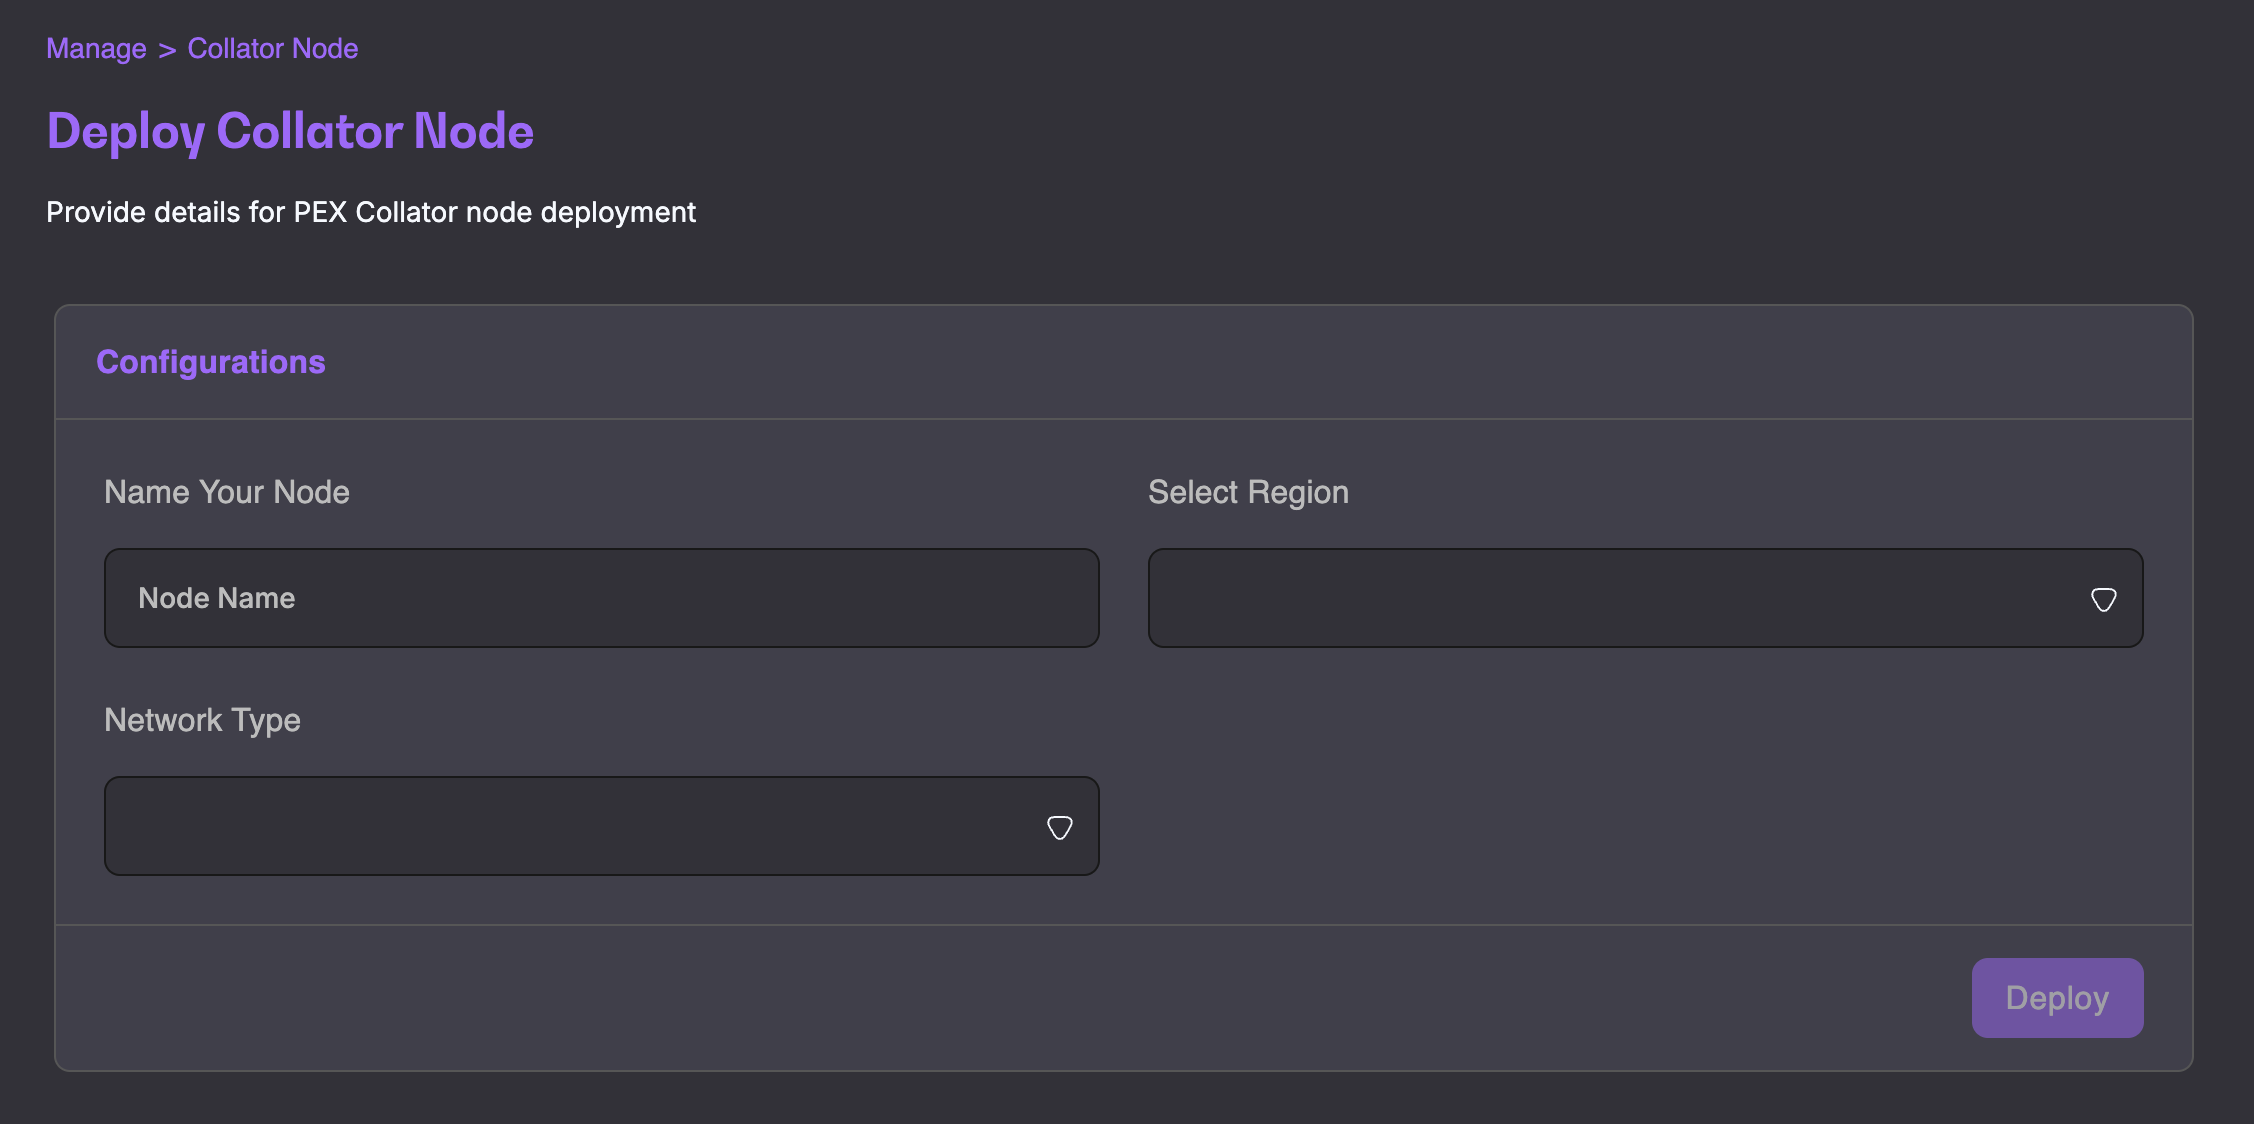
Fill in the necessary configurations details and go to Deploy
You will find your newly deployed node under Collator Nodes by clicking Manage.
You can access more information about your collator node details by clicking on View Details when in the manage view.
This section will include all general and specific details about your node and will allow you to kick off and track onboarding.
You can also view Node Analytics, such as Network Type, On-Chain Metrics, Logs and Alerts at any time by clicking Monitor Node.
A Collator node progresses through multiple independent statuses during setup and onboarding. These reflect infrastructure provisioning, chain synchronization, and onboarding state.
The node status reflects the state of the underlying infrastructure managed by Launchpad.
Requested The node deployment has been initiated and infrastructure provisioning is in progress.
Provisioning (automatic) Launchpad provisions and configures the collator environment. No operator action is required.
Ready Infrastructure provisioning is complete. The node is operational and able to begin chain synchronization.
The sync status indicates whether the node has fully synchronized with the Energy Web X network.
N/A The node is not yet ready to begin syncing (infrastructure provisioning not complete).
Syncing The node is actively synchronizing with the EWX network. This process can take up to 48 hours or longer, depending on network conditions.
Synced The node is fully synchronized and ready for onboarding.
Once the Collator node is deployed and synced, the onboarding process can be initiated by clicking Start Onboarding in the About section of the Collator node's Details page.
You can choose between Manual onboarding and Automatic onboarding.
Manual onboarding is intended for operators who want full control and custody over their Collator accounts and keys.
With manual onboarding, the operator:
Brings their own EWX account
Manages token funding across chains
Executes and self-validates required on-chain actions
Launchpad guides the operator step by step and validates progress where possible.
Manual Onboarding Steps:
Import EWX Account
The operator imports an existing EWX account address, holding a minimum of 5010 EWT (see for details).
Launchpad verifies on-chain state to ensure the account exists and is active.
Upon completion, click Request Collator Authorization for the Collator node to be authorized and registered to enter the candidate pool. You will be informed via email when your Collator is ready and the onboarding status within the Details page will change to Ready.
Note: Automatic onboarding is temporarily suspended.
With the Automatic onboarding, all the necessary steps will be automatically done by the Launchpad platform, allowing you to get started immediately with your Collator node.
With automatic onboarding:
Launchpad performs all required steps automatically
Account setup, key assignment, and validation are handled by the platform
No manual on-chain actions are required
Once all steps are complete, the operator can click Request for Collator Authorization.
The operator will be notified by email when the Collator is ready, and the onboarding status in the Details view will update to Ready.


Failed The deployment or initialization process failed and the node is not operational. Manual intervention or redeployment is required.
The operator must ensure the following EVM accounts are funded:
EWC EVM account: 1 EWT
Ethereum EVM account: 0.15 ETH
The operator confirms completion by manually validating and checking the corresponding confirmation boxes.
Session Key Assignment (set_keys)
The operator executes the set_keys transaction using their EWX account.
First, make a copy of the Collator node's Session Key Hex displayed in the Session Key field in the Collator Node ⇒ Details page.
To do so, navigate to , ensure you connect with the EWX Collator account from Step 1.
Select Developer ⇒ Extrinsics
Choose the EWX Collator account in the account field
This step must be completed and self-validated by the operator.


Input the copied Session Key Hex into the keys: EwParachainRuntimeSessionKeys field.
Input 0x0 in the proof: Bytes field.
Submit transaction and sign with the collator account.