# Documentation Overview

Welcome to Energy Web's documentation site. You will find here information about all our solutions, technologies and services!

<figure><img src="/files/CkeTK73uhKWdo4Ke5emh" alt=""><figcaption><p>Energy Web Tech Stack Overview</p></figcaption></figure>

## CONTENTS OVERVIEW

<table data-view="cards"><thead><tr><th></th><th></th><th data-hidden data-card-target data-type="content-ref"></th><th data-hidden data-card-cover data-type="files"></th></tr></thead><tbody><tr><td><mark style="color:purple;"><strong>CORE CONCEPTS</strong></mark></td><td>Learn about the essential components and elements of the Energy Web Ecosystem.</td><td><a href="/pages/8eLhVt30Fqx1t8VZmCu4">/pages/8eLhVt30Fqx1t8VZmCu4</a></td><td></td></tr><tr><td><mark style="color:purple;"><strong>LAYER X: EWX ECOSYSTEM</strong></mark></td><td>The <strong>EWX Ecosystem</strong> refers to all technologies and building blocks related to the <strong>EWX parachain</strong>.</td><td><a href="/pages/lIujlz95YrduNMxMORl2">/pages/lIujlz95YrduNMxMORl2</a></td><td></td></tr><tr><td><mark style="color:purple;"><strong>PUBLIC LAYER: EWC ECOSYSTEM</strong></mark></td><td>The <strong>EWC Ecosystem</strong> refers to all technologies and solutions built on the <strong>Energy Web Chain</strong>.</td><td><a href="/pages/HY8UX3HnXMCXFyq9CkyP">/pages/HY8UX3HnXMCXFyq9CkyP</a></td><td></td></tr><tr><td><mark style="color:purple;"><strong>SOFTWARE AS A SERVICE PLATFORM: LAUNCHPAD</strong></mark></td><td>Launchpad is a <strong>SaaS platform built</strong> by Energy Web and allowing users to develop various Energy Web solutions.</td><td><a href="https://docs.energyweb.org/launchpad">https://docs.energyweb.org/launchpad</a></td><td></td></tr><tr><td><mark style="color:purple;"><strong>INDUSTRY SPECIFIC SOLUTIONS</strong></mark></td><td>Energy Web offers generic and customizable solutions of the Energy Sector such as Green Proofs and Digital Spine .</td><td><a href="/pages/SgxYIrvyUKEvZ2V0Wkt1">/pages/SgxYIrvyUKEvZ2V0Wkt1</a></td><td></td></tr><tr><td><mark style="color:purple;"><strong>Earning and contributing on EWX for Newcomers</strong></mark></td><td>If you're new to Energy Web X and Web3 concepts and want to participate and earn rewards, <a href="https://app.gitbook.com/o/-MaVNTC0phnhS2JhwPF0/s/nf3YeoQlQerc93GsC2Me/~/edit/~/changes/214/core-concepts/energy-web-x/beginners-guide-to-earning-and-contributing-on-ewx">click here</a>. </td><td></td><td></td></tr></tbody></table>


# Energy Web 2025 Technology and Governance Upgrade FAQ

This document lists frequently asked questions and brief answers in relation to the Energy Web 2025 Technology and Governance Upgrade. Further information is available in other sections of the GitBook documentation and the related [Energy Web 2025 Yellow Paper](http://energyweb.org/documents/2025yellowpaper.pdf), as well as the [2025 EWT White Paper](http://energyweb.org/documents/micawhitepaper.pdf),

### 1. What Does the Energy Web 2025 Upgrade Entail?

The 2025 upgrade marks Energy Web platform’s transition from the legacy Energy Web Chain (EWC), a public but permissioned Proof‑of‑Authority (PoA) network, to Energy Web X (EWX), a public, permissionless, nominated Proof‑of‑Stake (NPoS) parachain on Polkadot.

The upgraded Energy Web technology platform consists of:

* Energy Web X (EWX) – the core blockchain layer providing NPoS, on‑chain governance, native token bridging, and EVM-compatible execution.<br>
* Verified Compute Cloud (VCC) – a decentralised off-chain business logic computation service, developed by the Energy Web Foundation as a blockchain layer 2 solution, complementing and interacting with EWX for on-chain finalization. VCC supports verification, automation and auditability for sustainable, mission-critical enterprise solutions.

With the upgrade, EWC transitions into an archive mode, while EWX becomes the strategic foundation for long-term use. EWT is deployed as an ERC‑20 representation on Ethereum for broader access and liquidity, while maintaining EWT supply cap of 100 million.

### 2. Why Was This Upgrade Required?

The upgrade from legacy Energy Web Chain (EWC) to Energy Web X (EWX) is a strategic evolution driven by the need for enhanced scalability, security, governance, economic stability and interoperability, critical for running enterprise grade applications on-chain.The original EWC PoA model successfully bootstrapped early enterprise deployments but presents limitations to decentralisation and linteroperability.

The 2025 upgrade addresses these constraints by:

* Moving to open, permissionless NPoS on EWX
* Leveraging Polkadot interoperability (XCM)
* Integrating ERC‑20 EWT on Ethereum for higher accessibility and utility
* Introducing VCC as layer 2 decentralised off-chain business logic for enterprise-grade service execution
* Implementing transparent, token‑holder-driven governance and treasury management

### 3. How Was This Upgrade Authorised (Zurich Hard Fork)?

The upgrade was formally approved through EWC’s validator governance process and funded through the Community Fund. Validators voted on [Energy Web Architecture Upgrade Proposal](https://github.com/energywebfoundation/ewf-zurich-upgrade/blob/master/Network%20Upgrade%20Documentation/Energy%20Web%20Architecture%20Upgrade%20Proposal%20\(with%20Vote%20Outcome\).pdf), approved by supermajority, implementing the Zurich Hard Fork, which initiated runtime upgrades (EWC supply freeze and transition to NPoS at EWX), ERC‑20 deployment, and bridge topology with additional advanced features including liquid staking and BYOT, as well as Worker Node Pallet integration facilitating layer 2 Verified Compute Cloud service. Any further upgrades will follow the new, broader on-chain governance mechanism.

Pre-upgrade the EWC Validators administered the Community Fund and determined the manner in which its EWT may be apportioned in accordance with the one-vote per Validator governance structure. For a list of previous motions please see this [section](https://app.gitbook.com/o/-MaVNTC0phnhS2JhwPF0/s/nf3YeoQlQerc93GsC2Me/~/edit/~/changes/202/core-concepts/energy-web-platform-governance-motions-2019-2025).

### 4. How Is the Upgrade Rolled Out (Zurich Hard Fork)?

* Freezes EWC token minting at \~83.26M EWT.
* Moves governance and chain evolution to EWX.
* Keeps EWC operational as an on‑ramp only (no new block rewards; no lowering back from EWX; existing apps may continue)
* The Energy Web Bridge maintains 1:1 conservation using lock/mint and burn/unlock semantics.

Note: the Zurich hard-fork was successfully executed at block height [36871700](https://explorer.energyweb.org/block/36871700/transactions) on the Energy Web Chain, on 6 August 2025 at 07:14:20 AM +4 UTC. <https://explorer.energyweb.org/block/36871700/transactions>

Important: If you still hold EWTb, you must first bridge it back to EWC using the legacy bridge, and only then lift it from EWC to EWX. You cannot bridge EWTb directly to EWX, or convert it directly into the new ERC-20 EWT on Ethereum. For more, please see the [section](https://app.gitbook.com/o/-MaVNTC0phnhS2JhwPF0/s/nf3YeoQlQerc93GsC2Me/~/edit/~/changes/202/energy-web-x-upgrade-faq/gitbook-section-name-ewt-token-mobility) on [EWT Token Mobility.](https://app.gitbook.com/o/-MaVNTC0phnhS2JhwPF0/s/nf3YeoQlQerc93GsC2Me/~/edit/~/changes/202/energy-web-x-upgrade-faq/gitbook-section-name-ewt-token-mobility)

#### 2. ERC‑20 EWT Deployment & Bridge Topology

* ERC‑20 EWT deployed on Ethereum with initial supply equal to frozen EWC supply.
* [The EWT ERC20 token contract](https://etherscan.io/address/0xB66a5D30D04f076E78ffB0d045C55846Fdcde928) was deployed on Sep-11-2025 08:39:59 AM UTC.&#x20;
* EWT ERC20 Token Contract: <https://etherscan.io/address/0xB66a5D30D04f076E78ffB0d045C55846Fdcde928>
* The Energy Bridge, which bridges Energy Web Tokens (EWT) between Energy Web X (EWX) with Ethereum Mainnet went live on 11 September 2025 at 08:45:59 AM UTC.
* The bidirectional bridge manages token bridging through a bridge pallet deployed on EWX and the [Energy Bridge contract](https://etherscan.io/address/0x5dded30f8cd557257ccdc4a530cb77ac45f0259d) deployed on Ethereum.&#x20;
* Energy Bridge Contract: <https://etherscan.io/address/0x5dded30f8cd557257ccdc4a530cb77ac45f0259d>

\
Bridge behaviour:<br>

* EWC → EWX: one‑way lift.
* EWX ↔ Ethereum: full bidirectional lock/mint, burn/unlock.
* Ensures unified, single EWT supply across chains.\ <br>

#### 3. Staking Activation (NPoS)

* Collator onboarding with minimum self‑stake.
* Delegation from Nominators.
* Gradual decentralisation.

Note: The [NPos upgrade](https://energywebx.subscan.io/block/5059493) to the Energy Web X chain was deployed on 8 October 2025 at 12:46:54 PM UTC. See runtime upgrade event: <https://energywebx.subscan.io/block/5059493>

#### 4. Delegated Stake & Liquid Staking (stEWT)

* Delegators earn rewards.
* Liquid staking introduces stEWT for use across ecosystem applications.<br>

#### 5. VCC & BYOT

* VCC rollout for decentralized business logic compute.
* BYOT support via Polkadot Asset Hub for stablecoins and additional tokens.<br>

#### 6. Evolution of On-Chain Governance

* Best practices for on-chain governance mechanisms to be implemented while accounting for network security, particularly learning from Polkadot and other ecosystem implementations.\ <br>

### 5. Who Is Affected and What Actions Are Needed?

#### EWC Validators

* Upgraded node clients for the Zurich Fork.
* No PoA block rewards issued post-apgrade.
* Encouraged to transition to EWX Collators.<br>

#### Exchanges & RPC Providers

* To integrate ERC‑20 EWT representation.
* To update nodes to post‑fork configurations.<br>

#### Developers

* Existing EWC deployments still run, but long‑term projects should target EWX.
* Both Launchpad+VCC and standard EVM routes are available.<br>

#### Token Holders

* Can lift EWT from EWC → EWX at 1:1.
* Can lower between EWX ↔ Ethereum.
* Cannot lower back to EWC after ERC‑20 activation.<br>

For more, please see the section on EWT Token Mobility.

### 6. What Is Changing in Tokenomics?

The token model is now:

* Fixed supply cap: 100 million.
* Frozen legacy minted supply: \~83.26M.
* Headroom: \~16.74M EWT that can only be minted via on‑chain governance.
* No automatic inflation.
* Transparent minting only under referendum, with mint events originating on Ethereum and bridged to EWX.
* Enhanced token utility via new token mobility features (staking, BYOT and liquid staking) and layer 2 Verified Compute Cloud service.<br>

### 7. How Are EWX Network Staking Rewards Distributed?

* Rewards come from transaction fees and any governance‑approved issuance.
* Collators earn points for block production.
* Rewards are allocated proportionally to points.
* Rewards are split between Collators and their Nominators based on stake.
* Slashing applies for misbehaviour or downtime.\ <br>

Parameters (reward rates, slashing percentages, active set size) can evolve through governance.

### 8 What is Verified Compute Cloud?

Verified Compute Cloud (VCC) Service has been developed by the Energy Web Foundation as a blockchain layer 2 solution for off-chain business logic computation, complementing and interacting with EWX for on-chain finalization. Key aspects of VCC include:

* Verified Compute Cloud Solution Groups (VCG) comprise VCC Operators and Stakers providing a service pursuant to a select VCC Protocol determined by the VCC Client.
* VCC Clients are users of the VCC service that determine the VCC Protocol and pay for the service.
* VCC Operators: Independent, distributed node operators technically leveraging Energy Web’s Worker Node Pallets, opting in to execute tasks defined by a given business logic (e.g. computing an energy load forecast or validating a batch of renewable energy certificates), communicating the outcome for subsequent on-chain verification and finalisation pursuant to a pre-agreed set of rules (VCC Protocol).
* VCC Stakers:  EWT token holders providing a slashable collateral as a service to support the enforcement of VCC Protocol requirements. This service does not confer ownership, revenue rights, nor does it guarantee yield.&#x20;
* VCC Protocol: Each registered VCC solution comes with a deterministic business logic specification that defines both the computation tasks and the rules for participation and achieving consensus on results; for instance, the rules may include:
* Required stake per VCC operator, acceptable identities or certifications for data management  (if any),
* Number of VCC operators that need to agree (quorum threshold like majority or supermajority),
* Time windows for task execution and result submission,
* Fee for successful execution and penalties for faults/disagreements, etc.

More information on VCC enterprise roll-out and how to qualify as a VCC Operator or Staker will be provided soon.

### 10. What is Liquid Staking on Energy Web X (EWX)?

Liquid staking on Energy Web X (EWX) lets users stake EWT without locking it, by depositing into a pooled nominator managed by the Liquid Staking Pallet and receiving liquid stEWT in return. stEWT stays fully transferable and usable across the ecosystem, including for participating in Verified Compute Cloud groups (VCGs), while continuously accruing staking rewards. Those rewards are automatically restaked, increasing the stEWT:EWT exchange rate over time without minting new tokens. This simplifies the staking process for users, removes the need to manage delegations and restake rewards while compounding utility,  safeguarding network security and avoiding excessive concentration of stake. stEWT will remain bound by the overall EWT supply cap.

The liquid staking model unlocks several key benefits for stakers and the Energy Web ecosystem:

* Stake EWT into a shared pool and receive liquid, transferable stEWT.
* No lock-up: stEWT can be moved, held, or used in applications (e.g., Verified Compute Cloud).
* Auto-compounding: staking rewards increase the exchange rate, boosting stEWT value.
* No delegation management required; the pallet stakes across a curated collator set.
* Improves network security, liquidity, and token efficiency across the ecosystem.

### 11. What Happens to the Community Fund?

The Community Fund transitions into the EWX on-chain treasury:

* Funded by fees, slashing, and governance‑approved issuance.
* Managed directly by EWT token holders.
* Intended to continue to support ecosystem development, audits, grants, and upgrades.\ <br>

### 12. How to Become a Collator and Apply for Nomination?

During the transition phase:

* Onboarding is curated and based on meeting technical standards and minimum stake.
* EWF supports eligible operators with nomination.<br>

Future phases aim for:

* Fully permissionless onboarding.
* Optional KYC/KYB overlays for regulated applications.\ <br>

### 13. What Is Proof of Stake on EWX?

EWX uses Nominated Proof-of-Stake:

* Collators produce blocks, stake EWT, earn rewards, and face slashing in case of misbehave or non-performing.
* Nominators back Collators and share rewards and risks.
* Relay Chain Validators provide finality.<br>

Features include:

* Minimum self‑stake and total stake thresholds.
* Dynamic active set based on total backing.
* Slashing calibrated based on severity.
* Future support for liquid staking (stEWT).

Participation in EWX is voluntary and comes with both risks and opportunities, as outlined in the [2025 EWT White Paper](http://energyweb.org/documents/micawhitepaper.pdf), and especially in the relevant [risk disclosures](https://www.energyweb.org/token-disclaimer).

<br>


# EWT Token Mobility

<figure><img src="/files/G6bFCIXqLbT2HAUy4VRJ" alt=""><figcaption></figcaption></figure>

As part of the 2025 technology and governance upgrade approved by the Energy Web Chain (EWC) validators (for more see [2025 Energy Web Yellow Paper](http://energyweb.org/documents/2025yellowpaper.pdf) and [2025 EWT White Paper](http://energyweb.org/documents/micawhitepaper.pdf)), an ERC-20–compatible representation of the Energy Web Token (EWT) has been implemented. This functional upgrade enables EWT to move between EWC, Energy Web X and Ethereum, expanding the platform’s interoperability and enhancing the EWT token utility. This documentation section serves to inform EWT holders on the impact of the 2025 upgrade but it should not be construed as an offer, recommendation, invitation, or inducement, to subscribe for or purchase the Energy Web Token. It does not constitute and is not intended to be financial or other advice and is not to be relied upon as the basis for any investment or other decision. Please be informed of all [associated risks](https://www.energyweb.org/token-disclaimer), and always verify all information presented here directly at the primary source, such as exchanges.

The functional conversion of EWT token ERC-20–compatible representation operates on a 1:1 basis,&#x20;

Note: If you currently hold a native representation of EWT in a self-custodial wallet or on an exchange, no immediate action is required. Your existing tokens remain valid and can continue to be held, transferred, and used in applications that use the native representation of EWT. You may choose to convert, stake, or bridge your EWT at your own convenience. No deadline or mandatory conversion has been imposed.&#x20;

In case you hold EWT in a hard or soft wallet, you can&#x20;

1. Use the bridging function to bridge your tokens to and from various chains and exchanges
2. Stake your tokens on EWX and secure the network post-bridging

In case you hold EWT on an exchange,

* If an exchange has already completed the conversion process and supports ERC-20 EWT, tokens can be withdrawn directly to an Ethereum token address (please see a list of actions by exchanges below, noting that this information should be verified directly with the respective exchange).\ <br>
* If an exchange still supports the original EWC chain and not yet the EWX and ERC-20 upgrade, tokens can be withdrawn to EWC and then bridged to EWX and from there to Ethereum, which has been facilitated by an interface at [energywebx.com](http://energywebx.com).

Please confirm the token representation supported by each wallet and/or exchange before making deposits and consider all[ risks](https://www.energyweb.org/token-disclaimer) related to token acquisition and management.

### 1. EWT Bridging Between Chains

Following the 2025 EWT technology and governance upgrade, bridging functionality has been made available through an interface energywebx.com, supporting token holders to move EWT across the following blockchains:

* Energy Web Chain (EWC) → Energy Web X (EWX)
* Use the Energy Web Bridge at [www.energywebx.com](http://www.energywebx.com)
* Lift locks tokens on EWC and mints them on EWX.
* EWX ↔ Ethereum
* Use the Energy Web Bridge at [www.energywebx.com](http://www.energywebx.com)
* Lift locks tokens on Ethereum and mints them on EWX while lower burns tokens on EWX and unlocks them on Ethereum

There is [a step-by-step guide](https://docs.energyweb.org/ewx-ecosystem/bridging-usdewt/bridging-usdewt-using-the-energy-web-x-bridging-web-app) on how to swap your tokens.

When users bridge EWT from the Energy Web Chain (EWC) or Energy Web X (EWX) to Ethereum, the tokens they receive come from the official EWT ERC-20 contract on Ethereum (smart contract that represents EWT on the Ethereum network):

Official ERC-20 contract address:  0xb66a5d30d04f076e78ffb0d045c55846fdcde928

Users are solely responsible for understanding the characteristics and risks associated with interacting with blockchain networks, including staking, bridging, or transferring EWT. Once again, please bear in mind the associated risks, and verify all information presented here directly at the primary source, such as exchanges.\
\
Important: EWTb (the legacy bridged EWT token on Ethereum) is not the same as the new official ERC-20 EWT on Ethereum Mainnet. If you still hold EWTb, you must first bridge it back to EWC using the legacy bridge, and only then lift it from EWC to EWX. You cannot bridge EWTb directly to EWX, nor convert it directly into the new ERC-20 EWT on Ethereum via the new bridge.<br>

### 2. Current Exchange Support for EWT ERC-20

Exchanges are in the process of updating their systems to support the EWT ERC-20 representation. Temporary suspensions of deposits or withdrawals may occur during these system updates. These processes are exchange-managed and follow standard operational procedures.

#### &#x20;MEXC [Official Announcement](https://www.mexc.com/nl-NL/announcements/article/mexc-completes-energy-web-ewt-contract-swap-17827791531864) on EWT ERC-20 Functional Upgrade

* Energy Web Token ERC-20 representation is active
* Deposits and withdrawals via Ethereum are enabled.

#### &#x20;KuCoin [Official Announcement ](https://www.kucoin.com/announcement/en-kucoin-has-completed-the-energy-web-ewt-token-migration-from-ewt-chain-to-ethereum-network-erc20)on EWT ERC-20 Functional Upgrade

* Energy Web Token ERC-20 representation is active
* Deposits and withdrawals via Ethereum are enabled.

#### [ Gate.io](http://gate.io) on EWT ERC-20 Functional Upgrade

* Energy Web Token ERC-20 representation is active
* Deposits and withdrawals via Ethereum are enabled.<br>

#### Kraken Kraken on EWT ERC-20 Functional Upgrade

* Continues to support the Energy Web Chain (EWC) representation of EWT\
  \
  \ <br>


# Core Concepts

In order to better understand the Energy Web Ecosystem, this section provides a high level introduction to the core concepts and terminologies which will be used across this documentation.


# Energy Web Chain

The Energy Web Chain (EWC) is a publicly-accessible[ EVM](https://ethereum.org/en/developers/docs/evm/)-based blockchain formed as a software infrastructure with permissioned validators hosted by EWF Affiliate organizations. It relies on a Proof-of-Authority consensus mechanism with capacity for a 30x performance improvement and 2-3 orders of magnitude lower energy consumption compared to Ethereum.


# Energy Web X

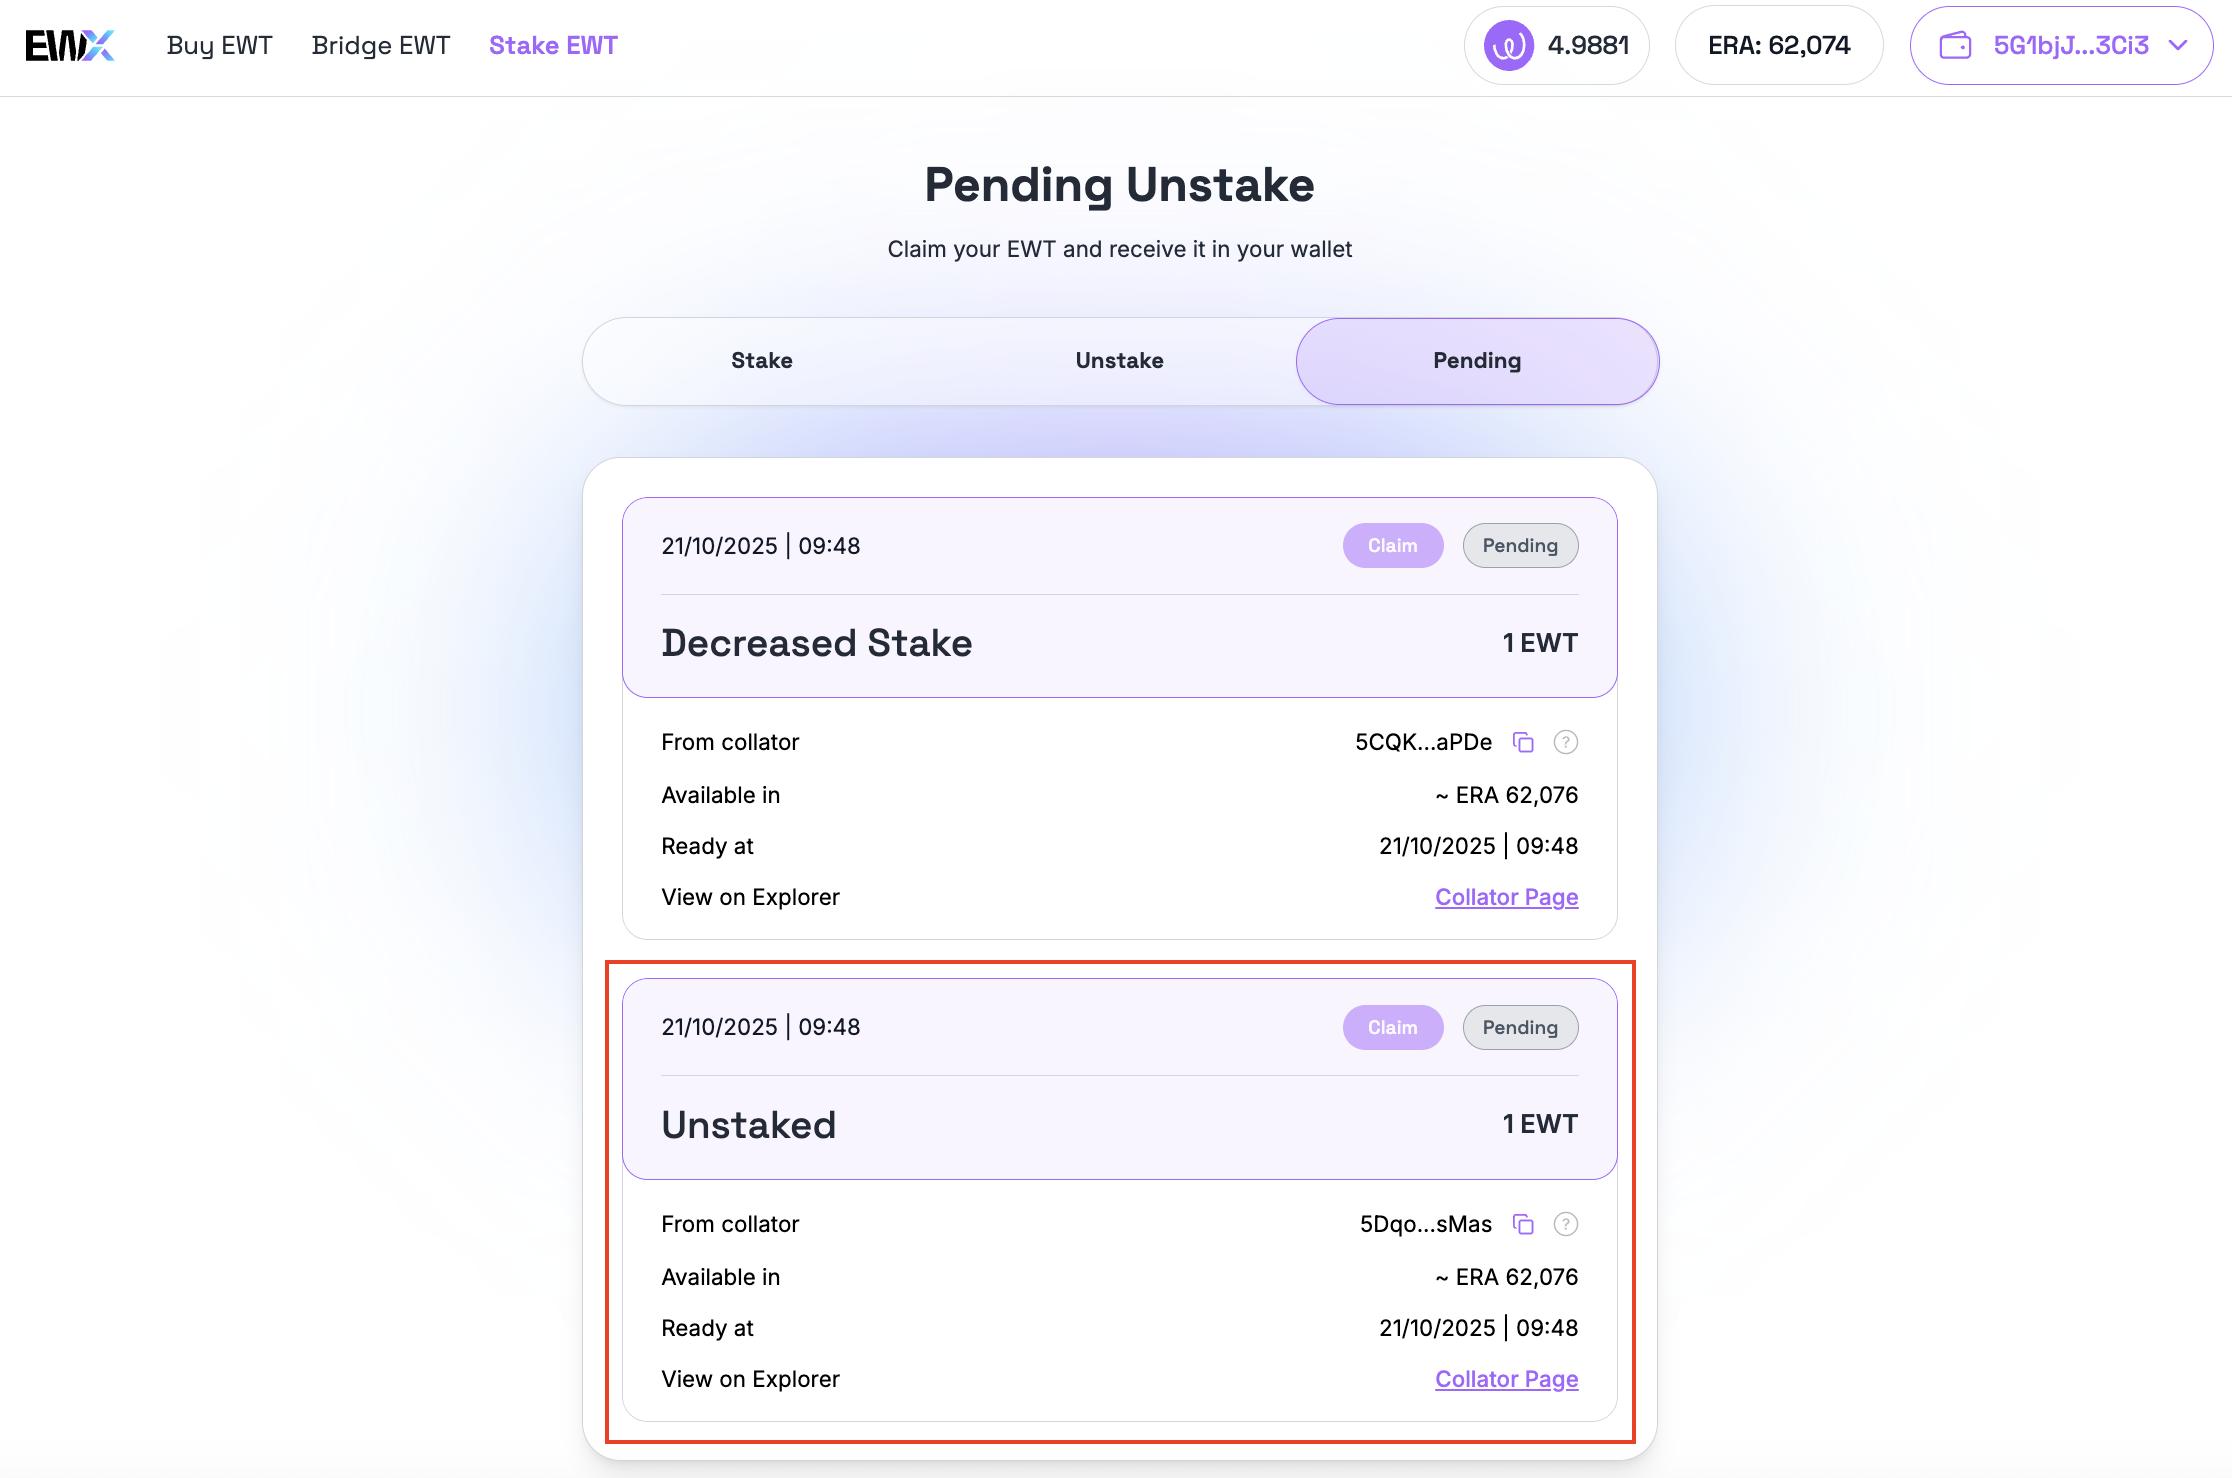
Energy Web X is an ecosystem comprising multiple applications and services including but not limited to the EWX blockchain, EWX Token Bridge, Lift & Lower Pallets, worker nodes, and worker node networks.&#x20;

EWX is a substrate-based blockchain under EWF. It is the backbone of the entire EWX ecosystem. The EWX Token Bridge is an EWC Smart Contract which facilitates the migration of EWT from EWC to EWX. The lift and lower pallets are equivalent to EVM-based smart contracts which enables the lifting and lowering of EWTs between EWC and EWX.


# Beginner's Guide for EWX Solution Staking

How to Participate in the EWX Network as a Staker and Support Network Security and Solution Accountability.

*This step-by-step guide explains how EWT holders can participate in securing the Energy Web X (EWX) network and support Verified Compute Cloud (VCC) solution accountability through liquid staking and solution group participation.*

### Step 1: Acquire Energy Web Tokens (EWT)

EWT can be acquired via decentralised and centralised exchanges. A list of supported exchanges is available [here](https://energywebx.com/).\
\
If you currently hold EWT on Ethereum or EWC, before you can stake, you must first bridge your tokens to Energy Web X (EWX) using the official [Energy Web Bridge](https://bridging.energywebx.com/bridge).&#x20;

*Note: Bridging tokens from EWC to EWX is a one-way function i.e., once tokens are bridged to EWX, they cannot be bridged back to EWC. Bridging tokens from Ethereum to EWX is a two-way function i.e. tokens can be moved back and forth using lock, mint, and burn unlock mechanics.*

### Step 2: Set Up a Compatible Wallet

First, install an [EWX supported wallet](https://energywebx.com/). Once installed, create a new account or import an existing one. Be mindful to securely back up your recovery phrase. Next, enable the Energy Web X network in your wallet settings to view your EWT balance and transact EWT. You can see the steps below to setup your wallet\
&#x20;   \- Download the wallet of your choice either from appstore or playstore\
&#x20;   \- Click the create new account tap, add your password\
&#x20;   \- Write down your seed phrase safely\
&#x20;   \- Verify your seed phrase\
&#x20;   \- Your wallet is ready\
&#x20;   \- Click the drop down button \
&#x20;   \- Click Manage networks\
&#x20;   \- Search Energy Web in the search bar\
&#x20;   \- Toggle on the Energy Web X network\
&#x20;   \- Select Manage tokens, and toggle on the EWX token\
You can see a visual guide on how to setup your wallet [here](https://www.energyweb.org/how-to-setup-wallet-on-mobile).

### Step 3: Liquid Stake Your EWT (stEWT)

Liquid staking on Energy Web X allows you to stake EWT and receive a liquid token representation called stEWT. stEWT is transferable and can be used across the ecosystem, including for participation in Verified Compute Cloud solutions. Liquid staking does not mint any new EWT; the overall EWT supply cap remains unchanged.&#x20;

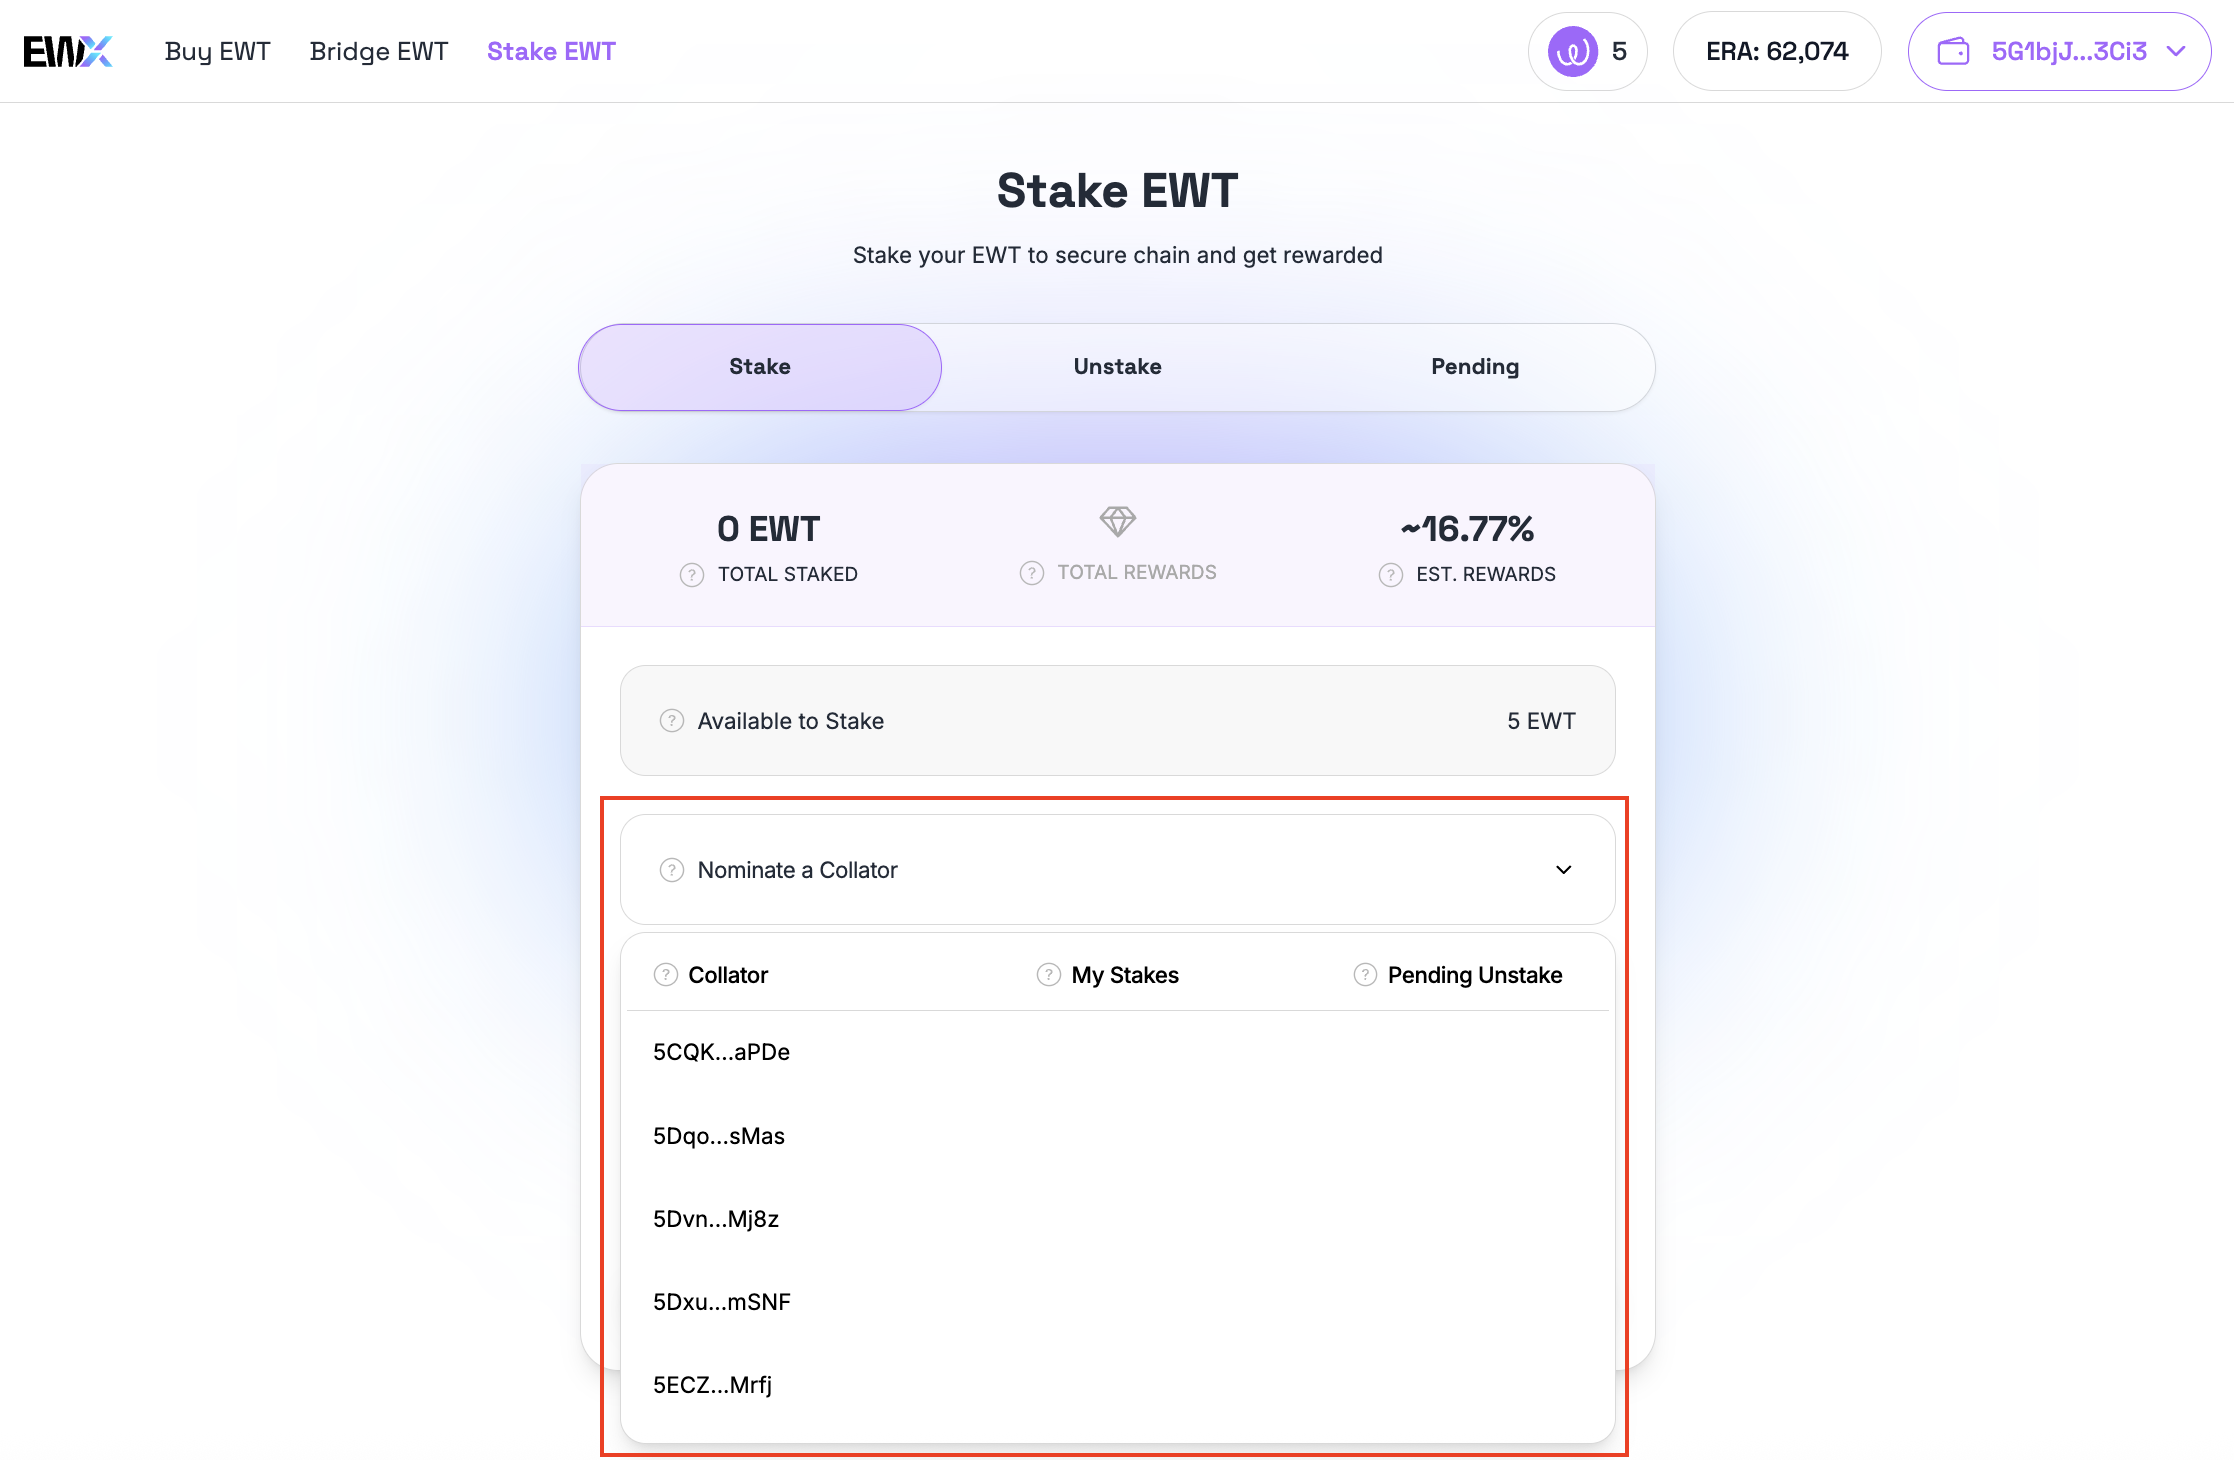
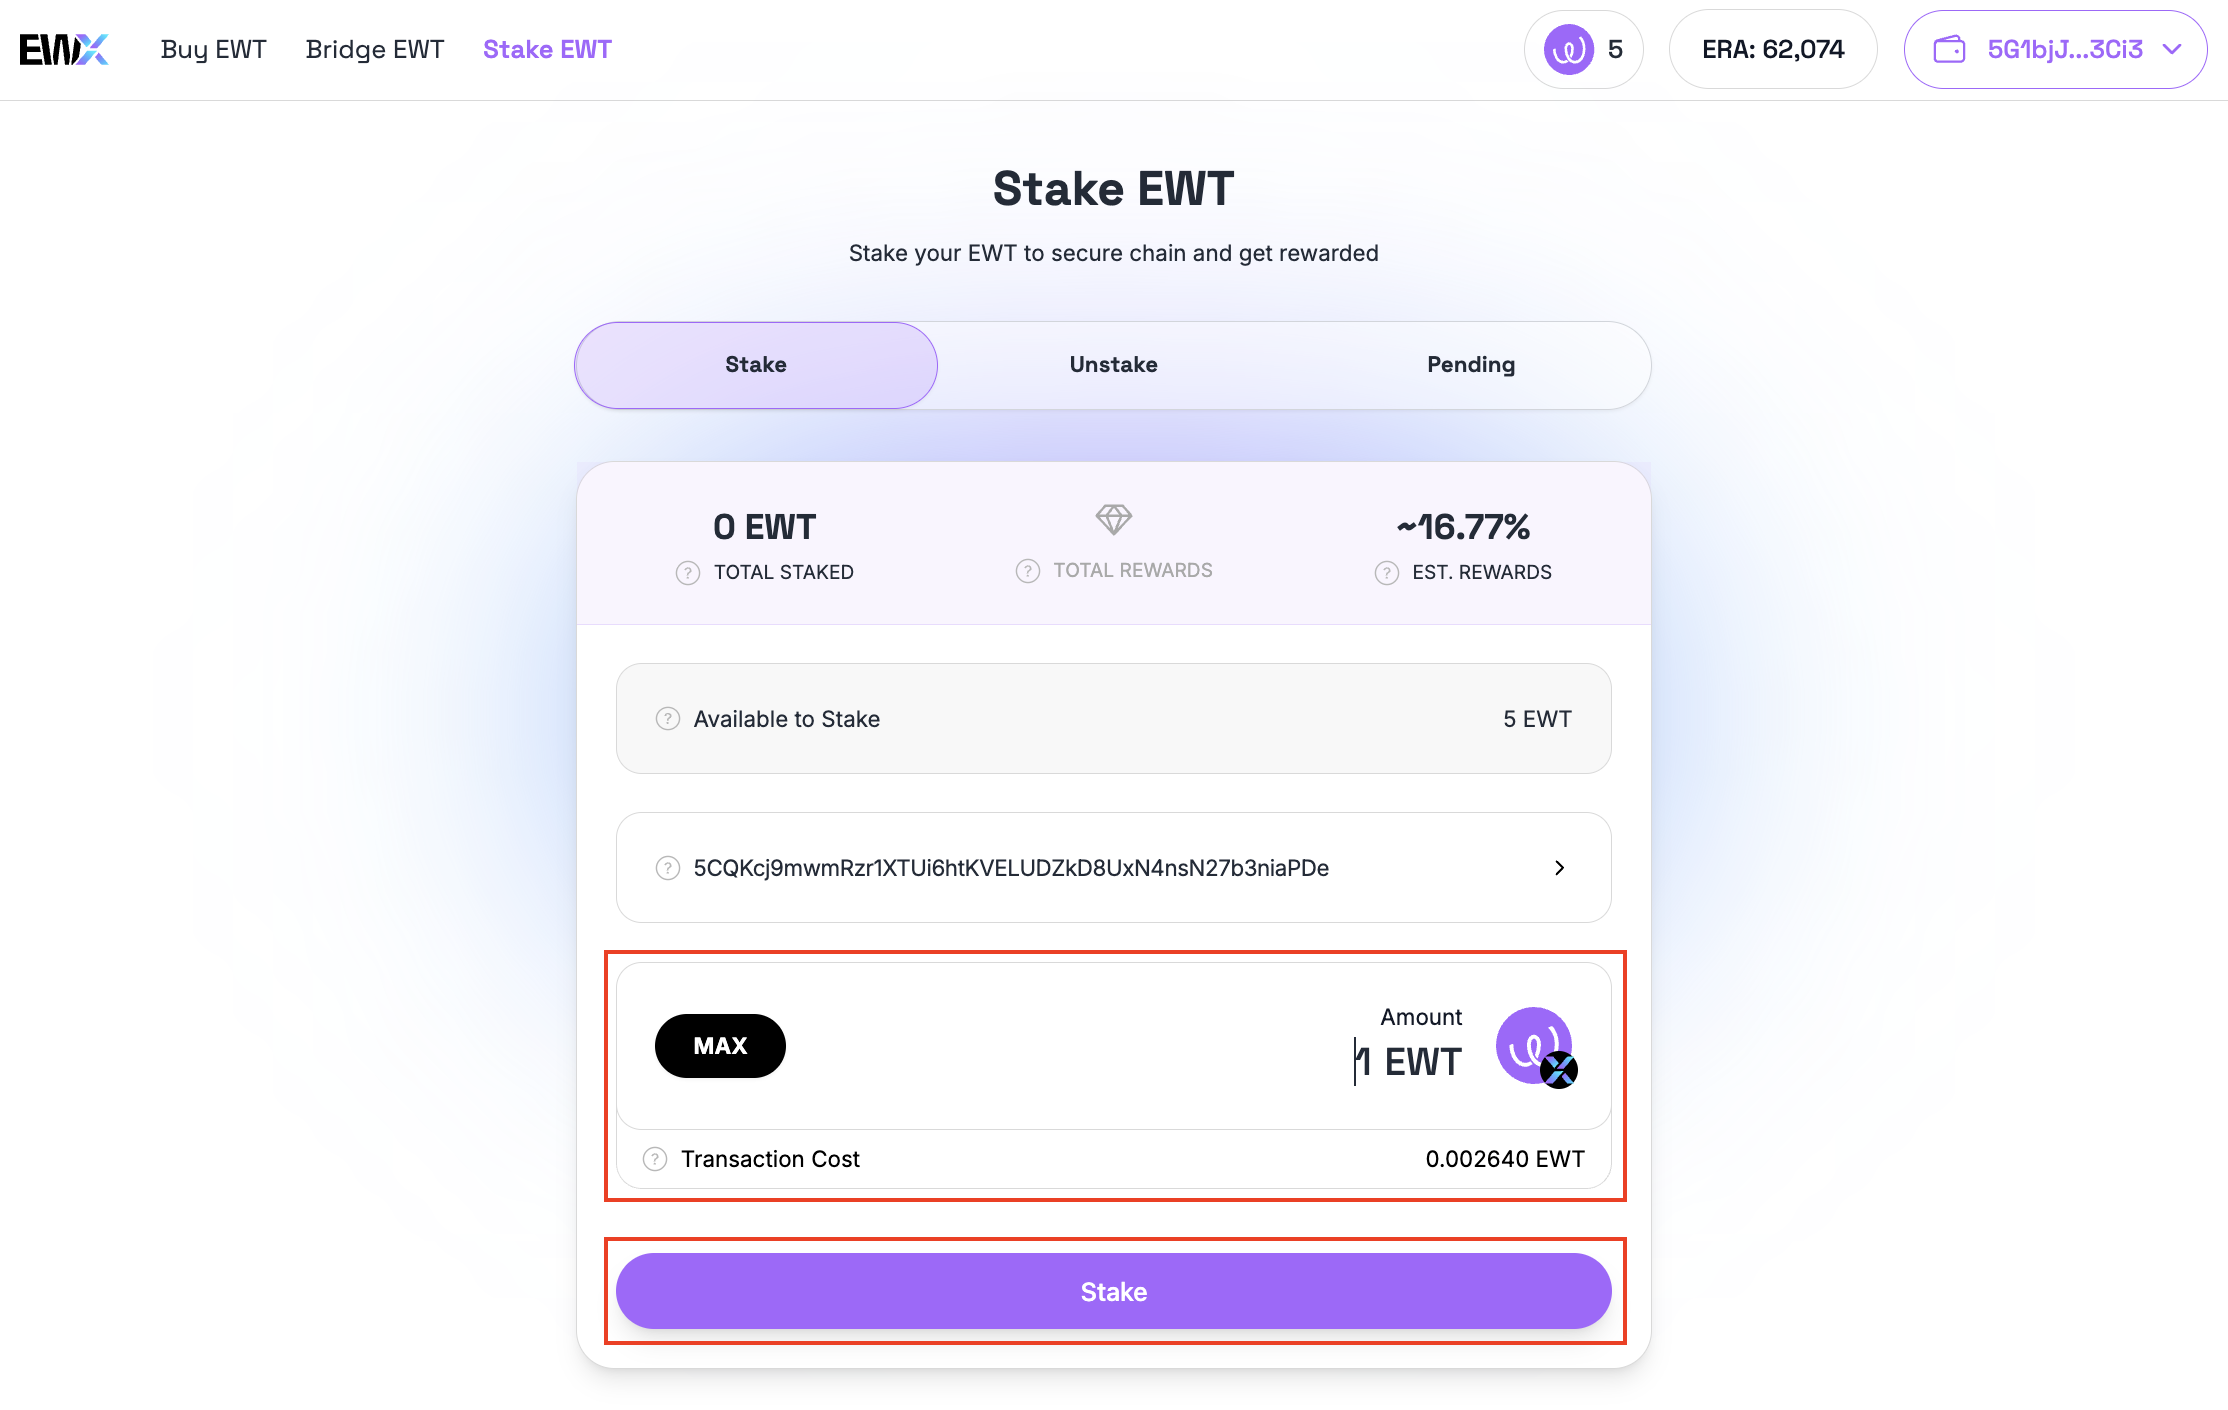
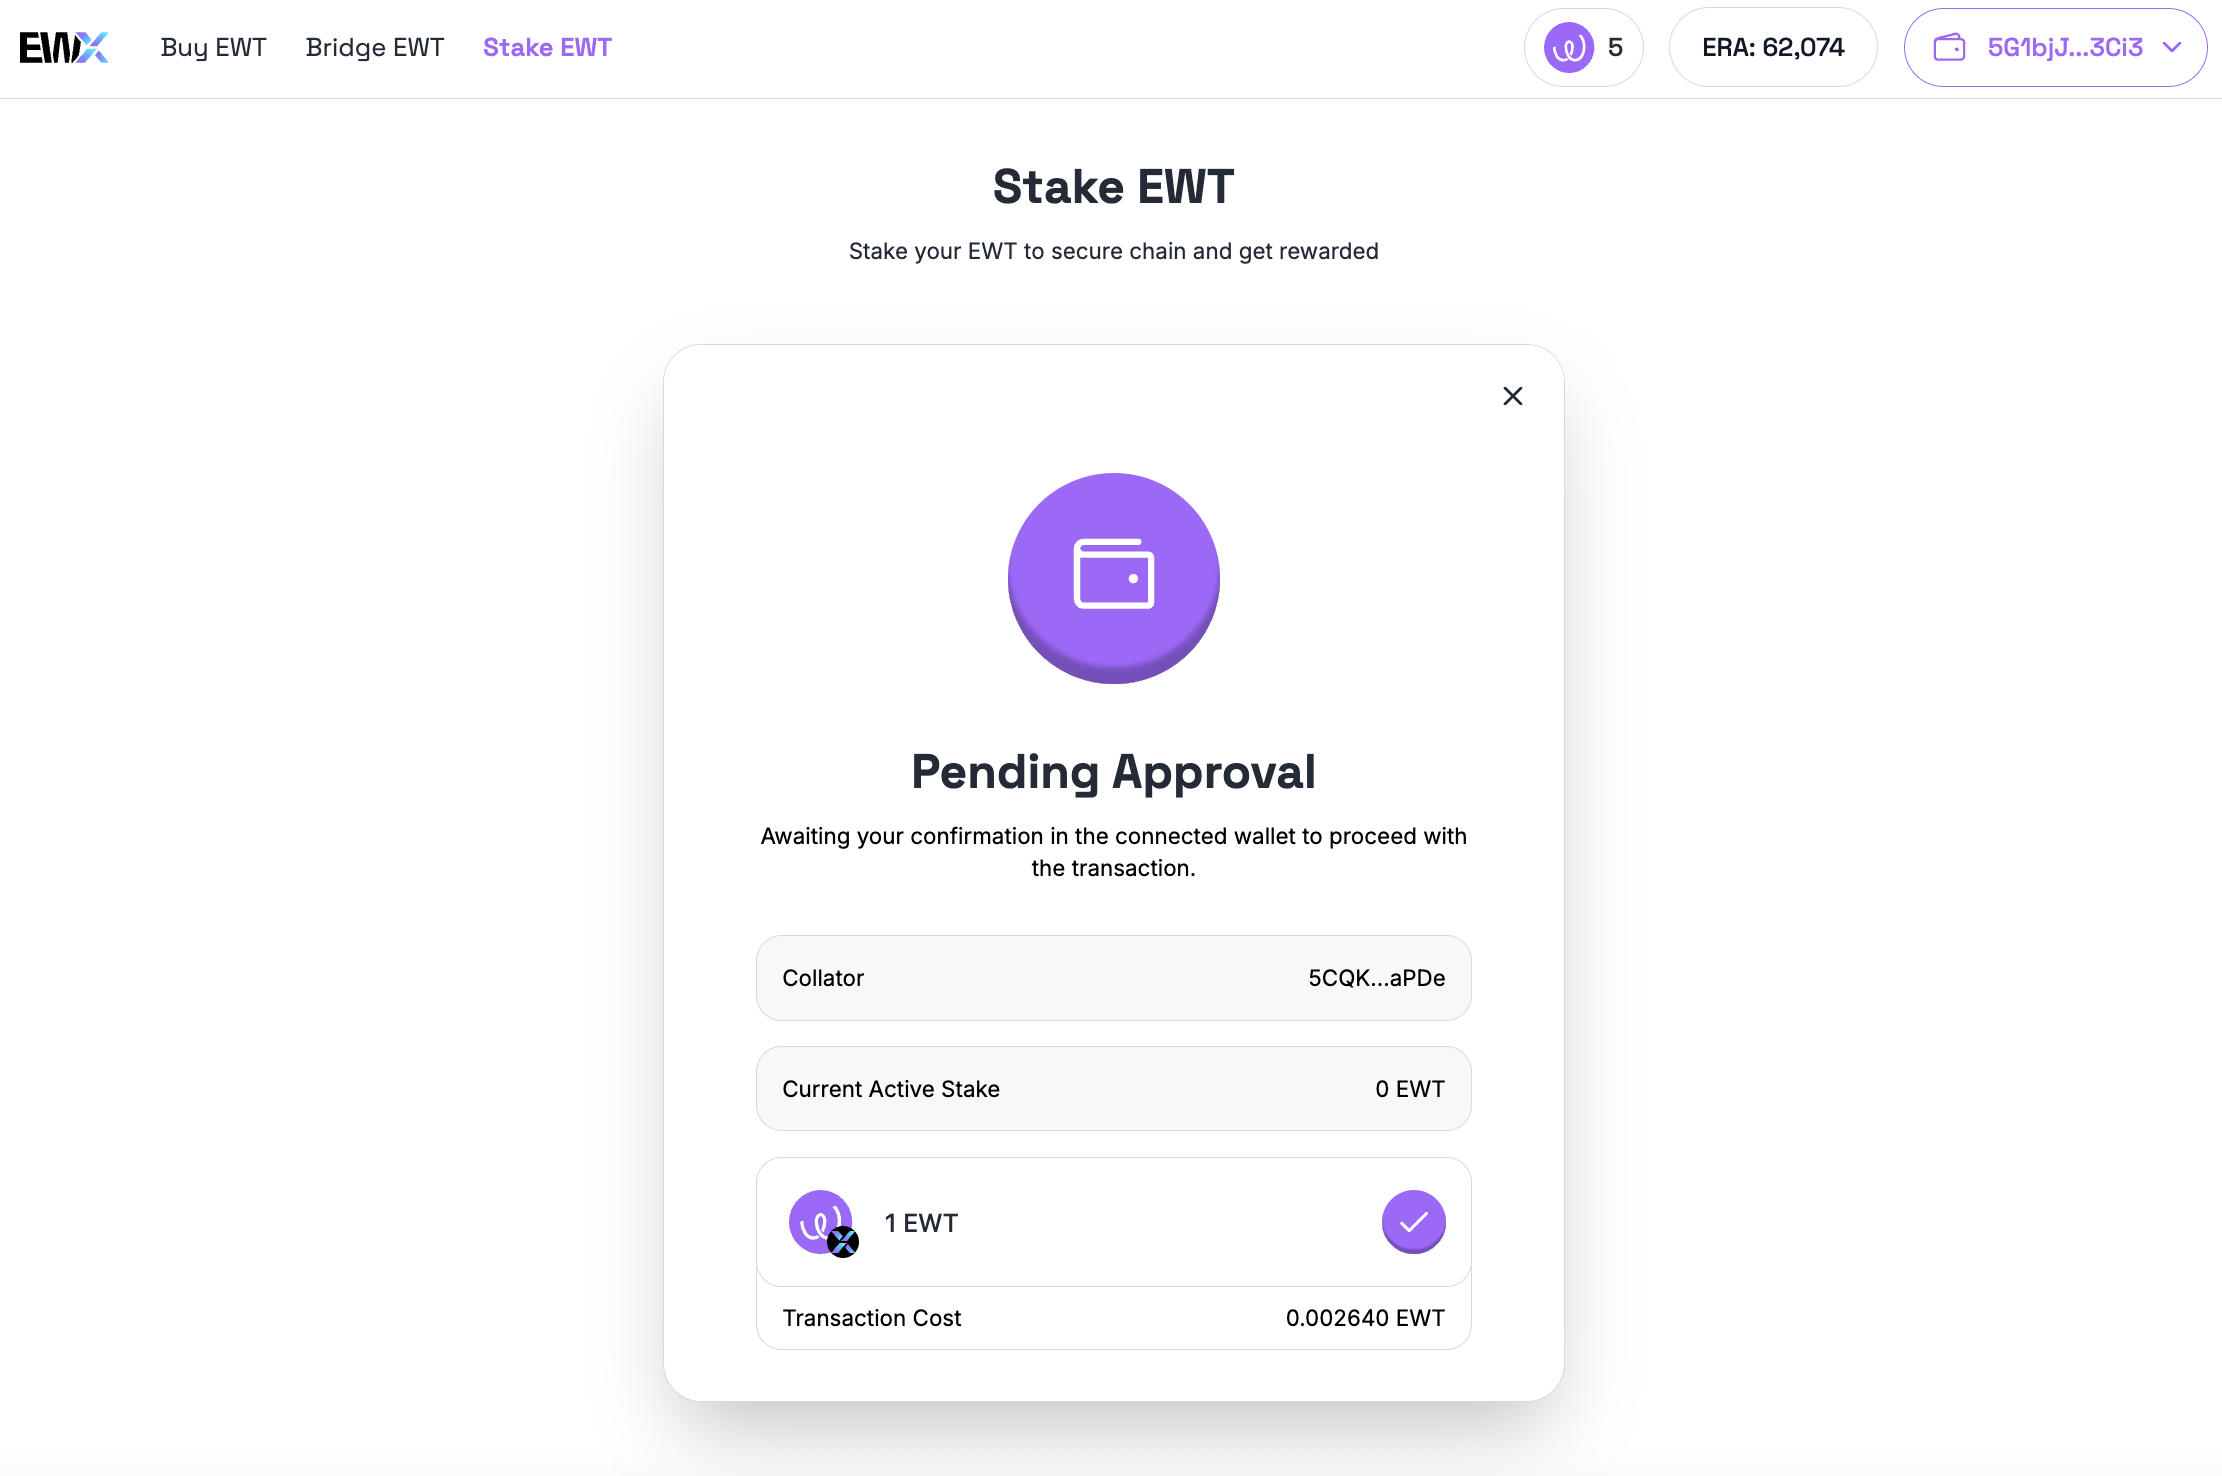
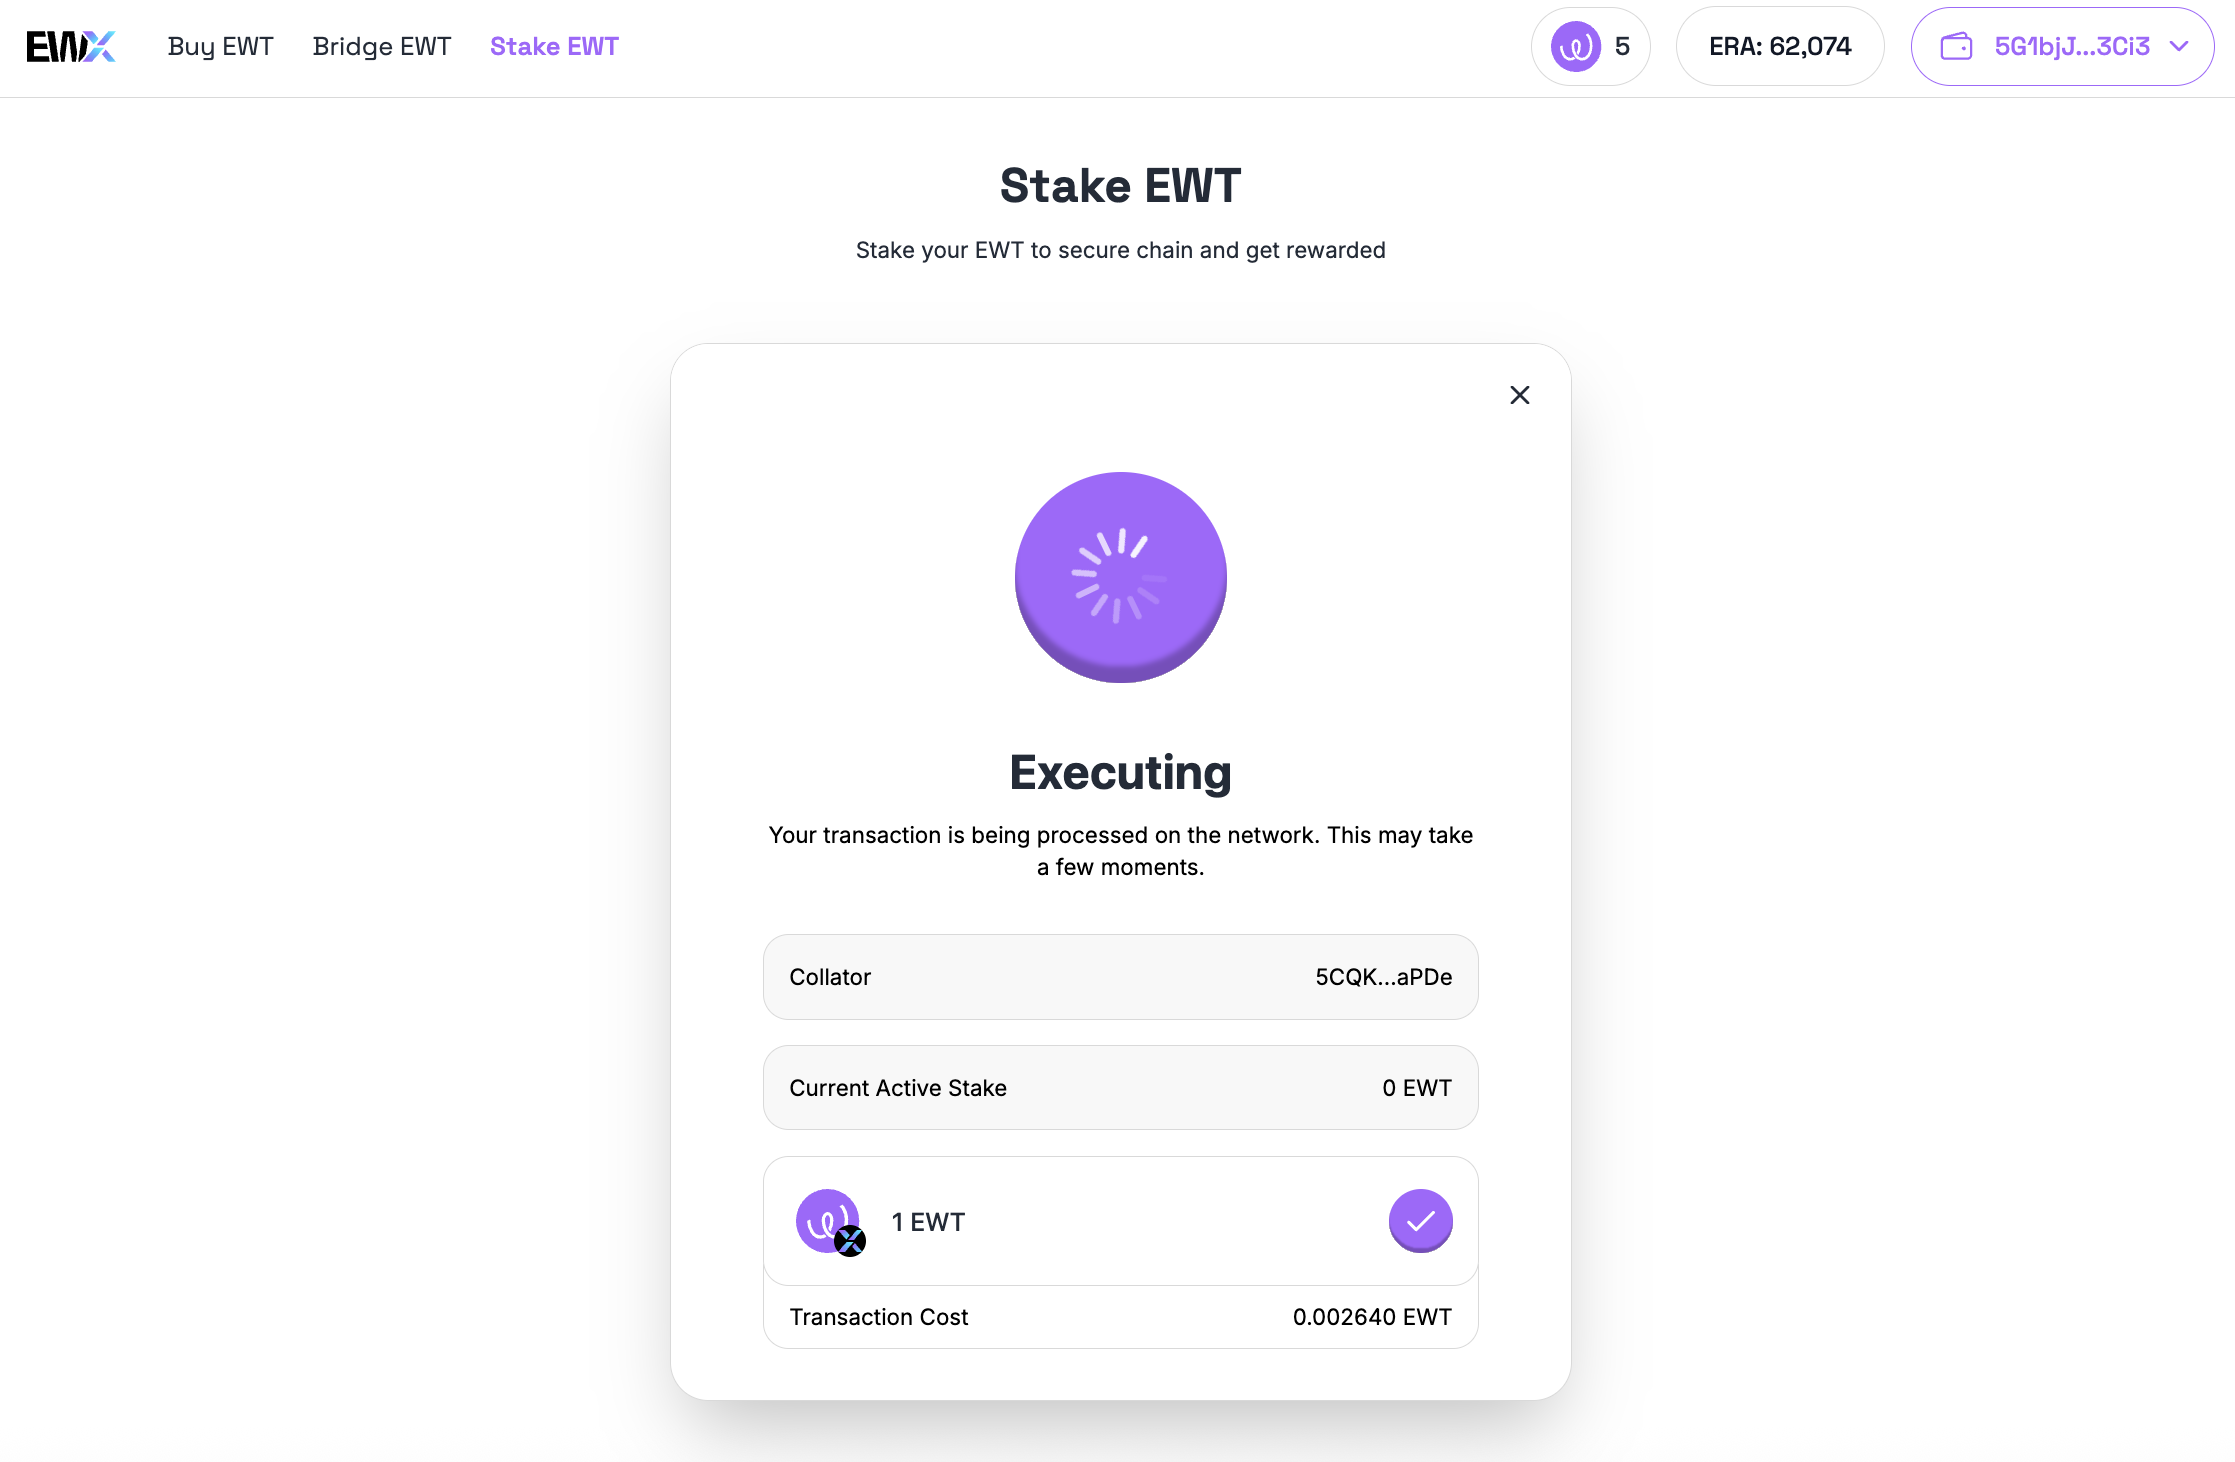
To liquid stake, open the [EWX Staking Application](https://staking.energywebx.com/stake) and select “Liquid Staking”. Then enter the amount of EWT you wish to stake, confirm and sign the transaction in your wallet. Once completed, your wallet will display a stEWT balance.

*Note: The exchange rate between EWT and stEWT may change gradually over time due to auto compounding of staking rewards. Click here for* [ *a video tutorial on how to liquid stake*](https://docs.energyweb.org/ewx-ecosystem/staking-on-energy-web-x/liquid-staking-on-energy-web-x/liquid-staking-with-the-energy-web-x-staking-web-app) *or read more* [*here*](https://docs.energyweb.org/ewx-ecosystem/staking-on-energy-web-x/liquid-staking-on-energy-web-x)*.*

### Step 4: Complete KYC to Stake on Verified Compute Solutions

Now that you have liquid staked your EWT, you can participate in Verified Compute Cloud solution groups. Some VCC solutions require participants to complete know-your-customer (KYC) identity verification before subscribing. The SAFc Registry is one example of a VCC solution that requires KYC.

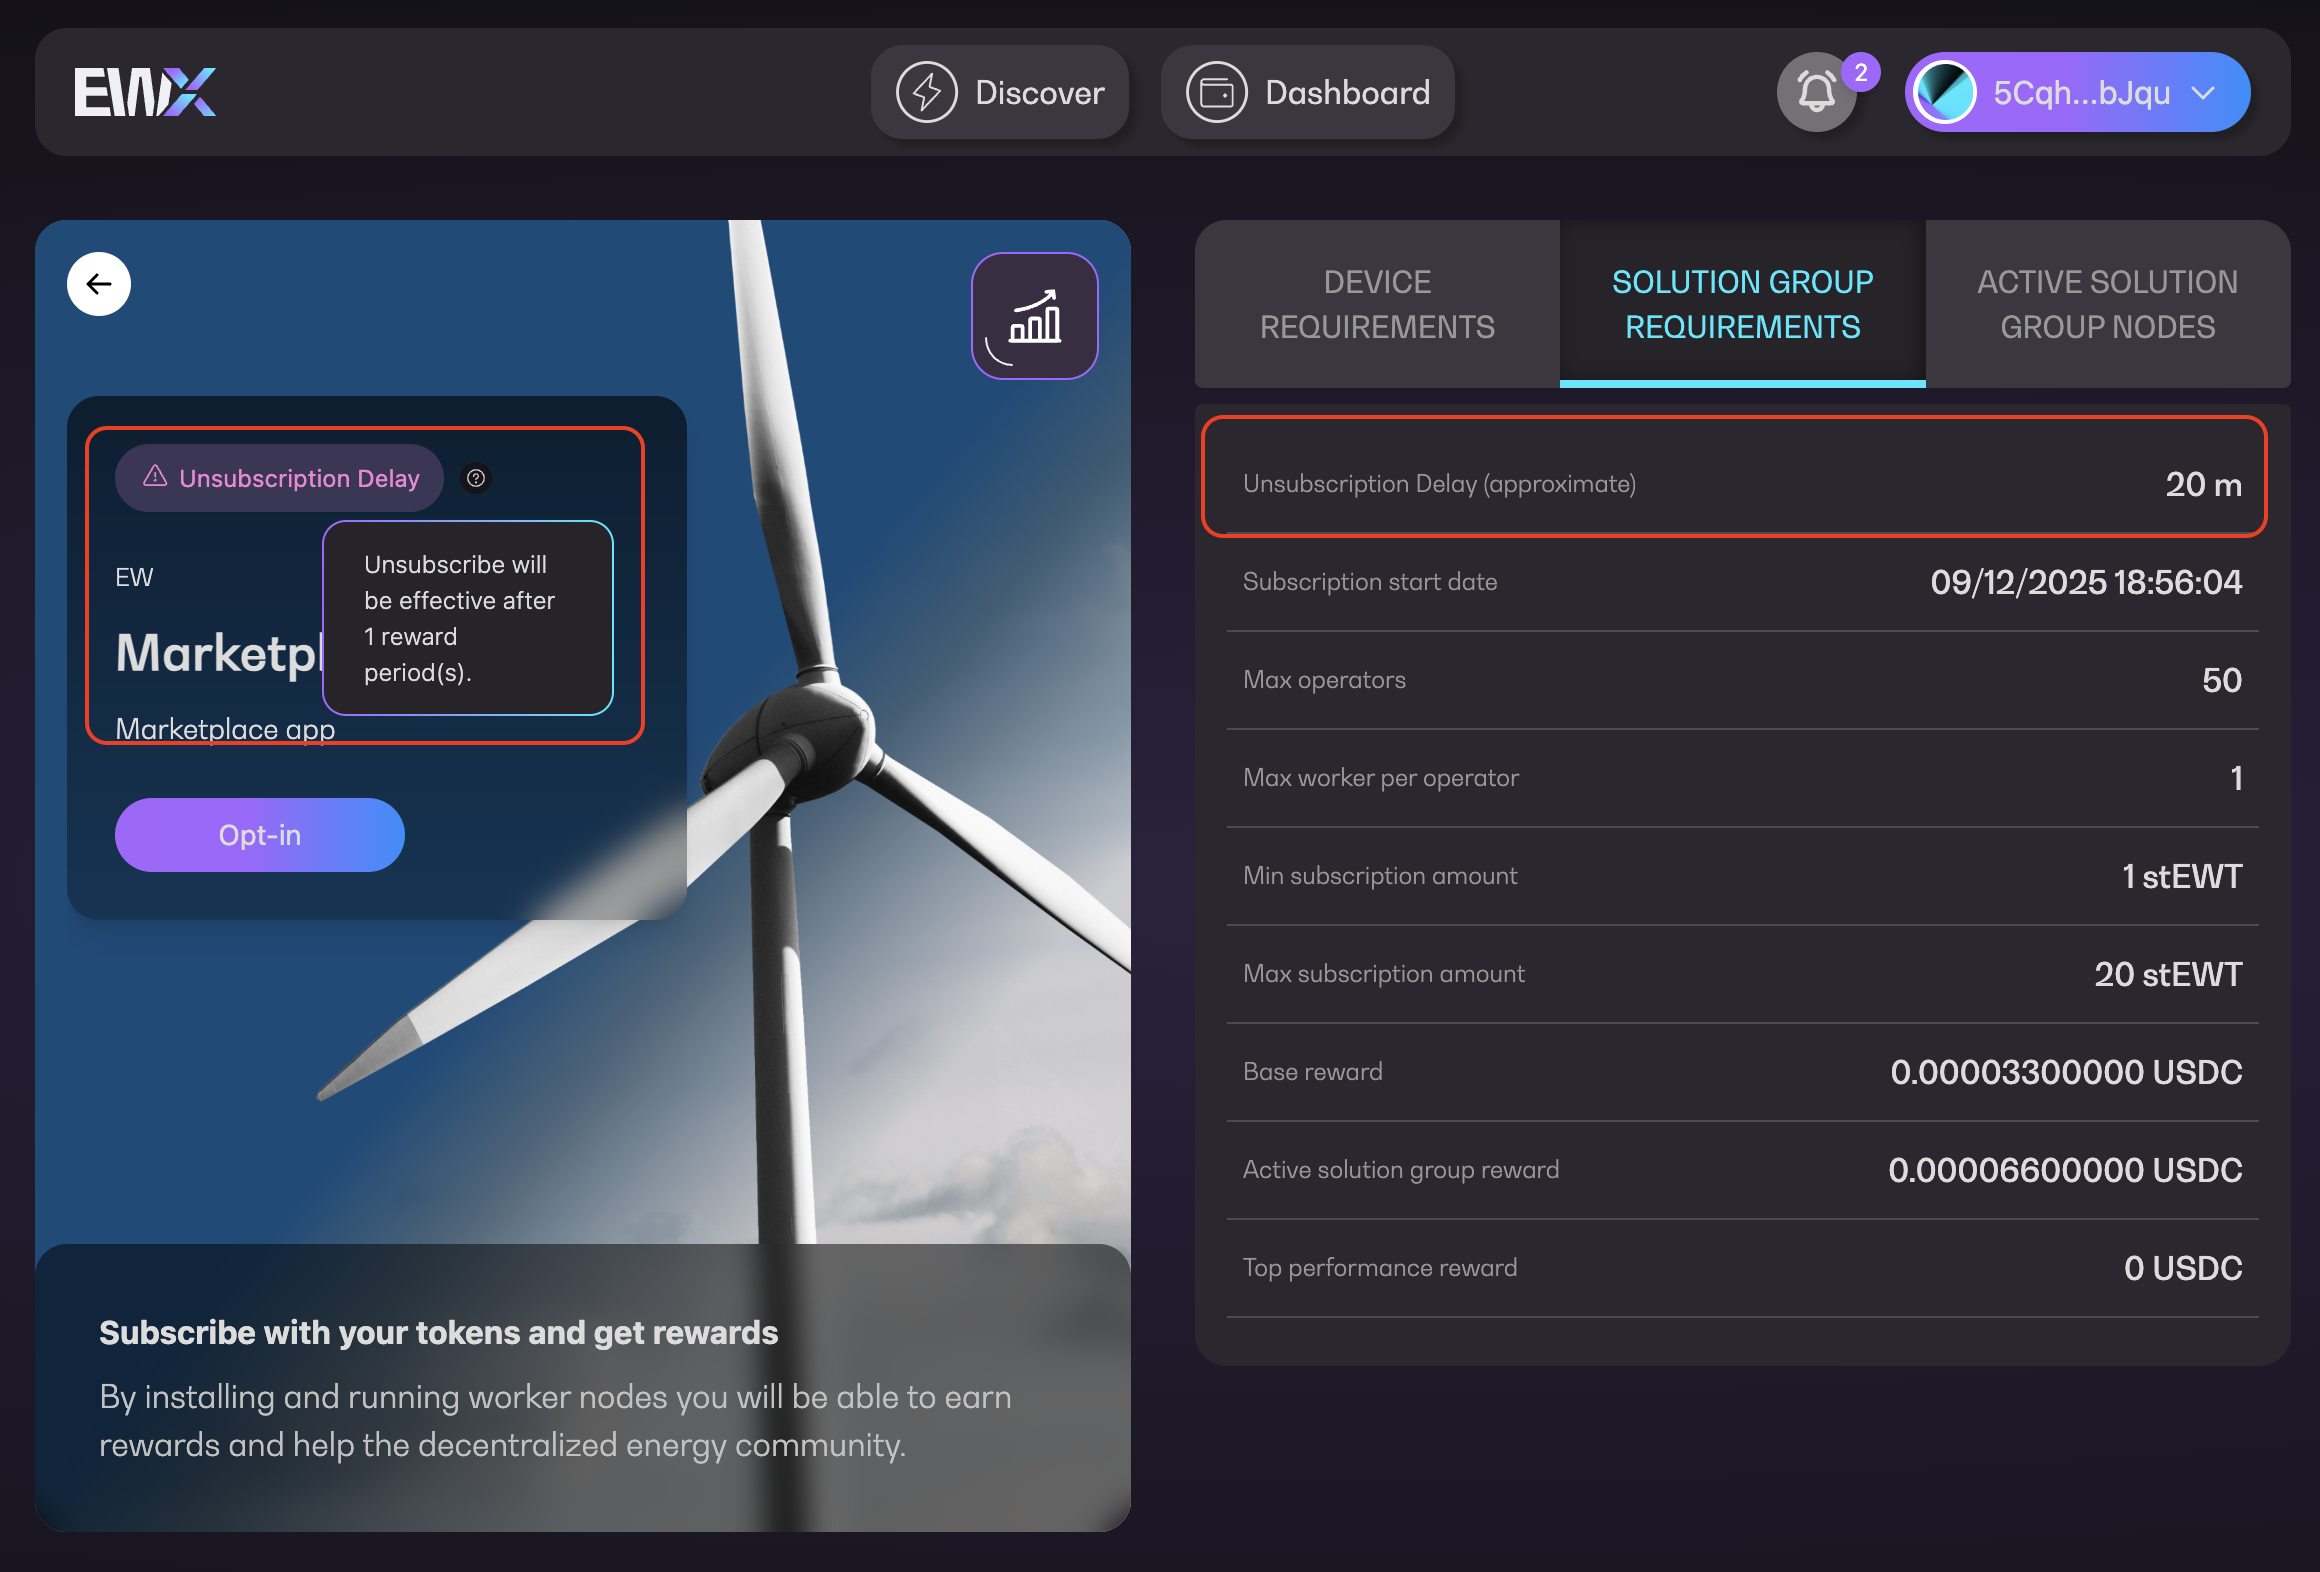
To initiate KYC, open or download the [Energy Web Marketplace web application](https://marketplace.energywebx.com/). Navigate to “Discover”, and locate the relevant Verified Compute Cloud solution group. Click “Initiate KYC” and sign the transaction in your wallet. A KYC form will open in a new browser tab, which you can follow to complete the KYC. Click [here](https://docs.energyweb.org/ewx-ecosystem/the-marketplace-app/kyc-verification/initiating-kyc-verification) for a tutorial on how to initiate the KYC identity verification.

Then complete the following KYC process, implemented by a third party verification service provider:

1. Enter your email address and submit the form.
2. Check your inbox for the verification email.&#x20;
3. When you receive the verification email, click Verify My Identity.
4. Complete the identity verification flow.

Once your identity has been verified, you can return to the [Energy Web Marketplace](https://marketplace.energywebx.com/). The solution group status will change to Opt In. Click [here ](https://docs.energyweb.org/ewx-ecosystem/the-marketplace-app/kyc-verification/submit-kyc-details)for a tutorial on how to complete the KYC identity verification.

### Step 5: Subscribe to a Verified Compute Cloud Solution Group

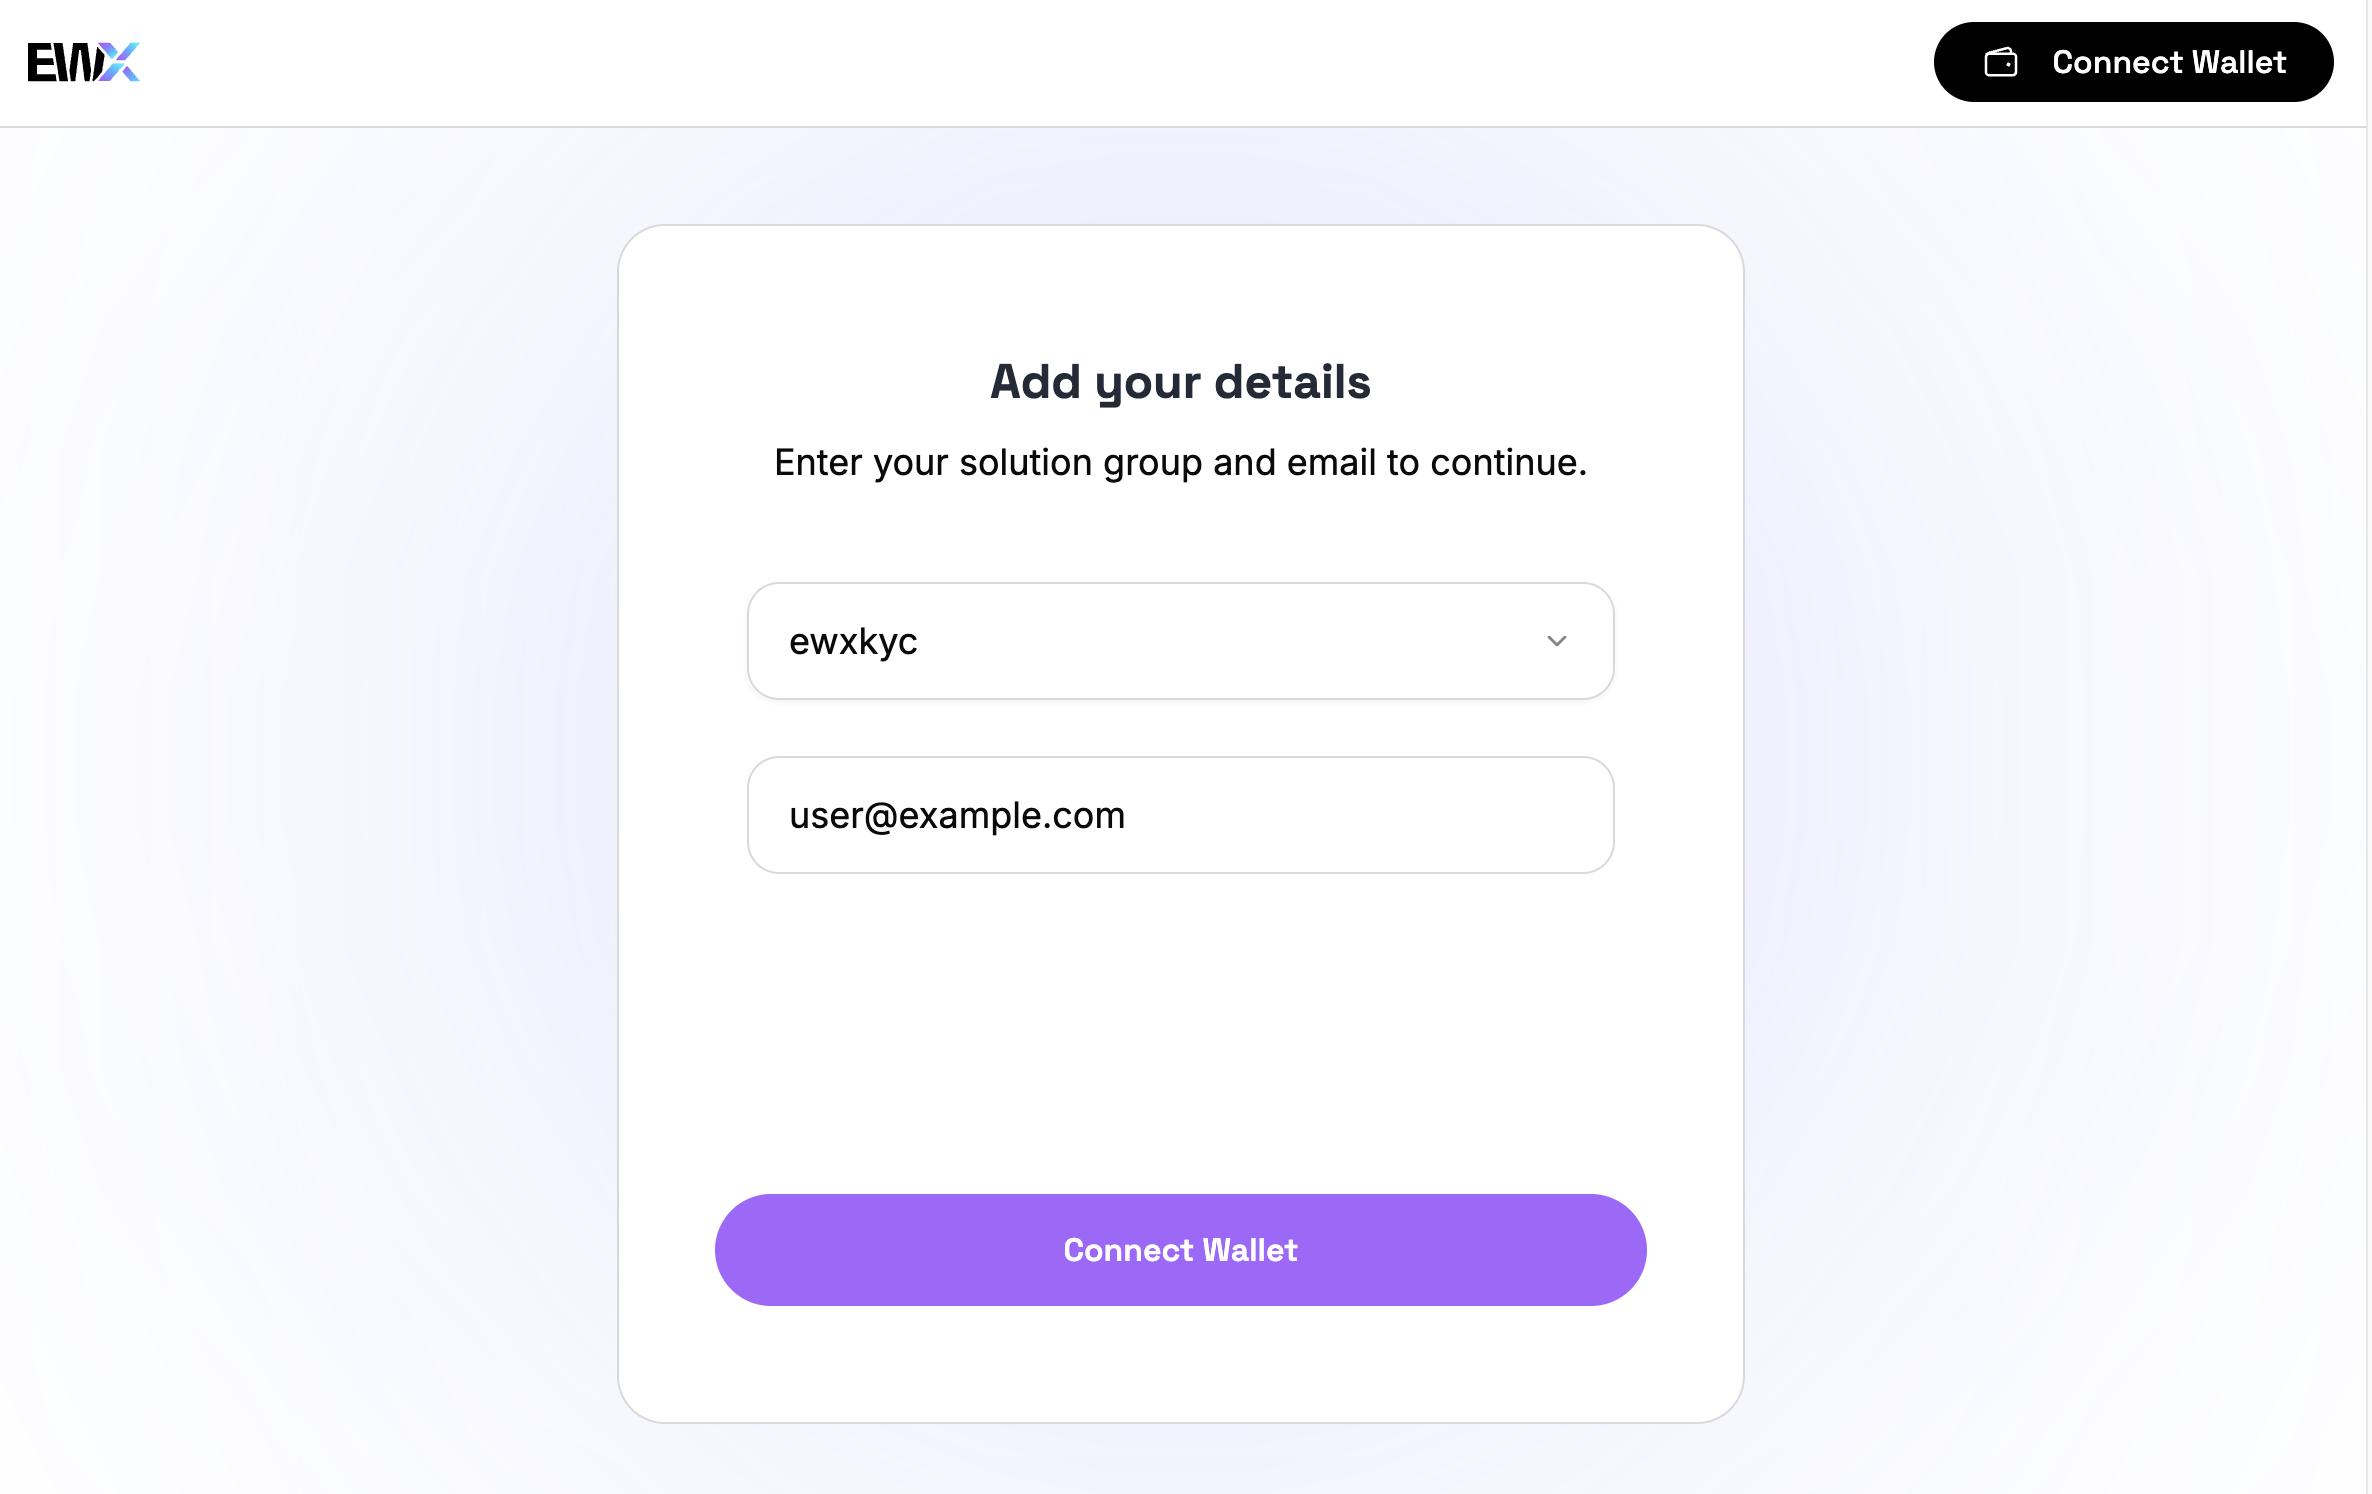
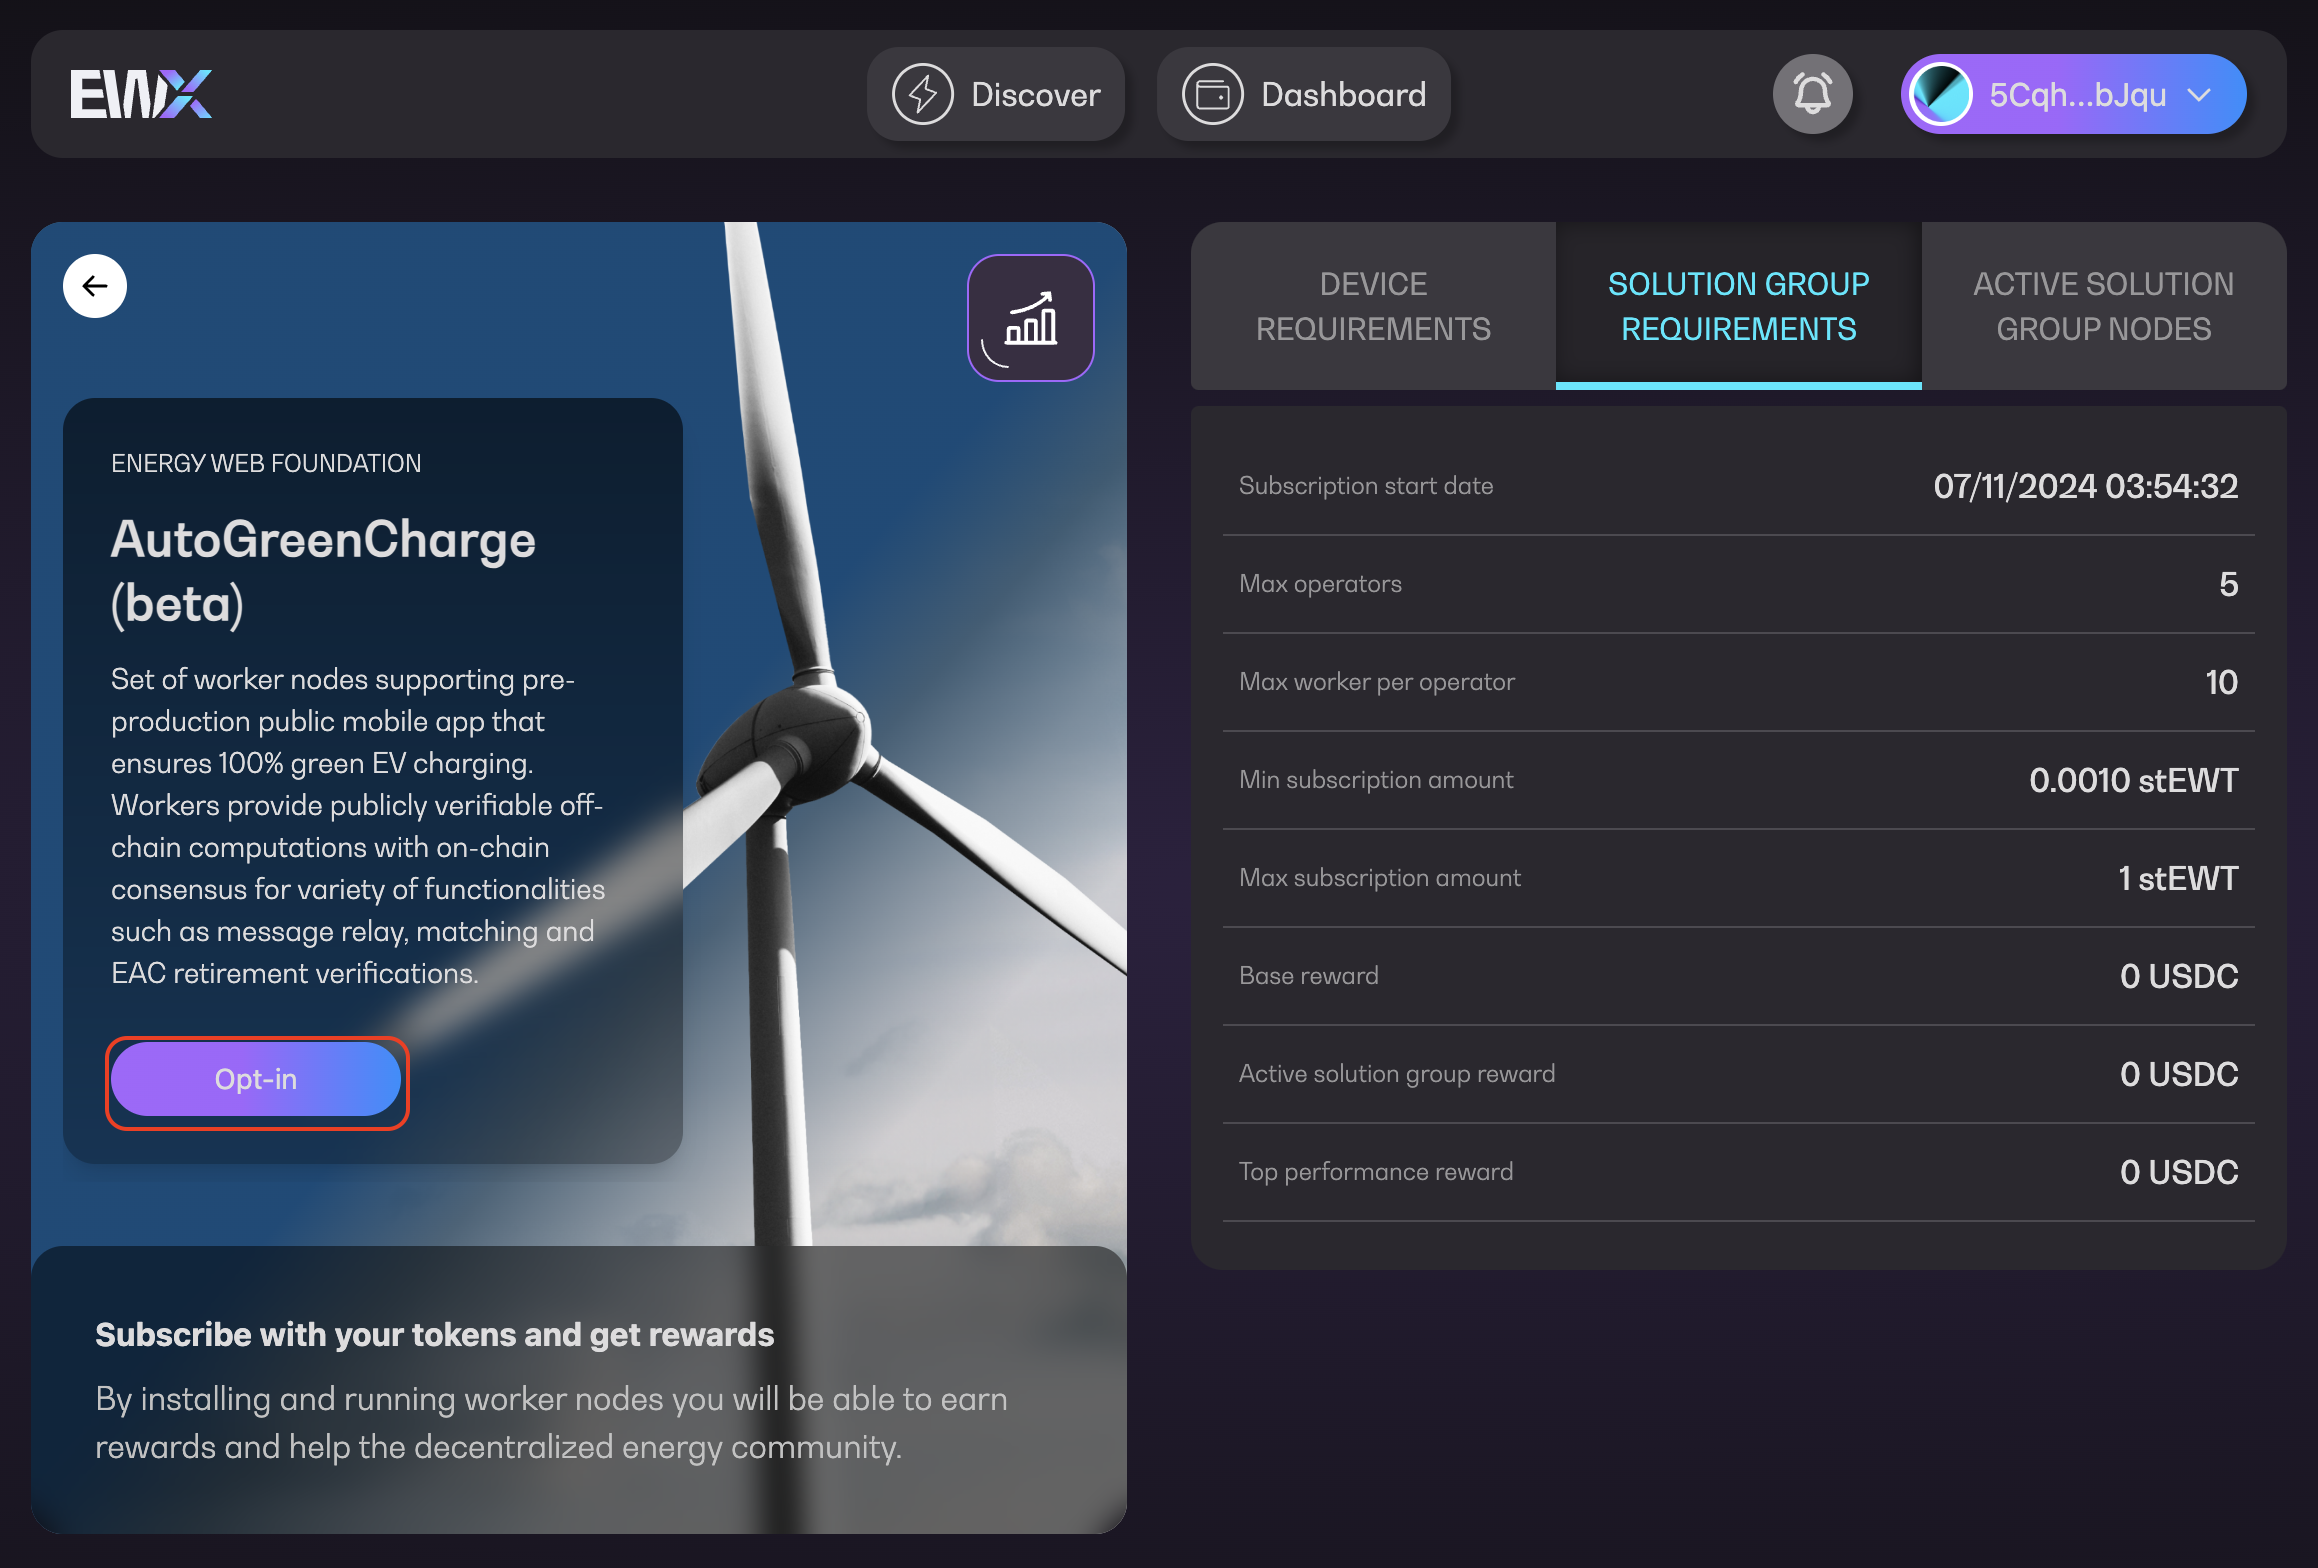
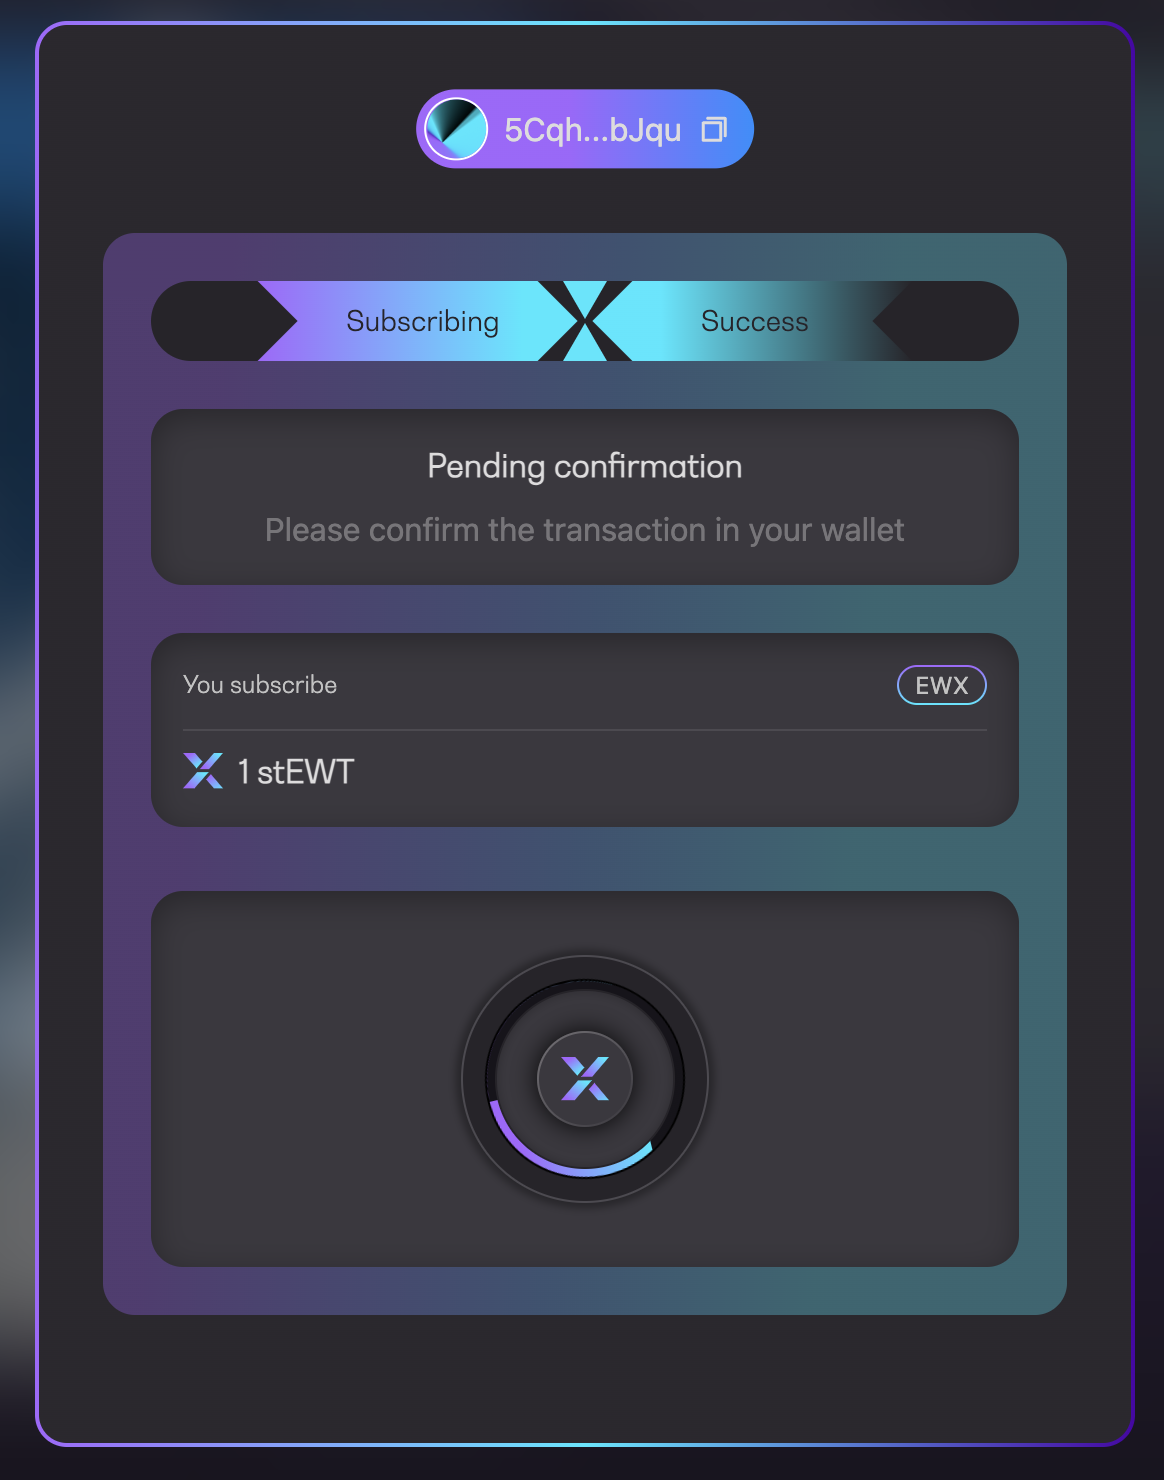
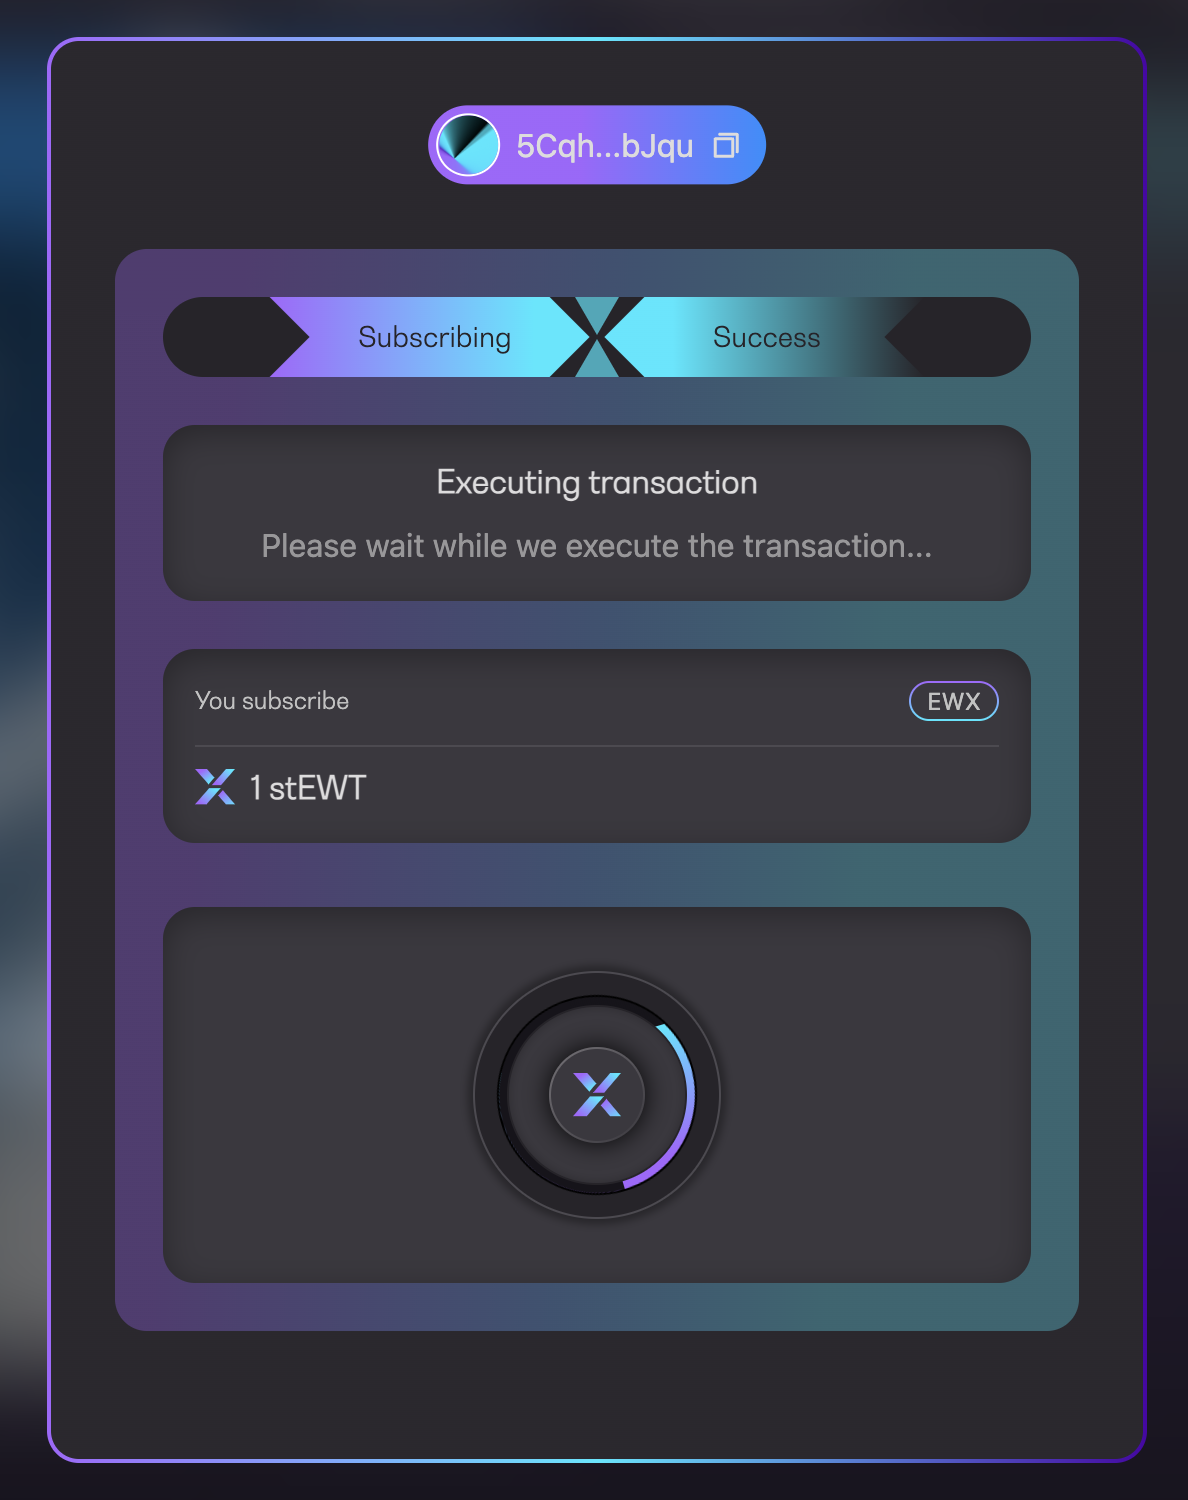
To subscribe, click on the “Opt In” button in the [Energy Web Marketplace](https://marketplace.energywebx.com/), and then complete the Sign Up as Operator flow. To sign up as an operator you need to follow the steps below:\
\
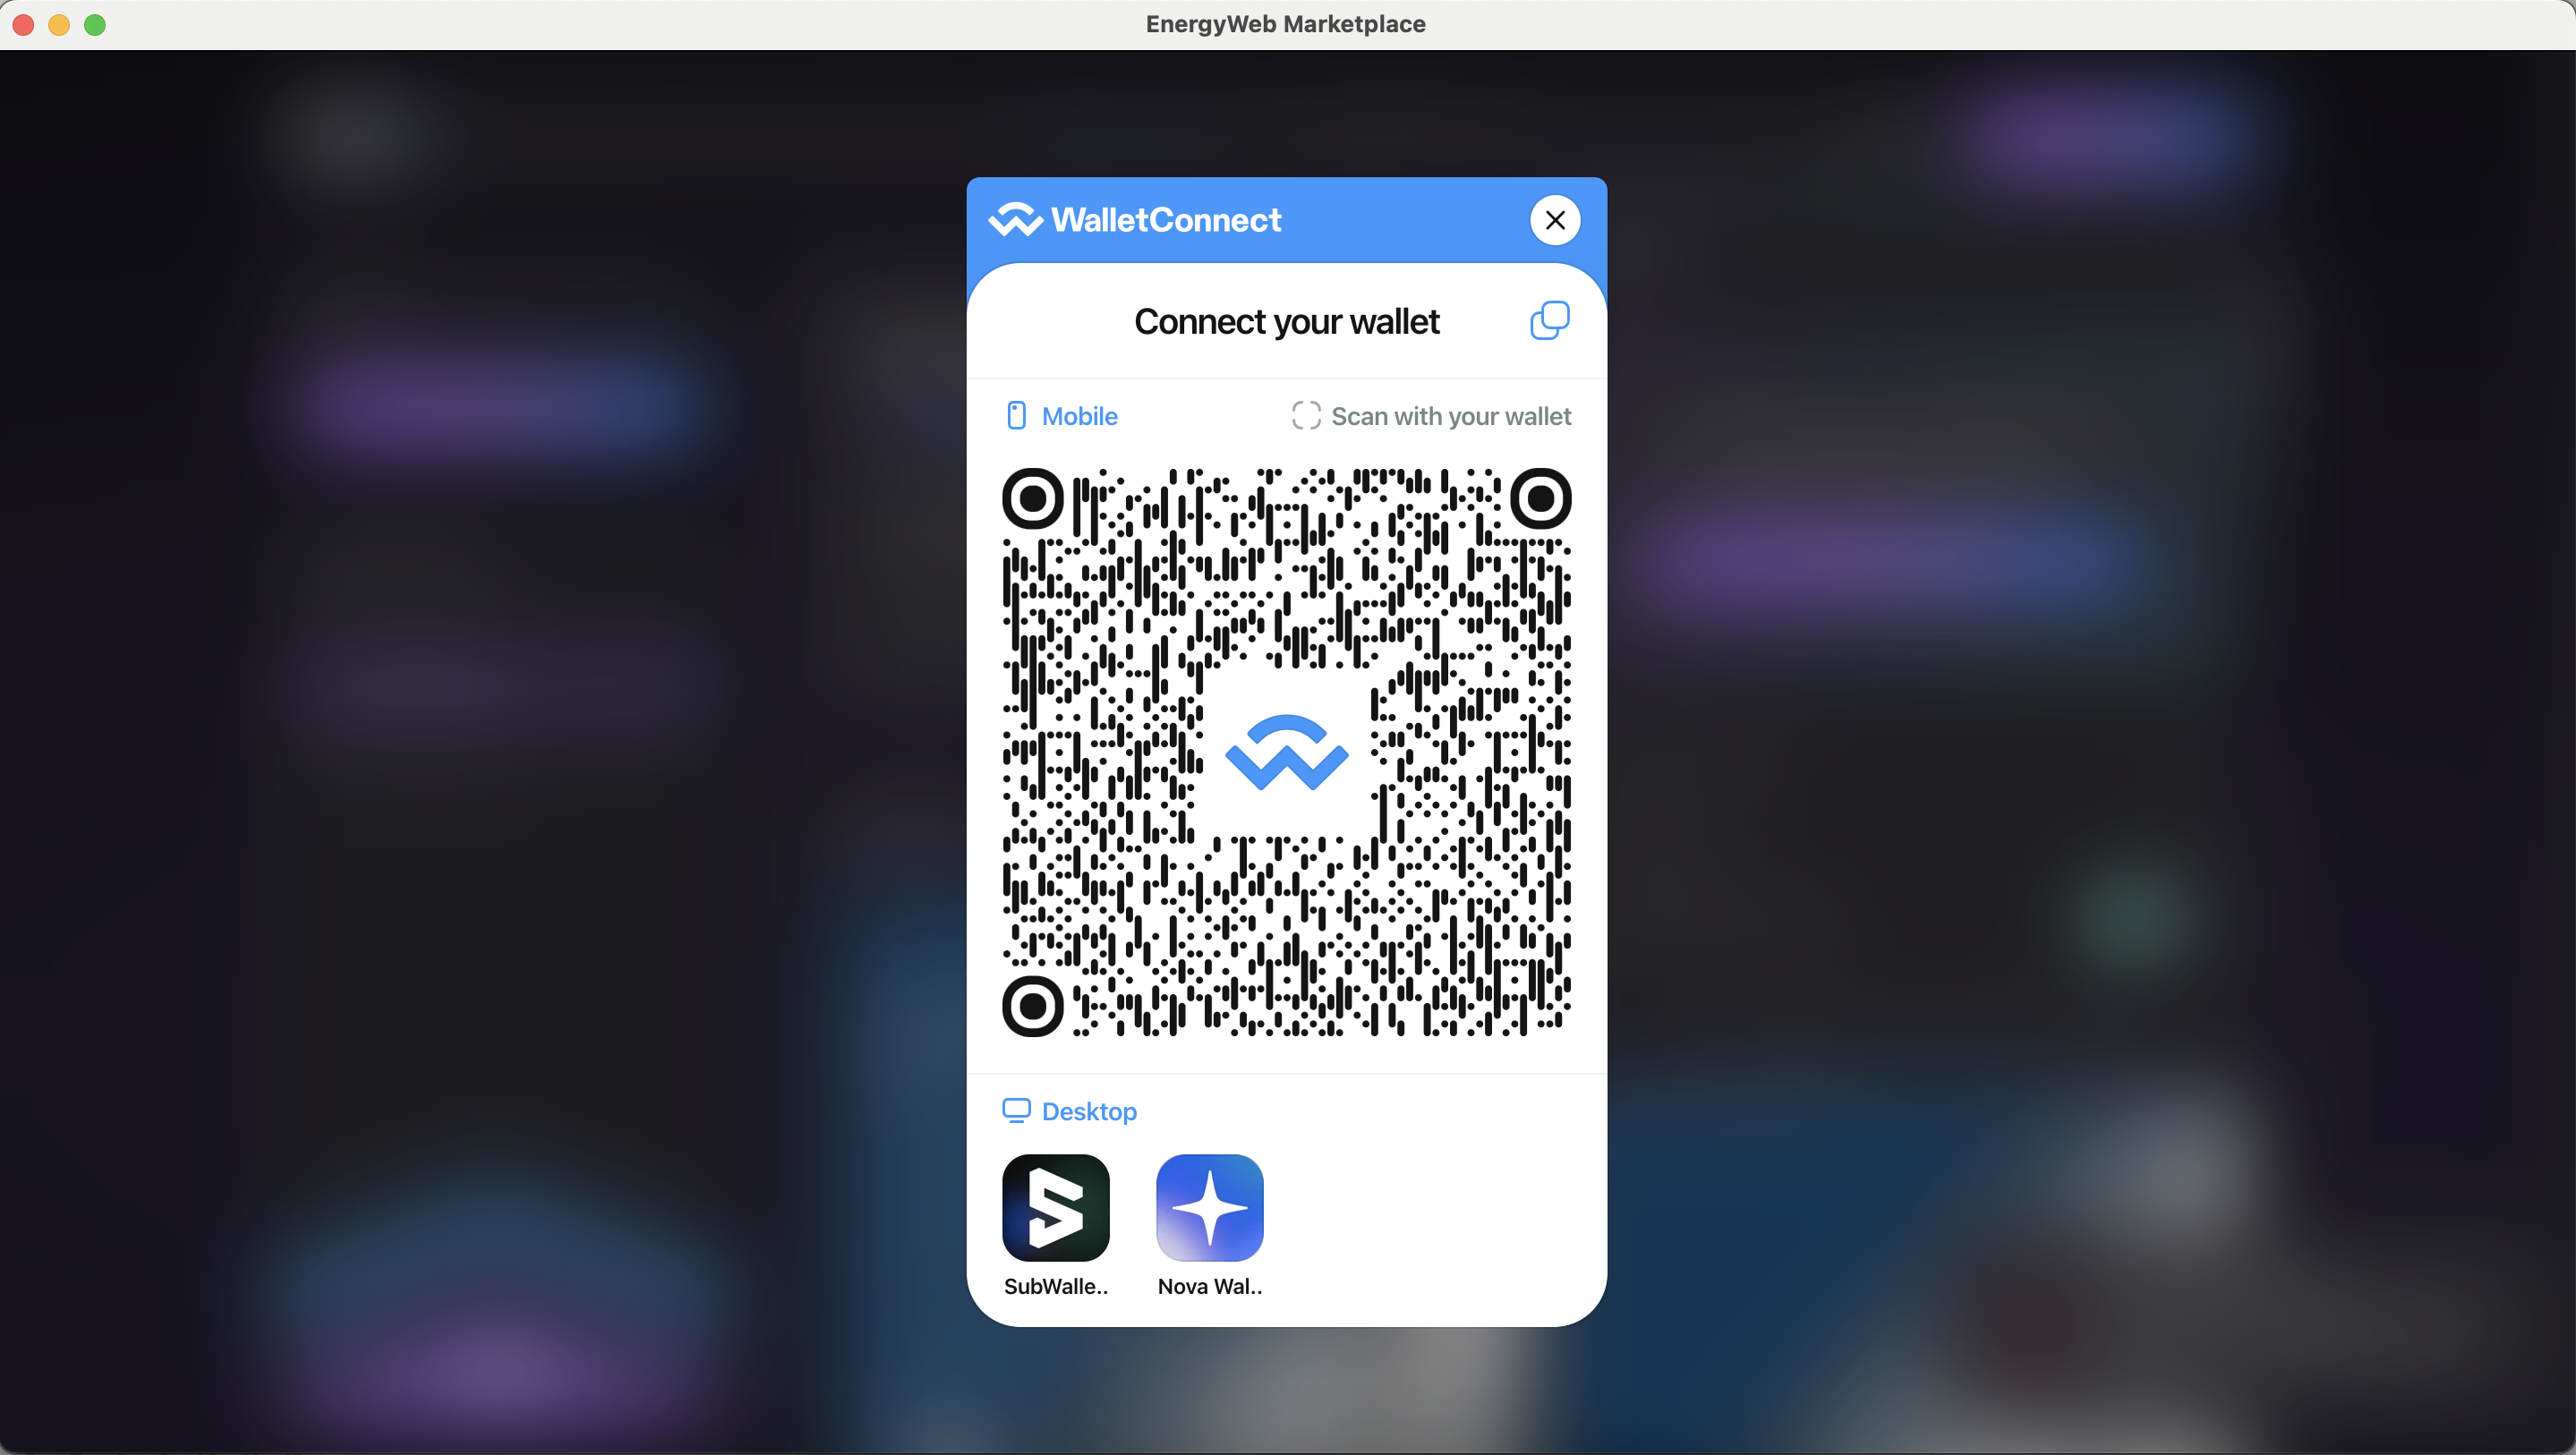
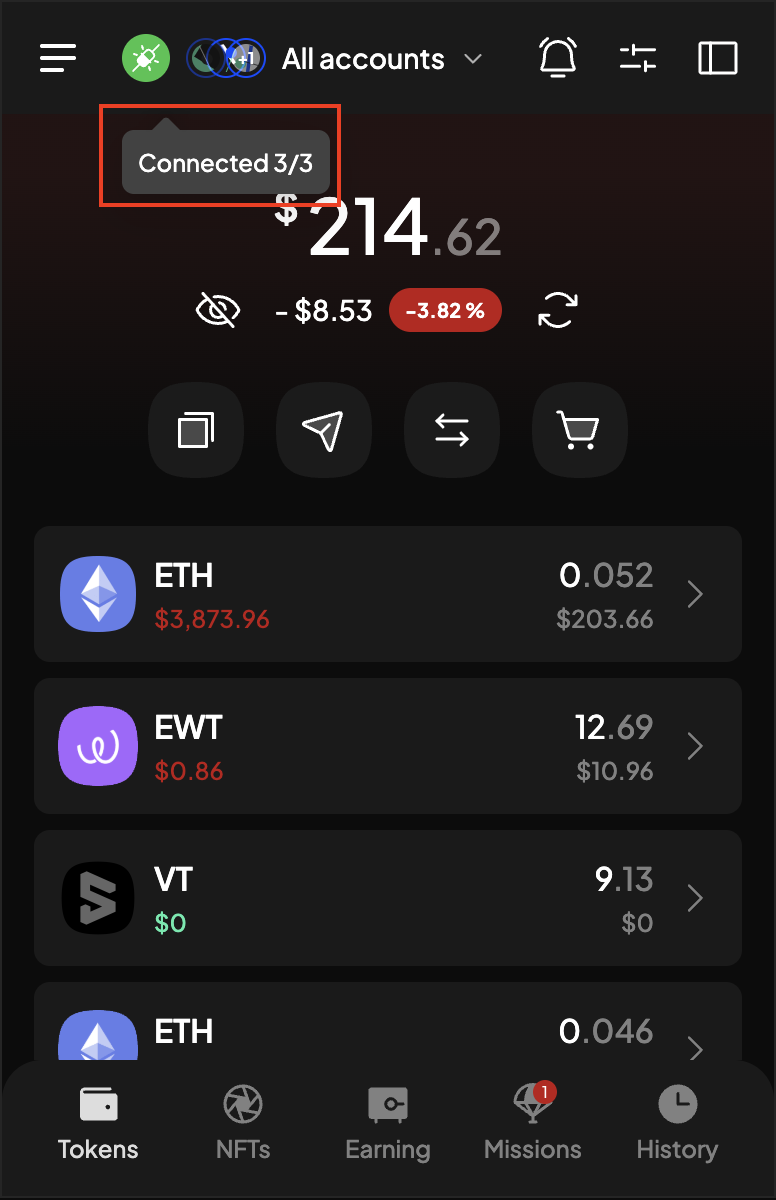
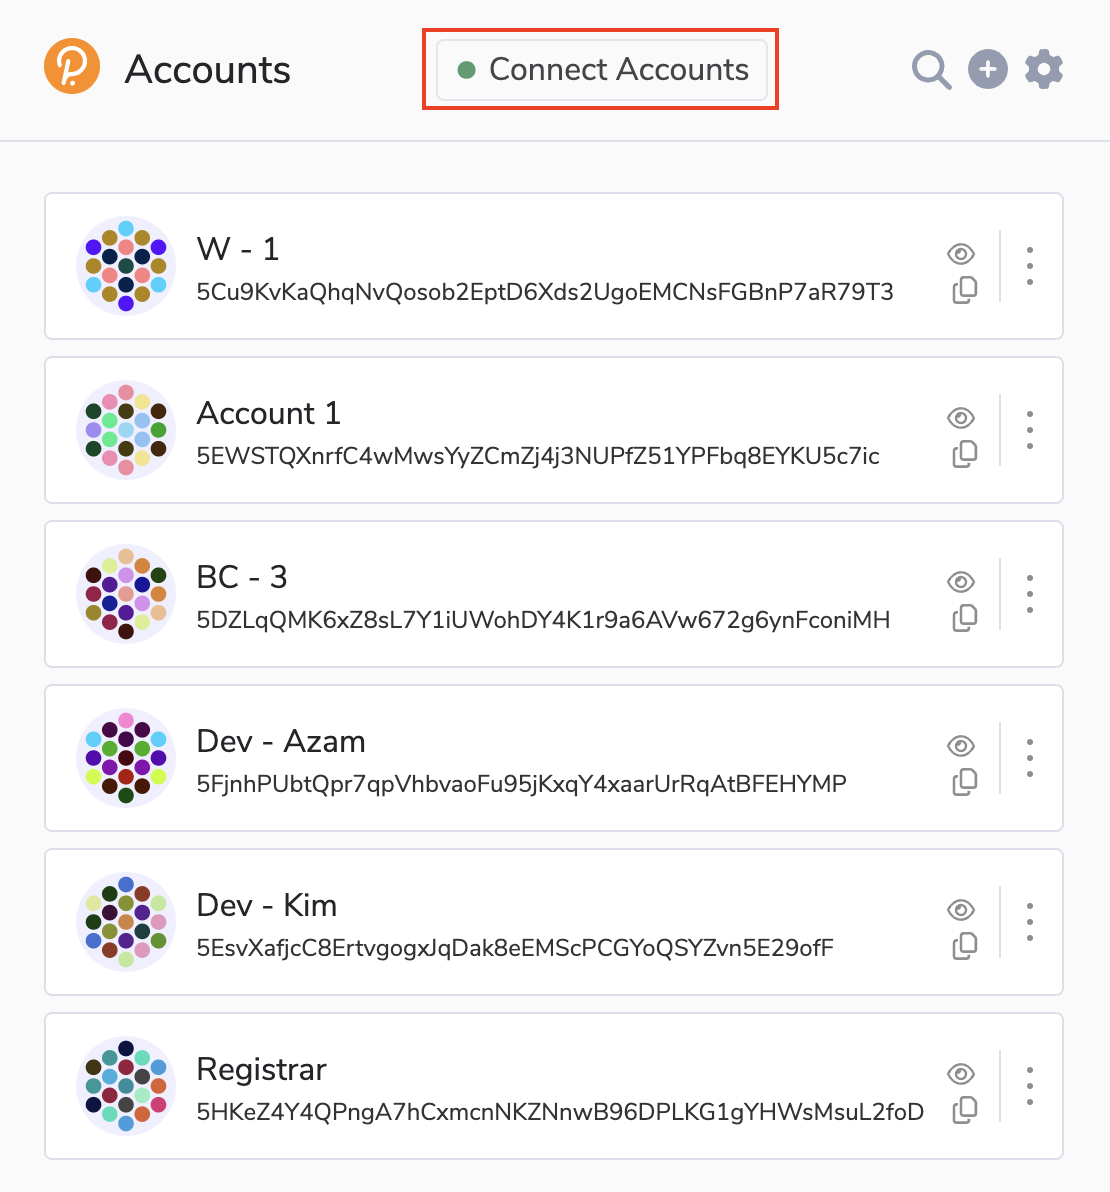
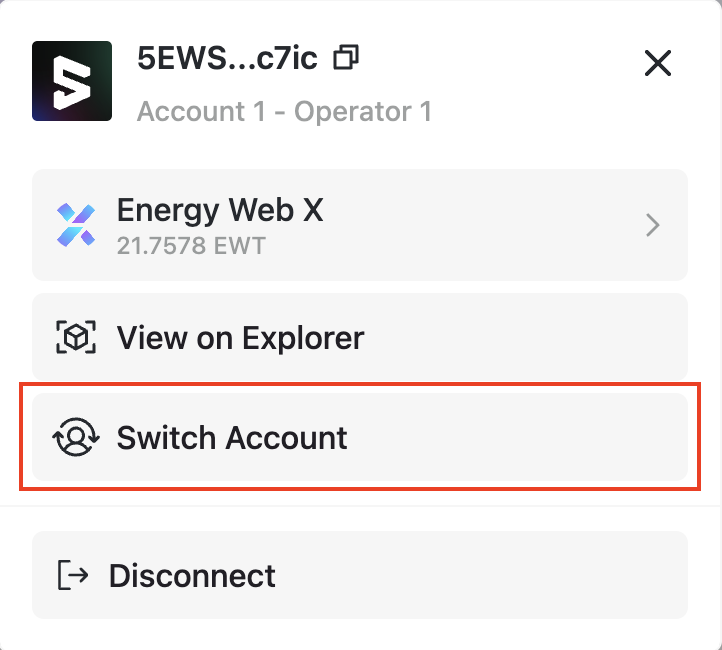
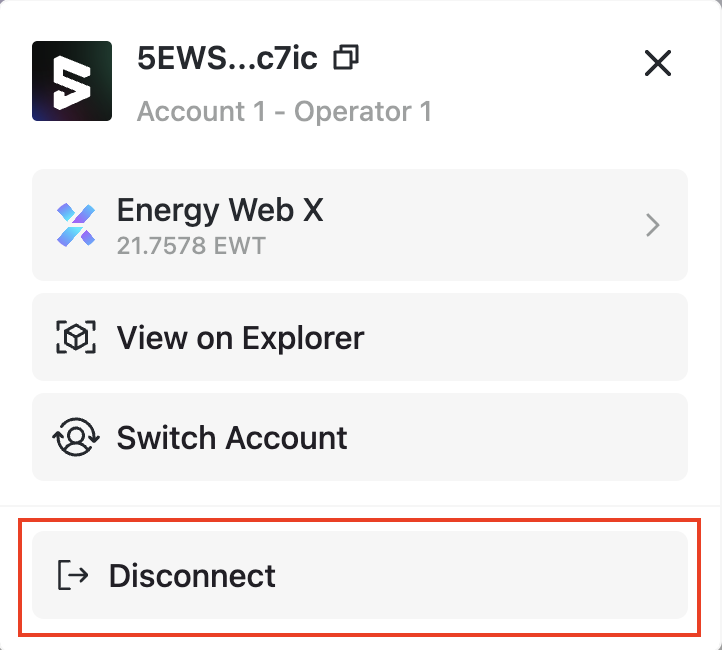
1\. Have your EWX account [connected](https://docs.energyweb.org/ewx-ecosystem/the-marketplace-app/operator-and-worker-accounts/connecting-to-operator-account) to the marketplace.&#x20;

2\. Have some [funds ](https://docs.energyweb.org/ewx-ecosystem/the-marketplace-app/operator-and-worker-accounts/funding-an-operator-account)in the account for transaction fee. &#x20;

3\. Select any of the solution group that is available for subscription and click Opt-in

4\. Enter the name you desired for your operator account in the text field, select country of residence and then hit "Continue"

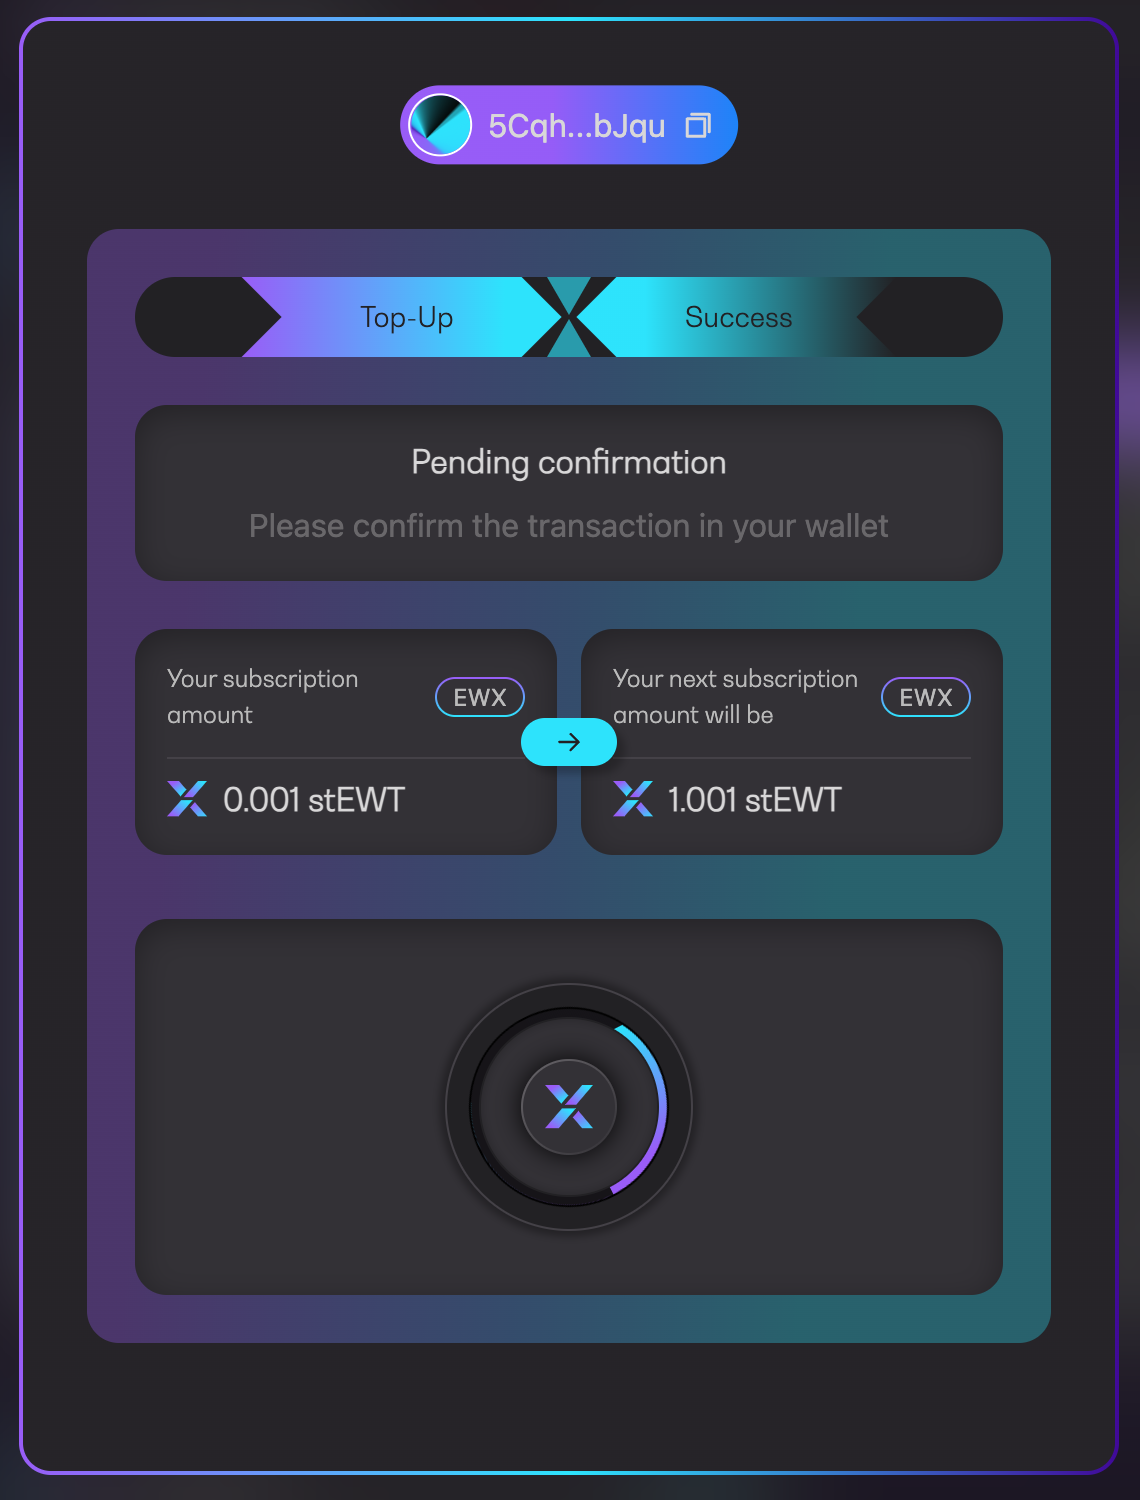
5\. Confirm the transaction in your wallet

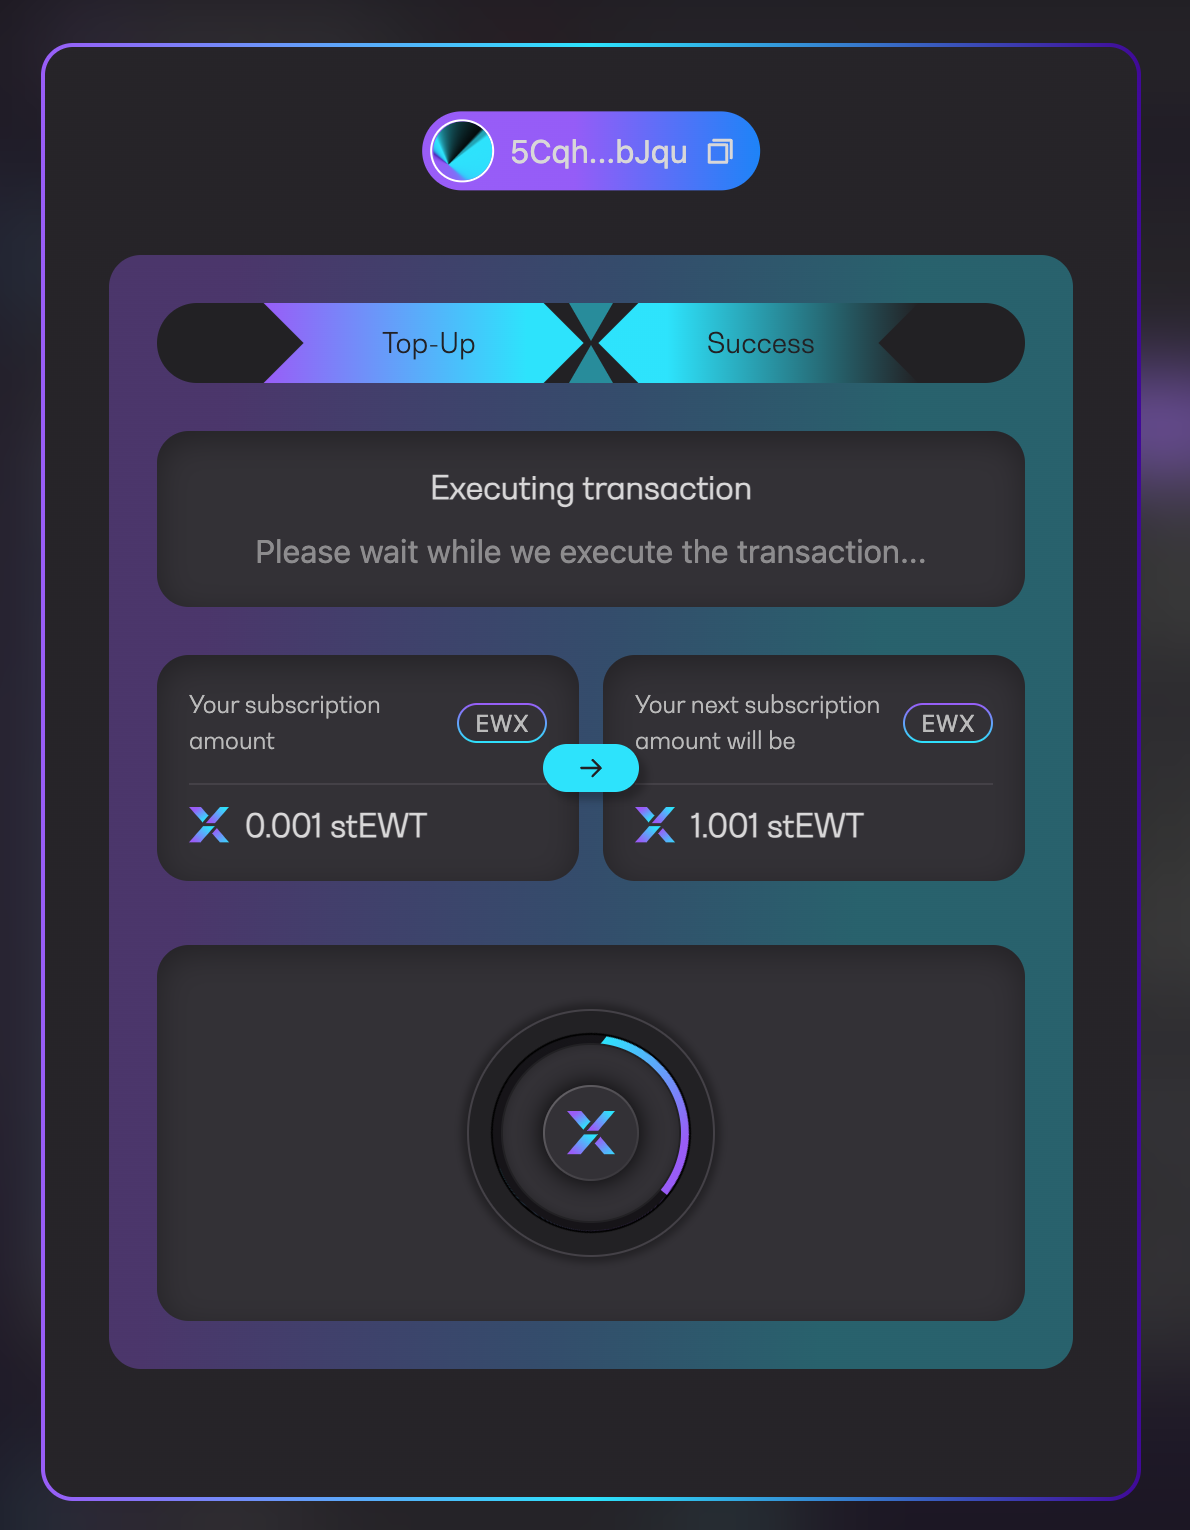
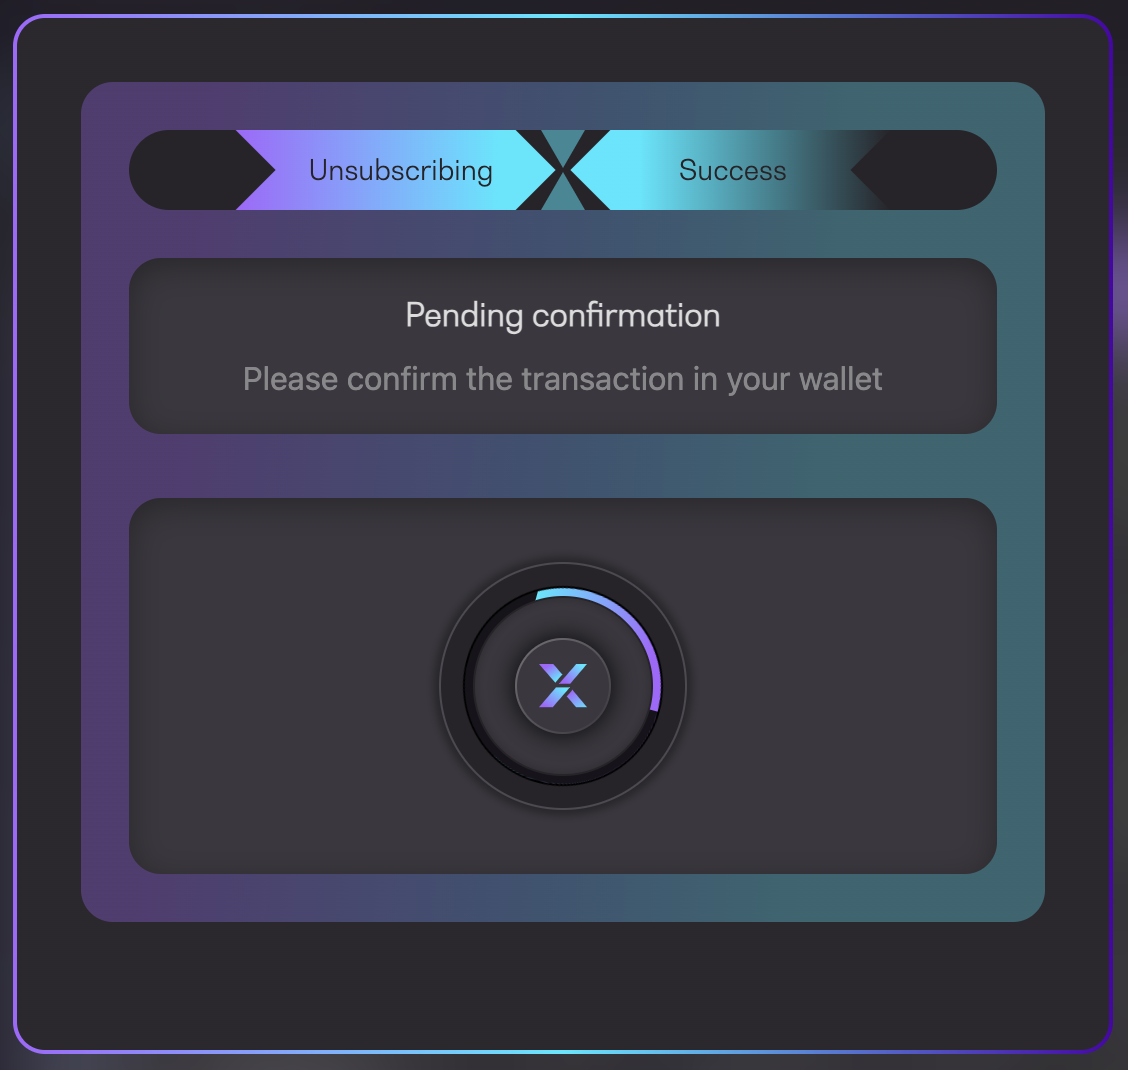
6\. Once approved, wait for the transaction to be executed

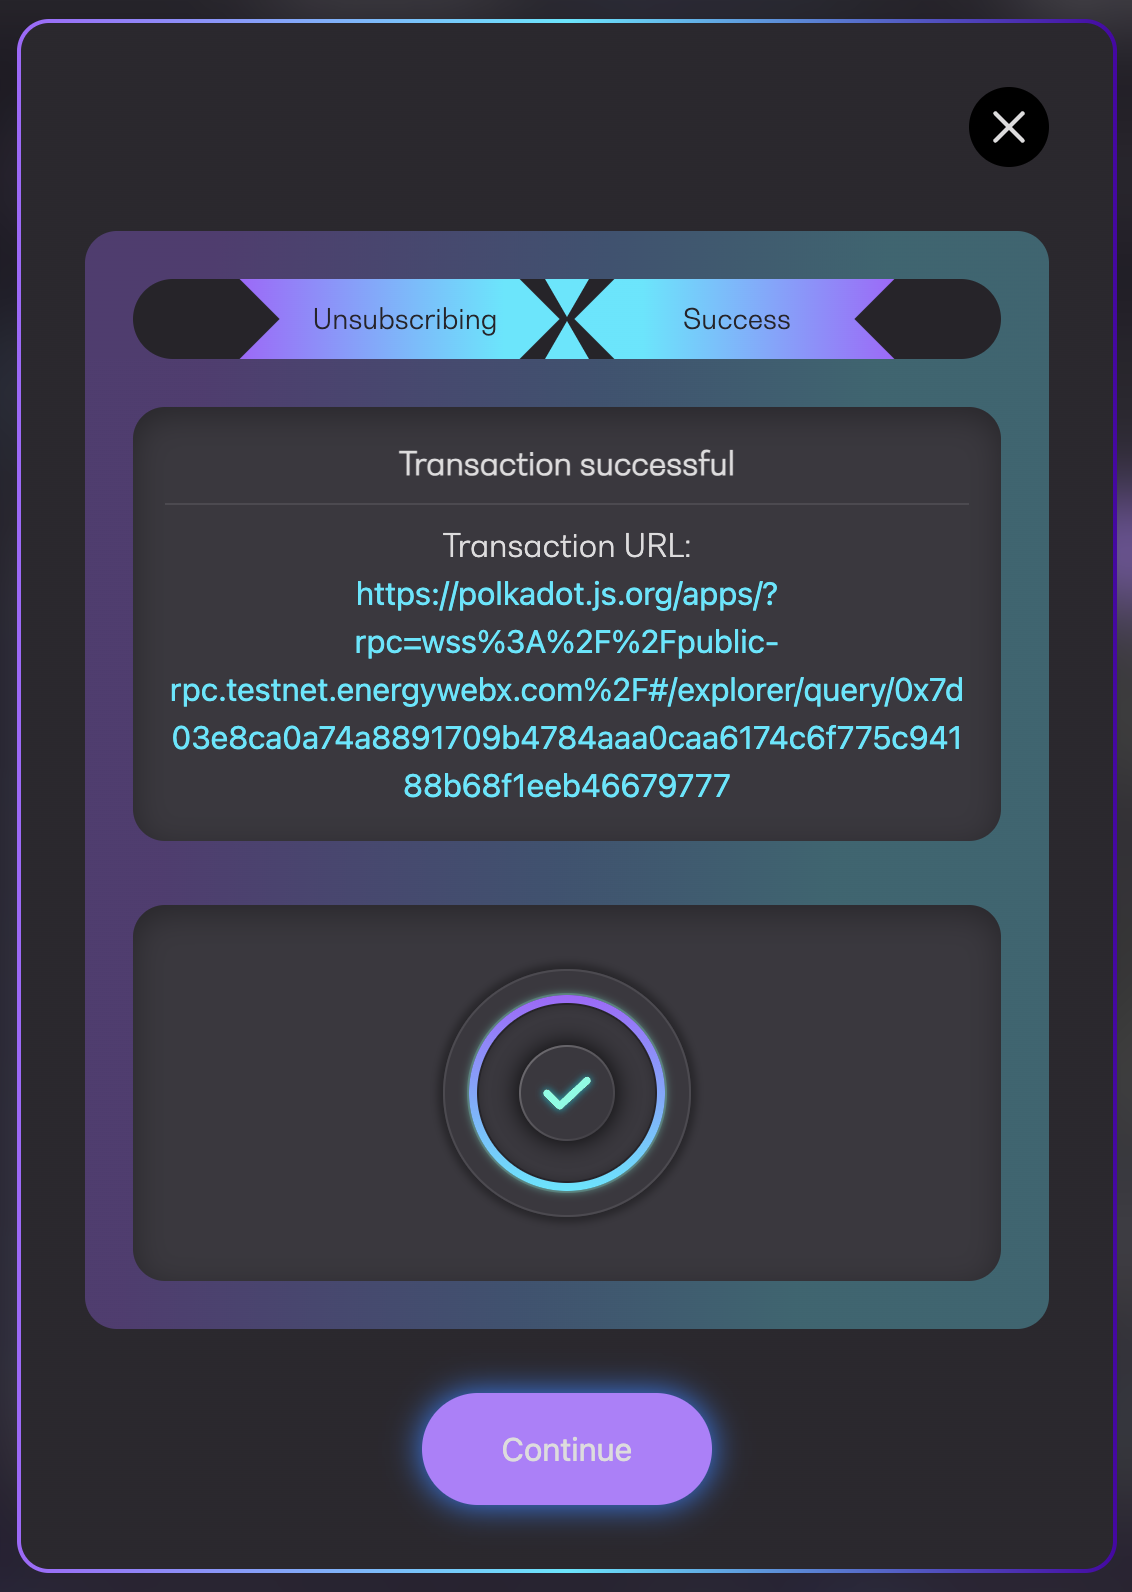
7\. You will see a success message along with the transaction URL to Polkadot explorer. Your operator account is now registered.

For more information and guide you can check [here](https://docs.energyweb.org/ewx-ecosystem/the-marketplace-app/operator-and-worker-accounts/creating-an-operator-account)

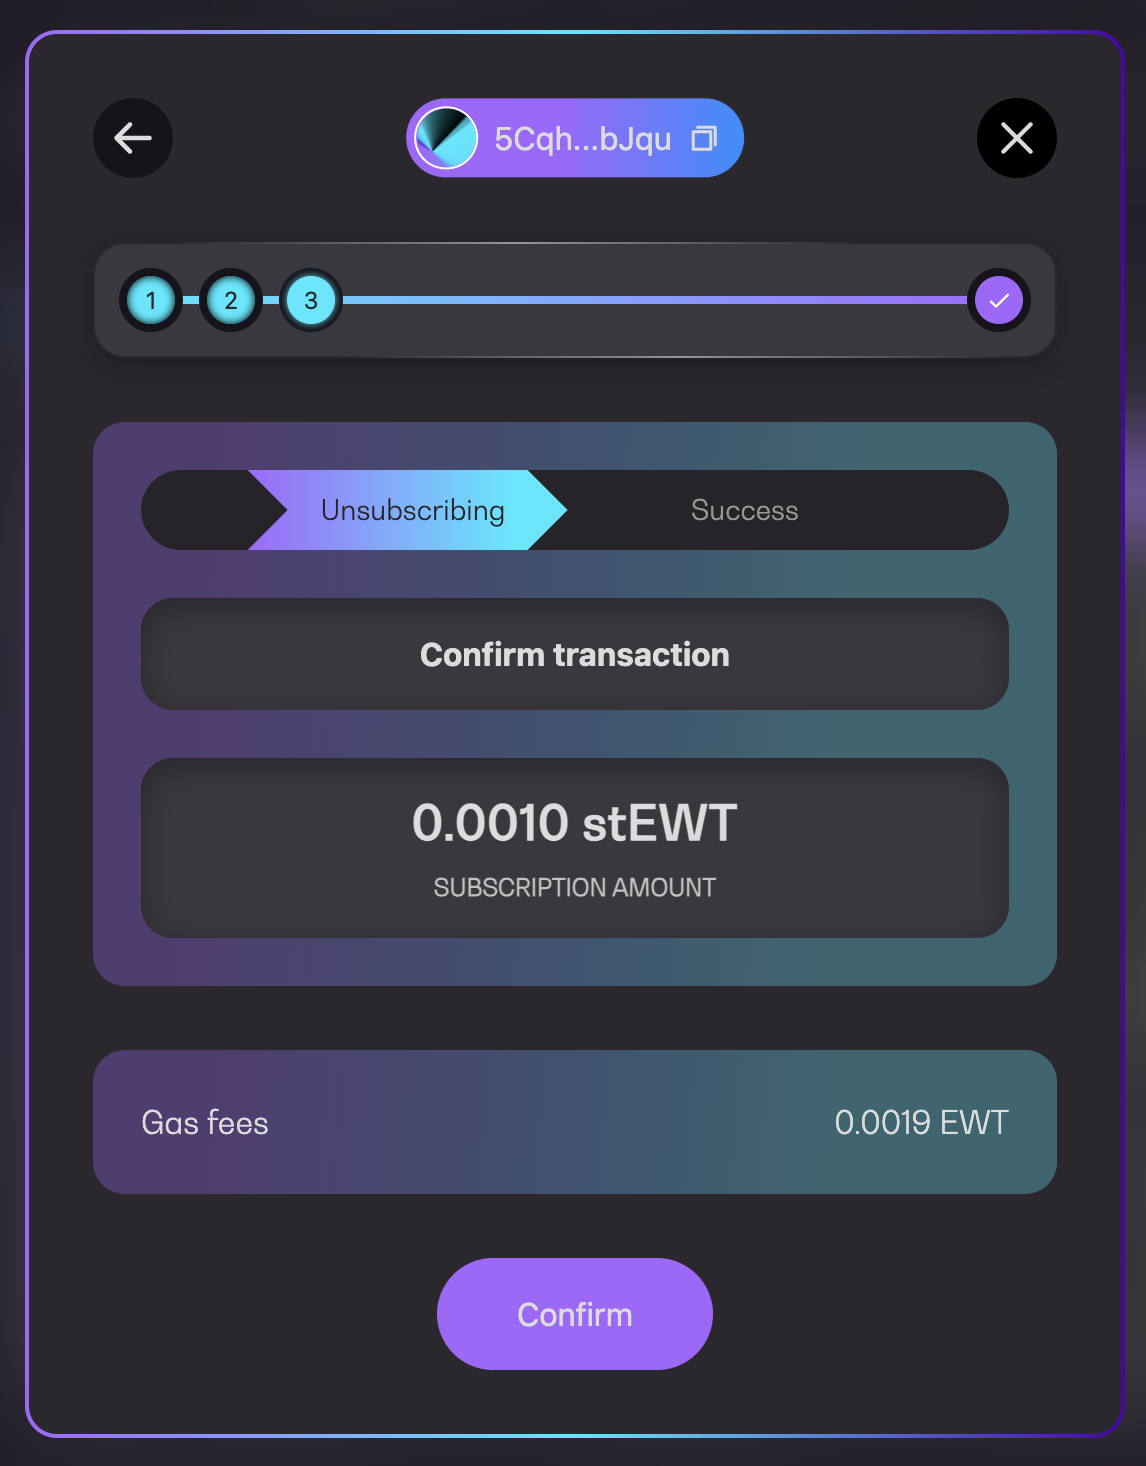
Choose the amount of stEWT to allocate. Confirm and sign the transaction. Click [here](https://docs.energyweb.org/ewx-ecosystem/the-marketplace-app/subscriptions/subscribing-to-a-solution-group) for a tutorial on how to subscribe to a solution group.&#x20;

When you subscribe to a VCC Solution Group, you commit stEWT as slashable collateral to support enforcement of the VCC Protocol. Your participation signals support for solution integrity and accountability. Rewards may accrue over time depending on successful service delivery and the relevant VCC Protocol conditions.

### Step 6: Claim Your Rewards

Any applicable rewards for successful service delivery are generated automatically, subject to the VCC Protocol conditions, and are claimable via the [Energy Web Marketplace](https://marketplace.energywebx.com/). To claim, please follow these steps:

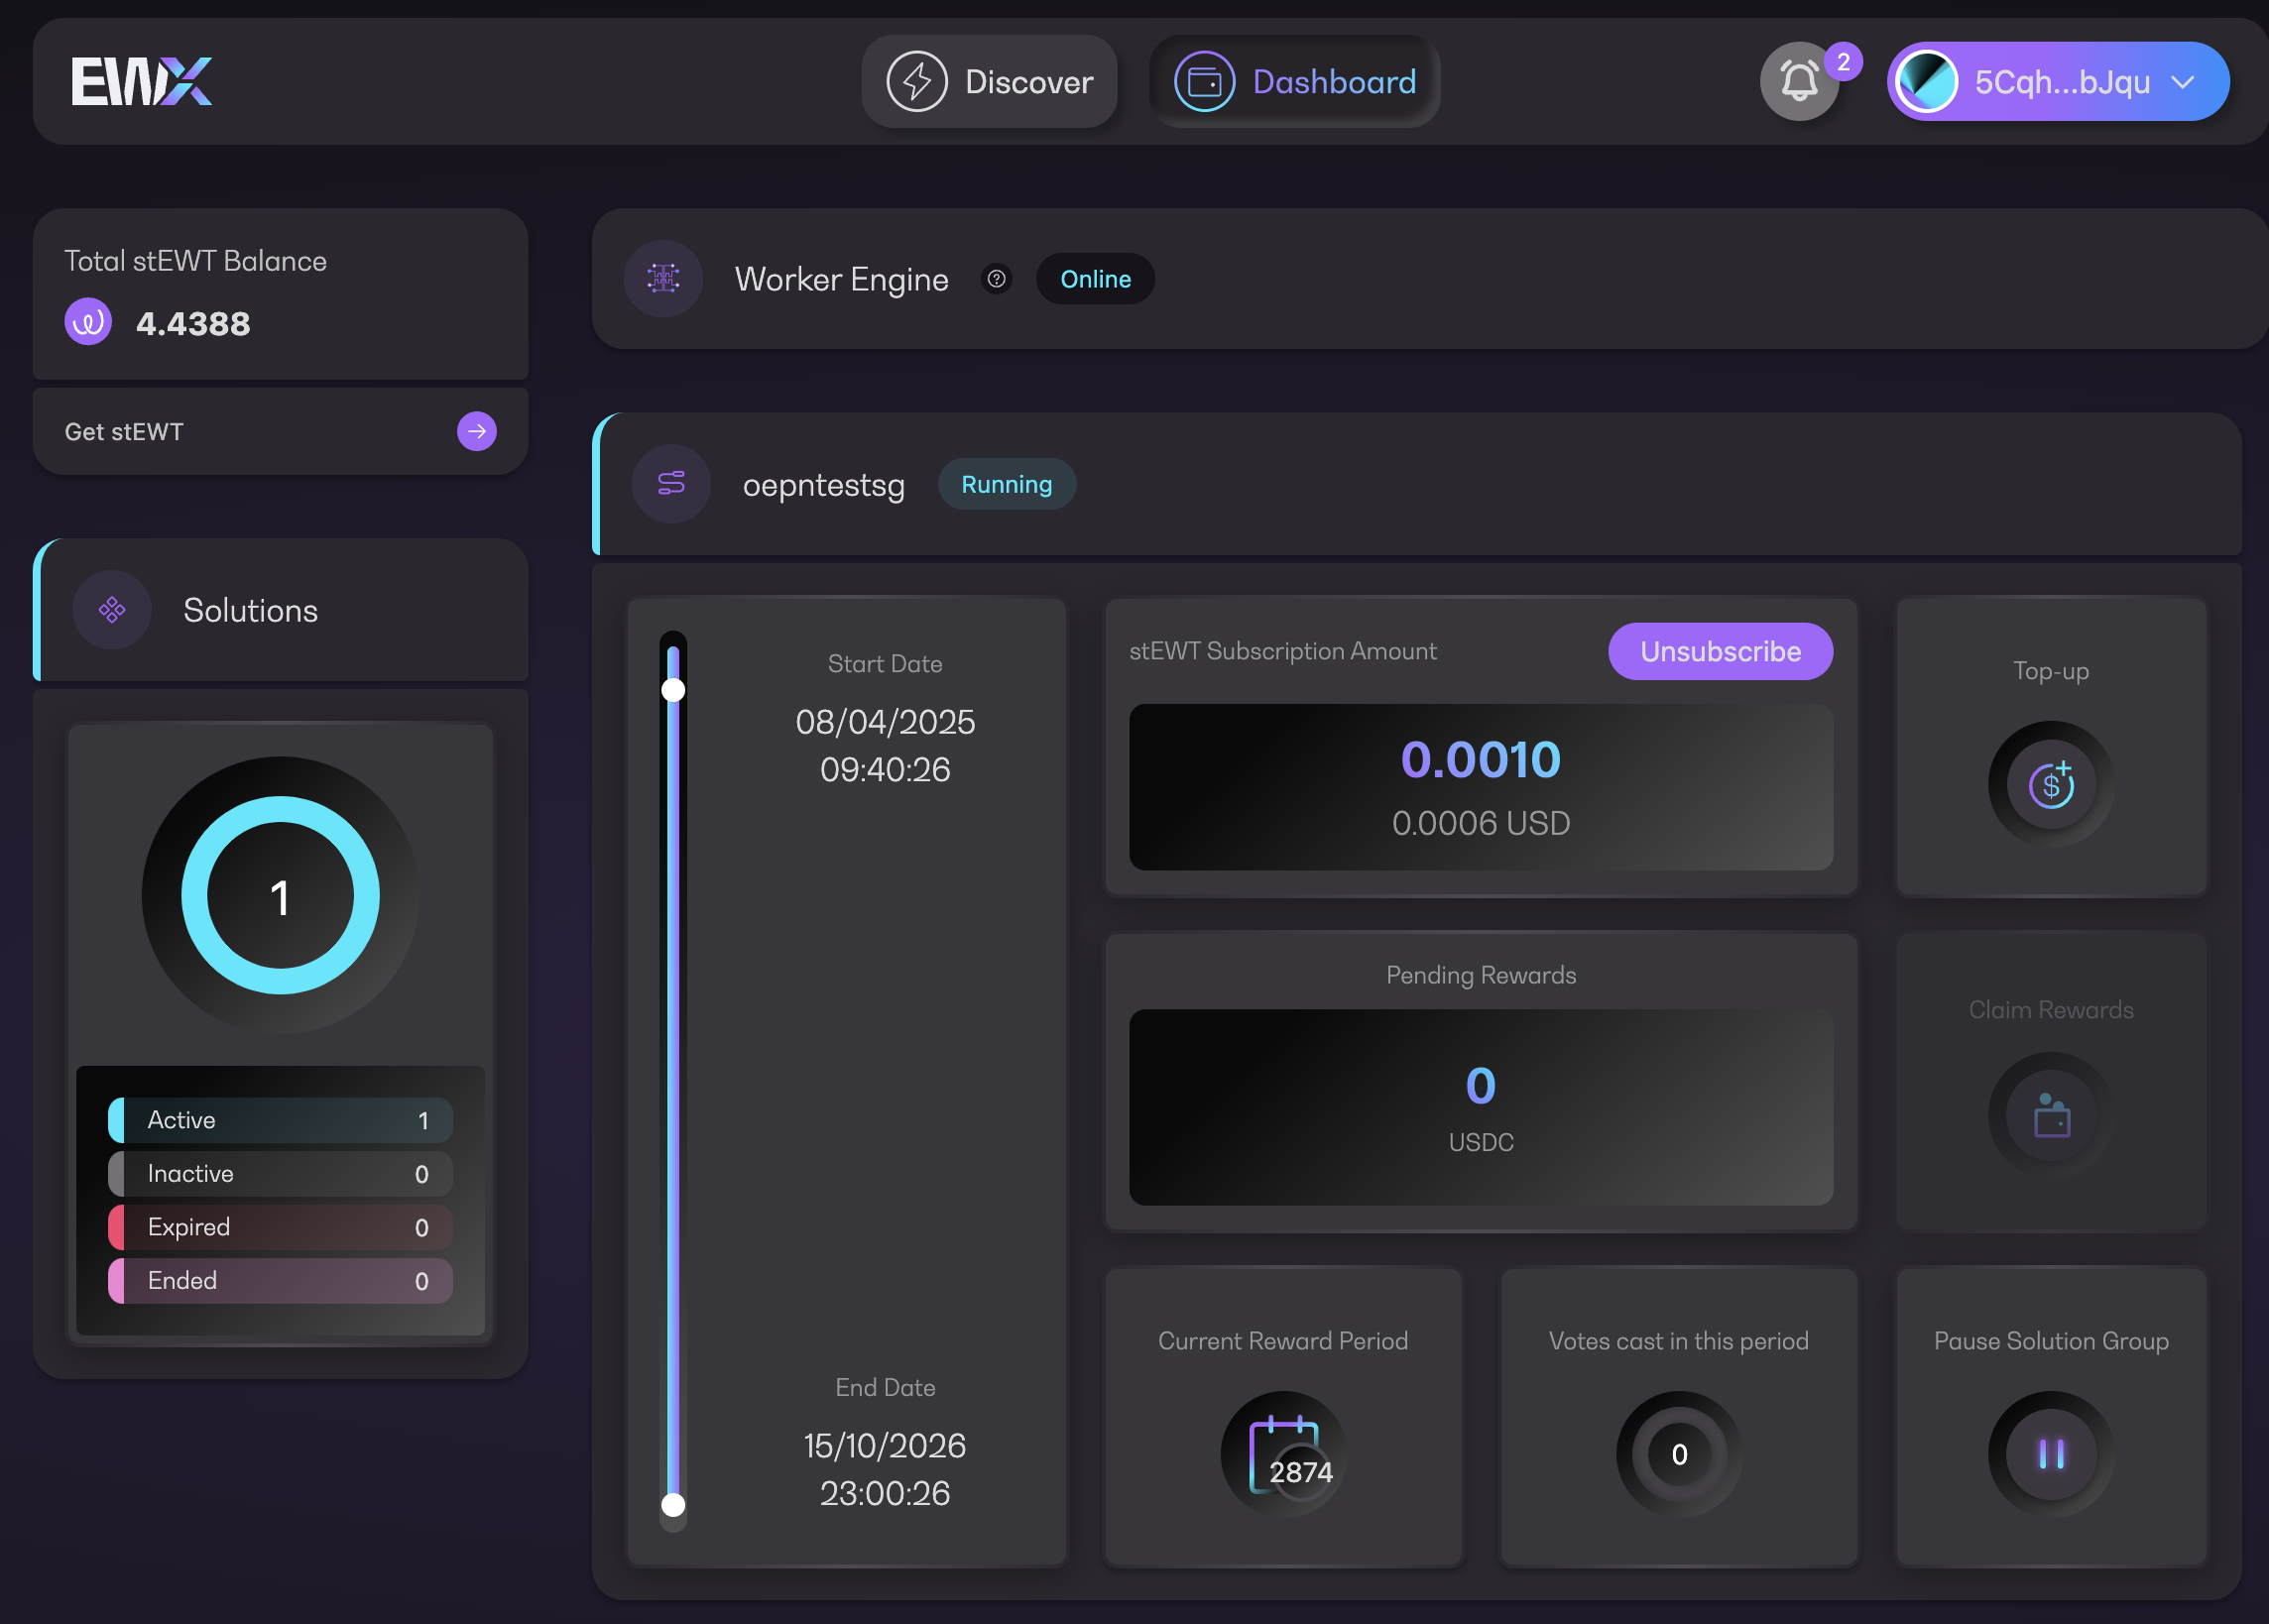
1. Navigate to your subscribed solution group
2. View “Available Rewards”
3. Click “Claim Rewards”
4. Confirm and sign the transaction in your wallet.

Once this claim process is completed, the generated rewards are credited to your account.

Note that awards paid in USDC may not yet be visible directly in the [Energy Web Marketplace](https://marketplace.energywebx.com/). Updates are in progress to enable this feature, and in the meantime USDC balances can be viewed via supported wallets (e.g. [Polkadot.js](http://polkadot.js), or Subscan). <br>


# Collator Off-boarding FAQ

Disclaimer: Energy Web is not responsible for individual staking decisions, including staking, unstaking, or taking no action, in relation to collator onboarding, offboarding, or growth events.

#### 1. Will delegators receive rewards from a collator they are delegating to, if said collator is deregistered before a growth event?

No. If a collator is deregistered before the growth snapshot, neither the collator nor its delegators will receive rewards for that growth period, even if the collator had already accrued points earlier in the period. Reward eligibility is determined at the growth snapshot, and collators must still be active at that point to be included.

Delegators wishing to maximise rewards should ensure they re-delegate their stake to an active collator prior to a growth snapshot. Alternatively, they can stake through liquid staking and have the pallet manage reallocations automatically (see Q3 below).

#### 2. What happens if I don’t unstake before a collator I’m delegating to is deregistered?

You do not need to take any action. Once the collator is deregistered, all delegations to that collator are automatically unlocked in the accounts of the delegators.&#x20;

#### 3. What happens to liquid staking when a collator is deregistered?

Any stake delegated by the Liquid Staking pallet to a deregistered collator is automatically reallocated.

During the next restake phase, those tokens are restaked to another collator in the WhitelistedCollators set, specifically the collator with the lowest total stake, ensuring balanced distribution. Liquid staking users do not need to take any action.

#### 4. How will I know if a collator has been deregistered?

Collator status changes are reflected by querying chain-state via [Polkadot.JS](http://polkadot.js), listening to on-chain events, and are displayed in collator dashboards on SubScan and various community run sites.&#x20;

Furthermore, Energy Web aims to communicate any deregistration events in advance to the community so appropriate action can be taken.&#x20;

#### 5. What if my collator goes offline but is not yet deregistered?

The aim is to have all collators who wish to deregister, deregistered prior to going offline.

An offline collator that remains registered would be eligible for rewards if they are registered and have accrued points at the time of the growth snapshot. Note that inactivity and poor performance would reduce points and therefore rewards.&#x20;

Delegators who prefer not to wait can re-delegate at any time. If the collator is later deregistered, the process described in above answers applies.

#### 6. Can a deregistered collator rejoin the network later?

Yes. A collator that has been deregistered may reapply and be onboarded again in the future, subject to seat availability and the collator onboarding and governance process. The collator would onboard with a new Collator address. Previous delegations are not automatically restored.

<br>


# Energy Web Tokens

The Energy Web Token (EWT) is the native utility token to access services and orchestrate stakeholders within its blockchain system. In the context of Energy Web Chain, EWT compensates validators for processing transactions, and are used to pay for transactions.&#x20;

Energy Web X leverages and complements the existing Energy Web Chain by introducing new technical capabilities that streamline the deployment and operation of Worker Node networks. &#x20;

To maximize the security of every Energy Web solution using worker nodes, EWT will be required to interact with worker nodes and Energy Web X. Most notably, Energy Web Tokens will be required to:&#x20;

* Reward worker node networks: worker nodes are software packages that need to be run by individuals and/or businesses. To attract entities to run worker nodes, enterprises will need to include rewards, paid in EWT, that compensate worker node operators for their work. &#x20;
* Operate worker nodes: to become a trusted party to run worker nodes, individuals and/or businesses will be required to stake EWT. Staking requirements and reward schedules are mass customizable - enterprises launching worker node networks can configure different thresholds and award schedules at their discretion.&#x20;
* Validate Energy Web X: Energy Web X validators will need to stake a significant number of Energy Web Tokens in order to become validators on Energy Web X. &#x20;

For clarity, instead of launching a new token with the Energy Web X blockchain, Energy Web X will be powered by the existing EWT. Users have the ability to “lift” Energy Web Tokens from the existing Energy Web Chain onto Energy Web X. Lifted Energy Web Tokens can then be used for the functions described above. With this mechanism in place, EWT holders will be able to “lower” Energy Web Tokens back to the main Energy Web Chain at their discretion. Over time, token holders will be able to lower EWT to other layer one blockchains (for example, main net Ethereum) making Energy Web solutions interoperable with any blockchain ecosystem.&#x20;

Utility tokens like EWT are different from other digital assets in the blockchain sphere such as coins, non-fungible tokens, and stablecoins. To learn more about the distinctions between these assets, see this article,[ The ultimate cryptocurrency explainer: Bitcoin, utility tokens, and stablecoins](https://thenextweb.com/news/bitcoin-stablecoins-utility-cryptocurrency).


# Token Lifting

Lifting is the process of migrating EWT from EWC to EWX. EWT will be needed by participants to register as worker node operators and to stake to solution groups containing the Smart Flows.


# Token Lowering

Lowering is the exact opposite of token lifting. It is the process of migrating EWT from EWX to EWC. Normally, this will be used to withdraw rewards claimed after gaining them by operating worker nodes.


# Worker Nodes and Worker Node Networks

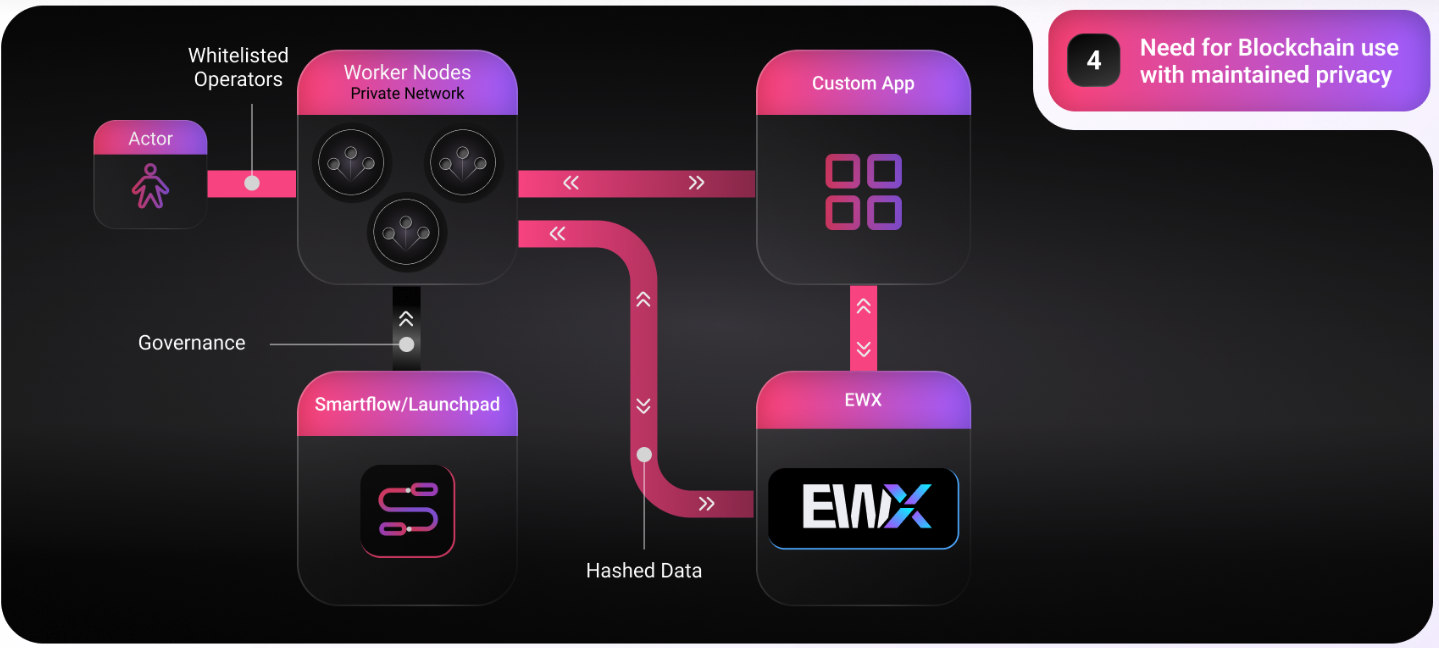
A worker node is a decentralized application (dApp) which enables enterprises to construct distributed computing networks which securely execute sensitive business operations. Each worker node can execute multiple solutions at the same time; subject to the limits of each operator system.&#x20;

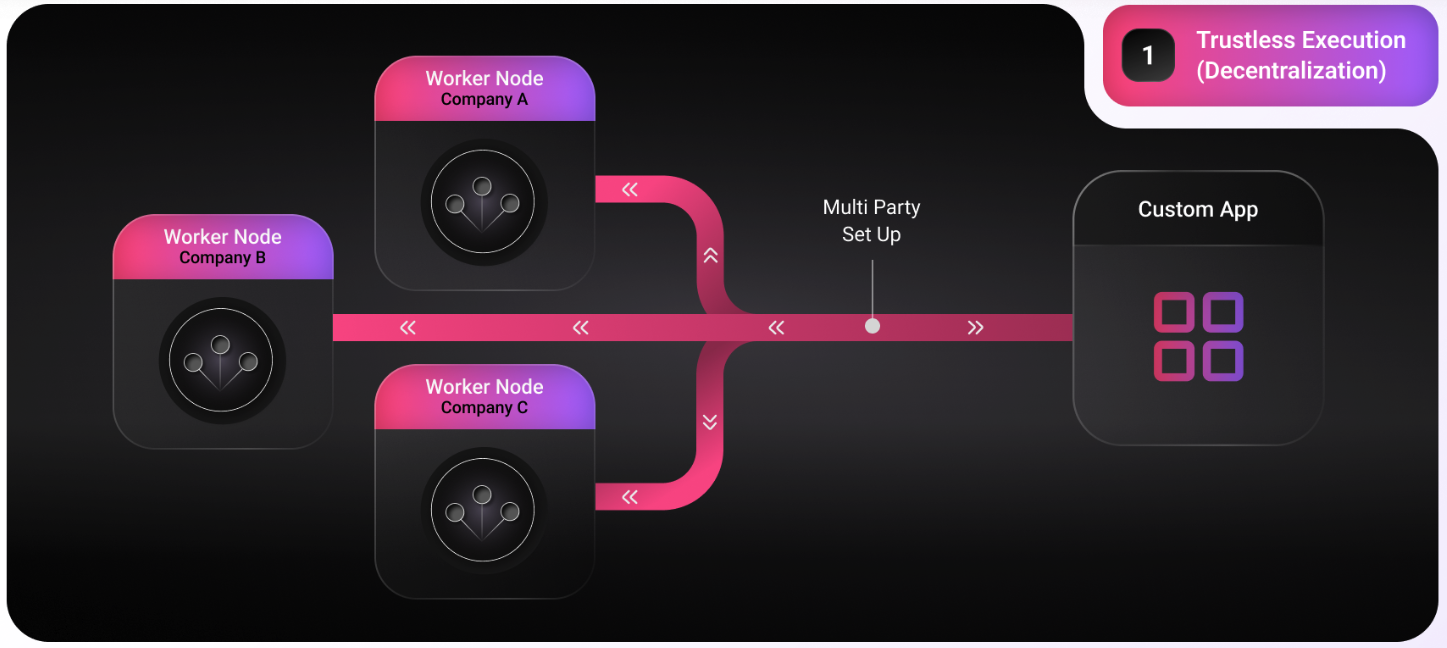
Worker nodes were originally developed to solve a paradox that hinders advanced renewable energy tracking solutions like 24x7 matching and green electric vehicle charging: credibility relies on accurate, publicly verifiable results (e.g., proof that digital representations of renewables are not double counted). But inputs from separate organizations, such as granular renewable energy production and electricity demand data, are commercially sensitive and need to remain private. Complex commercial, legal, and technical requirements often make it challenging for a single actor to unilaterally access and process all requisite data. The ability to establish a shared source of truth from segregated, individual information sources has been an ongoing challenge in multilateral settings; the challenge is even greater for energy market participants seeking to exchange and process granular data to procure services from distributed energy resources.&#x20;

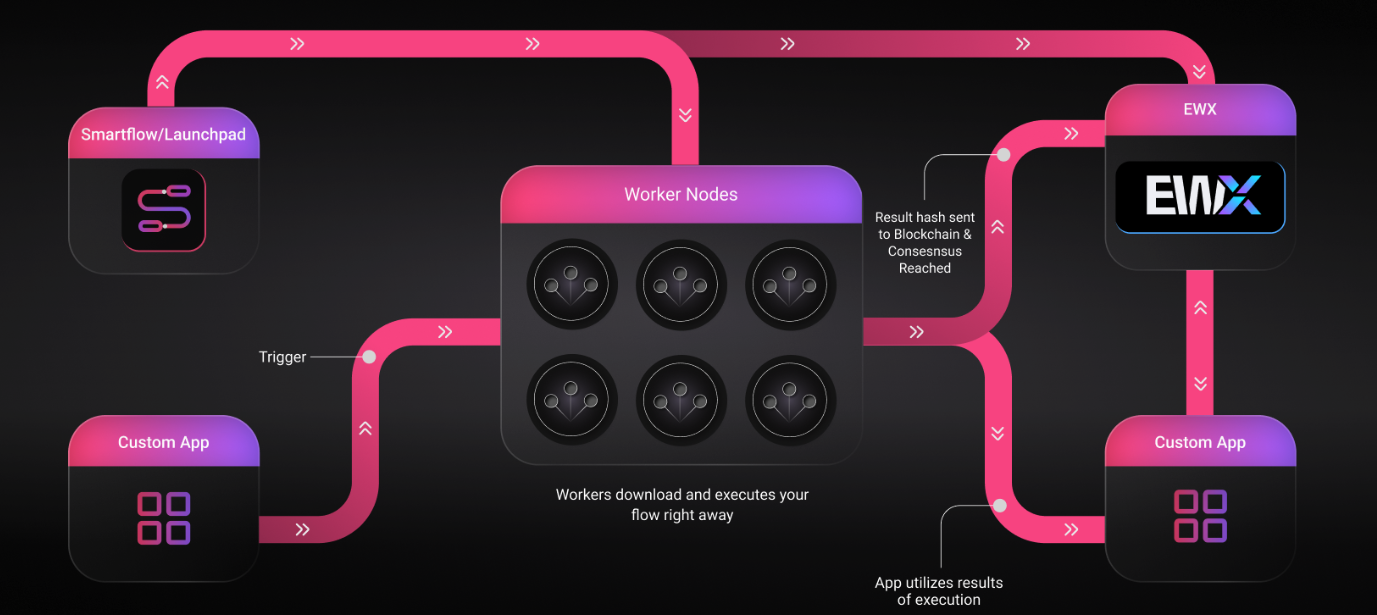
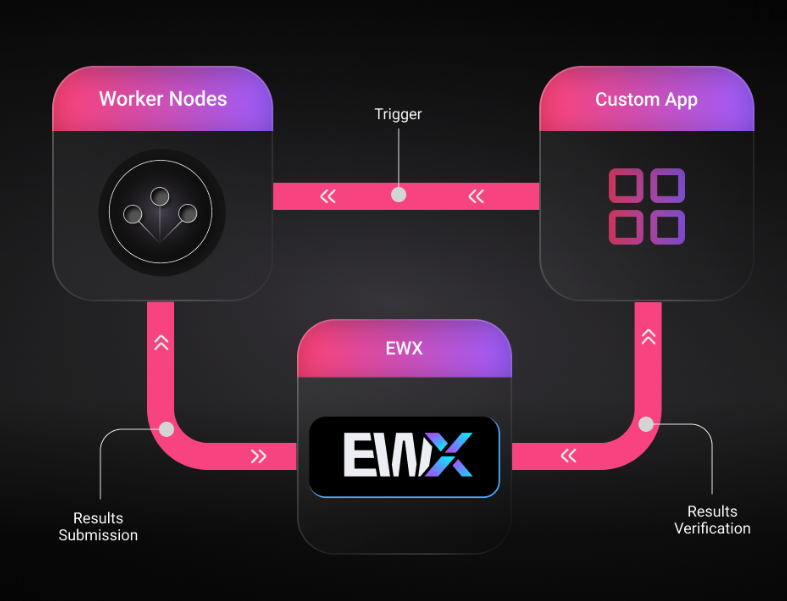
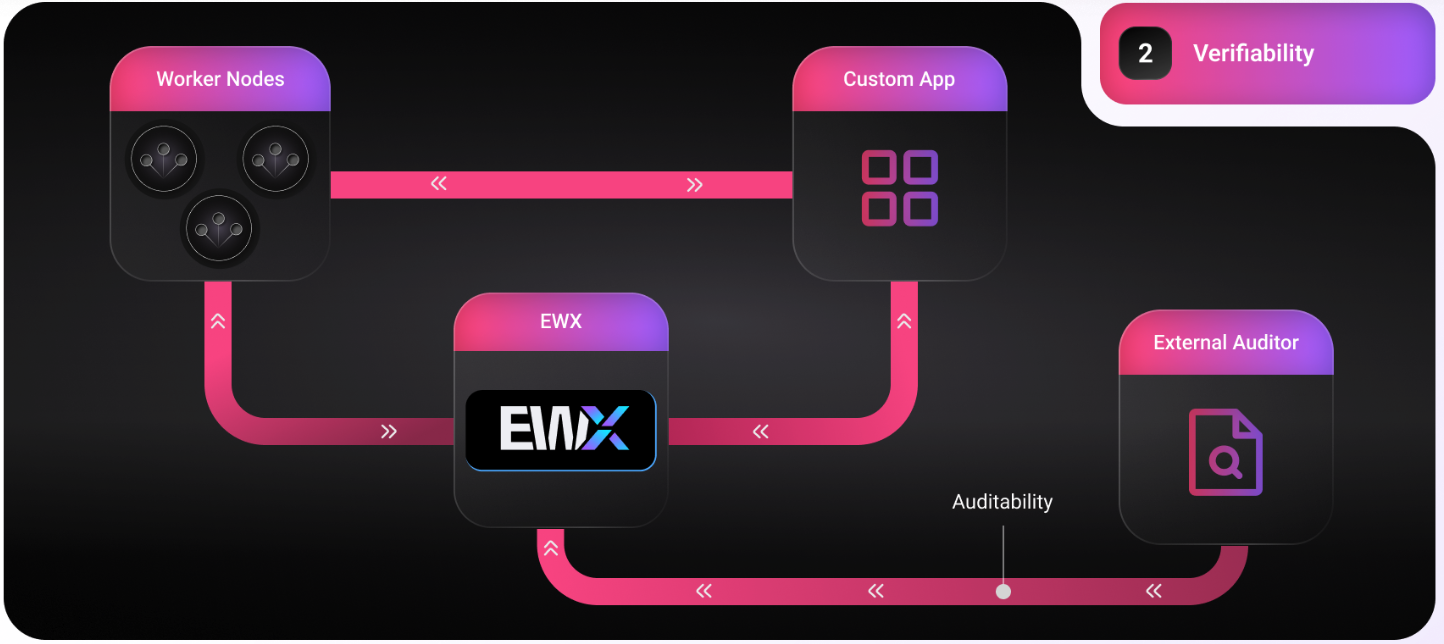
The Energy Web Worker Node toolkit solves these challenges by enabling enterprises to configure, launch, and maintain distributed computing networks that ingest data from external sources, execute custom workflows based on business logic, and vote on results in order to establish consensus without revealing or modifying the underlying data. Worker Nodes apply concepts and components from blockchain technology in a novel, enterprise-friendly architecture to provide all stakeholders with cryptographic proof that mutually agreed rules and processes are followed correctly, ensure computational outputs from business processes are correct, and preserve the privacy and integrity of underlying data for auditing purposes.&#x20;

Currently, there are 2 types of worker nodes available:&#x20;

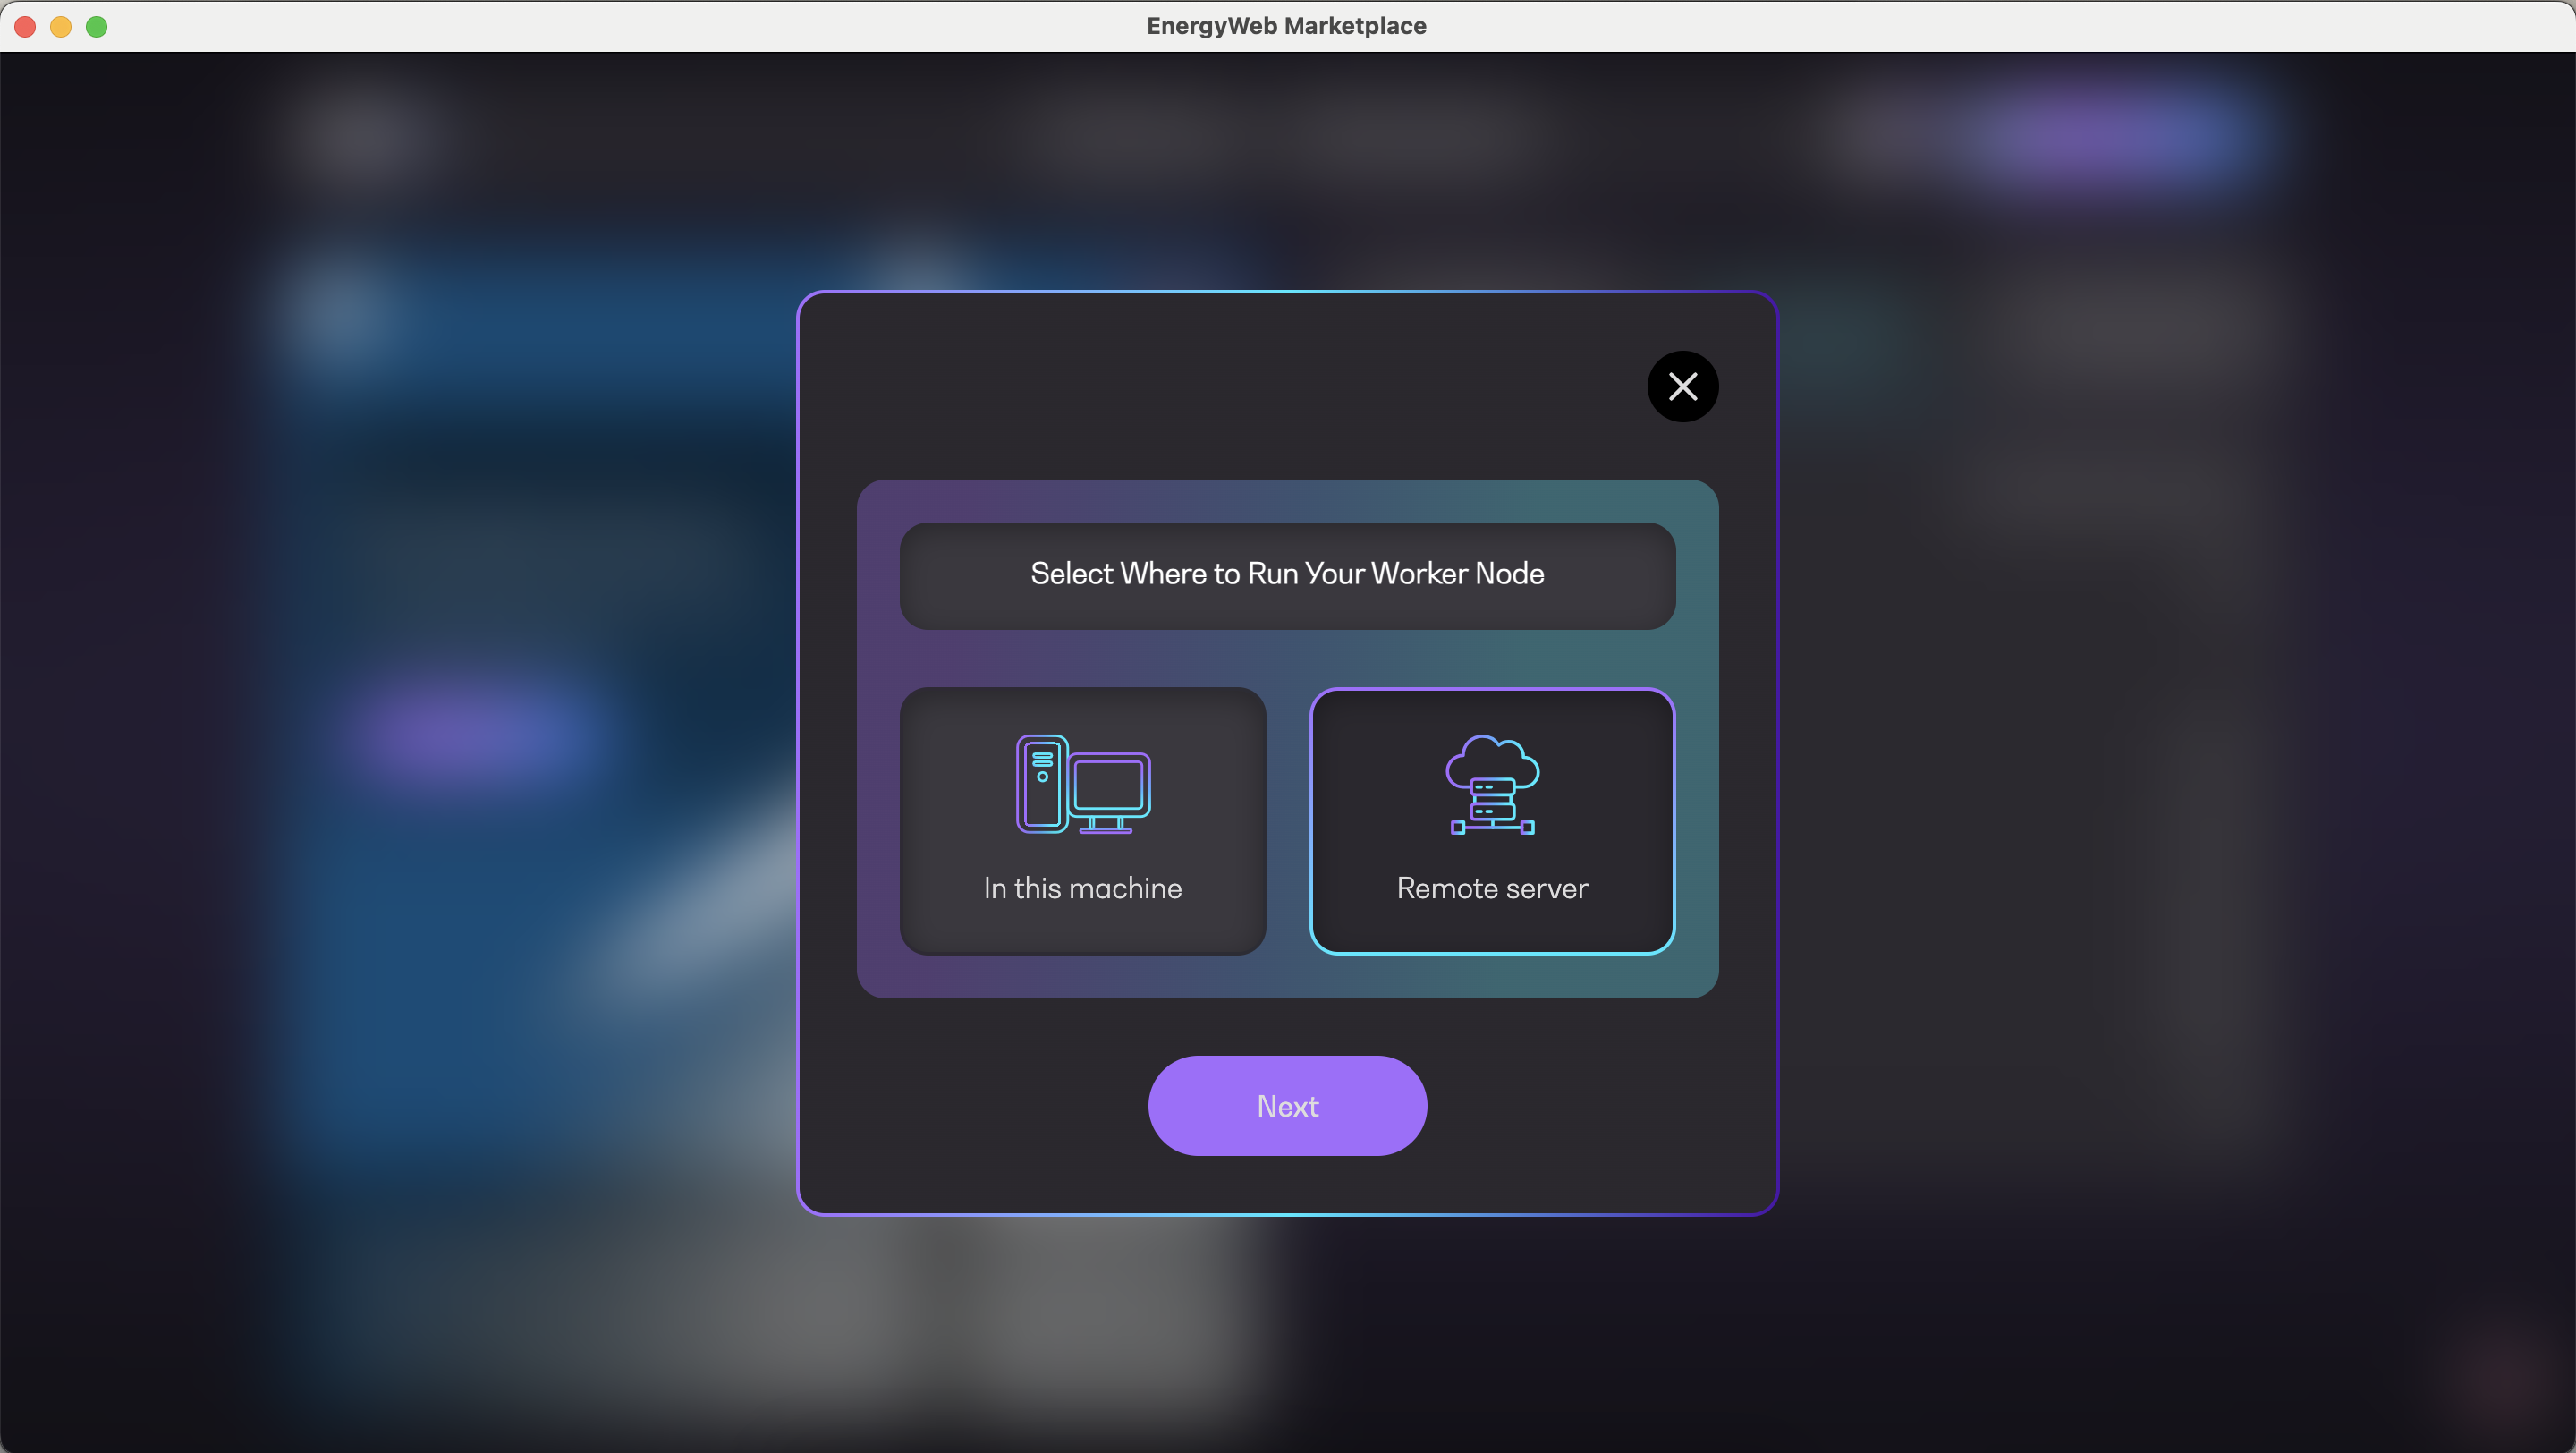
1. Server-based Worker Node&#x20;
2. Marketplace Desktop Application


# Server-based Worker Node

The server-based worker node is a decentralized application mainly offered to enterprises to be deployed in highly configurable execution environments on-cloud or on-premises. Deployment can be done via Dockerization.&#x20;

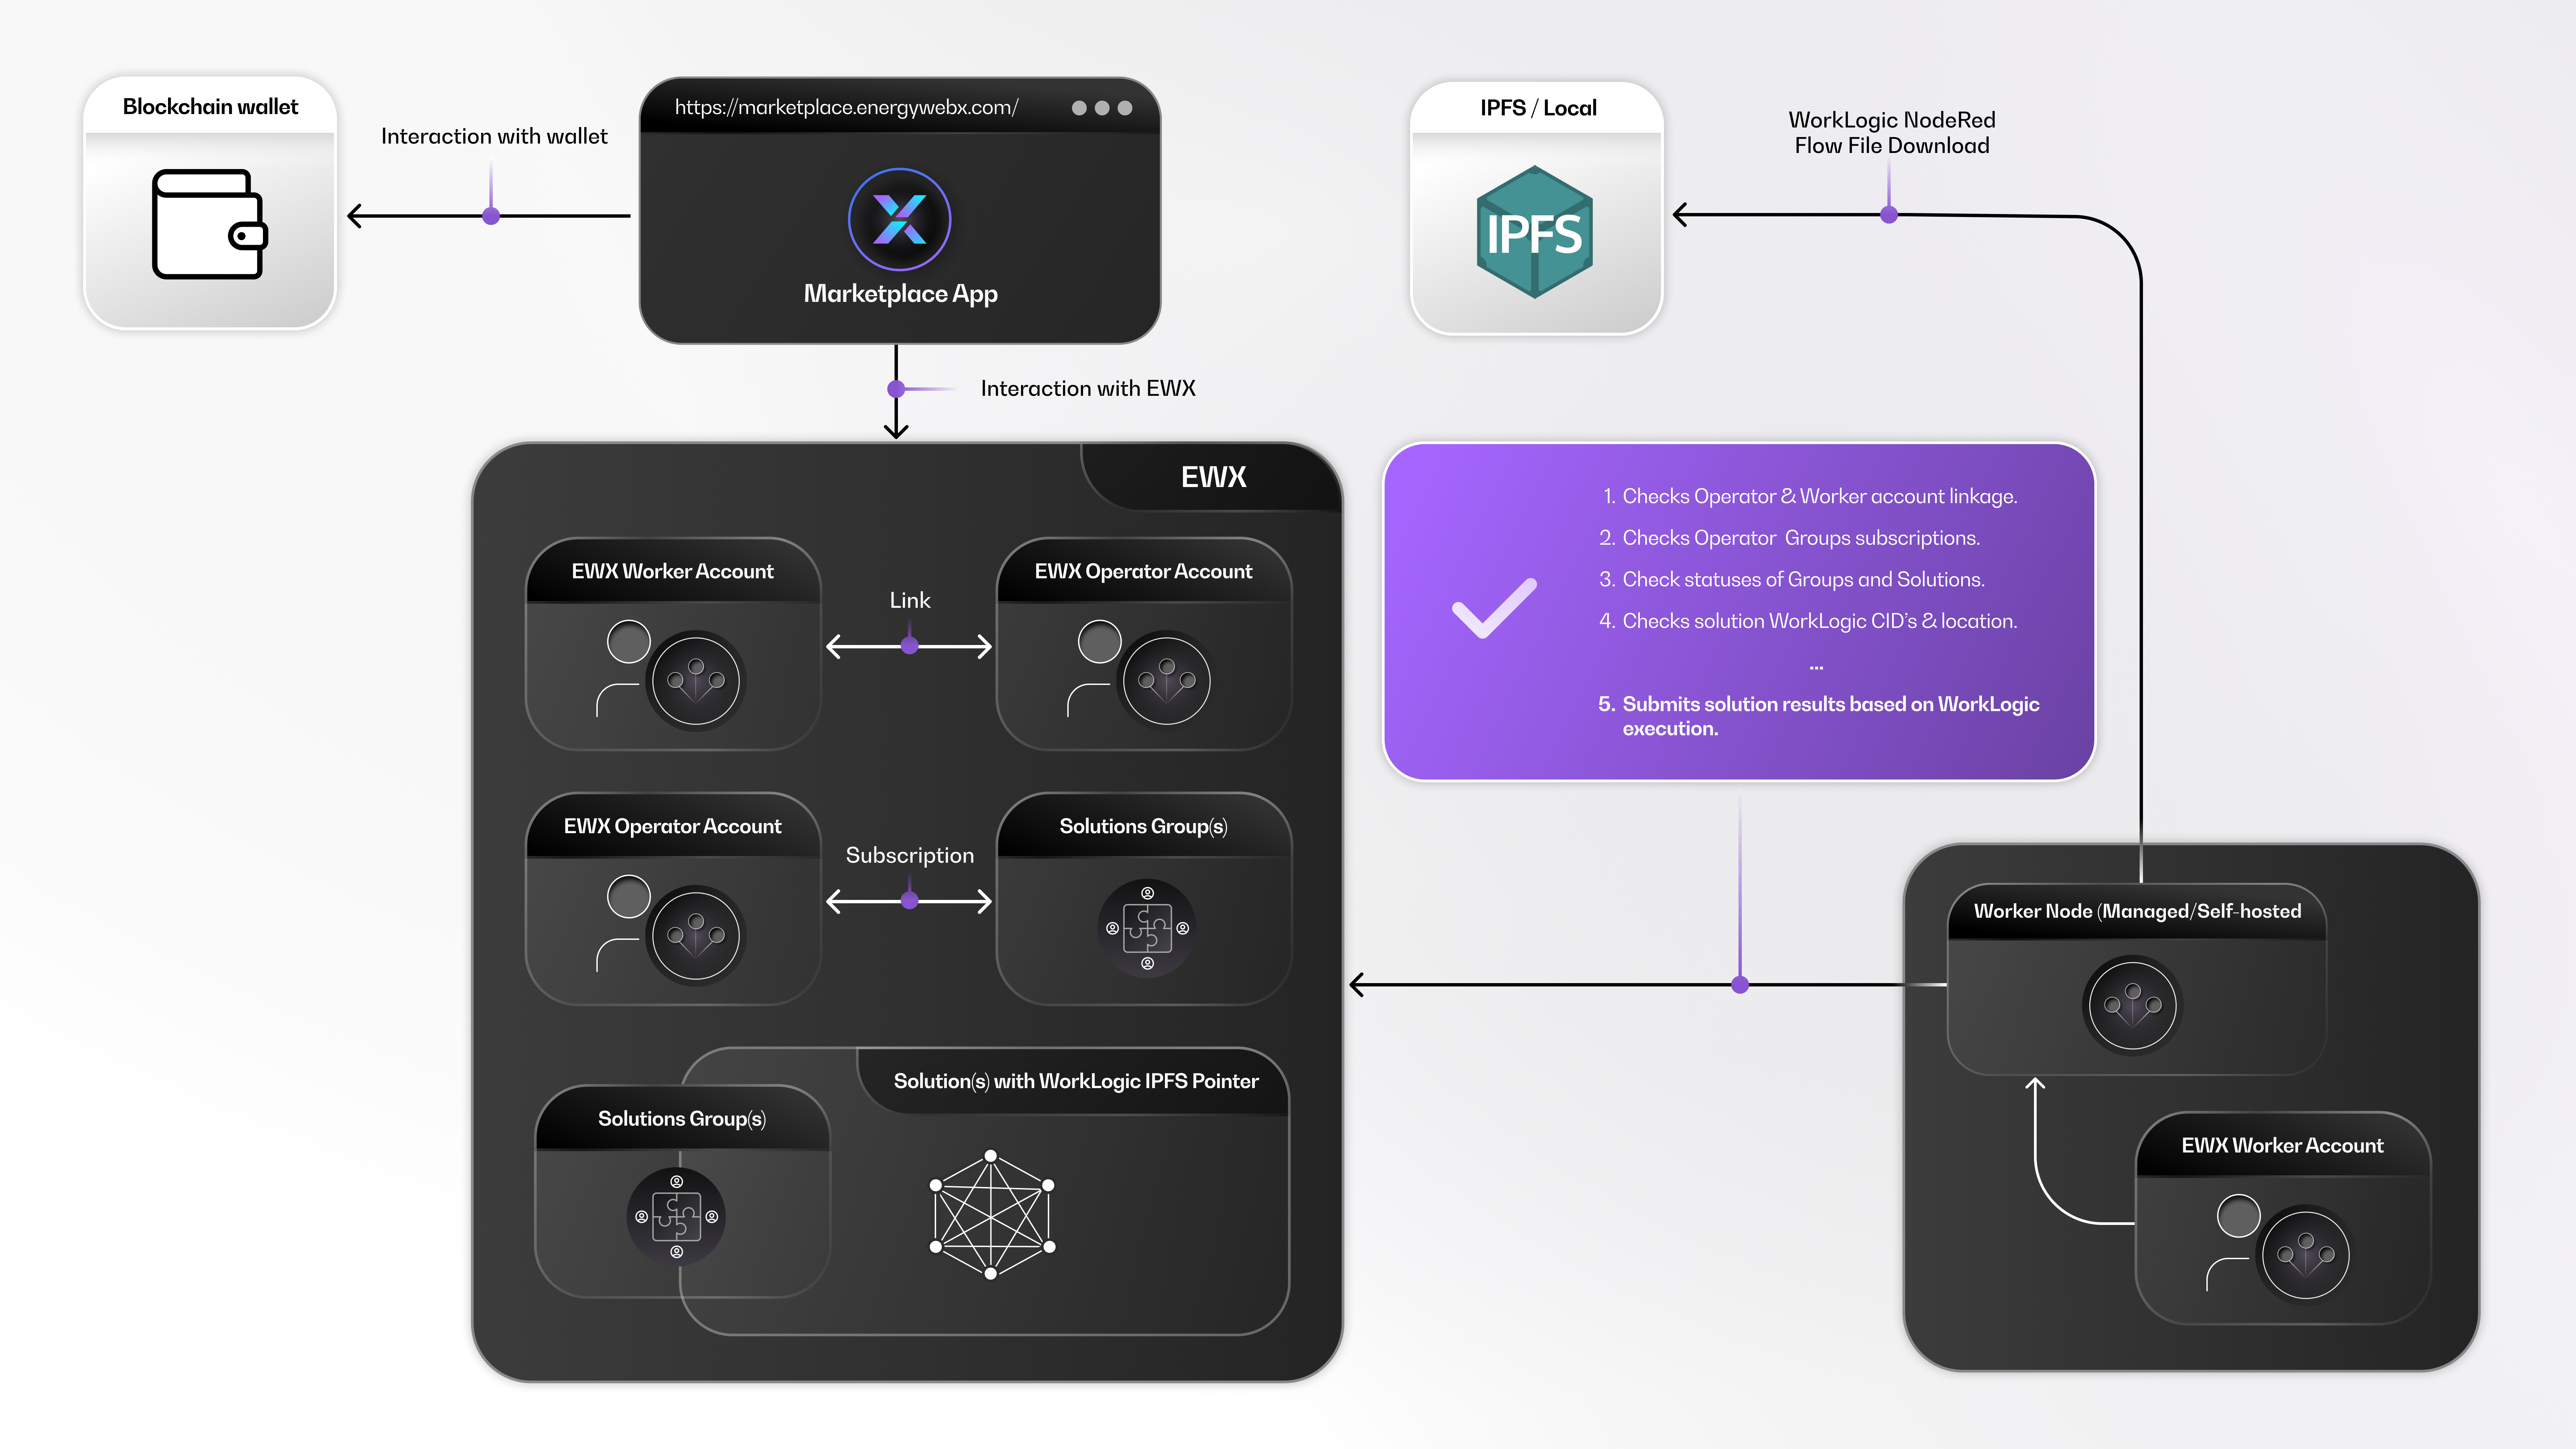
It is mainly composed of the worker node dApp and a Node RED server bundled in a single package. It automatically syncs the subscriptions of the worker node account set in its environment variable and subsequently runs any active solutions for diligent execution and submission of votes.


# Marketplace App (desktop-based)

The Marketplace App is a decentralized desktop application which provides an intuitive interface for the general community with limited technical background to easily participate in running worker nodes on their local machines. It also provides an interface to lift and lower EWTs. It supports Windows, MacOS, and Ubuntu systems.

<figure><img src="https://lh7-us.googleusercontent.com/docsz/AD_4nXfHVQz7imHtal3SWGtcSWQJYY56j2qN7H5w1NE5UwnDxcFlNV-K7DguLuvQ5C7IVU5X6oevzc__EWjR469Sj7tBuLHzi4NhB5QYHO4l5vTT28tWQUKgrdGJyUHqSh7BWcEWAs0NEjtbho6GB-onnEnNhQ?key=zwNZA5OIaLdHVVeX-otIAQ" alt=""><figcaption><p>The Marketplace Desktop App</p></figcaption></figure>


# Worker Node Operator

An operator is an entity who participates in hosting worker nodes to execute business case logic in a network of worker nodes. The operator is represented by their dedicated EWX account. &#x20;

An EWX account may be created using the publicly available Polkadot wallets. EWX is currently supported by below wallets:&#x20;

1. Nova Wallet -[ https://novawallet.io/](https://novawallet.io/)&#x20;
2. SubWallet -[ https://www.subwallet.app/](https://www.subwallet.app/)&#x20;

The EWX account MUST NOT be used as a worker node account because they serve different purposes. The operator account nominates a worker node account which can represent the operator when submitting worker node results to EWX.&#x20;

An EWX account can hold EWT for staking and claiming rewards.


# Smart Flows and Groups

<figure><img src="https://lh7-us.googleusercontent.com/docsz/AD_4nXdIubzVuJ--BqJjl83iFWZxOij_0D-jreymdcwRtY-i_Pf57UxKCe4tFVrY35boD_Kb_0PHjDRrp3_aVrUrQewGDSzDuxvbVoDNTov_DzYLcGVw-EggcU7ACNJDOnJ09vyovOtHWdXWk8un3U6q7eFO6g?key=zwNZA5OIaLdHVVeX-otIAQ" alt=""><figcaption><p>Solutions and groups on EWX and IPFS</p></figcaption></figure>

A solution is a representation of a business case logic within the worker node networks. It is composed of the solution metadata and a Smart Flow definition file. The Smart Flow file is stored on a publicly available decentralized file system - IPFS (Interplanetary File System).&#x20;

A solution group is a collection of solutions. Operators choose which solution group they opt to run and stake EWTs with. The worker node will run all active solutions under the subscribed solution group.

## Smart Flows

A smart flow is a set of logical nodes that define a business use case. In EWX, smart flows are created and configured using Node RED which provides a browser-based flow editor that makes it easier for enterprises to wire together flows. However, contents of a Node RED node may be auto generated by any third party and be available as an independent, reusable node.

<figure><img src="https://lh7-us.googleusercontent.com/docsz/AD_4nXcWfPGUMVO5uAbvg1rDZKCV1j_JnC-jZllojPgn6wi_8T-h-FeTRBKISXVeGrqizahCTZ_ZYsxiE-eyTDUGohqGwUJuhUfo_7hG8P33jRQana8SU_s65WZha15RYuOprcMVLZzzoMYZ5Gpzacxq260I_zc?key=zwNZA5OIaLdHVVeX-otIAQ" alt=""><figcaption><p>Sample smart flow definition</p></figcaption></figure>

Smart flows are exported to JSON files and are stored on IPFS. Worker nodes of subscribed operators can automatically fetch these files and deploy into each respective instance.

Below is the sample generic sequence diagram describing the process from fetching data from each respective business case provider system, processing the data, submitting the result to EWX, calculating the consensus, and forwarding the results back to the BC system. Business Case (BC) providers are those entities who have access to [EWX Launchpad](https://docs-launchpad.energyweb.org/) and define the logic of the Smart Flows.

<figure><img src="https://lh7-us.googleusercontent.com/docsz/AD_4nXeC4m5_k3s4nPE6HQVUMKj1aYRyIgsqdKWzGXRFG3O7VghSpPu93uwN4qvrFO9PS9QKFCnFJSeJzq6PA3bbD5j0X60M91Q5HgIBIqW09p7PCrwuhuUXbpKPHz_cia7gblvvv-nprkZu-fM-XLsc4dYFPI8?key=zwNZA5OIaLdHVVeX-otIAQ" alt=""><figcaption><p>Generic sequence diagram of a smart flow definition</p></figcaption></figure>


# Subscription

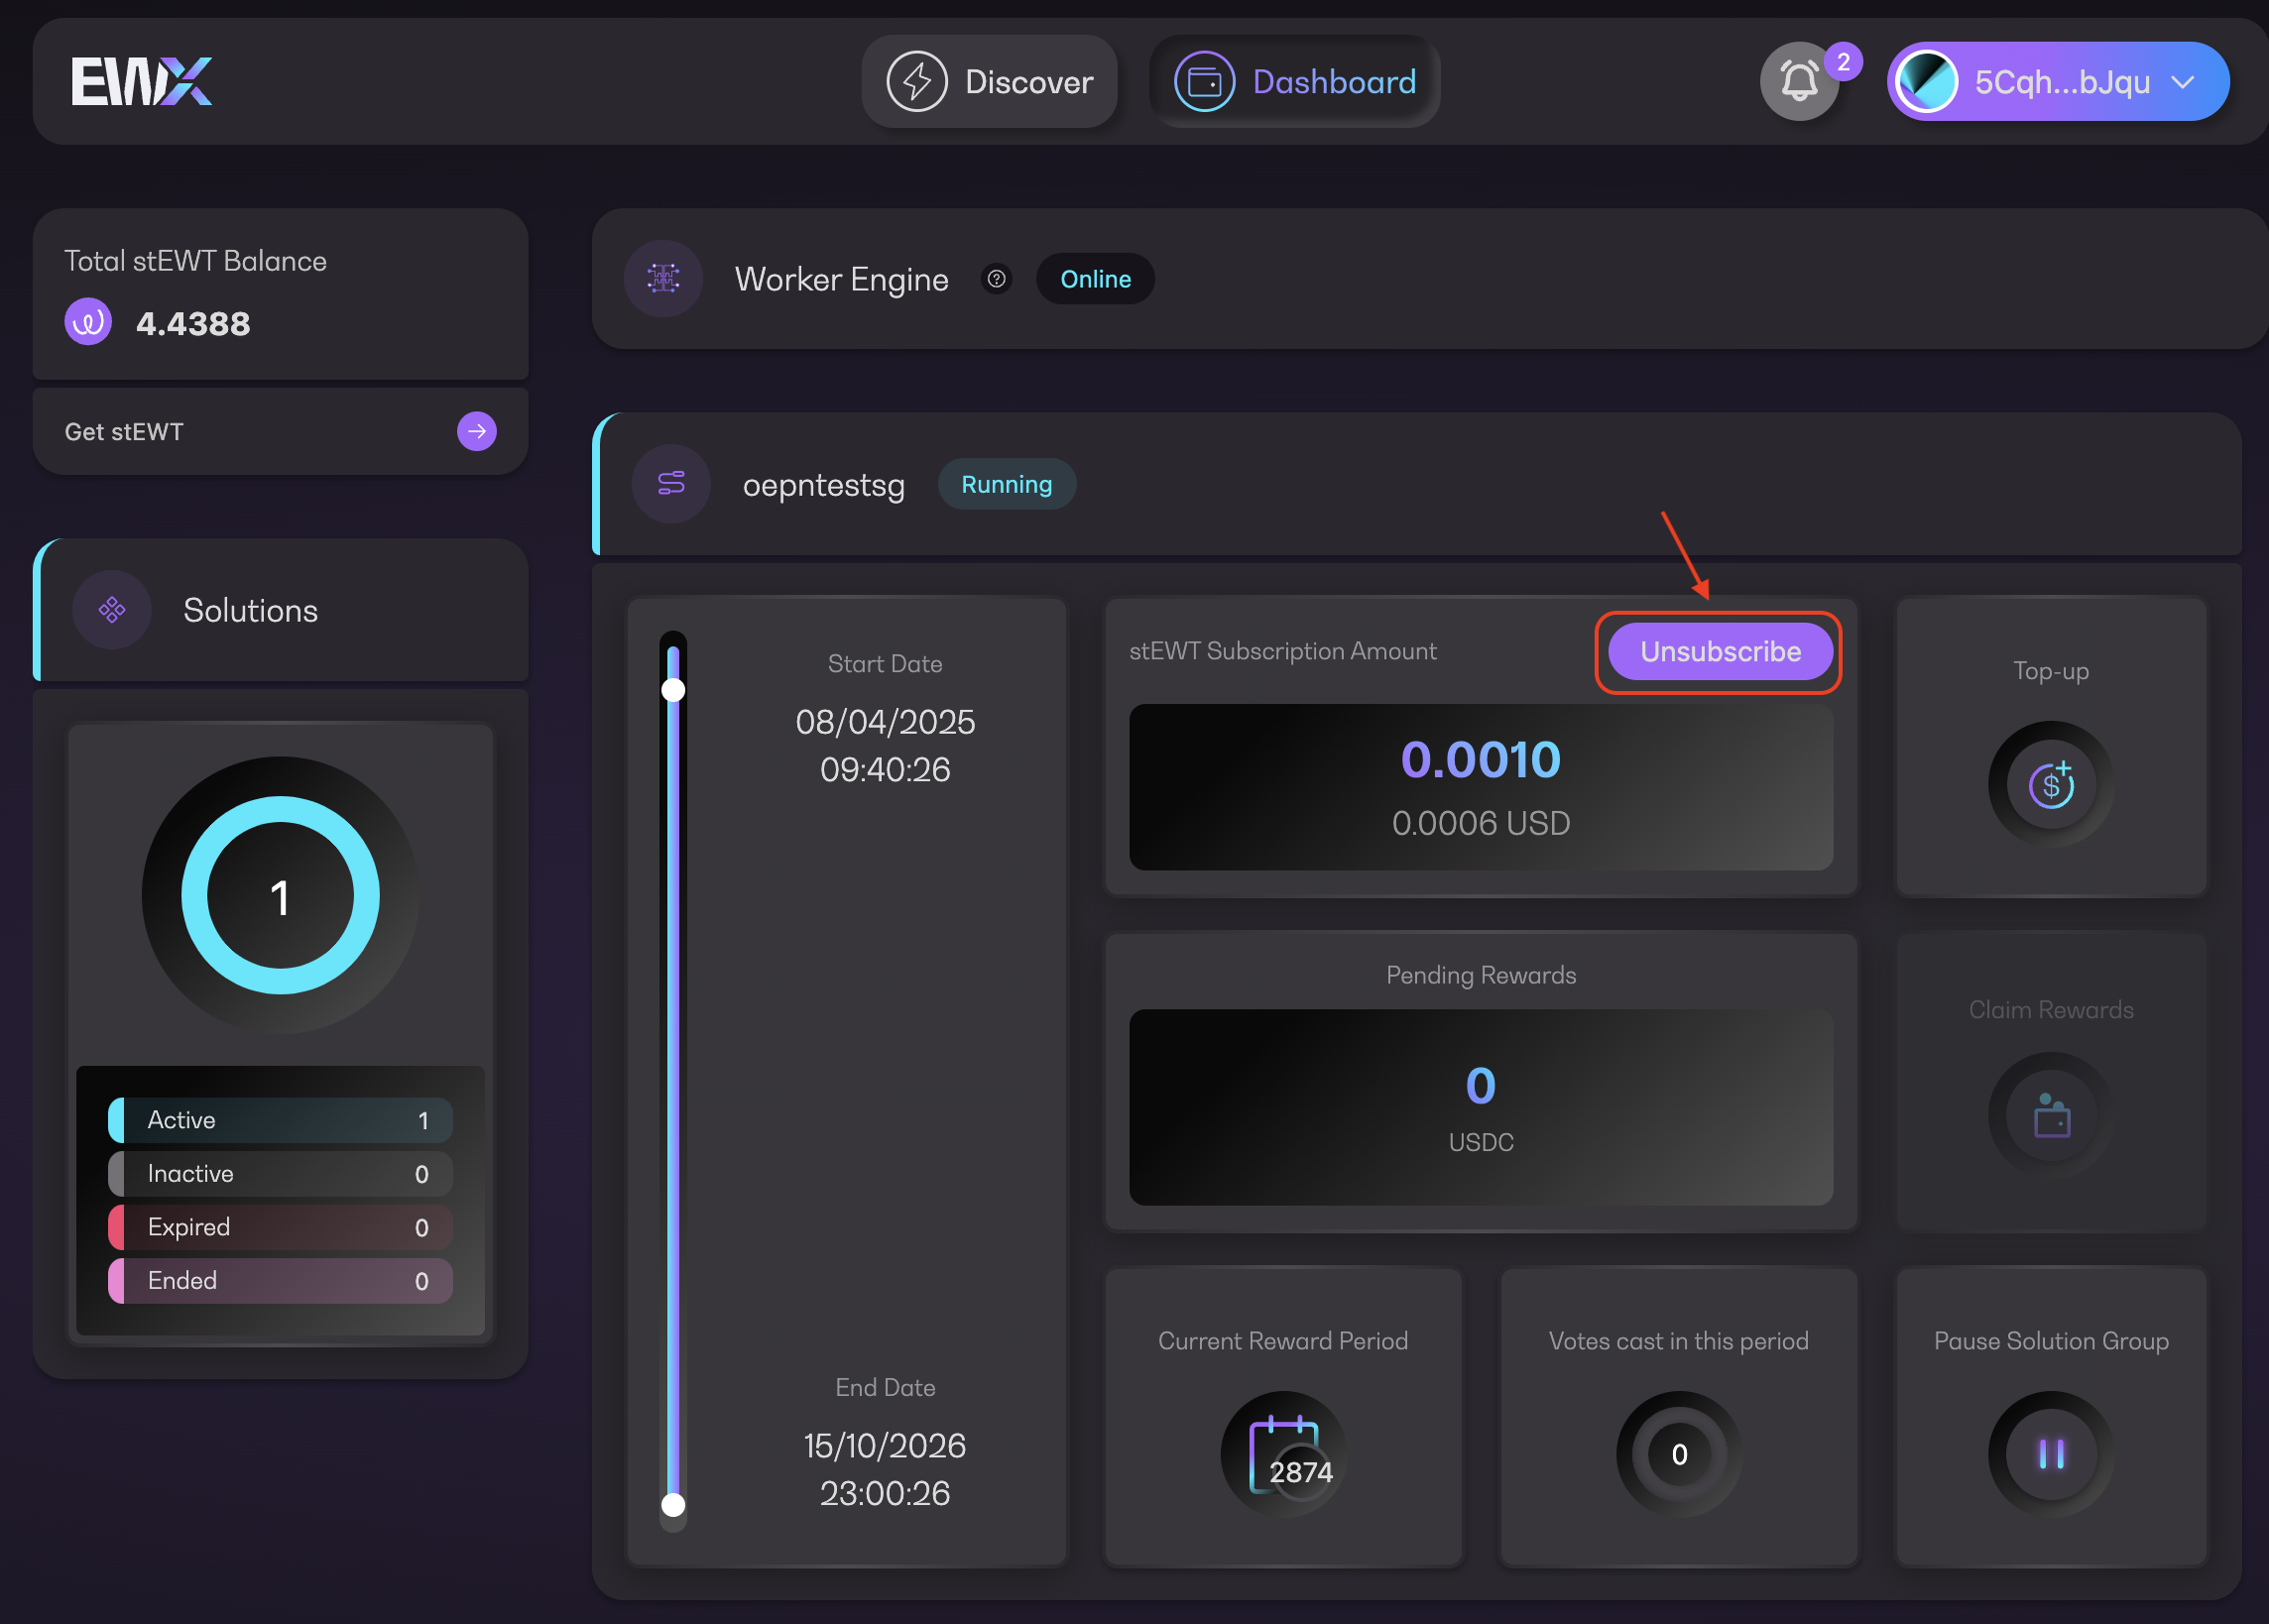
A subscription is an EWT staking action initiated by the worker node operator to agree and commit in actively participating in executing a group of solutions subject to the solution group’s terms and conditions. In return, the operators expect to gain rewards by diligently performing the solution executions while having the possibility to get slashed when underperforming. The solution registrar sets the stake amounts and other configurations upon the creation of the solution group and solutions.


# Reward Period

Reward period is the schedule for worker nodes to participate in vote submissions and gain rewards. The solution registrar defines the duration of reward periods. For example, if rewards are to be paid daily, the reward period needs to be set to a 24-hour estimated equivalent in blocks. Each block is approximately 12 seconds in duration.


# Voting and Consensus

A vote is initiated upon the submission of the Merkle-tree root hash of the calculated data for each specific use-case. All votes are tied to a voting round. &#x20;

A voting round is determined by the unique identifier provided by each BC when the Smart Flow fetches the data from the respective BC system for each specific use-case.&#x20;

For the current implementation, each worker computes the consensus right after its successful submission of a vote in a voting round. The worker fetches the previous vote submissions from EWX under the current voting round. The worker groups the root hashes and counts the submissions from unique operators per unique root hash.&#x20;

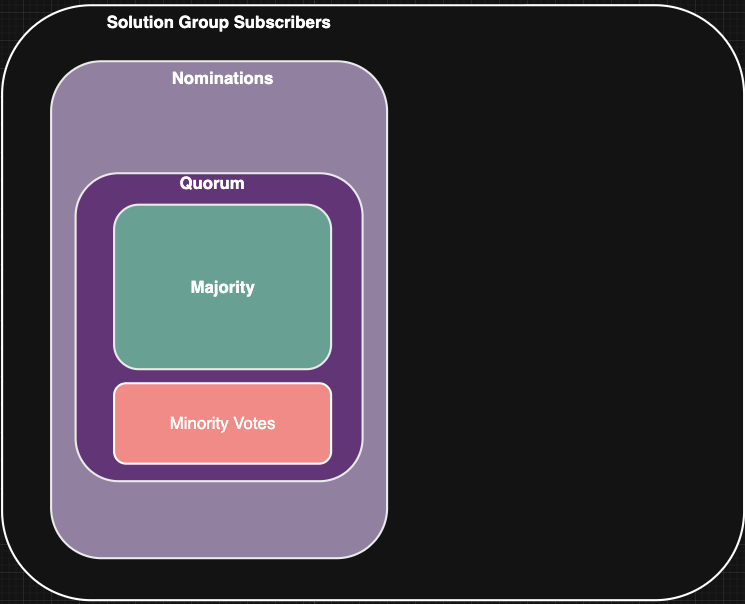
The consensus is determined when a particular root hash contains the majority of submitted votes.&#x20;

When the majority of votes is not met, the voting round becomes stale and no response coming from the network of worker nodes is expected. However, this scenario may be confirmed externally by directly querying on-chain using a third-party application which will not be available in this phase.&#x20;

EWF will develop a more robust consensus orchestrator environment and will be available towards Q4 2024. More details will be shared once requirements are finalized at EWF.&#x20;

## InEExS Project Consensus Mechanism

In the case of the InEExS Project, consensus is determined using the formula below:&#x20;

<mark style="color:purple;">`M = TO * 0.5 + 1`</mark>&#x20;

Wherein, M = majority of votes, and TO = Total operators subscribed in the solution group.&#x20;


# Ethereum

### Ethereum <a href="#ethereum" id="ethereum"></a>

The Energy Web blockchain is derived from [Ethereum blockchain](https://ethereum.org/en/) technology. Ethereum provides a strong foundation for the Energy Web Chain because it is open-source, widely used, and many well-developed tools for development on Ethereum exist today.

Ethereum-based technology is used as EW-DOS's trust layer because anyone can use Ethereum to build and deploy decentralized applications that run on blockchain technology. This aligns with the purpose of EW-DOS, which is to build decentralized, open-sourced applications that accelerate decarbonization of the energy grid.

#### What Sets Ethereum Apart from Other Blockchains? <a href="#what-sets-ethereum-apart-from-other-blockchains" id="what-sets-ethereum-apart-from-other-blockchains"></a>

Prior to Ethereum, most blockchains were protocols created to exist as a public, decentralized ledger for financial transactions (think Bitcoin).

Ethereum developed the[ Ethereum Virtual Machine](https://ethereum.org/en/developers/docs/evm/) (EVM) to allow users to store and execute programs on the Ethereum blockchain. This lets programmers write programs that contain logic and state management, both which are critical to[ decentralized applications (dapps)](https://ethereum.org/en/developers/docs/dapps/). These programs are called [smart contracts](https://ethereum.org/en/developers/docs/smart-contracts/). Once it is deployed on the blockchain, a smart contract has an address on the blockchain and anyone can use to interact with the contract or call its public functions. You can read more about how to interact with smart contracts [here](https://energy-web-foundation.gitbook.io/energy-web-documentation/legacy-documentation/ew-dos-technology-components-2023/trust-layer-energy-web-chain/ewc-guides-and-tutorials/interacting-with-a-smart-contract).

This means that blockchain technology can not only be used to buy and trade cryptocurrency, but also to create robust applications for decentralized finance, asset trading, gaming and, in our case, a decentralized energy market.

Read an overview of Ethereum and the Ethereum Virtual Machine on the Ethereum documentation's "What is Ethereum" section [here](https://ethdocs.org/en/latest/introduction/what-is-ethereum.html#:~:text=Like%20any%20blockchain%2C%20Ethereum%20also,and%20executes%20the%20same%20instructions.).

#### Ethereum Fundamentals <a href="#ethereum-fundamentals" id="ethereum-fundamentals"></a>

**The Energy Web Chain is derived from Ethereum, but it is a separate blockchain using a different consensus protocol and unique governance mechanisms.** However, most of the fundamentals of the Ethereum network are the same for the Energy Web Chain. These fundamentals are helpful in understanding the role that blockchain technology plays in EW-DOS. *This is especially true if you want to develop and deploy smart contracts on the Energy Web Chain.*

If you are unfamiliar with Blockchain technology, or the Ethereum Virtual Network, there are some additional resources below to get you started.

* [Introduction to Ethereum](https://ethereum.org/en/developers/docs/intro-to-ethereum/)
* [Transactions](https://ethereum.org/en/developers/docs/transactions/) (this is an overview of transactions in Ethereum, but we explain more about transactions on the Energy Web Chain [here](https://energy-web-foundation.gitbook.io/energy-web-documentation/legacy-documentation/foundational-concepts/ethereum/transaction-costs))
* [Blocks](https://ethereum.org/en/developers/docs/blocks/)
* [Accounts](https://ethereum.org/en/developers/docs/accounts/)
* [Ethereum Virtual Machine](https://ethereum.org/en/developers/docs/evm/)
* [Gas](https://ethereum.org/en/developers/docs/gas/)
* [Smart Contracts](https://ethereum.org/en/developers/docs/smart-contracts/)

#### Additional Resources <a href="#additional-resources" id="additional-resources"></a>

* [Ethereum Documentation:](https://ethereum.org/en/developers/docs/)[ Ethereum development documentation | ethereum.org](https://ethereum.org/en/developers/docs/)
* [“Best Resources for Learning About Blockchain and Ethereum” on Medium](https://medium.com/upstate-interactive/best-resources-for-learning-about-blockchain-and-ethereum-3c3bb5d2e746)
* [Dapp University YouTube Series on building Dapps with Ethereum:](https://www.youtube.com/c/DappUniversity/playlists)[ Dapp University](https://www.youtube.com/c/DappUniversity/playlists)
* [“The Ethereum Virtual Machine: How Does It Work?”](https://medium.com/mycrypto/the-ethereum-virtual-machine-how-does-it-work-9abac2b7c9e) on [Medium](https://medium.com/mycrypto/the-ethereum-virtual-machine-how-does-it-work-9abac2b7c9e)
* [Chapter 1: What Is Ethereum? · GitBook](https://cypherpunks-core.github.io/ethereumbook/01what-is.html)
* [Chapter 2: Ethereum Basics · GitBook](https://cypherpunks-core.github.io/ethereumbook/02intro.html)


# Transactions and Transaction Costs

A transaction is any action that updates the state of the blockchain. There are costs associated with each transaction that cover the computational cost of processing that transaction. These costs are variable and dependent on several factors, which are discussed [below](https://docs.energyweb.org/legacy-documentation/foundational-concepts/ethereum/transaction-costs#transaction-cost-variables).

This page covers the basic functionality of transactions, how their associated costs are calculated, and where to see transaction data from the Energy Web Chain and Volta Testnet. If you want to read more about the fundamentals of transactions, see the Ethereum documentation on [transactions](https://ethereum.org/en/developers/docs/transactions/), [blocks](https://ethereum.org/en/developers/docs/blocks/), and [gas](https://ethereum.org/en/developers/docs/gas/),

* [Transactions](https://docs.energyweb.org/legacy-documentation/foundational-concepts/ethereum/transaction-costs#transactions)
* [Transaction Cost Variables](https://docs.energyweb.org/legacy-documentation/foundational-concepts/ethereum/transaction-costs#transaction-cost-variables)
* [Calculating Transaction Costs](https://docs.energyweb.org/legacy-documentation/foundational-concepts/ethereum/transaction-costs#calculating-transaction-cost)
* [Gas Price and Block Size](https://docs.energyweb.org/legacy-documentation/foundational-concepts/ethereum/transaction-costs#gas-price-and-block-size)
* [Keeping the Public Transaction Cost Low](https://docs.energyweb.org/legacy-documentation/foundational-concepts/ethereum/transaction-costs#keeping-public-blockchain-transaction-costs-low)
* [Additional Resources](https://docs.energyweb.org/legacy-documentation/foundational-concepts/ethereum/transaction-costs#additional-resources)

### **Transactions** <a href="#transactions" id="transactions"></a>

A transaction is any ‘write’ operation that changes or updates the state of the blockchain. Transactions are always initiated by an [externally owned account](https://ethereum.org/en/developers/docs/accounts/), and they must be signed by the account owner that initiated the transaction in order to be completed. Examples of write transactions includ&#x65;**:**

* Transferring tokens between accounts
* Deploying new smart contracts or accounts
* Calling or Interacting with existing smart contracts

Once confirmed by the initiator, transactions can be in two states: pending and validated.

#### Pending Transactions <a href="#pending-transactions" id="pending-transactions"></a>

In a [Proof-of-Authority](https://docs.energyweb.org/legacy-documentation/ew-dos-technology-components-2023/trust-layer-energy-web-chain/system-architecture/proof-of-authority-consensus-mechanism) consensus blockchain, [validators](https://docs.energyweb.org/legacy-documentation/ew-dos-technology-components-2023/trust-layer-energy-web-chain/system-architecture/proof-of-authority-consensus-mechanism#energy-web-validators) take turn validating transactions and sealing blocks. Before a transaction is validated, it is in a "pending" state in the memory pool ("mempool"). The following image shows a transaction in a "pending" state. You can view all pending transactions on the Energy Web Block Explorer [here.](https://explorer.energyweb.org/pending-transactions)

**Notice that the transaction fee of a pending transaction is not determined yet and the "Block Number" is pending.**

![](https://docs.energyweb.org/~gitbook/image?url=https%3A%2F%2F2400236058-files.gitbook.io%2F%7E%2Ffiles%2Fv0%2Fb%2Fgitbook-legacy-files%2Fo%2Fassets%252F-M_pXALj14Egb-5Bal_p%252F-MhKgp5F9HQ2FJ0rShHF%252F-MhKi8DbhzdVlneJLYT7%252FScreen%2520Shot%25202021-08-17%2520at%25204.05.52%2520PM.png%3Falt%3Dmedia%26token%3D36a7bf5d-21f5-466f-bf41-cc72a45e4fc0\&width=768\&dpr=4\&quality=100\&sign=c1b5f3bf\&sv=2)Transaction in pending state - from Energy Web Block Explorer

#### Validated Transactions <a href="#validated-transactions" id="validated-transactions"></a>

After a transaction is validated by a validator, it is added to a block. The block is designated by a block number, shown in the image below. Each block in a blockchain is made up of strictly ordered, consecutive, validated transactions.

The following image is a transaction in a "validated" state. You can view all validated transactions on the Energy Web Block Explorer [here.](https://explorer.energyweb.org/txs)

**Notice that the transaction fee of a validated transaction is no longer 0, it has a value in EWT.**

![](https://docs.energyweb.org/~gitbook/image?url=https%3A%2F%2F2400236058-files.gitbook.io%2F%7E%2Ffiles%2Fv0%2Fb%2Fgitbook-legacy-files%2Fo%2Fassets%252F-M_pXALj14Egb-5Bal_p%252F-MhKWSDLDpHuAN2Wd74-%252F-MhKXpM-ZhldbxyQJiPb%252FScreen%2520Shot%25202021-08-17%2520at%25203.15.26%2520PM.png%3Falt%3Dmedia%26token%3Dac3158fb-a48c-4ff7-bc2f-0133c0e34d42\&width=768\&dpr=4\&quality=100\&sign=3845a998\&sv=2)

### **Determining Transaction Cost** <a href="#determining-transaction-cost" id="determining-transaction-cost"></a>

Every transaction that updates the chain has a transaction cost (transactions that are "read only" - meaning they do not update the state of the blockchain - do not have a cost.) It’s important to keep in mind that all transactions are not created equal: some are more computationally intensive than others, some are more urgent, some require greater degrees of privacy.

For example, an interaction with a smart contract that has complex functionality and many internal variables to store will be more computationally intensive than a simple transfer of tokens from one account to another.

As we’ll soon see, these differences from one transaction to the next can have an impact on ultimate transaction cost.

#### **Transaction Cost Variables** <a href="#transaction-cost-variables" id="transaction-cost-variables"></a>

**There are three key variables that influence transaction cost:**

#### **1. Gas Cost** <a href="#id-1.-gas-cost" id="id-1.-gas-cost"></a>

A transaction’s computational complexity is measured in[ gas](https://ethereum.org/en/developers/docs/gas/#what-is-gas), a unit that assigns a numeric value to each operational code, or instruction, that will be executed to complete the transaction. The gas cost of a transaction is determined by the amount and sophistication of code that needs to be executed as well as the amount and type of data that will be stored on the blockchain as a result. The more complex the transaction, the higher the gas cost.

#### **2. Gas Price** <a href="#id-2.-gas-price" id="id-2.-gas-price"></a>

To derive a concrete fee requires a gas price as well. Every user that initiates a transaction chooses a gas price they are willing to pay for that particular transaction, at that particular time. It is essentially a bid the user makes to have their transaction validated and added to the chain. Users that want to have their transaction expedited, for example, might bid a higher gas price to ensure that it’s included as soon as possible in the next available block.

Gas price is on the EW Chain is denominated in EWT (usually in minuscule units like [gwei](https://ethereum.org/en/glossary/#gwei), which represent one billionth of an EWT). The price is expressed in tokens (gwei) per unit of gas.

You can specify a gas price in a transaction through MetaMask:

![](https://docs.energyweb.org/~gitbook/image?url=https%3A%2F%2F2400236058-files.gitbook.io%2F%7E%2Ffiles%2Fv0%2Fb%2Fgitbook-legacy-files%2Fo%2Fassets%252F-M_pXALj14Egb-5Bal_p%252F-MhP0m6OxIphD9y2YByS%252F-MhPCkvRstcwRagaKJ8S%252FScreen%2520Shot%25202021-08-18%2520at%25201.01.51%2520PM.png%3Falt%3Dmedia%26token%3D48bdf598-2f8f-4f40-8df9-fa4991f2cda0\&width=768\&dpr=4\&quality=100\&sign=87462724\&sv=2)Gas price of .01 Gwei.

#### **3. Token Value** <a href="#id-3.-token-value" id="id-3.-token-value"></a>

Finally, token value—usually expressed in a fiat currency equivalent—translates virtual transaction cost into ‘real’ transaction cost. And when token value varies widely, perhaps due to token market volatility, resulting transaction costs can vary too.

### **Calculating Transaction Cost** <a href="#calculating-transaction-cost" id="calculating-transaction-cost"></a>

Using the three variables above, you can calculate the total transaction cost:

**TxCost(unit:fiat$) = GasCost(unit:gas) x gasprice(unit:token/gas) x tokenvalue($/token)**

**Here’s how a fee would be calculated for a hypothetical transaction on the Energy Web Chain:**

50,000 gas x 1 gwei per gas = 50,000 gwei = 0.00005 EWT

If the market price of EWT was $1 at the time of the transaction, this would equate to $0.00005 fee. If the price of EWT was $10, this would equate to $0.0005.

### Gas Price, Gas Limits and Block Size <a href="#gas-price-gas-limits-and-block-size" id="gas-price-gas-limits-and-block-size"></a>

To ensure that block time remains consistent and to prevent any given block from being overloaded with transactions, the EW Chain has a predefined limit to the amount of [gas](https://ethereum.org/en/developers/docs/gas/) that can be consumed in each block. Each block on the Energy Web Chain has a size limit of 8 million units of gas.

Gas cost, as we've mentioned, represents the computational effort that validators undertake when validating transactions and sealing blocks. The gas price is denominated in EWT, which is paid to the validators for their work.

Each validator may set their own minimum gas price that they are willing to accept in order to include a transaction in their blocks. Currently on the EWC, the default is 0.1 gwei, but the overall range is between 0.01 gwei and 1 gwei. **When initiating a transaction on the EW Chain, you should make sure that your gas price is at least 0.01 gwei,** and if you want to ensure that your transaction is executed within the next 1-3 blocks (roughly 15 seconds), you should choose a higher gas price.

**Because each transaction uses different amounts of gas, the number of transactions that fit on a block will vary.**

Each block on the Energy Web Chain has a size limit of 8 million units of gas. Hypothetically, a single extremely computationally intensive transaction could consume 8M gas, but a simple transfer of EWT between two accounts (the most basic transaction type there is) consumes 21,000 gas. This is why a simple metric of “transactions per second” is misleading; not all transactions are created equal in terms of complexity (i.e. gas cost.) If many of the transactions that are waiting in the memory pool have low computational cost, you can fit more transactions in the block. If they are larger, the block will hold less transactions.

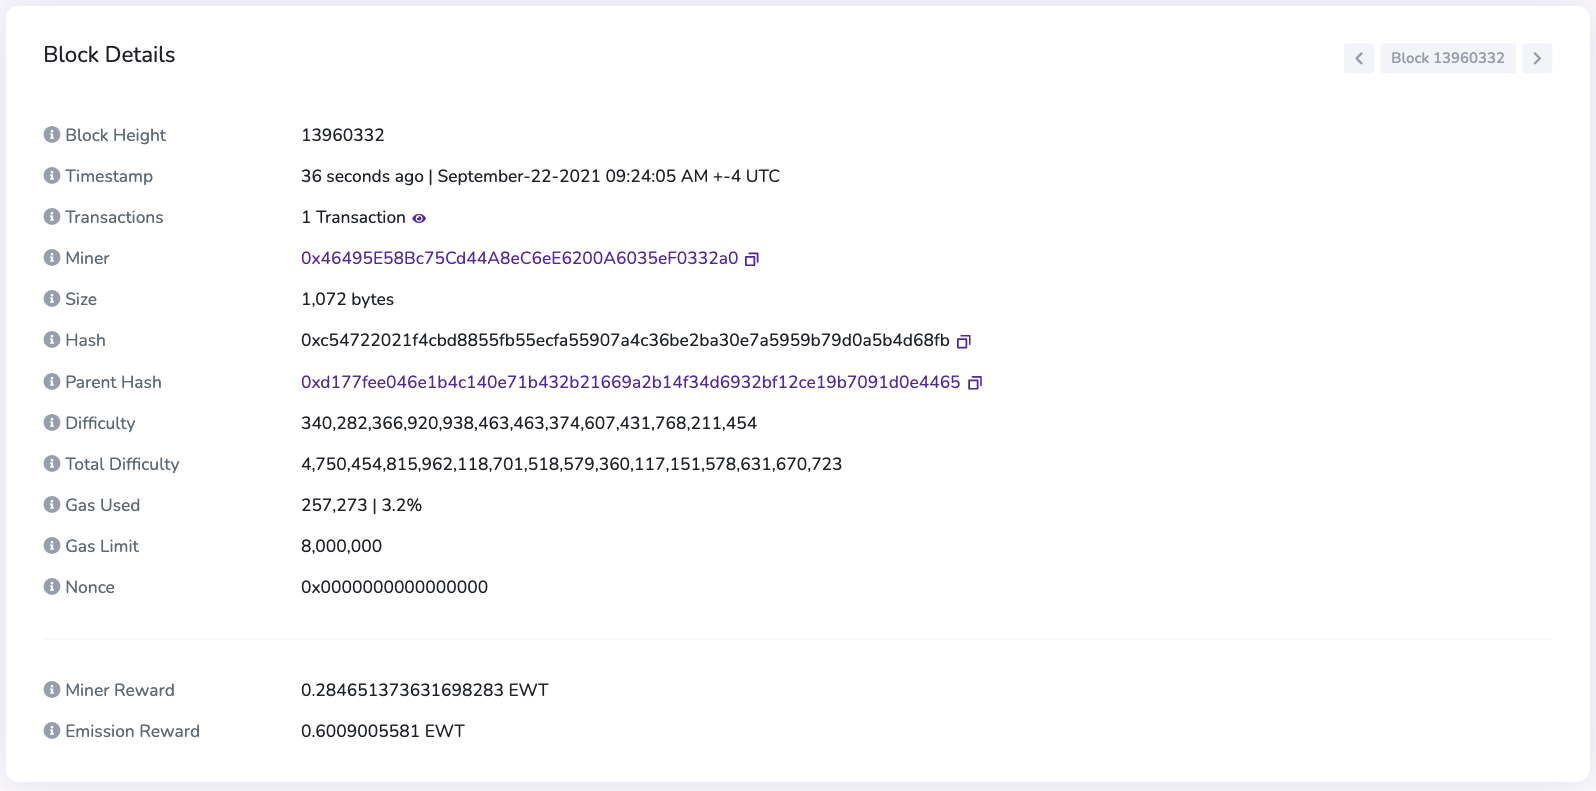
Take a look at the details of a block added to the Energy Web Chain:

![](https://docs.energyweb.org/~gitbook/image?url=https%3A%2F%2F2400236058-files.gitbook.io%2F%7E%2Ffiles%2Fv0%2Fb%2Fgitbook-legacy-files%2Fo%2Fassets%252F-M_pXALj14Egb-5Bal_p%252F-MgfrB6rhZQxe4f7ie76%252F-MggZSgCqnUeKen-PUUl%252FScreen%2520Shot%25202021-08-09%2520at%25202.15.48%2520PM.png%3Falt%3Dmedia%26token%3Dfe203b6f-1d35-4f54-b7aa-cf6d906f54f3\&width=768\&dpr=4\&quality=100\&sign=3b6ffc12\&sv=2)Block Details of a Single Block on the Energy Web Chain

From this we can see that:

* This block includes 43 transactions
* The gas limit for the block is 8,000,000 (this limit remains constant for every block)
* Only 1,553,623 units of gas were used to create the block (less than 20% of its limit)
* If there were more transactions waiting in the memory pool to be added to the block, this block could have processed \~6,446,377 units worth of gas.

**You can see all block and transaction details for the Energy Web production chain at** [**https://explorer.energyweb.org/**](https://explorer.energyweb.org/)**.**

**You can see all block and transaction details for the Volta Testnet at** [**https://volta-explorer.energyweb.org/**](https://volta-explorer.energyweb.org/)**.**

### **Keeping Public Blockchain Transaction Costs Low** <a href="#keeping-public-blockchain-transaction-costs-low" id="keeping-public-blockchain-transaction-costs-low"></a>

The same three variables above that define transaction cost also present opportunities to manage those costs and keep them low.

**1. Lean smart contracts can help keep gas costs down:** App developers and other smart contract writers are incentivized to write lean, efficient code—writing smart contracts and initiating transactions that are as computationally efficient as possible.

**2. Gas price bids should remain low on networks with high transaction capacity:** Of the three variables that contribute to transaction costs, gas prices are arguably the most powerful lever, since the bidded prices are solely at the discretion of the user submitting a transaction to the network. For reasons we’ll explore below, in the absence of sustained block “congestion”, gas prices can remain low and stable.

**3. “Just in time” gas price calculations mitigate some risks of token value volatility:** For a variety of reasons, some token markets are more volatile than others. But just because a token’s value relative to a fiat currency changes, it doesn’t mean that transaction fees similarly change without warning. Users calibrate gas price bids at the time of the transaction, and thus will bid a denomination of tokens relative to the token’s value at the time. While it is possible that a past transaction fee could end up being significantly more or less expensive relative to current (or future) token value, transaction fees at the time they are incurred should remain relatively stable as a function of fiat currency.

#### **If users desire a low-cost network, why do transaction costs rise in the first place?** <a href="#if-users-desire-a-low-cost-network-why-do-transaction-costs-rise-in-the-first-place" id="if-users-desire-a-low-cost-network-why-do-transaction-costs-rise-in-the-first-place"></a>

So why would anyone bid a high price for any transaction? Shouldn’t transaction fees remain very low, as rational users consistently attempt to minimize their costs? In reality, transaction fees vary precisely because of competition among users to get transactions confirmed.

At any given moment there may be hundreds or thousands of transactions waiting to be confirmed and formally added to the blockchain. These pending transactions sit in a memory pool, or "mempool", where they are ultimately selected by validators (miners in the case of proof-of-work blockchains) to be included in a block. But each block has a finite gas limit, meaning not all transactions can be confirmed at once. As a result, validators will typically give preference to the most-lucrative (or expensive, depending on perspective) transactions in the mempool. Transactions with lower fees may end up having to wait for their transaction to get confirmed.

Ultimately, fees are about transaction *prioritization*. The higher the gas price you pay, the faster your transaction will be confirmed. If you don’t care about the amount of time it takes to confirm your transaction, you can offer a very low (or no) gas price. However, with this strategy you run the risk that your transaction never gets confirmed, and just sits in the mempool queue indefinitely.

#### **Lessons from what we know about the Energy Web Chain** <a href="#lessons-from-what-we-know-about-the-energy-web-chain" id="lessons-from-what-we-know-about-the-energy-web-chain"></a>

At the most basic level, transaction fees on the EWC are determined as a function of supply (e.g., computational capacity of the network, as defined by block gas limit and block speed / time) and demand (i.e., number of pending transactions). Volatility comes into the equation because supply, namely block time and block gas limit, is essentially fixed, whereas demand fluctuates as a function of the number of users and and the volume and complexity of transactions in the memory pool at any given time. Occasionally, transaction fee trends diverge from transaction volume, but generally the two are correlated.

Looking at historical data since the launch of the EWC in June 2019, it’s fair to say that transaction fees are usually extremely low - with average block utilization (in terms of gas consumption) around 15-20% the minimum gas price of 0.1 gwei is almost always sufficient to ensure a transaction is validated within 2 blocks. Based on the historical market price of EWT, transaction fees expressed in terms of fiat currency are typically in the range of $0.0001 (or less).

### Additional Resources <a href="#additional-resources" id="additional-resources"></a>

* [Energy Web blog post "How to Manage Transaction Costs on Public Blockchains"](https://energyweb.org/2019/04/01/how-to-manage-transaction-costs-on-public-blockchains/)
* ["Chapter 6: Transactions" from *Mastering Ethereum*](https://cypherpunks-core.github.io/ethereumbook/06transactions.html)
* Ethereum documentation on
  * [Transactions](https://ethereum.org/en/developers/docs/transactions/)
  * [Blocks](https://ethereum.org/en/developers/docs/blocks/)
  * [Gas](https://ethereum.org/en/developers/docs/gas/)


# Decentralized Identifiers (DIDs)

A DID is an identifier that is user-generated and not coupled to any centralized authority. It can be used to identify any subject, such as a non-tangible asset, a customer, or an organization.

Unlike traditional forms of identification, DIDs are not generated by a central authority, such as a government-issued driver’s license, or a bank-issued account number, and they are not stored in a centralized database. A user can create a DID for themselves or an asset using cryptographic or other means.

A DID for a given system resides in a decentralized [DID registry](https://www.w3.org/TR/did-spec-registries/). DID Registries, like VCs and DIDs themselves, are developed according to W3C standards. Most DID registries live on a decentralized ledger, or a blockchain. In the case of EW-DOS, the DID registry is on the [Energy Web Chain](broken://pages/WZkNfBgP8oHVMm5nYhHo).

[Learn more about DIDs](https://www.w3.org/TR/did-core/)

#### **How are DIDs Created?** <a href="#how-are-dids-created" id="how-are-dids-created"></a>

**Public-Private Key Pairs**

A DID is derived from a public-private key pair that is generated programmatically through a cryptographic algorithm. The algorithm produces a private key and a corresponding public key. Crypto wallets such as[ MetaMask](https://metamask.io/) will generate these keys for you on creation of an account. The public key can be exposed and shared with others, **but the private key should not be shared with anyone**. The algorithm used to generate the key-pair makes it virtually impossible for any outsider to guess your private key.

Your public key serves as your address on the blockchain, and your private key serves as your private identifier, similar to a password, and is used to sign [transactions](https://ethereum.org/en/developers/docs/transactions/) on the blockchain. The signature is proof that you initiated that transaction.

#### **DID Format** <a href="#did-format" id="did-format"></a>

DIDs are made up of a [scheme](https://www.w3.org/TR/did-use-cases/#dfn-did-schemes), a [method](https://www.w3.org/TR/did-use-cases/#dfn-did-methods) and a unique method identifier. There are many DID methods that are supported by different blockchain networks. You can see a full list [here. ](https://w3c.github.io/did-spec-registries/#did-methods)DID methods define operations to create, resolve, update and deactivate DIDs and their associated DID Documents, which are discussed below. DID Methods are often associated with a verifiable data registry, which are registries with store DIDs and their data. If the registry is implemented on a blockchain, smart contracts usually serve as the data registry. An example of this is the [did:ethr registry](https://github.com/uport-project/ethr-did).

Energy Web Chain uses the [ETHR DID Method Specification](https://github.com/decentralized-identity/ethr-did-resolver/blob/master/doc/did-method-spec.md). The string that identifies this DID method is "ethr", and the method identifier is always the user’s public key (also known as an address.)

![](https://energy-web-foundation.gitbook.io/~gitbook/image?url=https%3A%2F%2F2400236058-files.gitbook.io%2F%7E%2Ffiles%2Fv0%2Fb%2Fgitbook-legacy-files%2Fo%2Fassets%252F-M_pXALj14Egb-5Bal_p%252F-Mj-UoQ4eaJFceOIJB9z%252F-Mj-XFA6egIDkC8uA7gC%252FScreen%2520Shot%25202021-09-07%2520at%25209.53.07%2520AM.png%3Falt%3Dmedia%26token%3Dd7bac9ce-e68c-4496-92b6-aea3f6eeedcf\&width=768\&dpr=4\&quality=100\&sign=1298917b\&sv=1)DID generated by ID Registry using ETHR DID Method Specification

#### **DID Documents** <a href="#did-documents" id="did-documents"></a>

Every DID resolves to a corresponding [DID document](https://www.w3.org/TR/did-use-cases/#dfn-did-documents), which contains metadata about the subject's authentication mechanisms and attributes, like its public key.

Below is a sample JSON document that was created by the EW-DOS DID library. For a list of required and possible DID Document properties, [see the W3C documentation on DID Document Properties.](https://www.w3.org/TR/did-core/#did-document-properties)

Copy

```
{
   "id":"did:ethr:0x17b65C8C9746F87c82cc6f7C4FC38fCA5f1AeB75",
   "authentication":[
      {
         "type":"owner",
         "validity":{
            "_hex":"0x1fffffffffffff"
         }
      }
   ],
   "created":null,
   "delegates":null,
   "proof":null,
   "publicKey":[
      {
         "id":"did:ethr:0x5B1B89A48C1fB9b6ef7Fb77C453F2aAF4b156d45#key-owner",
         "type":"Secp256k1veriKey",
         "controller":"0x5B1B89A48C1fB9b6ef7Fb77C453F2aAF4b156d45",
         "publicKeyHex":"0x02d0e12da3425d7b01fd2e49b283f939f3a13d71273d749dd8933d3b792bb20078"
      },
      {
         "id":"did:ethr:0x17b65C8C9746F87c82cc6f7C4FC38fCA5f1AeB75#key-owner",
         "type":"Secp256k1veriKey",
         "controller":"0x17b65C8C9746F87c82cc6f7C4FC38fCA5f1AeB75",
         "publicKeyHex":"0x020ee3388dd3db4e3e4da39f2fdc27113161d33579c4d0350b5672bcb654ceff98"
      }
   ],
   "updated":null,
   "@context":"https://www.w3.org/ns/did/v1"
}
```

**Additional Resources on DIDs**

* [W3C DID Documentation](https://www.w3.org/TR/did-core/#introduction)
* [Energy Web - DID Explainer](https://did-explainer.energyweb.org/#/default-dashboard)
* [EW’s DID Library is open-source](https://medium.com/energy-web-insights/ewfs-did-library-is-open-source-1f355c95503e)
* [Energy Web - “Digging Deeper into Self-sovereign Identity and Access Management” on](https://medium.com/energy-web-insights/digging-deeper-into-self-sovereign-identity-and-access-management-e6eefbac631e)[ Medium](https://medium.com/energy-web-insights/digging-deeper-into-self-sovereign-identity-and-access-management-e6eefbac631e)
* [W3C, ](https://w3c-ccg.github.io/did-primer/)["A Primer for Decentralized Identifiers"](https://w3c-ccg.github.io/did-primer/)
* [“Everything you need to know about Self-Sovereign Identity and Decentralized Identifiers” (3 part series) on](https://medium.com/metadium/everything-you-need-to-know-about-self-sovereign-and-decentralized-identities-2e4fb566de90) [Medium](https://medium.com/metadium/everything-you-need-to-know-about-self-sovereign-and-decentralized-identities-2e4fb566de90)
* [Chapter 4: Cryptography · GitBook](https://cypherpunks-core.github.io/ethereumbook/04keys-addresses.html)

Medium Series on private keys and their relevance in the Ethereum Network:

* [Part One: ](https://medium.com/portis/part-one-understanding-private-keys-311389737fbe)[Understanding Private Keys](https://medium.com/portis/part-one-understanding-private-keys-311389737fbe)
* [Part Two:](https://medium.com/portis/part-two-turning-random-numbers-into-an-ethereum-address-3928f56b225c)[ Turning Random Numbers into an Ethereum Address](https://medium.com/portis/part-two-turning-random-numbers-into-an-ethereum-address-3928f56b225c)
* [Part Three: ](https://medium.com/portis/part-three-creating-and-signing-ethereum-transactions-e9cca44d7e2d)[Creating and Signing Ethereum Transactions](https://medium.com/portis/part-three-creating-and-signing-ethereum-transactions-e9cca44d7e2d)

MetaMask[ glossary](https://docs.metamask.io/guide/common-terms.html#words-are-hard) on key terms:

* [Public Key](https://docs.metamask.io/guide/common-terms.html#public-key)
* [Private Key](https://docs.metamask.io/guide/common-terms.html#private-key)


# Energy Web Platform Governance Motions, 2019-2025

Energy Web Chain (EWC) has been governed by Validators based in fifteen countries, representing publicly known and geographically diverse entities, many of whom are subject to strong domestic regulatory supervision regimes. The EWC Validators ranged from large energy-sector market participants (including utilities, grid operators, and cleantech developers) to blockchain and energy startups and had over time grown to about 40 entities. All major Energy Web platform governance motions prior to 2025 technology and governance upgrade are listed below:

**Energy Web Platform Governance Motions:**

***June 2019***

* EWC Launch and Initial Token Allocation

Following a period of research, development and testing (including support to the first [Proof-of-Authority (Kovan) blockchain network](https://rmi.org/press-release/press-release-energy-web-foundation-launch/) and the establishment of [Volta testnet](https://volta-explorer.energyweb.org/)), EWC was officially launched on 16 June 2019 (“Launch”) when the genesis block was approved by the parties responsible for EWC governance (the “Validators”) via system contracts. At Launch, the development of the EW Chain was complete, its protocol was deployed for production, and it was fully operational. Since that time, EWF and other third parties have continued to develop software development kits (SDKs) and decentralized applications; however, it is to be noted developers and users of the EW Chain are not required to access or use the SDKs in order to interact with the EWC (or upgraded EWX), and that EWC/EWX remain operational without any further development of SDKs or deployment of additional decentralized applications.&#x20;

EWC validators also approved an initial allocation of 21.2 million EWT to 102 entities (including some individuals) that provided funds for Energy Web platform development (“Participants”). Participants that purchased EWT prior to April 1, 2018 were not permitted to transfer or otherwise dispose of their EWT until at least September 16, 2019. Participants who made their purchase after April 1, 2018 were required to not transfer their EWT until at least December 16, 2019.  The Validators also approved an allocation of 20.9 million EWT to the Foundation (EWF) and 10 million to its founders, with approximately 35% of the EWF allocation earmarked to pay operational expenses. Including payments to EWF staff and service providers who support and implement the decisions and directives of the Validators (see Table 1 below). The purpose was described in more detail in the [2018 Energy Web White Paper](https://cdn.prod.website-files.com/65e5b22cf7f0480a007420fc/67adf26dc78bbc568191f50b_EWF-Paper-TheEnergyWebChain-v1-201810.pdf) and the updated [2019 Energy Web White Paper](https://cdn.prod.website-files.com/65e5b22cf7f0480a007420fc/67adf26e027740e64f98b5df_EWF-Paper-TheEnergyWebChain-v2-201907.pdf), while the [2020 Energy Web White Paper](https://cdn.prod.website-files.com/65e5b22cf7f0480a007420fc/66636832be155a40f00ea44e_EnergyWeb-EWDOS-PART2-TechnologyDetail-202006-vFinal.pdf), the [2021 Energy Web Light Paper](https://cdn.prod.website-files.com/65e5b22cf7f0480a007420fc/67adf2cf3305692602370a17_dSLA%20Lightpaper.pdf) and the [2023 Energy Web Light Paper](https://assets-global.website-files.com/65e5b22cf7f0480a007420fc/6632318e1bba52472c83eaeb_EWX%20Lightpaper.pdf) detailed the subsequent technical updates, leading up to the Energy Web 2025 Upgrade.

<figure><img src="/files/OeaDizCodAADlxyaNdZk" alt=""><figcaption></figcaption></figure>

Table 1: EWT Token Allocation, June 2019

* Rough Consensus Model: Validators adopted an interim off-chain “rough consensus” approach for adding/removing validators, protocol/client updates, and governance changes, relying on EWF support to protect a transparent decision framework while the validator set was still small.

<br>

***July and August 2019***

* Validator Eligibility Criteria: In July 2019, Validators approved criteria requiring validators to be legally registered organizations, active EWF Members, and to have proven technical competence by having run a Volta testnet validator.&#x20;
* Energy Web Token (EWT) Listing:  In July 2019, Validators discussed exchanges’ listing as a key step to decentralize token supply and support utility token classification, and supported moving forward, beginning with the Liquid exchange listing, tasking EWF to administratively support the registration process, and then consider other exchanges, including the US once there is more regulatory clarity. In August a Liquid Listing Date was approved for September. Validators also discussed the risks of maintaining a default minimum gas price of zero and supported a recommendation to raise the minimum to 1 Gwei (0.000000001 EWT). This was intended to reduce exposure to spam or DDoS attacks while keeping fees low relative to Ethereum. Validators noted the need to recalibrate the minimum gas price over time in response to market conditions, balancing security with affordability for developers and users.

***September 2019***&#x20;

* Validator Eligibility / Transition from Affiliate to Member Program: Validators deliberated on the shift from the one-time EWF Affiliate MOU to an annual EWF Membership model beginning in 2020 as a key requirement for validator eligibility. The new structure requires members to actively support EWF’s mission, contribute to the ecosystem, pay fees or provide in-kind contributions, and demonstrate commercial activity or developer engagement. Validators discussed safeguards for smaller companies, including potential staking or multi-sig payout mechanisms. They agreed that the updated criteria would apply equally to existing and new entrants.
* Transitioning from Interim Governance Model: With nearly 20 validators across 14 time zones, validators agreed that the rough consensus model based on monthly calls was no longer scalable. EWF was tasked with documenting the governance processes and introducing signaling vote tools by year-end, with formal validator votes replacing reliance on silence as tacit agreement, thereby creating a clearer audit trail for validator decisions.&#x20;

***October 2019***

* Formal Voting Mechanism: Validators agreed to replace the rough consensus model with a formal off-chain voting process on the EW Chain Governance Forum (Discourse). Voting delegation was disallowed, participation will be monitored by EWF, one voting event (five business days) per month will be scheduled, and decisions will pass by simple majority (no incentives/penalties for now). The first vote was scheduled for the week of November 11, 2019. &#x20;
* Validator Eligibility / EW Membership: Validators prioritized two mechanisms for future eligibility rules: (i) requiring small companies (<$5m annual revenue) to stake block rewards for a set period, and (ii) clearer membership criteria and transparency for EWF Members. A formal proposal to require small companies to stake mined tokens for one year, applying either to all or only to new entrants from 2020, was prepared for a November vote.&#x20;

***November 2019***

* Validator Token Staking: Validators discussed and rejected a motion to demand from new validators to lock block rewards in escrow for 1 year to build reputation and deter malicious behavior.  The decision tally was as follows: 9 Yes, 13 No, 2 abstained.
* Emergency Operating Procedures: Validators retired the legacy “Node Control” tool and established formal EOPs, authorizing temporary removal of validators or node updates by EWF in emergencies (e.g. unplanned forks, malicious/benign failures), subject to validator review within 48 hours. The decision tally was as follows: 17 Yes, 3 No. Validators also discussed the need for better visibility into node stability, with suggestions including dashboards, netstats-style pages, and sharing monitoring scripts. EWF was tasked with investigating the feasibility and resource requirements for a netstats-like monitoring tool while emphasizing that each validator remains responsible for monitoring its own node.

***December 2019***

* Ethereum Istanbul Hard Fork Alignment: Validators approved adoption of Ethereum’s Istanbul hard fork (EIPs 152, 1108, 1344, 1884, 2028, 2200) to align EWC with Ethereum mainnet improvements. Implemented via a 5-stage rollout plan (Volta test updates, validator client upgrades, chainspec updates, fork observation). The decision tally was as follows: 14 Yes, 2 Abstain. In two subsequent discussions in December they deliberated on the governance of the EWT Community Fund and the 2020 validator eligibility criteria but no new decisions were made.&#x20;

<br>

***January 2020***

* Validator Eligibility 2020 and Beyond: Validators confirmed that their participation in the EWF Membership program remains the primary eligibility criterion, as it provides KYC and financial commitment required under PoA mechanism. Validators who did not renew membership were removed on 17 January 2020. Future improvements to the membership process and potentially a queue for new applicants was discussed. No minimum validator count was set, but diversity across regions and business models was emphasized. There were also additional discussions on the governance mechanism for the Community Fund, which is open to the entire ecosystem, but no specific decisions were made on that topic.

***February 2020***

* Nethermind Client Funding: Validators approved a community funding allocation for development of a Nethermind AuRa client (sealing mode, telemetry integration, Docker support, docs). Deliverables were funded in two phases totaling 2,877 EWT. The decision tally was as follows: 19 Yes (unanimous). <br>

***April 2020***

* Update on EWT Status: EWF reported to validators on the assignment to engage with external counsel and regulators to ensure utility classification. As a result, it was agreed that EWF would proceed with the global, including US-accessible exchange listings, starting with Bitmart on 8 May 2020. The validators were also informed that the EWC-ETH bridge is now production ready, enabling listings on Ethereum-based DEXs such as IDEX. Energy Web Wallet integration with Ledger via MyCrypto was also reported.&#x20;
* Technical Updates on Operating, Monitoring, and Maintaining Validator Nodes: EWF reported that it is setting up ENS on Volta and EWC, offering one free domain per member for the first year (future pricing TBD), pursuant to received directives from the validators. Validators noted the transition from Parity to OpenEthereum, with v2.7.x being the final Parity-branded update and introducing a non-backwards-compatible chain DB format. Concerns were raised about validator liability if third parties use alternative clients and it was agreed that a working group and governance forum post would be created to explore liability limitations and user terms.&#x20;

***May 2020***

* Community Fund Governance: Validators reviewed a draft governance model for the Community Fund, prepared by EWF based on prior validator discussion. It allocates one-third of tokens respectively to (i) an EW Chain Account governed by validators for technology development, (ii) an EW Operating Account for the Foundation’s mission and development of additional open-source components, and (iii) a Decarbonization Account for grants and environmental certificates. Validators supported the model in principle, with feedback on clarifying scope between validator vs. Foundation governance, structuring grants to mitigate token volatility, and ensuring proposals are denominated in EWT. EWF was tasked with refining the document, creating a new forum section for EWC Account proposals, and incorporating all validator inputs. <br>

***June 2020***

* New Member / Validator Onboarding Process: Validators reviewed a new formal application process requiring validator entities to pass KYC/AML, demonstrate legitimate business activities aligned with EWF’s mission, and provide references. The EWF NetOps team was tasked with reviewing applications and sharing them with validators for comment and approval. Validators supported a case-by-case approach for non-energy companies and suggested creating a template to categorize validators and publish public-facing information.
* Community Fund Governance: Validators deliberated and approved the updated, three-part Community Fund model in principle: (i) ⅓ reserved for EW Chain core infrastructure, governed by validators; (ii) ⅓ reserved for EWC operations and development of a utility layer, including EW-DOS development, with governance delegated to EWF; (iii) ⅓ reserved for an “Impact” fund to support wider adoption of EW technology. Grants to be denominated in EWT. Final approval was expected by July, after which funding proposals could be accepted. Validators also agreed to publish external discussion summaries for enhanced transparency, while maintaining validator-only forums for the discussions. They also noted the release of Parity 2.7.2-stable, the last Parity-branded client before OpenEthereum. Plans were approved to update Volta and EWC nodes by the end of June, with further testing required for OpenEthereum compatibility. Validators also discussed the resilience benefits of multi-client diversity and considered a future Community Fund proposal to fund Nethermind development to production grade, including telemetry and installation scripts.&#x20;

***July and August 2020***

* Energy Web Community Fund: The three-part governance mechanism for the Community Fund was formally implemented. In July 2020, validators adopted Proposal 04 to award 2,877 EWT to Nethermind to develop a production-ready client for EWC to improve chain resiliency, funded from Chain Reserve on a deliverables-based schedule, by a vote of 20 in favor and 4 not voting. The Operations Reserve funded the Innovation Challenge, awarding 3,700 EWT to winning and runner-up teams. EWF also reported on building a monitoring tool to track balances across reserves. The new Nethermind Client Testing began mid-August 2020 when validators agreed to a soft target of at least three nodes adopting Nethermind once stable, while leaving final client choice to each validator.
* New Member / Validator Applications: Validators noted that the new formal application and KYC process for prospective members came into effect, though no new applications were received in July 2020. In August 2020, two new applicants were approved under the formal application and KYC process – Vodafone and Zytech Solar.
* EWC Client Update – OpenEthereum 2.7.2: Significant issues with Parity/OpenEthereum 2.7.2 led validators to downgrade Volta nodes and keep EWC nodes on v2.5.13-stable. No further client updates will proceed until OpenEthereum issues are resolved.&#x20;

***December 2020***

* Bug Bounty Program:  Validators established an EW-DOS Technical Committee, composed of representatives from validator organizations, to manage bug reports, with tiered EWT rewards (Low–Critical), with work funded from Community Fund reserves. The decision tally was as follows: 21 Yes (unanimous).&#x20;

***May 2021***

* Upgrade OpenEthereum Client & Berlin Hard Fork for Validator Nodes: Validators agreed to align EWC with Ethereum’s Berlin upgrade by moving validator nodes to OpenEthereum v3.2.5 and activating EIPs 2565 (ModExp gas), 2718 (typed tx envelope), 2929 (state access gas increases), and 2930 (access lists). Execution followed a staged plan across Volta to EWC, with defined observation windows and rollback contingencies. The decision tally was as follows: 37 Yes (unanimous).&#x20;

***August 2021***

* Community Fund Grant: Anyblock Analytics Validator Accounting Tool: Validators approved a funding allocation for an accounting dashboard to help validators track and verify EWT rewards (block rewards/fees) and transactions. The decision tally was as follows: 28 Yes (unanimous).&#x20;

***September 2021***

* London Upgrade, EIP-1559 & related EIPs:  Validators agreed to implement Ethereum’s London Upgrade on EWC (EIPs 1559, 3198, 3529, 3541, 3554), with a streamlined process vs. Berlin Upgrade: all validators to update within set windows; self-reporting via forms; non-compliant nodes to be temporarily removed; staged Volta observation, EWC activation with public comms. The decision tally was as follows: 37 Yes (unanimous).<br>

***November 2021***

* Community Fund Grant: Trust Wallet, Bl0x: Validators approved a funding allocation (grant) to Bl0x to add native EWT to Trust Wallet (chain/address/signing logic, tests, open-source PRs), implement WalletConnect, and co-author user documentation. The decision tally was as follows: 35 Yes (unanimous).

***December 2021***

* Validator Code of Conduct Update : Validators amended the Code of Conduct to integrate objective enforcement including thresholds around Node health, uptime, meeting attendance, voting participation (rolling 6 months). Any violations are to trigger escalation suspensions/expulsion; compliance tracked via a public validator dashboard. The decision tally was as follows: 23 Yes, 9 No.<br>

***March 2025***

* Energy Web Architecture Upgrade Proposal (Zurich Hard Fork): Validators approved the Energy Web 2025 Upgrade, transforming the Energy Web platform architecture from membership-based PoA validation on EWC to permissionless, nominated PoS validation on EWX Polkadot parachain, with the following key features: EWT migration to ERC-20 on Ethereum, on-chain treasury governance replacing exclusively validator-managed Community Fund and decentralising platform governance overall, as well as  permissionless staking options (collators, liquid restaking; Verified Compute Cloud staking with stEWT facilitated by Worker Node Network pallet) and multi-asset enablement as BYOT for verified compute reward payout fees.&#x20;

<br>


# Energy Web Chain

The Energy Web Chain (EWC) is an open-source, [Proof-of-Authority](/ewc-validator-documentation/ewc-governance/proof-of-authority-consensus-mechanism) public blockchain [derived from Ethereum](/core-concepts/ethereum) blockchain technology. It is the foundational trust and persistence layer of EW-DOS.

The blockchain performs three key functions in EW-DOS:

1. Provides the smart contract mechanism to store [decentralized identities](/core-concepts/decentralized-identifiers-dids) (DIDS)
2. Facilitates on-chain verification and transactions between parties
3. Executes smart contracts that are used by EW-DOS's decentralized applications, SDKs and utility packages.‌

<figure><img src="https://energy-web-foundation.gitbook.io/~gitbook/image?url=https%3A%2F%2F2400236058-files.gitbook.io%2F%7E%2Ffiles%2Fv0%2Fb%2Fgitbook-x-prod.appspot.com%2Fo%2Fspaces%252F-M_pXALj14Egb-5Bal_p%252Fuploads%252FY2Jt87waiIIPHkHv0h2a%252FEnergy%2520Web%2520Decentralized%2520Operating%2520System_1.jpg%3Falt%3Dmedia%26token%3D150ce9a6-0755-4413-8050-09d545256f98&#x26;width=768&#x26;dpr=4&#x26;quality=100&#x26;sign=fe0379a4&#x26;sv=1" alt=""><figcaption></figcaption></figure>

You can read more about the Proof-of-Authority consensus mechanism [here](/ewc-validator-documentation/ewc-governance/proof-of-authority-consensus-mechanism).

The blockchain **provides trust** in several ways that allow for a decentralized system that is self-executing and without central authority or oversight of on-chain transactions:

1. **The data in each block is immutable and unchangeable.** Each [block in a blockchain](https://ethereum.org/en/developers/docs/blocks/) is linked to the previous block by a cryptographically created hash. If one block is tampered with, the hash of every subsequent block in the chain would be need to be updated. Because Validators' consensus is required to create new blocks, a block with an alternative transaction history would be rejected by Validators.
2. **Smart contracts provide automated logic for on-chain actions.** Transactions on the chain are governed by code called [smart contracts](https://ethereum.org/en/developers/docs/smart-contracts/) that contain explicit logic and requirements for actions to occur. When specific conditions are met, the code will self-execute. Once a smart contract is deployed on the blockchain, it cannot be changed or reversed, removing the risk that anyone can update the logic of the contract for personal gain.
3. **Cryptographic verification is required for** [**on-chain transactions**](https://ethereum.org/en/developers/docs/transactions/#whats-a-transaction)**.** In order for an individual to verify any on-chain transaction, they must sign the transaction using their private key. This makes it impossible to perform a transaction unless you have the private key.

#### Persistence on the Energy Web Chain <a href="#persistence-on-the-energy-web-chain" id="persistence-on-the-energy-web-chain"></a>

The Energy Web Chain stores the following information:

* Smart contracts for [Decentralized Identities (DIDs) ](/core-concepts/decentralized-identifiers-dids)that are created through EW-DOS's identity and access management library.
* Smart contracts that govern validator consensus behavior and remuneration. These are known as [system contracts](https://energy-web-foundation.gitbook.io/energy-web-documentation/legacy-documentation/ew-dos-technology-components-2023/trust-layer-energy-web-chain/system-architecture/system-contracts).
* Smart contracts that implement other Ethereum network protocols, such as permissioning and [the OpenEthereum client](https://energy-web-foundation.gitbook.io/energy-web-documentation/legacy-documentation/ew-dos-technology-components-2023/trust-layer-energy-web-chain/system-architecture/system-contracts#implementing-client-protocol) protocols.
* Smart contracts that contain logic and functionality specific to applications deployed on the Energy Web Chain and the utility packages that connect them and their users to the Energy Web Chain.

If you're not familiar with Smart Contracts, you can read Ethereum's introduction to smart contracts [here](https://ethereum.org/en/developers/docs/smart-contracts/).

You can see a list of repositories containing EW-DOS smart contracts [here](https://energy-web-foundation.gitbook.io/energy-web-documentation/legacy-documentation/ew-dos-technology-components-2023/trust-layer-energy-web-chain/ewc-guides-and-tutorials/interacting-with-a-smart-contract#ew-dos-smart-contracts).


# System Architecture

The Energy Web Chain is comprised of different components that provide the functionalities determined by the blockchain’s protocol.

Broadly speaking, protocols are defined rules and standards. Internet protocols, like HTTP protocol for example, define standard procedures for the transfer of data over the internet.

A blockchain network is no different. In a decentralized and self-executing system like a public blockchain, protocols are of significant importance in establishing how the system works, and then ensuring that the system continues to self-execute as designed.

Protocols exist to determine specific aspects of blockchain behavior, such as:

* How transactions are validated
* Who gets to validate transactions and when
* How validators are compensated
* How peer nodes interact with each other

The system components below ensure that the Energy Web blockchain adheres to Ethereum's protocols, and the protocols established by OpenEthereum's [Proof-of-Authority consensus engine](https://openethereum.github.io/Proof-of-Authority-Chains). (OpenEthereum is the Ethereum client that is used by the Energy Web Chain.&#x20;

### System Components <a href="#system-components" id="system-components"></a>

#### [1. System Contracts](https://energy-web-foundation.gitbook.io/energy-web-documentation/legacy-documentation/ew-dos-technology-components-2023/trust-layer-energy-web-chain/system-architecture/system-contracts) <a href="#id-1.-system-contracts" id="id-1.-system-contracts"></a>

System Contracts are [smart contracts ](https://ethereum.org/en/developers/docs/smart-contracts/)that implement the [Authority Roundtable Proof-of-Authority consensus engine](https://openethereum.github.io/Proof-of-Authority-Chains) protocols. Read more about Energy Web's system contracts [here.](https://energy-web-foundation.gitbook.io/energy-web-documentation/legacy-documentation/ew-dos-technology-components-2023/trust-layer-energy-web-chain/system-architecture/system-contracts)

#### [2. Validator Node Architecture](https://energy-web-foundation.gitbook.io/energy-web-documentation/legacy-documentation/ew-dos-technology-components-2023/trust-layer-energy-web-chain/system-architecture/validator-node-architecture) <a href="#id-2.-validator-node-architecture" id="id-2.-validator-node-architecture"></a>

The validator node architecture monitors validator behavior to ensure consistent and secure blockchain operation. Read more about the validator node architecture [here.](https://energy-web-foundation.gitbook.io/energy-web-documentation/legacy-documentation/ew-dos-technology-components-2023/trust-layer-energy-web-chain/system-architecture/validator-node-architecture)


# Proof-of-Authority Consensus Mechanism

In a centralized system, such as a bank or a broker, a designated authority or central operating system would be in charge of adding transactions or information to the system, making sure that each transaction is trustworthy, up to date with the whole system, and does not duplicate previous transactions.

In contrast, public blockchains are decentralized, peer-to-peer systems that have no central authority or oversight like this. Designated actors are responsible for processing transactions, creating new blocks and maintaining the integrity and history of previous blocks.

**The system for determining these actors and how they are selected is called a** [**consensus mechanism**](https://ethereum.org/en/developers/docs/consensus-mechanisms/)**.** These mechanisms determine the process of who can confirm transactions and create new blocks on the blockchain and the protocol for how they do so. Because there is no central oversight, consensus needs to be designed in a way that prevents or disincentivizes malicious or uninformed actors from corrupting the integrity of the chain.&#x20;

There are many consensus algorithms. You may have heard of some widely used ones like [Proof-of-Work](https://ethereum.org/en/developers/docs/consensus-mechanisms/#proof-of-work) or [Proof-of-Stake](https://ethereum.org/en/developers/docs/consensus-mechanisms/#proof-of-stake'). Each mechanism has its own way of determining who is eligible to process transactions and create new blocks, and how how actors are selected to do so.

**The Energy Web Chain uses the Proof-of-Authority (PoA) consensus mechanism.**&#x20;

&#x20;All consensus mechanisms have disadvantages and advantages and are chosen based on the purpose and use case of the blockchain it will be serving.[ Read more about why Energy Web employs the Proof-of-Authority mechanisms.](/ewc-validator-documentation/ewc-governance/proof-of-authority-consensus-mechanism)


# System Contracts

System contracts are the Energy Web Chain's[ smart contracts](https://ethereum.org/en/developers/docs/smart-contracts/) that implement OpenEthereum's protocols for [Aura Proof-of-Authority consensus mechanism](https://openethereum.github.io/Proof-of-Authority-Chains).&#x20;

Energy Web's smart contracts are open-sourced, and you can see them on github [here. ](https://github.com/energywebfoundation/ewc-system-contracts)

* [Validator Set Contracts](/ewc-ecosystem/energy-web-chain/system-architecture/system-contracts/validator-set-contract) - manage validator permissioning and behavior
* [Reward Contract](/ewc-ecosystem/energy-web-chain/system-architecture/system-contracts/block-reward-contract) - manages validator block rewards
* [Holding Contract ](/ewc-ecosystem/energy-web-chain/system-architecture/system-contracts/holding-contract)- manages the initial disbursement of pre-mined energy web tokens

## **Implementing Client Protocol**

System contracts are the Energy Web Chain’s smart contracts that implement [OpenEthereum’s permissioning protocols](https://openethereum.github.io/Permissioning). These protocols determine what actions can be taken on the network.

In order to adhere to the expected protocol, the Energy Web Chain’s system contracts must implement the interfaces that are expected by the AuRa consensus engine, so that it can conform to the client’s protocols.&#x20;

Let’s take [OpenEthereum's Validator-Set](<https://openethereum.github.io/Validator-Set >) contract as an example.&#x20;

**The OpenEthereum documentation specifies that&#x20;*****“A simple validator contract has to have the following interface”***

```
[
    {
        "constant": false,
        "inputs": [],
        "name": "finalizeChange",
        "outputs": [],
        "payable": false,
        "type": "function"
    },
    {
        "constant": true,
        "inputs": [],
        "name": "getValidators",
        "outputs": [
            {
                "name": "_validators",
                "type": "address[]"
            }
        ],
        "payable": false,
        "type": "function"
    },
    {
        "anonymous": false,
        "inputs": [
            {
                "indexed": true,
                "name": "_parent_hash",
                "type": "bytes32"
            },
            {
                "indexed": false,
                "name": "_new_set",
                "type": "address[]"
            }
        ],
        "name": "InitiateChange",
        "type": "event"
    }
]
```

Now let’s look at Energy Web’s [ValidatorSetRelay smart contract](https://github.com/energywebfoundation/ewc-system-contracts/blob/master/contracts/validatorset/ValidatorSetRelay.sol).&#x20;

You can see that this smart contract implements all of the functions of the Validator-Set protocol interface that was specified above.&#x20;

```
pragma solidity 0.5.8;

import "../misc/Ownable.sol";
import "../interfaces/IValidatorSetRelay.sol";
import "../interfaces/IValidatorSet.sol";
import "../interfaces/IValidatorSetRelayed.sol";


/// @title Validator Set Relay contract
/// @notice This owned contract is present in the chainspec file. The Relay contract
/// relays the function calls to a logic contract called Relayed for upgradeability
contract ValidatorSetRelay is IValidatorSet, IValidatorSetRelay, Ownable {

    /// System address, used by the block sealer
    /// Not constant cause it is changed for testing
    address public systemAddress = 0xffffFFFfFFffffffffffffffFfFFFfffFFFfFFfE;
    
    /// Address of the inner validator set contract
    IValidatorSetRelayed public relayedSet;

    /// Emitted in case a new Relayed contract is set
    event NewRelayed(address indexed old, address indexed current);

    modifier nonDefaultAddress(address _address) {
        require(_address != address(0), "Address cannot be 0x0");
        _;
    }

    modifier onlySystem() {
        require(msg.sender == systemAddress, "Sender is not system");
        _;
    }

    modifier onlyRelayed() {
        require(msg.sender == address(relayedSet), "Sender is not the Relayed contract");
        _;
    }

    constructor(address _owner, address _relayedSet)
        public
    {
        _transferOwnership(_owner);
        _setRelayed(_relayedSet);
    }

    /// @notice This function is used by the Relayed logic contract
    /// to iniate a change in the active validator set
    /// @dev emits `InitiateChange` which is listened by the Parity client
    /// @param _parentHash Blockhash of the parent block
    /// @param _newSet List of addresses of the desired active validator set
    /// @return True if event was emitted
    function callbackInitiateChange(bytes32 _parentHash, address[] calldata _newSet)
        external
        onlyRelayed
        returns (bool)
    {
        emit InitiateChange(_parentHash, _newSet);
        return true;
    }

    /// @notice Finalizes changes of the active validator set.
    /// Called by SYSTEM
    function finalizeChange()
        external
        onlySystem
    {
        relayedSet.finalizeChange();
    }

    /// @notice This function is used by validators to submit Benign reports
    /// on other validators. Can only be called by the validator who submits
    /// the report
    /// @dev emits `ReportedBenign` event in the Relayed logic contract
    /// @param _validator The validator to report
    /// @param _blockNumber The blocknumber to report on
    function reportBenign(address _validator, uint256 _blockNumber)
        external
    {
        relayedSet.reportBenign(
            msg.sender,
            _validator,
            _blockNumber
        );
    }

    /// @notice This function is used by validators to submit Malicious reports
    /// on other validators. Can only be called by the validator who submits
    /// the report
    /// @dev emits `ReportedMalicious` event in the Relayed logic contract
    /// @param _validator The validator to report
    /// @param _blockNumber The blocknumber to report on
    /// @param _proof Proof to submit. Right now it is not used for anything
    function reportMalicious(address _validator, uint256 _blockNumber, bytes calldata _proof)
        external
    {
        relayedSet.reportMalicious(
            msg.sender,
            _validator,
            _blockNumber,
            _proof
        );
    }

    /// @notice Sets the Relayed logic contract address. Only callable by the owner.
    /// The address is assumed to belong to a contract that implements the
    /// `IValidatorSetRelayed` interface
    /// @param _relayedSet The contract address
    function setRelayed(address _relayedSet)
        external
        onlyOwner
    {
        _setRelayed(_relayedSet);
    }

    /// @notice Returns the currently active validators
    /// @return The list of addresses of currently active validators
    function getValidators()
        external
        view
        returns (address[] memory)
    {
        return relayedSet.getValidators();
    }

    /// @dev The actual logic of setting the Relayed contract
    function _setRelayed(address _relayedSet)
        private
        nonDefaultAddress(_relayedSet)
    {
        require(
            _relayedSet != address(relayedSet),
            "New relayed contract address cannot be the same as the current one"
        );
        address oldRelayed = address(relayedSet);
        relayedSet = IValidatorSetRelayed(_relayedSet);
        emit NewRelayed(oldRelayed, _relayedSet);
    }
}
```


# Name registry

Energy Web has deployed [OpenEthereum's Name Registry contract.](https://github.com/openethereum/name-registry) This contract is identical to OpenEthereum's original contract, with the exception that it was made Ownable by Energy Web Foundation. Only Energy Web can reserve a name or drain funds from this contract.&#x20;

There are two reasons for making this contract Ownable:

1. OpenEthereum's name registry might be needed for other OpenEthereum related system contracts later: e.g. [service transaction checker](https://wiki.parity.io/Permissioning.html#gas-price), or [auto updater](https://wiki.parity.io/Automatic-Updating).
2. We will have the official [Ethereum Name Service](https://ens.domains/) system set up on the chain, so this contract is only needed for internal purposes and will not be used publicly.

The name registry is a placeholder for now. The contract can be found in our repo: <https://github.com/energywebfoundation/ewc-system-contracts/tree/master/contracts/registry>

## Interacting with the Name Registry Contract

### Contract Address and ABI

| Contract       | Address                                    | JSON ABI                                                         |
| -------------- | ------------------------------------------ | ---------------------------------------------------------------- |
| SimpleRegistry | 0x1204700000000000000000000000000000000006 | <https://gist.github.com/ngyam/255a461e2241085a6530d455f7c15529> |

### Callable Functions

| Function                   | Description                                                           |
| -------------------------- | --------------------------------------------------------------------- |
| entries(bytes32)           | Returns an entry based on the sha3 hash of the name registered.       |
| reverse(address)           | Reverse resolution of an address.                                     |
| fee()                      | Returns the fee for reserving a name (not really relevant to public). |
| getData(bytes32,string)    | Returns a string data value from an entry, given its key.             |
| getAddress(bytes32,string) | Returns an address data value from an entry, given its key.           |
| getUint(bytes32,string)    | Returns an unsigned integer data value from an entry, given its key.  |
| getOwner(bytes32)          | Returns the owner of an entry.                                        |
| hasReverse(bytes32)        | Returns true if entry has a reverse address registered.               |
| getReverse(bytes32)        | Returns reverse address of an entry.                                  |
| canReverse(address)        | Returns true if address can have a reverse.                           |
| reverse(address)           | Returns the reverse value of an address.                              |
| reserved(bytes32)          | Returns true if the name (its sha3 hash) is already reserved.         |


# Holding Contract

## Overview

The Holding Contract holds tokens for initial investors. These tokens are "pre-mined", and do not enter the pool through block validation. Tokens are held for affiliates until a specific point of time that is specified in the contract, at which point they can be released to the specified address. The constructor of the holding contract and its initial balance is part of the chainspec file. This allows the investors' tokens to be locked at the first block.&#x20;

The mapping between the account address and the token amount is hard coded into the contract and cannot be changed after deployment. After a  block that has a later timestamp than the holding timestamp of an address is created,   the tokens for that address can be transferred to the address by calling the realeaseFunds method. This method can be called by anyone, not only by the address that holds that balance. &#x20;

<figure><img src="/files/s8GdLp6AHCLqK687Kxhn" alt=""><figcaption><p>Interaction with Holding Contract</p></figcaption></figure>

### Documentation and Source Code

* [Energy Web Holding Contract ](https://github.com/energywebfoundation/ewc-system-contracts/tree/master/contracts/vesting)

## Check a Balance and Withdraw Funds

If you're an investor and want to see your balance, you can use the Balance Viewer interface: <http://balance.energyweb.org/>[.](http://balance.energyweb.org/)

You will need MetaMask pointed to a local or a remote node&#x20;

* To learn how to connect via remote RPC, go [here](/ewc-ecosystem/ewc-guides-and-tutorials/set-up-metamask-to-interact-with-energy-web-chain)
* To learn how to run a local node go [here](/ewc-ecosystem/ewc-guides-and-tutorials/run-a-local-rpc-node)

1. Enter your address in the lookup field to see your holding balance
2. If the release period has ended, press the "Withdraw" button to release the funds to the address it belongs to. **Make sure you trigger the withdraw function with an account that has some ethers to cover transaction costs**

<figure><img src="/files/Adlv1er93CQ0z4jK8SKI" alt=""><figcaption><p>Holding Contract User Interface</p></figcaption></figure>

## Mapping Between Address and Tokens

The mapping between addresses and tokens/release timestamp is kept in the storage of this contract. This mapping data structure was filled at the deploy time of the contract and cannot be changed.&#x20;

```
mapping (address => Holder) public holders;

// -- snip --

struct Holder {
    uint256 availableAmount;
    uint256 lockedUntilBlocktimestamp;
}

// -- snip --

// in the constructor
addHolding(0x120470000000000000000000000000000000000a, 10000000000000000000000000, 1564509540);
```

## Interacting with the Holding Contract

### Contract Address and ABI

| Contract | Address                                    | JSON ABI                                                         |
| -------- | ------------------------------------------ | ---------------------------------------------------------------- |
| Holding  | 0x1204700000000000000000000000000000000004 | <https://gist.github.com/ngyam/4393eb96ada896b62afc922b760c6802> |

### Callable Functions

| Function Name         | Description                                                                                             |
| --------------------- | ------------------------------------------------------------------------------------------------------- |
| releaseFunds(address) | Releases funds for a holding address if it is present in the contract and the holding period is over    |
| holders(address)      | Returns the holding data for an address, the available amount and the holding-period-end blocktimestamp |
| TARGET\_AMOUNT()      | Returns the total amount initially held by the contract                                                 |


# Block Reward Contract

## Overview

The Block Reward contract manages block reward payouts to validators. Block rewards are issued as native Energy Web tokens that are minted by the engine.&#x20;

Two entities are rewarded by each created block:

1. The block author (validator)
2. [The community fund](https://medium.com/energy-web-insights/the-energy-web-community-fund-9765cc24f2c4)

<figure><img src="/files/SoFwgssguMZU5Mm6YamB" alt=""><figcaption><p>Interaction graph for the block reward contract</p></figcaption></figure>

### Documentation and Source Code

* [Energy Web Block Reward Contract](https://github.com/energywebfoundation/ewc-system-contracts/tree/master/contracts/reward)
* [OpenEthereum documentation on Block Reward Contract](https://openethereum.github.io/Block-Reward-Contract)

## Block Reward Payouts&#x20;

### Block Authors

Block authors are rewarded each time they seal a block. The amount issued to block authors decreases over time, as depicted by the Discreet S Curve.&#x20;

Calculator: <https://github.com/energywebfoundation/discrete-scurve-calculator>

<figure><img src="/files/I7q4Wow7apbpeVd3326p" alt=""><figcaption><p>Fig. 2.: Discrete inverse S curve use for block rewards. Calculated for a 5 second step size, 10 million ethers total payout over 10 years</p></figcaption></figure>

### Energy Web Community Fund

A portion of block rewards goes to the Community Fund. Unlike the amount awarded to block authors, the amount that goes to the Community Fund remains constant over time.&#x20;

The amount is chosen to add up to roughly 37.9 million tokens over a 10 year period. The community fund can change its own address and set a payout address too.

With 5 second step size: **Payout-per-block** = **600900558100000000 wei**

Visual representation of the community reward distribution is depicted below in Fig. 3.

<figure><img src="/files/ngfub1RsIftofV6I1Isx" alt=""><figcaption><p>Fig. 3.: Community reward distribution.</p></figcaption></figure>

## Interaction with Block Reward Contract

### Contract Address and ABI

| Name           | Address                                    | JSON ABI                                                         |
| -------------- | ------------------------------------------ | ---------------------------------------------------------------- |
| RewardContract | 0x1204700000000000000000000000000000000002 | <https://gist.github.com/ngyam/07d34631fa0e899e5896303b5ec92a3c> |

| Function Name                             | Description                                                                                                                                                                                                  |
| ----------------------------------------- | ------------------------------------------------------------------------------------------------------------------------------------------------------------------------------------------------------------ |
| mintedTotally()                           | Returns the token amount that was minted totally in wei                                                                                                                                                      |
| mintedForCommunity()                      | Return the token amount that was totally minted for the community fund in wei                                                                                                                                |
| mintedForCommunityForAccount(address)     | Returns the total token amount that was minted for a certain address for the community so far in wei                                                                                                         |
| mintedForAccount(address)                 | Return how much was minted for an account so far in wei                                                                                                                                                      |
| mintedInBlock(uint256)                    | Returns how much was minted in certain block in wei                                                                                                                                                          |
| mintedForAccountInBlock(address, uint256) | Returns how much was minted for a certain account in a certain block in wei                                                                                                                                  |
| communityFundAmount()                     | Returns the constant payout for the community per block in wei                                                                                                                                               |
| communityFund()                           | Returns community fund address                                                                                                                                                                               |
| payoutAddresses(address)                  | Returns an address' payout address                                                                                                                                                                           |
| setPayoutAddress(address)                 | Sets payout address for sender                                                                                                                                                                               |
| resetPayoutAddress()                      | Resets payout address for sender                                                                                                                                                                             |
| getBlockReward(uint256)                   | Returns blockreward amount for a certain block number                                                                                                                                                        |
| checkRewardPeriodEnded()                  | Returns true if blockreward period has ended (based on blocknumber), false otherwise. The blockreward period right now ends after 10 years. After that no blockrewards or community fund payouts are minted. |


# Validator-Set Contract

## Overview

Validator Set contracts provide information on current validators and private functionality to add and remove validators.&#x20;

<figure><img src="/files/s7yq9jtfQQKWGDONf3aw" alt=""><figcaption><p>Validator set components</p></figcaption></figure>

### Documentation and Source Code

* [Energy Web Validator Set Contracts](https://github.com/energywebfoundation/ewc-system-contracts/tree/master/contracts/validatorset)
* [OpenEthereum documentation on Validator Set contracts](https://openethereum.github.io/Validator-Set)

## Components

For upgradeability purposes, the contracts are divided into 2 parts. See below Fig. 1.

### RelaySet Contract

This contract implements the required [reporting ValidatorSet](https://openethereum.github.io/Validator-Set) interface expected by the engine and it is the contract defined in the chainspec seen by the engine. It relays most of the function calls to the RelayedSet contract, which holds the actual logic. The logic contract can be replaced (upgraded), so it is possible to change the behavior of validator management without conducting a hard fork.

### RelayedSet Contract

This contract implements the logic and manages the validator list. The owner of the validator set interacts with this contract for managing the validators. This contract maintains two validator sets:

1. The current validator set (the validators who are actively sealing)
2. The migration validator set, which is the new set we migrate to in case of a change (validator addition or removal).

## Validator States

Validators and potential validators have four states in these contracts:

1. **Active** **validator**: Validator is in the active validator set, sealing new blocks
2. **Not a validator**: The address nothing has to do with validation.
3. **Pending To Be Added Validator**: Validator is already added by the owner and their acceptance is pending, but not active yet until it is finalized. This implies that the validator cannot report, be reported,  or produce blocks yet.
4. **Pending To Be Removed Validator**: Validator is pending to be removed (removed by the owner), but it is not finalized, and so is still active as a validator. This implies that as long as the removal is not finalized, the validator is actively producing blocks, can report and can be reported on.

## Reporting

The RelayedSet contract logs malicious or benign reports by emitting corresponding log events that can be seen by anyone. Reporting can only be on and about active sealing validators.

```
event ReportedMalicious(address indexed reporter, address indexed reported, uint indexed blocknum);
event ReportedBenign(address indexed reporter, address indexed reported, uint indexed blocknum);
```

The events contain the reporter- and reported address, and the block number which the validator was reported on.

### Interaction with RelayedSet (logic) Contract <a href="#validatorsetcontracts-interactionwiththerelayed-logic-contract" id="validatorsetcontracts-interactionwiththerelayed-logic-contract"></a>

| Name                | Address                                    | JSON ABI                                                         |
| ------------------- | ------------------------------------------ | ---------------------------------------------------------------- |
| ValidatorSetRelayed | 0x1204700000000000000000000000000000000001 | <https://gist.github.com/ngyam/62a6702dc32edbad9b4421179cfaad30> |

#### Callable functions

| Function                      | Description                                                                                                                                                                                                                                                                                                                                                                                                                                                      |
| ----------------------------- | ---------------------------------------------------------------------------------------------------------------------------------------------------------------------------------------------------------------------------------------------------------------------------------------------------------------------------------------------------------------------------------------------------------------------------------------------------------------- |
| finalized()                   | Returns true if there are ongoing changes to the active set, false otherwise. If true, implies that current validators list equals migration validators list.                                                                                                                                                                                                                                                                                                    |
| addressStatus(address)        | <p></p><p>Returns the state of an address, two integers: an integer representing the validator state, and an index value. The index is the position of the validator address in the currentValidators array. It is only relevant if the address is an active validator, should be ignored otherwise.</p><p>The validator state mappings are:</p><ul><li>NonValidator: 0</li><li>Finalized: 1</li><li>PendingToBeAdded: 2</li><li>PendingToBeRemoved: 3</li></ul> |
| getValidators()               | Returns currently active block producing validators                                                                                                                                                                                                                                                                                                                                                                                                              |
| getMigrationValidators()      | Returns the migration validator set. If there are no changes, it returns the same list as getValidators().                                                                                                                                                                                                                                                                                                                                                       |
| getUnion()                    | Returns the union of current and migration sets. Useful for tracking the statuses of all affected validators in case of an ongoing change                                                                                                                                                                                                                                                                                                                        |
| getValidatorsNum()            | Returns the number of currently active validators                                                                                                                                                                                                                                                                                                                                                                                                                |
| isPendingToBeAdded(address)   | Returns true if address is pending to be added to the active list.                                                                                                                                                                                                                                                                                                                                                                                               |
| isPendingToBeRemoved(address) | Returns true if address is pending to be removed from the active list.                                                                                                                                                                                                                                                                                                                                                                                           |
| isPending(address)            | Returns true if address is pending to be added or removed.                                                                                                                                                                                                                                                                                                                                                                                                       |
| isActiveValidator(address)    | Returns true if address is an active validator, meaning it partakes in producing new blocks. Note that a validator who is pending to be removed is still active.                                                                                                                                                                                                                                                                                                 |
| isFinalizedValidator(address) | Returns true if address is a finalized validator, meaning it is active and NOT pending to be removed either.                                                                                                                                                                                                                                                                                                                                                     |

#### Events you can listen to, in addition to report events:

```
event ChangeFinalized(address[] validatorSet);
event NewRelay(address indexed relay);
```

### Interaction with Relay Contract <a href="#validatorsetcontracts-interactionwiththerelayed-logic-contract" id="validatorsetcontracts-interactionwiththerelayed-logic-contract"></a>

#### Callable functions

| Function Name      | Description                                 |
| ------------------ | ------------------------------------------- |
| getSystemAddress() | Returns the system address                  |
| getValidators()    | Same as RelayedSet getValidators()          |
| relayedSet()       | Returns the address of the Relayed contract |

#### Events you can listen to:

```
event NewRelayed(address indexed old, address indexed current);
```


# Validator Node Architecture

The system architecture of a validator node on the Energy Web Chain is made up of two components:&#x20;

1. [The OpenEthereum Client](#openethereum-client)
2. [Telemetry monitoring system](#telemetry-monitoring-system)

Together these two components allow validators to run a local node of the chain, validate transactions, seal blocks, and monitor validator behavior and metrics.&#x20;

## OpenEthereum Client

A client is software that allows you to run a local node on your machine and interact directly with the blockchain. Every validator must run a full node in order to participate in validation.&#x20;

Remember that the Energy Web Chain is derived from the Ethereum blockchain. Because of this we use an Ethereum client to connect with the chain called [OpenEthereum](https://openethereum.github.io/). Anyone can create a client, as long as it implements the protocols laid out in [Ethereum’s yellow paper](https://ethereum.github.io/yellowpaper/paper.pdf), and there are a number of Ethereum clients to choose from.&#x20;

Energy Web uses the OpenEthereum client because it supports the [Authority Roundtable (AuRa)](https://openethereum.github.io/Aura), which is a consensus algorithm specifically for Proof-ofAuthority blockchains. **OpenEthereum allows validators to connect to the chain, collect transactions and seal blocks according the AuRa consensus algorithm.**

&#x20;To read more about OpenEthereum, you can [visit their wiki.](https://openethereum.github.io/index)

To read more about Ethereum clients, see the [Ethereum documentation.](https://ethereum.org/en/developers/docs/nodes-and-clients/)&#x20;

## Telemetry Monitoring system&#x20;

The monitoring system collects comprehensive, real-time data and metrics on validator performance and provides a user interface for viewing the data. It is  important  to gather as much data about the validator nodes as possible in order to ensure a secure and performant blockchain. To do so, we rely on well established industry solutions to transfer these metrics off the validator node to protect the sensitive nature of the data.&#x20;

**The use of the telemetry monitoring system is opt-in.** Validators can disable it if they have their own monitoring system in place that allows for real time tracking of all relevant metrics.

### Telemetry Architecture

There are four components involved in the data collection process:

* [OpenEthereum](https://openethereum.github.io/index) client - monitors validator node behavior
* [Telegraf](https://docs.influxdata.com/telegraf/v1.10/): open-source server agent that collects data from the OpenEthereum client
* [InfluxDB](https://docs.influxdata.com/influxdb/v1.7/) - open source database that stores the data collected from Telegraf
* [Grafana](https://grafana.com/docs/) - data visualization tool that queries the InfluxDB for data and provides graphical interface for data visualization

All components are run in separate docker containers managed by docker compose. For additional information on docker visit: <https://docs.docker.com/> and <https://docs.docker.com/compose/>.

<figure><img src="/files/4fFr0s8TZdYjG04nSrgx" alt=""><figcaption></figcaption></figure>

### Data Collection Process Overview

1. The OpenEthereum client collects data on the validator node. Collected data includes:
   * CPU usage
   * Memory usage
   * Disk usage
   * Number of connected peers
   * List of visible P2P peers
   * Current block
   * Network latency to 3 different and major locations (e.g. cloudflare, google, amazon)
   * Network throughput
   * Network error rate
   * Number of SSH keys
   * Service status for SSH, docker and the parity container
   * SHA256 hashes of key system components/binaries
   * Current chain specification file (or hash)
2. Telegraf collects relevant metrics from the host machine and the custom-built OpenEthereum metrics collector. The metrics collector allows Telegraf to receive the metrics from the OpenEthereum client
3. The collected metrics are stored in an InfluxDB database and can be visualized using Grafana


# Energy Web Block Explorer

The block explorer interface provides the most important on-chain information about blocks, transactions, accounts and [Energy Web Token (EWT)](/core-concepts/energy-web-tokens). Below is an overview of what information you can view on the Block Explorer.&#x20;

Note that there is a separate site for the Volta Testnet Block Explorer.&#x20;

* Volta Testnet Block Explorer: <https://volta-explorer.energyweb.org/>
* Main Network Block Explorer: <https://explorer.energyweb.org/>

## Block Explorer Overview&#x20;

<figure><img src="/files/6zEM7a1B4mY6AzSaBRJ4" alt=""><figcaption></figcaption></figure>

### Blocks

* [Blocks](https://explorer.energyweb.org/blocks) - block details for all sealed blocks
  * Block Height
  * Num transactions
  * Hash
  * Parent Hash
  * Difficulty
  * Total Difficulty
  * Gas Used
  * Gas Limit
  * Block Rewards
  * Miner (validator)
  * Transactions

<figure><img src="/files/88rssAN6N35EnXIofG7i" alt=""><figcaption></figcaption></figure>

### Transactions

* [Validated](https://explorer.energyweb.org/txs) - transaction details for all validated transactions
  * Transaction address
  * Status
  * Block Number
  * Nonce
  * Transaction fee
  * Transaction Speed
  * Raw input
  * Gas
  * Internal Transactions
* [Pending](https://explorer.energyweb.org/pending-transactions) - transaction details for  all pending transactions
  * Transaction address
  * Nonce
  * Gas limit
  * Internal Transactions

<figure><img src="/files/qk67mEy8OEu7883tEETP" alt=""><figcaption></figcaption></figure>

### [Accounts](https://explorer.energyweb.org/accounts)

Account details for all external and smart contract account addresses with balances and associated transactions

* Address
* Token balance
* Num. transactions
* Last balance update
* Gas used
* All transactions
* Coin balance history

<figure><img src="/files/beDNSFDTfStXhkoQ3unB" alt=""><figcaption></figcaption></figure>

### Tokens

* [All](https://explorer.energyweb.org/tokens)
* [Bridged from Ethereum](https://explorer.energyweb.org/bridged-tokens/eth)
* [Bridged from Binance Smart Chain](https://explorer.energyweb.org/bridged-tokens/bsc)

<figure><img src="/files/bwMdaBIAsnmJ8Go5poAQ" alt=""><figcaption></figcaption></figure>

### APIs

* GraphQL: GraphQL interface which you can use to query specific information that are on chain: <https://explorer.energyweb.org/graphiql>. To find out more about the possible queries visit: <https://github.com/ConsenSys/ethql#query-handbook>


# Energy Web Chain Governance & Validators

Learn about the EWC Governance and the role of Validators in depth in our [Validators specialized documentation](https://docs.energyweb.org/ewc-validator-documentation/ewc-governance/governance-process).


# Energy Web Tokens

The Energy Web Chain native token

## What is the Energy Web Token?

The [Energy Web Token (EWT)](https://www.energyweb.org/technology/token/) is the native **utility token** of the Energy Web Decentralized Operating System (EW-DOS). Tokens are used in EW-DOS to pay for[ gas fees](https://ethereum.org/en/developers/docs/gas/) on the [Energy Web Chain](/ewc-ecosystem/energy-web-chain), and for staking to secure the [Energy Web X blockchain](/core-concepts/energy-web-x) as well as [Worker Node Networks](/core-concepts/worker-nodes-and-worker-node-networks). You will need EWT in your digital wallet (we recommend using [MetaMask](https://metamask.io)) if you want to make transactions or use applications or smart contracts that are deployed on the Energy Web Chain main network.&#x20;

## EWT on the Energy Web Chain

Like other public blockchains, the Energy Web Chain uses EWT as a utility token to **access services and orchestrate stakeholders within its blockchain system**. In the context of the Energy Web Chain, EWT compensate validators for processing transactions, and are used to pay for transactions  - for example, registering a new asset or organization in [Switchboard](https://docs.energyweb.org/legacy-documentation/glossary-of-terms#switchboard).

Utility tokens like EWT are different from other digital assets in the blockchain sphere such as coins, non-fungible tokens, and stablecoins. To learn more about the distinctions between these assets, see this article,[ <img src="https://next.tnwcdn.com/assets/img/favicon/favicon-194x194.png" alt="" data-size="line">The ultimate cryptocurrency explainer: Bitcoin, utility tokens, and stablecoins](https://thenextweb.com/news/bitcoin-stablecoins-utility-cryptocurrency) .

## EWT on Energy Web X

Energy Web X will leverage and complement the existing Energy Web Chain by introducing new technical capabilities that streamline the deployment and operation of [Worker Node networks](broken://pages/9AAfktDaTKCsvxRl4lgz).&#x20;

To maximize the security of every Energy Web solution using worker nodes, EWT will be required to interact with worker nodes and Energy Web X. Most notably, Energy Web Tokens will be required to:

* Reward worker node networks: worker nodes are software packages that need to be run by individuals and/or businesses. In order to attract entities to run worker nodes, enterprises will need to include rewards, paid in EWT, that compensate worker node operators for their work.&#x20;
* Operate worker nodes: in order to become a trusted party to run worker nodes, individuals and/or businesses will be required to stake EWT. Staking requirements and reward schedules are mass customizable—enterprises launching worker node networks can configure different thresholds and award schedules at their discretion.
* Validate Energy Web X: Energy Web X validators will need to stake a significant number of Energy Web Tokens in order to become validators on Energy Web X.&#x20;

For clarity, instead of launching a new token with the Energy Web X blockchain, Energy Web X will be powered by the existing or EWT. Users have the ability to “lift” Energy Web Tokens from the existing Energy Web Chain onto Energy Web X. Lifted Energy Web Tokens can then be used for the functions described above. With this mechanism in place, EWT holders will be able to “lower” Energy Web Tokens back to the main Energy Web Chain at their discretion. Over time, token holders will be able to lower EWT to other layer one blockchains (for example, main net Ethereum) making Energy Web solutions interoperable with any blockchain ecosystem.

## Get EWT

You can buy EWT on any of the exchanges listed [here](https://coinmarketcap.com/currencies/energy-web-token/markets/). You can also bridge EWTB ERC20 tokens acquired on Ethereum mainnet back to EW Chain by [following this guide](/community-ressources/community-resources/using-the-energy-web-chain/token-bridge).

## **Additional Resources:**

* [<img src="https://www.kraken.com/favicon.ico" alt="" data-size="line">What is Energy Web Token? | EWT Coin | Kraken](https://www.kraken.com/en-us/learn/what-is-energy-web-token-ewt)
* \*\*\*\*[**The utility of the utility token for utilities -** how companies can use the Energy Web Token to build and operate enterprise-grade decentralized applications on a public digital infrastructure](https://medium.com/energy-web-insights/the-utility-of-the-utility-token-for-utilities-69c9be603a59)
* [<img src="https://energyweb.org/wp-content/uploads/2019/04/cropped-ew-favicon-192x192.png" alt="" data-size="line">](https://energyweb.org/technology/token/)[Energy Web Token - Energy Web](https://energyweb.org/technology/token/)


# EWC Guides and Tutorials


# Getting started with Energy Web Chain

## 1. Install MetaMask

You will need to [install MetaMask](https://metamask.io/) (or another Ethereum wallet) to connect to EW-DOS applications on the Volta test network or the main network, and to sign transactions on the blockchain.&#x20;

Read more about using MetaMask [here](/ewc-ecosystem/ewc-guides-and-tutorials/set-up-metamask-to-interact-with-energy-web-chain).&#x20;

## 2. Get Tokens

If you are using applications or smart contracts on the [**Volta Test Network (testnet)**](/ewc-ecosystem/ewc-guides-and-tutorials/developing-on-the-volta-test-network-and-main-network-energy-web-chain), you will need [Volta tokens](/ewc-ecosystem/ewc-guides-and-tutorials/developing-on-the-volta-test-network-and-main-network-energy-web-chain#get-started-using-volta).&#x20;

* Learn how to get Volta Tokens [here](https://docs.energyweb.org/legacy-documentation/community-resources/using-the-energy-web-chain/volta-testnet-token).&#x20;
* Once you have Volta tokens, you will need to [connect MetaMask to the Volta blockchain](/ewc-ecosystem/ewc-guides-and-tutorials/set-up-metamask-to-interact-with-energy-web-chain#connect-metamask-to-the-energy-web-blockchain).&#x20;

If you are using or developing applications or smart contracts deployed on the [**Energy Web Main Network (mainnet)**](/ewc-ecosystem/energy-web-chain), you will need to have [Energy Web Tokens](/ewc-ecosystem/energy-web-tokens).

* &#x20;Learn how to get EWT [here](#id-2.-get-tokens).&#x20;
* Once you have EWT, you will need to [connect MetaMask to the Energy Web Chain](/ewc-ecosystem/ewc-guides-and-tutorials/set-up-metamask-to-interact-with-energy-web-chain#connect-metamask-to-the-energy-web-blockchain).&#x20;

## 3. Using EW-DOS

### Learn about Volta Testnet and Energy Web Mainnet

{% content-ref url="/pages/CMJQze7k8e6eG5HRQrZU" %}
[Developing on the Volta Test Network and Main Network (Energy Web Chain)](/ewc-ecosystem/ewc-guides-and-tutorials/developing-on-the-volta-test-network-and-main-network-energy-web-chain)
{% endcontent-ref %}


# Developing on the Volta Test Network and Main Network (Energy Web Chain)

Blockchain networks to support test and production environments

Energy Web supports two distinct blockchain networks:

1. The Volta Test Network (Testnet)
2. The Energy Web Production Network (Mainnet)

**These networks are independent of each other.** They each have their own chain specifications that the [OpenEthereum client](/ewc-ecosystem/ewc-guides-and-tutorials/run-a-local-rpc-node) uses to configure the blockchain. You can [view them on github here](https://github.com/energywebfoundation/ewf-chainspec).&#x20;

You cannot transfer tokens between these two blockchains. They each use their own unique utility token that pays for transaction fees on the blockchain (read more about this [here](https://docs.energyweb.org/legacy-documentation/foundational-concepts/ethereum/transaction-costs)).

&#x20;The Energy Web Chain's main network utility token is the [Energy Web Token](/core-concepts/energy-web-tokens), which has real fiat value. The Volta Test Network's token is the [Volta Token](https://docs.energyweb.org/legacy-documentation/community-resources/using-the-energy-web-chain/volta-testnet-token), and it has no real value. They are not interchangeable -  if you have Volta tokens, this does not mean you have Energy Web Tokens, and vice versa.

## **Developing on Volta Test Network**

Volta is the pre-production test network (testnet) of the Energy Web Chain. It’s the blockchain equivalent of a test server or test environment in traditional software development. Most blockchains have at least one test network. Ethereum, for example, [has several test networks](https://ethereum.org/en/developers/docs/networks/#testnets) for pre-deployment testing. &#x20;

Volta is used as a staging network to:

* Test [smart contracts](https://ethereum.org/en/developers/docs/smart-contracts/) before they are deployed on the production chain. If you write your own smart contract, you will want to deploy it and test it on Volta first to make sure it works as expected. Because tokens on the testnet ([Volta tokens](https://docs.energyweb.org/legacy-documentation/community-resources/using-the-energy-web-chain/volta-testnet-token)) have no real value, you can test thoroughly and incur no cost.&#x20;
* Test protocol updates before they are deployed on the production chain. Each time there is an [upgrade to Ethereum's protocol](https://ethereum.org/en/history/), we test it on the Volta Network first.&#x20;

The utility token for the Volta Test Network is the [Volta token](https://docs.energyweb.org/legacy-documentation/community-resources/using-the-energy-web-chain/volta-testnet-token). Volta tokens have no real value, but you will need them to "pay" for transaction costs associated with interacting with smart contracts on the Volta network. Read more about the Volta Token and how to get some [here.](broken://pages/-MhnN4JQbzTzLczar_N3)&#x20;

### Get Started Using Volta

* [Get Volta Tokens](https://docs.energyweb.org/legacy-documentation/community-resources/using-the-energy-web-chain/volta-testnet-token#get-tokens)&#x20;
* [Connect to Volta Test Network using MetaMask](/ewc-ecosystem/ewc-guides-and-tutorials/set-up-metamask-to-interact-with-energy-web-chain#manually-configuring-metamask-to-connect-to-the-volta-testnet) - you will need to connect to the Volta network in order to access applications and smart contracts deployed on Volta
* [Run a local node](/ewc-ecosystem/ewc-guides-and-tutorials/run-a-local-rpc-node) - you have the option to run your own local node of the Volta network. You can read about the purpose and benefits of running a local node [here](/ewc-ecosystem/ewc-guides-and-tutorials/run-a-local-rpc-node#benefits-to-running-a-local-node).&#x20;

## Developing on Energy Web Main Network

The Energy Web main network (mainnet) is the production network of the Energy Web Chain. The gas fees to pay for transactions require Energy Web Tokens (EWT), which have real value. You can read more about EWT and how to acquire it [here](/ewc-ecosystem/energy-web-tokens).&#x20;

{% hint style="info" %}
You can read more about transaction costs on the Energy Web Chain [here](/core-concepts/ethereum/transactions-and-transaction-costs).&#x20;
{% endhint %}

### Get Started Using the Energy Web Chain

* [Get EWT](/ewc-ecosystem/energy-web-tokens)&#x20;
* [Connect to Energy Web Main Network using MetaMask](/ewc-ecosystem/ewc-guides-and-tutorials/set-up-metamask-to-interact-with-energy-web-chain#manually-configuring-metamask-to-connect-to-the-energy-web-mainnet) - you will need to connect to the Energy Web Chain in order to access applications and smart contracts deployed on the Energy Web main network
* [Run a local node](/ewc-ecosystem/ewc-guides-and-tutorials/run-a-local-rpc-node) - you have the option to run your own local node of the Energy Web Chain. You can read about the purpose and benefits of running a local node [here](broken://pages/-MgReXUh0VNiQP7VTIRC#benefits-to-running-a-local-node).&#x20;


# Run a Local RPC Node

Run a full instance of the blockchain on your machine

You have the option of running a full node of the Energy Web Chain main network or Volta test network locally. Running a local node does requires a degree of technical capability. It helps to understand the benefits of doing so, and the alternatives to running a full local node.&#x20;

There are a number of benefits to running your own node, which are [described below](broken://pages/-MgReXUh0VNiQP7VTIRC#why-run-a-local-node).&#x20;

* [What does it mean to run a node?](#what-does-it-mean-to-run-a-node)
* [What do I need to run a node?](#what-do-i-need-to-run-a-node)
* [Benefits to Running a Local Node](#benefits-to-running-a-local-node)
* [Alternatives to Running a Local Node](#alternatives-to-running-a-local-node)
* [Run a local node](#run-a-local-node-using-the-command-line)
* [Connect your local node to MetaMask](#connect-your-local-node-to-metamask)

## **What does it mean to run a node?**

A 'client' is software that implements a blockchain's protocols and allows you to connect directly with the blockchain - that is to **read data from the blockchain or initiate transactions on the blockchain**, such as transferring tokens. Anyone can create client software, as long as it implements that blockchain's official protocols. Ethereum's protocols are specified in their [ yellow paper](https://ethereum.github.io/yellowpaper/paper.pdf), and there are a number of Ethereum clients to choose from.&#x20;

**A node is any machine that is actively running client software and is connected to the blockchain.** Blockchain is often called a “peer-to-peer” network, because its network is made up of many peers running nodes simultaneously that are connected to each other.&#x20;

Depending on if you are running a full node, a light node, or an archive node (see the differences between these nodes [here](https://docs.ethhub.io/using-ethereum/running-an-ethereum-node/)), your client will sync with the current state of blockchain and then continue to execute every transaction that is added to the blockchain. Essentially it is having a live copy or version of the blockchain running locally on your machine.&#x20;

Depending on the blockchain you are you connecting to, this can take up large amounts of space and take a long time to retrieve and sync the history of the chain on your machine. For example, synching with the Energy Web chain will require much less resources than syncing with the Ethereum mainnet, as it is a much larger and longer-running blockchain.&#x20;

## **What do I need to run a node?**

To run a node, you need to install the client software. The Energy Web mainnet and Volta testnet both use the [OpenEthereum](https://openethereum.github.io/) client (formally known as Parity), because it supports the [Authority Roundtable (AuRa)](https://openethereum.github.io/Aura), which is a consensus algorithm specifically for Proof-of-Authority (PoA)  blockchains. You can read more about the PoA consensus algorithm and why we implemented it for the Energy Web Chain [here](/ewc-ecosystem/energy-web-chain/system-architecture/proof-of-authority-consensus-mechanism). &#x20;

{% hint style="info" %}
Only [approved validators](https://www.energyweb.org/members) can create or 'seal' new blocks on the Energy Web Chain. If you run a full local node, you will be able to validate transactions, but not create new blocks.
{% endhint %}

## Benefits to Running a Local Node

1. **The more nodes there are, the more secure the system is as a whole.** Blockchains are decentralized technology, so by design the system performs better if there are multiple instances of it rather than just one. The more nodes there are, the less points of failure or opportunities for malicious action.&#x20;
2. **Your transactions are more direct and more secure.** Software that provides **i**ntermediary connections to the blockchain like [Infura](https://infura.io/) or [MetaMask](https://metamask.io/) are, like any other web-based software, susceptible to downtime or error. By connecting to the blockchain yourself, you are removing your dependency on external providers for secure and direct connection. You also do not expose your public keys to the browser. &#x20;
3. **You can self-verify transactions.** You have part or all of the blockchain running on your node, so you can query the chain for transactions directly (and as often as you want) rather than relying on a user interface like a [block explorer](/ewc-ecosystem/energy-web-chain/energy-web-block-explorer). Your queries can be more specific and efficient, giving you only the information that you need, for example, ‘how many transactions did addresses X, Y and Z send during this time period on each day for the last 30 days?’&#x20;
4. **You are not subject to rate limits.** Infura (and therefore MetaMask, as it implements Infura to connect to the blockchain) [does have rate limits for JSON RPC requests](https://infura.io/docs/ethereum/json-rpc/ratelimits). If your development requires a lot of requests to the blockchain, running a local node may be more efficient.&#x20;

## Alternatives to Running a Local Node

Running a local node is not necessary to use applications that run on the blockchain or transfer tokens.&#x20;

To use applications deployed on the Energy Web Chain, or to transfer tokens, you can connect to the blockchain through [MetaMask](https://metamask.io/) using a remote RPC. You can see guidance for doing that on the Volta Test Network and the Energy Web Main Network [here](/ewc-ecosystem/ewc-guides-and-tutorials/set-up-metamask-to-interact-with-energy-web-chain). &#x20;

## **Run a local node using the command line**

### Hardware Requirements <a href="#hardware-requirements" id="hardware-requirements"></a>

You need to meet OpenEthereum hardware requirements and have enough disk space to store database snapshots (which will grow in time).\
[<img src="https://docs.ethhub.io/assets/images/favicon.ico" alt="" data-size="line">OpenEthereum - EthHub](https://docs.ethhub.io/using-ethereum/ethereum-clients/openethereum/)

* Multi-core CPU
* 4GB RAM
* SSD drive and free space
  * EWC RPC node - 150 GB
  * Volta RPC node - 200 GB
* A decent DSL connection is required

### **Download Chainspec file**

Download and save the chain config to your local machine.&#x20;

Note that there are different chainspec files for the[ Volta Testnet](broken://pages/-MgLiGK5QgHztz4JLgPQ#developing-on-volta-test-network) and the [Energy Web production chain](broken://pages/-MgLiGK5QgHztz4JLgPQ#developing-on-energy-web-main-network):

* The chainspec file  for Volta Test Network is [here](https://github.com/energywebfoundation/ewf-chainspec/blob/master/Volta.json).&#x20;
* The chainspec file for Energy Web Main Network is [here](https://github.com/energywebfoundation/ewf-chainspec/blob/master/EnergyWebChain.json).&#x20;

1\. Download the chainspec file. \
[<img src="https://github.com/fluidicon.png" alt="" data-size="line">GitHub - energywebfoundation/ewf-chainspec: EWF official chainspec repository](https://github.com/energywebfoundation/ewf-chainspec)

Volta  Testnet chainspec:

```
curl -L https://raw.githubusercontent.com/energywebfoundation/ewf-chainspec/master/Volta.json -o chainspec-volta.json
```

Energy Web Chain (production) chainspec:&#x20;

```
curl -L https://raw.githubusercontent.com/energywebfoundation/ewf-chainspec/master/EnergyWebChain.json -o chainspec-ewc.json
```

### Using OpenEthereum Client

1. Download [OpenEthereum client v3.3.5](https://github.com/openethereum/openethereum/releases/tag/v3.3.5)
2. Full specification for OpenEthereum configuration options can be found here:\
   [<img src="https://openethereum.github.io/public/openethereum_logo_black.svg" alt="" data-size="line">OpenEthereum Documentation - Configuring OpenEthereum](https://openethereum.github.io/Configuring-OpenEthereum)
3. Run the following command in your terminal. Provide the path to the chain config that you want to use. The following command references the Volta chain config.

```
chmod +x openethereum
./openethereum --chain /path/to/chainconfig/Volta.json
```

Your local node should start:

```
2024-03-05 10:49:35 UTC Starting OpenEthereum/v3.3.5-stable-6c2d392d8-20220405/x86_64-linux-gnu/rustc1.58.1
2024-03-05 10:49:35 UTC Keys path /home/ubuntu/.local/share/openethereum/keys/Volta
2024-03-05 10:49:35 UTC DB path /home/ubuntu/.local/share/openethereum/chains/Volta/db/d94a0a739a3e416a
2024-03-05 10:49:35 UTC State DB configuration: fast
2024-03-05 10:49:35 UTC Operating mode: active
2024-03-05 10:49:35 UTC Not preparing block; cannot sign.
2024-03-05 10:49:36 UTC Configured for Volta using AuthorityRound engine
2024-03-05 10:49:36 UTC Signal for switch to contract-based validator set.
2024-03-05 10:49:36 UTC Initial contract validators: [0x36f67dd84e7327c10c7ead6c429a47189798fbdc, 0x20df7a4e8408add37c6a5c4afc1b1509924619fe, 0x77901f14183b1669c80e8c6137ff6721c9a26b25]
2024-03-05 10:49:36 UTC Listening for new connections on 127.0.0.1:8546.
2024-03-05 10:49:40 UTC Not preparing block; cannot sign.
2024-03-05 10:49:41 UTC Public node URL: enode://bb4962584a90ebcb373f5dd22cbe005ddd1300e7889c124ba33bfb0c327799948d8248054b7b6301f3bee46844c16cdaaffd390472198ddfb96798c8d03868b7@172.31.16.183:30303
2024-03-05 10:49:46 UTC Syncing    #1143 0xa666…220c   114.43 blk/s    0.0 tx/s    0.0 Mgas/s      0+    0 Qed LI:#1143    2/25 peers   405 KiB chain 0 bytes queue  RPC:  0 conn,    0 req/s,    0 µs
2024-03-05 10:49:51 UTC Syncing    #3559 0xe8e6…6a6c   483.00 blk/s    0.0 tx/s    0.0 Mgas/s      0+  124 Qed LI:#3683    2/25 peers   978 KiB chain 187 KiB queue  RPC:  0 conn,    0 req/s,    0 µs
2024-03-05 10:49:56 UTC Syncing    #5930 0xc530…ce9d   474.11 blk/s    0.2 tx/s    0.0 Mgas/s      0+ 1182 Qed LI:#7112    3/25 peers   2 MiB chain 2 MiB queue  RPC:  0 conn,    0 req/s,    0 µs
2024-03-05 10:50:01 UTC Syncing    #8458 0x63ee…be65   505.40 blk/s    0.0 tx/s    0.0 Mgas/s      0+ 3226 Qed LI:#11684    3/25 peers   3 MiB chain 5 MiB queue  RPC:  0 conn,    0 req/s,    0 µs
2024-03-05 10:50:06 UTC Syncing   #10352 0xf609…52e3   379.12 blk/s    0.0 tx/s    0.0 Mgas/s      0+ 5142 Qed LI:#15494    3/25 peers   3 MiB chain 8 MiB queue  RPC:  0 conn,    0 req/s,    0 µs
```

### Connect your local node to MetaMask

Connect your MetaMask to the Volta Test Network or Energy Web Chain via remote RPC. You can read how to do this [here.](broken://pages/-MhJxK0Indgu1ustBC1E)&#x20;

Get the URL of your MetaMask account. You can do this by clicking the settings dropdown and selecting "Expand View."&#x20;

![](/files/-Mk7kdfAOLi8TiajxVGl)

When the view is expanded, copy the URL in the browser&#x20;

![](/files/-Mk7kgnOPxCSI3-E8K7U)

Run the following command in your terminal

```
openethereum --chain path/to/chainconfig/Volta.json --jsonrpc-cors METAMASK URL  
```

## **Run a local node using Docker with OpenEthereum client**

This section describes minimal setup to run an RPC node locally or on the server using Docker container run with docker-compose. This is **solely for development** purposes, it's not a production grade recommendation.

\
See OpenEthereum documentation for Docker:\
[<img src="https://openethereum.github.io/public/openethereum_logo_black.svg" alt="" data-size="line">OpenEthereum Documentation - Docker](https://openethereum.github.io/Docker)

### Prerequisites <a href="#prerequisites" id="prerequisites"></a>

* [docker](https://docs.docker.com/engine/)
* [docker-compose](https://docs.docker.com/compose/)
* [curl](https://curl.se/)

### Set up <a href="#set-up" id="set-up"></a>

1. Verify that prerequisites are installed:

```
docker --version 
docker-compose --version 
curl --version
```

2\. Create working directory

```
mkdir openethereum 
cd openethereum 
mkdir -p chain-data/chains
```

3\. Create docker-compose.yaml file

```
cat > docker-compose.yaml << 'EOF'
version: '3.8'
services:
  openethereum:
    image: openethereum/openethereum:v3.3.5
    restart: always
    ports:
      - 8545:8545
      - 8546:8546
      - 30303:30303
      - 30303:30303/udp
    command:
      --jsonrpc-interface all --chain /config/chainspec.json
      # Uncomment this if connecting local node to MetaMask
      # --jsonrpc-cors chrome-extension://URL-OF-METAMASK
    volumes:
      - ./chain-data:/home/openethereum/.local/share/io.parity.ethereum/
      - ./chainspec-volta.json:/config/chainspec.json:ro
      # chainspec file should be changed if using EWC
      # - ./chainspec-ewc.json:/config/chainspec.json:ro
EOF
```

4\. Download database snapshot - this takes some time and requires resources due to the size of the .tar file, but it will speed up synchronization process.&#x20;

**\*Note that this step is optional. If you do not download the database snapshot, move to Step 6.** <br>

Volta (depending on your internet connection \~1 hour download time for us):

```
curl -L -C - https://chain-download.energyweb.org/volta -o ./chain-data/chains/volta.tar
```

&#x20;Energy Web Chain (production) (30 minutes download time for us):

```
curl -L -C - https://chain-download.energyweb.org/ewc -o ./chain-data/chains/energywebchain.tar
```

5\. Unpack database snapshot. This snapshot only works with OpenEthereum client.&#x20;

**\*Note that this step is optional. If you did not complete Step 5, skip this step and move to Step 6.**&#x20;

Volta:

```
sudo tar -xvf ./chain-data/chains/volta.tar -C ./chain-data/chains
```

Energy Web Chain (production):

```
curl -L -C - https://chain-download.energyweb.org/ewc -o ./chain-data/chains/energywebchain.tar
```

**6.** Set permission&#x73;**:**

```
sudo chmod -R 777 chain-data
```

8\. Start container:

```
docker-compose up -d
```

9\. Examine logs:

```
docker-compose logs --tail 20 openethereum
```

The log output should be similar to the following (sometimes the logging output does not appear immediately, wait some time):

```
openethereum_1  | 2024-03-05 10:54:30 UTC Starting OpenEthereum/v3.3.5-stable/x86_64-linux-musl/rustc1.59.0
openethereum_1  | 2024-03-05 10:54:30 UTC Keys path /home/openethereum/.local/share/io.parity.ethereum/keys/Volta
openethereum_1  | 2024-03-05 10:54:30 UTC DB path /home/openethereum/.local/share/io.parity.ethereum/chains/Volta/db/d94a0a739a3e416a
openethereum_1  | 2024-03-05 10:54:30 UTC State DB configuration: fast
openethereum_1  | 2024-03-05 10:54:30 UTC Operating mode: active
openethereum_1  | 2024-03-05 10:54:30 UTC Not preparing block; cannot sign.
openethereum_1  | 2024-03-05 10:54:30 UTC Configured for Volta using AuthorityRound engine
openethereum_1  | 2024-03-05 10:54:30 UTC Signal for switch to contract-based validator set.
openethereum_1  | 2024-03-05 10:54:30 UTC Initial contract validators: [0x36f67dd84e7327c10c7ead6c429a47189798fbdc, 0x20df7a4e8408add37c6a5c4afc1b1509924619fe, 0x77901f14183b1669c80e8c6137ff6721c9a26b25]
openethereum_1  | 2024-03-05 10:54:30 UTC Listening for new connections on 127.0.0.1:8546.
openethereum_1  | 2024-03-05 10:54:35 UTC Not preparing block; cannot sign.
openethereum_1  | 2024-03-05 10:54:35 UTC Public node URL: enode://b111a66d9d0cc942abe1c728d74e8109673a1dc80a2d50be8546993c51cecd6151f2c7e3322bb6a992adcd906af5f686b8d14d8c4373aafdd02c108aeb71ab07@172.28.0.2:30303
openethereum_1  | 2024-03-05 10:54:40 UTC Syncing    #1450 0x4a2f…7898   144.03 blk/s    0.0 tx/s    0.0 Mgas/s      0+   73 Qed LI:#1524    2/25 peers    434 KiB chain  105 KiB queue  RPC:  0 conn,    0 req/s,    0 µs
openethereum_1  | 2024-03-05 10:54:45 UTC Syncing    #2097 0xdef1…082f   129.40 blk/s    0.0 tx/s    0.0 Mgas/s      0+ 2601 Qed LI:#4699    2/25 peers    767 KiB chain    4 MiB queue  RPC:  0 conn,    0 req/s,    0 µs

```

10\. After some, you will sync with the network. Until a full sync, you will see be in a "syncing" state:

```
12021-11-03 15:33:42 UTC Syncing #14332274 0x2b0d...23c2 0.00 blk/s 0.0 tx/s 0.0 Mgas/s 0+ 0 Qed LI:#14332276 1/25 peers 72 KiB chain 0 bytes queue RPC: 0 conn, 0 req/s, 87 µs
```

&#x20;

11\. Check the database synchronization status in the command line using OpenEthereum's 'eth-syncing' module:\
[<img src="https://openethereum.github.io/public/openethereum_logo_black.svg" alt="" data-size="line">OpenEthereum Documentation - The \`eth\` Module](https://openethereum.github.io/JSONRPC-eth-module)

```
curl --data '{"method":"eth_syncing","params":[],"id":1,"jsonrpc":"2.0"}' -H "Content-Type: application/json" -X POST localhost:8545
```

The output will show current synchronization status:

```
{"jsonrpc":"2.0","result":{"currentBlock":"0xdab79f","highestBlock":"0xdac9d2","startingBlock":"0xdab172","warpChunksAmount":null,"warpChunksProcessed":null},"id":1}
```

It will take some time to fully sync with the current state of the blockchain. When the synchronization is finished status will be:

```
{"jsonrpc":"2.0","result":false,"id":1}
```

## **Additional Resources**

* [Install EWC/Volta RPC node](https://github.com/energywebfoundation/ewf-rpc)
* ["Chapter 3: Ethereum Clients" from *Mastering Ethereum*](https://cypherpunks-core.github.io/ethereumbook/03clients.html)
* [*Nodes And Clients* Ethereum Documentation](https://ethereum.org/en/developers/docs/nodes-and-clients/)


# Run RPC Node using Nethermind client

Nethermind Client

1. [Download Nethermind Client](https://downloads.nethermind.io/)
2. Full specification for Nethermind configuration options can be found here:
   1. <https://docs.nethermind.io/>
   2. <https://docs.nethermind.io/get-started/system-requirements>
3. Run the following command in your terminal -

#### Run RPC node in Volta Network

```
chmod +x nethermind
# To run a Full node
./nethermind --config volta 

# To run an Archive node
./nethermind --config volta_archive
```

#### Run RPC node in EWC Network

```
# To run a Full node
./nethermind --config energyweb

# To run an Archive node
./nethermind --config energyweb_archive
```

Your local node should start:

```
2024-03-05 13-54-12.2501|Nethermind starting initialization.
2024-03-05 13-54-12.2939|Client version: Nethermind/v1.25.4+20b10b35/linux-x64/dotnet8.0.2
2024-03-05 13-54-12.2980|Loading embedded plugins
2024-03-05 13-54-12.2981|  Found plugin type Nethermind.Consensus.AuRa.AuRaPlugin
2024-03-05 13-54-12.2982|  Found plugin type Nethermind.Consensus.Clique.CliquePlugin
2024-03-05 13-54-12.2983|  Found plugin type Nethermind.Consensus.Ethash.EthashPlugin
2024-03-05 13-54-12.2983|  Found plugin type Nethermind.Consensus.Ethash.NethDevPlugin
2024-03-05 13-54-12.2983|  Found plugin type Nethermind.Hive.HivePlugin
2024-03-05 13-54-12.2983|  Found plugin type Nethermind.UPnP.Plugin.UPnPPlugin
Resolved executing directory as /home/ubuntu/neth/nethermind-1.25.4.
2024-03-05 13-54-12.3211|Loading 12 assemblies from /home/ubuntu/neth/nethermind-1.25.4/plugins
2024-03-05 13-54-12.3212|Loading assembly Nethermind.Init
2024-03-05 13-54-12.3230|Loading assembly Nethermind.Merge.AuRa
2024-03-05 13-54-12.3254|  Found plugin type Nethermind.Merge.AuRa
2024-03-05 13-54-12.3255|Loading assembly Nethermind.HealthChecks
2024-03-05 13-54-12.3270|  Found plugin type Nethermind.HealthChecks
2024-03-05 13-54-12.3271|Loading assembly Nethermind.EthStats
2024-03-05 13-54-12.3276|  Found plugin type Nethermind.EthStats
2024-03-05 13-54-12.3277|Loading assembly Nethermind.Consensus.AuRa
2024-03-05 13-54-12.3315|Loading assembly Nethermind.Optimism
2024-03-05 13-54-12.3330|  Found plugin type Nethermind.Optimism
2024-03-05 13-54-12.3331|Loading assembly Nethermind.JsonRpc.TraceStore
2024-03-05 13-54-12.3338|  Found plugin type Nethermind.JsonRpc.TraceStore
2024-03-05 13-54-12.3338|Loading assembly Nethermind.Mev
2024-03-05 13-54-12.3361|  Found plugin type Nethermind.Mev
2024-03-05 13-54-12.3361|Loading assembly Nethermind.Init.Snapshot
2024-03-05 13-54-12.3365|  Found plugin type Nethermind.Init.Snapshot
2024-03-05 13-54-12.3366|Loading assembly Nethermind.Merge.Plugin
2024-03-05 13-54-12.3393|  Found plugin type Nethermind.Merge.Plugin
2024-03-05 13-54-12.3394|Loading assembly Nethermind.AccountAbstraction
2024-03-05 13-54-12.3419|  Found plugin type Nethermind.AccountAbstraction
2024-03-05 13-54-12.3420|Loading assembly Nethermind.Api
2024-03-05 13-54-12.4062|Loading standard NLog.config file from /home/ubuntu/neth/nethermind-1.25.4/NLog.config.
2024-03-05 13-54-12.4908|NLog.config loaded in 83ms.
2024-03-05 13-54-12.4915|Reading config file from /home/ubuntu/neth/nethermind-1.25.4/configs/volta.cfg
2024-03-05 13-54-12.5428|Configuration initialized.
05 Mar 13:54:12 | RocksDb Version: 8.3.2 
05 Mar 13:54:12 | Loading chainspec from embedded resources: /home/ubuntu/neth/nethermind-1.25.4/chainspec/volta.json 
05 Mar 13:54:12 | CPU:  (CT) 
05 Mar 13:54:12 | Using http://ipv4.icanhazip.com to get external ip 
05 Mar 13:54:12 | Setting up memory allowances 
05 Mar 13:54:12 |   Memory hint:          768 MB 
05 Mar 13:54:12 |   General memory:        32 MB 
05 Mar 13:54:12 |   Peers memory:          25 MB 
05 Mar 13:54:12 |   Netty memory:         134 MB 
05 Mar 13:54:12 |   Mempool memory:       110 MB 
05 Mar 13:54:12 |   Fast blocks memory:    46 MB 
05 Mar 13:54:12 |   Trie memory:           83 MB 
05 Mar 13:54:12 |   DB memory:            335 MB 
05 Mar 13:54:12 | Generating private key for the node (no node key in configuration) - stored in plain + key store for JSON RPC unlocking 
05 Mar 13:54:14 | Store this password for unlocking the node key for JSON RPC - this is not secure - this log message will be in your log files. Use only in DEV contexts. 
05 Mar 13:54:16 | Block tree initialized, last processed is 0, best queued is 0, best known is 0, lowest inserted header , body , lowest sync inserted block number  
05 Mar 13:54:16 | Initializing 15 plugins 
05 Mar 13:54:16 |   Clique by Nethermind 
05 Mar 13:54:16 |   Clique by Nethermind initialized in 0ms 
05 Mar 13:54:16 |   AuRa by Nethermind 
05 Mar 13:54:16 |   AuRa by Nethermind initialized in 0ms 
05 Mar 13:54:16 |   Ethash by Nethermind 
05 Mar 13:54:16 |   Ethash by Nethermind initialized in 0ms 
05 Mar 13:54:16 |   Optimism by Nethermind 
05 Mar 13:54:16 |   Optimism by Nethermind initialized in 0ms 
05 Mar 13:54:16 |   NethDev by Nethermind 
05 Mar 13:54:16 |   NethDev by Nethermind initialized in 0ms 
05 Mar 13:54:16 |   AuRaMerge by Nethermind 
05 Mar 13:54:16 |   AuRaMerge by Nethermind initialized in 0ms 
05 Mar 13:54:16 |   Merge by Nethermind 
05 Mar 13:54:16 |   Merge by Nethermind initialized in 2ms 
05 Mar 13:54:16 |   MEV by Nethermind 
05 Mar 13:54:16 |   MEV by Nethermind initialized in 0ms 
05 Mar 13:54:16 |   HealthChecks by Nethermind 
05 Mar 13:54:16 |   HealthChecks by Nethermind initialized in 1ms 
05 Mar 13:54:16 |   Hive by Nethermind 
05 Mar 13:54:16 |   Hive by Nethermind initialized in 0ms 
05 Mar 13:54:16 |   Account Abstraction by Nethermind 
05 Mar 13:54:16 |   Account Abstraction Plugin: User Operation Mining Disabled 
05 Mar 13:54:16 |   Account Abstraction by Nethermind initialized in 0ms 
05 Mar 13:54:16 |   EthStats by Nethermind 
05 Mar 13:54:16 |   EthStats by Nethermind initialized in 0ms 
05 Mar 13:54:16 |   Snapshot by Nethermind 
05 Mar 13:54:16 |   Snapshot by Nethermind initialized in 0ms 
05 Mar 13:54:16 |   TraceStore by Nethermind 
05 Mar 13:54:16 |   TraceStore by Nethermind initialized in 0ms 
05 Mar 13:54:16 |   UPnP by Nethermind 
05 Mar 13:54:16 |   UPnP by Nethermind initialized in 0ms 
05 Mar 13:54:16 | Loaded 0 static nodes from file: /home/ubuntu/neth/nethermind-1.25.4/Data/static-nodes.json 
05 Mar 13:54:16 | Skipping Account Abstraction network protocol 
05 Mar 13:54:16 | Now syncing nodes starting from root of block 0 
05 Mar 13:54:16 | No block tree levels to review for fixes. All fine. 
05 Mar 13:54:16 | Numbers resolved, level = Max(0, 0), header = Max(0, 0), body = Max(0, 0) 
05 Mar 13:54:16 | Beacon Numbers resolved, level = 0, header = 0, body = 0 
05 Mar 13:54:16 | Loading fork choice info 
05 Mar 13:54:16 | Grafana / Prometheus metrics are disabled in configuration 
05 Mar 13:54:16 | System.Diagnostics.Metrics disabled 
05 Mar 13:54:16 | Skipping Flashbots RPC plugin 
05 Mar 13:54:16 | Skipping Account Abstraction RPC plugin 
05 Mar 13:54:16 | Json RPC is disabled 
05 Mar 13:54:16 | 
======================== Nethermind initialization completed ========================
This node    : enode://15ec8f735368cf809735071cd607ee8e12fe86bbbc99c14161272c8a2253d4a7cf063d46b9cd201735011ae008687175b504bdcf45f8f20605a763d39b951044@15.188.207.110:30303
Node address : 0x1dc9ca5452806e178959506e100300d3566ec79f (do not use as an account)
Mem est tx   :    40 MB
Mem est DB   :     8 MB
Genesis hash : 0xebd8b413ca7b7f84a8dd20d17519ce2b01954c74d94a0a739a3e416abe0e43e5
External IP  : 15.188.207.110
Ethereum     : tcp://15.188.207.110:30303
Discovery    : udp://15.188.207.110:30303
Client id    : Nethermind/v1.25.4+20b10b35/linux-x64/dotnet8.0.2
Chainspec    : chainspec/volta.json
Chain head   : 0
Chain ID     : Volta
===================================================================================== 
05 Mar 13:54:17 | Changing state Disconnected to FastHeaders at processed: 0 | state: 0 | block: 0 | header: 0 | target block: 26907152 | peer block: 26907152 
05 Mar 13:54:17 | Sync mode changed from Disconnected to FastHeaders 
05 Mar 13:54:17 | Connected to 2 bootnodes, 7 trusted/persisted nodes 
05 Mar 13:54:20 | Changing state FastHeaders to FastSync, FastHeaders at processed: 0 | state: 0 | block: 0 | header: 26680000 | target block: 26907153 | peer block: 26907153 
05 Mar 13:54:20 | Sync mode changed from FastHeaders to FastSync, FastHeaders 
05 Mar 13:54:21 | Peers | with best block: 2 | all: 2 | eth66 (100 %) | Active: 2 Headers, 1 Bodies, 1 Receipts, 1 Blocks | Sleeping: None | OpenEthereum (100 %) 
05 Mar 13:54:21 | Old Headers       2,560 / 26,680,000 (  0.01 %) | queue     2,048 | current            0 Blk/s | total          640 Blk/s 
05 Mar 13:54:25 | Discovered new block 26907154 13:54:25 (0xbf2c2c...21b348), tx count: 0 miner 0xe6c064719623c5bc62ef51caa4639416f8634ab6, sent by [Peer|eth66|26907154|   3.121.165.10:30303| Out], with AuRa step 341929373 
05 Mar 13:54:26 | Old Headers       6,144 / 26,680,000 (  0.02 %) | queue         0 | current          717 Blk/s | total          683 Blk/s 
05 Mar 13:54:26 | Downloaded   26,680,637 / 26,907,154 ( 99.16 %) | current            0 Blk/s | total          128 Blk/s 
05 Mar 13:54:30 | Discovered new block 26907155 13:54:30 (0x702e54...a3e29f), tx count: 0 miner 0xc09e63b27775508b6599daf3b6dcbe09cf3f82ac, sent by [Peer|eth66|26907155|   3.121.165.10:30303| Out], with AuRa step 341929374 
05 Mar 13:54:31 | Old Headers       8,192 / 26,680,000 (  0.03 %) | queue         0 | current          410 Blk/s | total          585 Blk/s 
05 Mar 13:54:31 | Downloaded   26,681,653 / 26,907,155 ( 99.16 %) | current          203 Blk/s | total          167 Blk/s 
05 Mar 13:54:35 | Discovered new block 26907156 13:54:35 (0xa73994...be656b), tx count: 0 miner 0x20ea864187c1c1eaa613726ed4d211244209503c, sent by [Peer|eth66|26907156|   3.121.165.10:30303| Out], with AuRa step 341929375 
05 Mar 13:54:36 | Old Headers       9,728 / 26,680,000 (  0.04 %) | queue         0 | current          307 Blk/s | total          512 Blk/s 
05 Mar 13:54:36 | Downloaded   26,682,669 / 26,907,156 ( 99.17 %) | current          203 Blk/s | total          179 Blk/s 

```

## **Run a local node using Docker with Nethermind client**

This section describes minimal setup to run an RPC node locally or on the server using Docker container run with docker-compose. This is **solely for development** purposes, it's not a production grade recommendation.

\
See Nethermind documentation for Docker: <https://docs.nethermind.io/get-started/installing-nethermind#docker-container>

### Set up <a href="#set-up" id="set-up"></a>

1. Verify that prerequisites are installed:

```
docker --version 
docker-compose --version 
```

2. Create working directory

```
mkdir data_dir
```

3. Create docker-compose.yaml file

```
cat > docker-compose.yaml << 'EOF'
version: '3.8'
services:
  nethermind:
    image: nethermind/nethermind:1.25.4
    restart: always
    command:
      --config volta -dd /nethermind/data_dir
      # For EnergyWebChain network
      # --config energyweb -dd /nethermind/data_dir
    volumes:
      - ./data_dir:/nethermind/data_dir     
    ports:
      - 8545:8545
      - 8546:8546
      - 30303:30303
      - 30303:30303/udp
EOF
```

4. Start container:

```
docker-compose up -d
```

5. Examine logs:

```
docker-compose logs --tail 20 nethermind
```

The log output should be similar to the following

```
nethermind_1  | Mem est tx   :    40 MB
nethermind_1  | Mem est DB   :     8 MB
nethermind_1  | Genesis hash : 0xebd8b413ca7b7f84a8dd20d17519ce2b01954c74d94a0a739a3e416abe0e43e5
nethermind_1  | External IP  : 15.188.207.110
nethermind_1  | Ethereum     : tcp://15.188.207.110:30303
nethermind_1  | Discovery    : udp://15.188.207.110:30303
nethermind_1  | Client id    : Nethermind/v1.25.4+20b10b35/linux-x64/dotnet8.0.2
nethermind_1  | Chainspec    : chainspec/volta.json
nethermind_1  | Chain head   : 0 (0xebd8b4...0e43e5)
nethermind_1  | Chain ID     : Volta
nethermind_1  | ===================================================================================== 
nethermind_1  | 05 Mar 13:57:50 | Changing state Disconnected to FastSync, FastHeaders at processed: 0 | state: 0 | block: 26696639 | header: 26696639 | target block: 26907183 | peer block: 26907183 
nethermind_1  | 05 Mar 13:57:50 | Sync mode changed from Disconnected to FastSync, FastHeaders 
nethermind_1  | 05 Mar 13:57:51 | Connected to 2 bootnodes, 4 trusted/persisted nodes 
nethermind_1  | 05 Mar 13:57:54 | Peers | with best block: 2 | all: 2 | eth66 (100 %) | Active: 2 Headers, 1 Bodies, 1 Receipts, 1 Blocks | Sleeping: None | OpenEthereum (100 %) 
nethermind_1  | 05 Mar 13:57:54 | Old Headers     122,368 / 26,680,000 (  0.46 %) | queue         0 | current            0 Blk/s | total       30,593 Blk/s 
nethermind_1  | 05 Mar 13:57:54 | Downloaded   26,697,149 / 26,907,183 ( 99.22 %) | current            0 Blk/s | total          131 Blk/s 
nethermind_1  | 05 Mar 13:57:59 | Old Headers     130,048 / 26,680,000 (  0.49 %) | queue         0 | current        1,537 Blk/s | total       14,454 Blk/s 
nethermind_1  | 05 Mar 13:57:59 | Downloaded   26,698,165 / 26,907,184 ( 99.22 %) | current          203 Blk/s | total          173 Blk/s 
nethermind_1  | 05 Mar 13:58:00 | Discovered new block 26907185 13:58:00 (0x03214c...f02603), tx count: 0 miner 0x20ea864187c1c1eaa613726ed4d211244209503c, sent by [Peer|eth66|26907185|   3.121.165.10:30303| Out], with AuRa step 341929416 
```

## Nethermind Configuration

* <https://docs.nethermind.io/fundamentals/configuration>


# Deploy a Smart Contract on Volta with Remix

Below are steps to deploy a [smart contract](https://ethereum.org/en/developers/docs/smart-contracts/) on the [Volta Test Network](broken://pages/-MgLiGK5QgHztz4JLgPQ) (the test network for the [Energy Web Chain](broken://pages/-Me5MuK_QNjl5c61emFu)) using [Remix](https://remix.ethereum.org). Remix is a web application used to compile, deploy and test smart contracts on Ethereum networks.&#x20;

In order to deploy a smart contract to the Energy Web Chain Main Network, rather than the Volta Test Network, the steps are identical, except that you will connect your MetaMask to the Energy Web Chain rather than to Volta. We recommend that you always deploy and test your smart contracts to Volta first to make sure they behave as expected.&#x20;

Once your smart contract is deployed, you can use the contract's ABI and address on the blockchain to interact with its public methods. For more information on how to interact with smart contracts, go [here](broken://pages/-Maj5JTAJP_FveiuluSB).&#x20;

### 1. Configure MetaMask to connect to the Volta Test Network

You can see steps for doing this  are [here](broken://pages/-MhJxK0Indgu1ustBC1E). If you do not have a MetaMask installed, you can do so [here](https://metamask.io/).&#x20;

### 2. Get Volta Tokens

You will need [Volta tokens](broken://pages/-MhnN4JQbzTzLczar_N3) to to pay for the transaction fee for deploying the smart contract to the blockchain. For directions on how to get Volta Tokens, go [here](broken://pages/-MhnN4JQbzTzLczar_N3). To learn more about what transaction fees are, you can go [here](broken://pages/-MgfuEwbYhObS2Q2ihiL).&#x20;

\*Note that if you are deploying to the Energy Web Main Network, you will need to have [EWT](broken://pages/-MezQqZmVh-7tqqIN19D#get-ewt).&#x20;

### 3. Navigate to [remix.ethereum.org ](https://remix.ethereum.org)

### 4. Navigate to the "Deploy and Run Transactions" icon on the left panel (shown below).

In the "Environment" dropdown, selected "Injected Web3". Notice that when you select this, "Custom (73799) network shows up. 73799 is the Volta Test Network - this confirms that we are connected to the Volta network via MetaMask.&#x20;

<figure><img src="/files/yqlu41H8j3eyVxYgZRQg" alt=""><figcaption></figcaption></figure>

### 5. Confirm the connection on MetaMask

You will need to confirm the connection to MetaMask.

### 6. Create a simple smart contract

Go to the  file explorer panel (select the first icon on the left panel). Add a new .sol file in the 'Contracts' folder. Below it is called VoltaContract.sol.

<figure><img src="/files/2kMMkwnQpprYpgN1KTLY" alt=""><figcaption></figcaption></figure>

In the .sol file, add the following code:

```
pragma solidity >=0.4.0 <0.7.0;

contract SimpleReturn {
    function get() public pure returns (string) {
        return "Volta";
    }
}
```

### **7. Compile the smart contract**

If there are no errors, click "Compile VoltaContract.sol" (make sure that the 'Language' selected is 'Solidity').

<figure><img src="/files/8JS3ypZ3CfNJv66sCxDY" alt="" width="375"><figcaption></figcaption></figure>

### **8. Copy the deployed contract's** [**ABI**](https://docs.soliditylang.org/en/v0.5.3/abi-spec.html) **(Application Binary Interface)**

If you want to interact with your contract in the future using an API client, you will need the contract's ABI. The ABI is in the bottom right hand corner of the Solidity Compiler page after it is compiled.&#x20;

<div align="center"><figure><img src="/files/Hn3fEQXogyoRnOtZhn2b" alt="" width="375"><figcaption></figcaption></figure></div>

### **9.** Deploy the smart contract

Click 'Deploy' to deploy the contract to Volta Test Network.

<figure><img src="/files/jOk12IPqNRgWGbOmS9jI" alt=""><figcaption></figcaption></figure>

Confirm the transaction in MetaMask. **Make sure that you have some gwei as a gas price by doing the following**:

Select **EDIT**

<figure><img src="/files/trdeiQPAzfkdfoI6IvG8" alt="" width="351"><figcaption></figcaption></figure>

Select "Edit suggested gas fee"

<figure><img src="/files/OnGWmhthTeaFGtvFY2W1" alt="" width="274"><figcaption></figcaption></figure>

**Make sure you have a Gas price of 6e-8 GWEI (this should be autofilled)**

<figure><img src="/files/b4PGVuu4mYAcJWIbEotI" alt="" width="280"><figcaption></figcaption></figure>

Confirm the transaction in MetaMask

### 10. See and test the deployed transaction

Once your contract is deployed, you can see it in the **"Deployed Contracts**" section of the same page ("Deploy and Run Transactions")

<figure><img src="/files/Qh9dkBKNgJy2gTbnIK5s" alt="" width="563"><figcaption></figcaption></figure>

Click on "get" to test our contract's functionality. Remember from the code that is should just return a string "Volta".&#x20;

<figure><img src="/files/THNnT7KfTmIh9aoZyWaG" alt=""><figcaption></figcaption></figure>

### 11. See deployed contract on the Volta Block Explorer

Copy the address of the contract by clicking the copy icon.

<figure><img src="/files/Zfcdygr9osaBELUWR5PC" alt=""><figcaption></figcaption></figure>

Go to the [Volta Block Explorer (volta-explorer.energyweb.org)](https://volta-explorer.energyweb.org). If you are deploying to the main network, the block explorer is [explorer.energyweb.org](https://explorer.energyweb.org).&#x20;

Paste the contract address in the search bar at the top right:\\

<figure><img src="/files/lFcc0QW4P8WRQBlTfayu" alt=""><figcaption></figcaption></figure>

You can see the smart contract address details, the block it was created in, and the byte code. The block explorer contract details from the example above is [here](https://volta-explorer.energyweb.org/address/0x7D6FA5708aa3AcFf1A22f864d3a4809B6EaAEAB5/transactions).&#x20;

<figure><img src="/files/QJbe90Y6KGgz9caTVkjN" alt=""><figcaption><p>Block explorer details for contract created</p></figcaption></figure>

### 12. Use your smart contract in dapps

Now that you have your smart contract's address on the blockchain and its ABI, you can use an Ethereum API client to interact with your contract in your decentralized applications. For a tutorial on how to do this, go [here](broken://pages/-Maj5JTAJP_FveiuluSB).&#x20;

{% content-ref url="/pages/-Maj5JTAJP\_FveiuluSB" %}
[Broken mention](broken://pages/-Maj5JTAJP_FveiuluSB)
{% endcontent-ref %}


# Interacting with Smart Contracts in EW-DOS

EW-DOS [utility layer](broken://pages/-Mdw3RbI2NuPE2daUQdp) packages and [SDKs](broken://pages/-Mdw3Vke0uRCbFguK6gD) interact with [smart contracts that are deployed on the Energy Web Chain](#ew-dos-smart-contracts). To do this, they use API Client Libraries to connect to the blockchain and create instances of smart contracts to access their public functions.

{% hint style="info" %}
If you're not familiar with what a smart contract is, you can read Ethereum's introduction to smart contracts [here](https://ethereum.org/en/developers/docs/smart-contracts/).
{% endhint %}

Below we provide an overview of API Client libraries and a some code examples. Note that exact implementation varies in each package or SDK, but the fundamental concepts remain the same.

## API Client Libraries

You can interact with smart contracts (i.e. call their public read and write functions) on the the Energy Web Chain and the Volta Test Network using any Ethereum API client library. Client libraries allow you to connect to and interact with the blockchain network. You can read about all the functionalities of Ethereum API client libraries in the Ethereum documentation [here](https://ethereum.org/en/developers/docs/apis/javascript/).

The most popular JavaScript libraries for interacting with Ethereum networks are [ethers.js](https://docs.ethers.io/v5/) and [web3.js](https://web3js.readthedocs.io/). **EW-DOS uses ethers.js, so below we will provide ethers.js examples**, however concepts will be similar among different client libraries.

When interacting with a contract, you use a library to first create a Provider, which is a connection the blockchain. You then use the provider to create an instance of the smart contract that you want to interact with. Once this instance is created, you can call the public methods that are exposed in the smart contract.

### 1. Instantiate a Provider

**A provider is a connection to the blockchain**. It gives you an interface to interact with the network. To create a [JSONRpcProvider](https://docs.ethers.io/v5/api/providers/jsonrpc-provider/#JsonRpcProvider), you will need the JSON RPC Url. To create an [IPCProvider](https://docs.ethers.io/v5/api/providers/other/#IpcProvider), you will need the path local IPC filename (this is only available in node.js).

You can see the full ethers.js documentation on Providers [here](https://docs.ethers.io/v5/api/providers/provider/).

```
import { providers, Signer, utils, errors, Wallet } from "ethers";
const { JsonRpcProvider } = providers;

this._provider = new JsonRpcProvider({ url: rpcUrl });
```

See source code [here](https://github.com/energywebfoundation/iam-client-lib/blob/5079d43dfec808140372d224a983c86c742634c0/src/iam/iam-base.ts#L189)

### 2. Instantiate a Contract

To create a new instance of a contract that is already deployed on the blockchain, you need three pieces of information:

1. **The contract's ABI**- the ABI (Application Binary Interface). The ABI is a JSON object that provides the interface to your smart contract. It defines the contract's constructor, events and the behavior of its public functions. **The contract's ABI is generated with the smart contract is compiled.**
2. **The contract's address** - every smart contract has an address when it is deployed to the blockchain. You can deploy the same contract on multiple blockchains, but each contract will have a different address.
3. **The provider**

You can see the ethers.js documentation \*\*\*\* for creating a new instance of a deployed Contract [here](https://docs.ethers.io/v5/api/contract/contract/).

```
//pass in the smart contract address, smart contract ABI, provider:
this._contract = new Contract(settings.address, this.settings.abi, this._provider);
```

See source code[ here](https://github.com/energywebfoundation/ew-did-registry/blob/921886becbf8bd40e5181c269389b2e64e977903/packages/did-ethr-resolver/src/implementations/resolver.ts#L58)

### 2. Implement Contract Methods

The Contract method returns a new instance of that contract at the address passed in. Now that we have an instance of this contract, we can interact with its public methods:

```
    try {
      valid = await this._contract.validDelegate(identityAddress, bytesType, delegateAddress);
    } catch (error) {
      throw new Error(error);
    }
```

See source code [here](https://github.com/energywebfoundation/ew-did-registry/blob/921886becbf8bd40e5181c269389b2e64e977903/packages/did-ethr-resolver/src/implementations/resolver.ts#L162)

## **EW-DOS Smart Contracts**

| **Smart Contracts**                                                                   | Link to Source Code                                                                                |
| ------------------------------------------------------------------------------------- | -------------------------------------------------------------------------------------------------- |
| IAM Smart Contracts                                                                   | <https://github.com/energywebfoundation/iam-contracts>                                             |
| [Origin ](broken://pages/-Mjnro_mlPcyFZv9YvtW#origin-core-sdk)Smart Contracts         | <https://github.com/energywebfoundation/origin/tree/master/packages/traceability/issuer/contracts> |
| [Volta](broken://pages/-MgLiGK5QgHztz4JLgPQ#get-started-using-volta) System Contracts | <https://github.com/energywebfoundation/volta-system-contracts>                                    |
| Energy Web [System Contracts](broken://pages/-Mgvt_l1c3bx4EVIvBUR)                    | <https://github.com/energywebfoundation/ewc-system-contracts>                                      |
| [Staking](broken://pages/-MezSIQi7dq9tC189RkN) Contracts                              | <https://github.com/energywebfoundation/staking-contracts>                                         |

For a tutorial on how to deploy a smart contract on the Volta Test Network or Energy Web Main Network, go [here](broken://pages/-Mkj6h_81ApQzweiP1xs).

{% content-ref url="/pages/-Mkj6h\_81ApQzweiP1xs" %}
[Broken mention](broken://pages/-Mkj6h_81ApQzweiP1xs)
{% endcontent-ref %}


# Set up MetaMask to interact with Energy Web Chain

{% hint style="info" %}
[Broken mention](broken://pages/9jR19sdP5aaCggOYmCuu#metamask) is a browser extension and a mobile app that handles blockchain account management and helps users securely interact with a [Broken mention](broken://pages/-MiSNVkhQ5wfS9ckkp2q#dapp). It’s supported in Chrome, Brave, and Safari browsers, as well as it is available for Android and iOS devices. By default, you can connect to the Ethereum Mainnet or any of the Ethereum test network.
{% endhint %}

{% hint style="info" %}
If you don’t have MetaMask installed install the extension first. \
Learn about[Broken mention](broken://pages/9jR19sdP5aaCggOYmCuu#metamask) here.
{% endhint %}

## Connect MetaMask to the Energy Web blockchain

Prerequisite: Metamask plugin is installed in the browser; this section explains how to add the Energy Web blockchain to it.

### Option1: Automatic configurator

To configure Metamask to connect to the Energy Web blockchain or to Volta, the fastest way to do that is using the [Energy Web MetaMask configuration toolbox](https://csb-qo27t.netlify.app/) or [Chainlist](https://chainlist.org/)&#x20;

### Option2: Manual configuration

{% tabs %}
{% tab title="Configure Energy Web mainnet" %}

### Manually configuring MetaMask to connect to the Energy Web mainnet

1\. Click on the "Networks" dropdown at the top of your MetaMask interface and select "Custom RPC"\
\
![](/files/f0aXbPlak4pvFpW8cNHC)

\
2\. Add the new network using the following settings

| Field              | Value                           |
| ------------------ | ------------------------------- |
| Network Name       | EWC                             |
| New RPC URL        | <https://rpc.energyweb.org>     |
| Chain ID           | 246                             |
| Currency Symbol    | EWT                             |
| Block Explorer URL | <http://explorer.energyweb.org> |

### ![](/files/BdukUCAPoUx75R7iKtq7)

\
3\. Save the settings and switch to the newly added network 'EWC'
{% endtab %}

{% tab title="Configure Volta testnet" %}

### Manually configuring MetaMask to connect to the Volta testnet

\
1\. Click on the "Networks" dropdown at the top of your MetaMask interface and select "Custom RPC"\
\
![](/files/f0aXbPlak4pvFpW8cNHC)\
\
2\. Add the new network using the following settings

| Field              | Value                                 |
| ------------------ | ------------------------------------- |
| Network Name       | Volta                                 |
| New RPC URL        | <https://volta-rpc.energyweb.org>     |
| Chain ID           | 73799                                 |
| Currency Symbol    | VT                                    |
| Block Explorer URL | <http://volta-explorer.energyweb.org> |

![](/files/UzkymsmDY6zr9Cq2qGLp)\
\
3\. Save the settings and switch to the newly added network 'Volta'
{% endtab %}

{% tab title="Configure Consortia RPC" %}

## Manually configuring MetaMask to connect to the Consortia RPC

The Consortia RPC is an alternative to using the Energy Web Mainnet RPC.&#x20;

1\. Click on the "Networks" dropdown at the top of your MetaMask interface and select "Custom RPC"

![](/files/f0aXbPlak4pvFpW8cNHC)

2\. Add the new network using the following settings

| Field              | Value                                |   |
| ------------------ | ------------------------------------ | - |
| Network Name       | EnergyWeb RPC                        |   |
| New RPC URL        | <http://consortia-rpc.energyweb.org> |   |
| Chain ID           | 246                                  |   |
| Currency Symbol    | EWT                                  |   |
| Block Explorer URL | <https://explorer.energyweb.org>     |   |
| {% endtab %}       |                                      |   |
| {% endtabs %}      |                                      |   |

{% hint style="info" %}
Depending on what network you connected to, and if you have Energy Web tokens or Volta Tokens in your account, you should see your balance.&#x20;
{% endhint %}

### Video Tutorial

{% embed url="<https://youtu.be/bggsw686Mfc>" %}
Tutrial how to connect Metamask to Energy Web Blockchain
{% endembed %}

{% content-ref url="/pages/9jR19sdP5aaCggOYmCuu" %}
[Broken mention](broken://pages/9jR19sdP5aaCggOYmCuu)
{% endcontent-ref %}


# Using the Ethereum Name Service

The Ethereum Name Service is available on Energy Web Chain and Volta Testnet

The Energy Web blockchain uses the [Ethereum Name Service](https://docs.ens.domains/) (ENS) for name-spacing assets that are anchored on our blockchain. ENS is a critical part of providing user-friendly dApps. You can interact with the ENS contracts that are deployed on the Energy Web Chain in several ways.

Below we explain:

* [The benefits of ENS](#benefits-of-ethereum-name-service)
* [The main components of ENS (Registry and Resolvers)](#main-components-of-ens)
* [Interacting with  ENS on Energy Web Chain](#ens-on-the-energy-web-chain)

## Benefits of Ethereum Name Service&#x20;

The [Ethereum Name Service](https://docs.ens.domains/) (ENS) is a distributed, open, and extensible naming system based on the Ethereum blockchain.&#x20;

Machine-readable blockchain identifiers such as Ethereum addresses, content hashes and metadata are difficult to interact with in a user interface. ENS was developed to provide human-readable, user-friendly mapping for these identifiers, and to give users the ability to reserve domain names for our applications. To date, it is the most widely used blockchain naming standard.&#x20;

ENS solves a similar problem that Domain Name Systems (DNS) provide. DNS lets us navigate to a website using human language and an intuitive format ([www.energyweb.org](http://www.energyweb.org)), rather than using an IP address that is impractical to remember and has no association with the content that it directs you to (104.26.13.227). Similar to DNS, ENS supports a  structure of dot notation for hierarchy and nesting.

Using ENS, you can create identifiers for the following blockchain content types:

* Address
* Reverse address (e.g. an address resolves to alice.eth)
* Content hash (e.g.: IPFS/Swarm hashes)
* ABI definitions
* DNS records
* Public keys
* Smart contract interfaces (see [ EIP 165](https://eips.ethereum.org/EIPS/eip-165))
* Text (email, physical address, geo location, metadata)

You can see a full list [here in the ENS documentation](https://docs.ens.domains/contract-api-reference/publicresolver), as well as the specifications for resolving each type.&#x20;

### Examples:

As a simple example,  if you want to send funds to your friend Alice, you can specify the recipient as “alice.eth” instead of “0x0052569B2d787bB89d711e4aFB56F9C1E420a2a6”.&#x20;

If you want to refer to a content hash of a report listed at your custom domain, you can refer to it has “myReport.myDomain”, instead of by the hash identifier.

<figure><img src="/files/yq78pLqTENbuMo586eoG" alt=""><figcaption><p>Organization namespace using ENS nested notation</p></figcaption></figure>

The two main components of ENS, explained below, are responsible for storing the human-readable address in smart contract registry, and resolving it to its original content.&#x20;

## Main Components of ENS

ENS has two primary components: the Registry and the Resolvers.&#x20;

### Registry&#x20;

A smart contract that holds all of the domains/subdomains, the owner of the domain, and the domain resolver (the method used to map it back to its original address.) You can see the ENS Registry smart contract [here.](https://github.com/ensdomains/ens-contracts/blob/master/contracts/registry/ENSRegistry.sol)&#x20;

### Resolvers&#x20;

Methods that translate the human-readable names to their original address. A resolver has multiple methods, each of which are responsible for resolving different types identifiers (for example, one method is responsible for resolving contract ABI definitions ,  one method is responsible for resolving content hashes.)&#x20;

* You can see the ENS smart contracts for all of the resolver types [here](https://github.com/ensdomains/ens-contracts/tree/master/contracts/resolvers/profiles)
* You can read more about the Registry and Resolvers in the original documentation [here](https://docs.ens.domains/#ens-architecture)

What’s important to take away is that the two primary components for ENS are  smart contracts that hold a mapping for all domains/subdomains, and provide resolver methods for  translating different address types to a human readable form.  **These contracts are extendible, so you can add your own resolvers for different address types.**&#x20;

## ENS on the Energy Web Chain

Energy Web has deployed the ENS smart contracts on the Energy Web mainnet and Volta testnet. You have several options for interacting with ENS, depending on your use case.&#x20;

### Interact directly with the smart contracts on the blockchain

| **Contract**             | **Source**                                                                                                                                                                                                                                               | **Volta address**                            | **EWC address**                              |
| ------------------------ | -------------------------------------------------------------------------------------------------------------------------------------------------------------------------------------------------------------------------------------------------------- | -------------------------------------------- | -------------------------------------------- |
| <p>Registry<br><br></p>  | [<img src="https://github.com/fluidicon.png" alt="" data-size="line">ens/ENSRegistryWithFallback.sol at master · ensdomains/ens](https://github.com/ensdomains/ens/blob/master/contracts/ENSRegistryWithFallback.sol)                                    | `0xd7CeF70Ba7efc2035256d828d5287e2D285CD1ac` | `0x0A6d64413c07E10E890220BBE1c49170080C6Ca0` |
| ETH Registrar Controller | [<img src="https://github.com/fluidicon.png" alt="" data-size="line">ethregistrar/ETHRegistrarController.sol at master · ensdomains/ethregistrar](https://github.com/ensdomains/ethregistrar/blob/master/contracts/ETHRegistrarController.sol)           | `0xb842CCA1682DC2Ee6A9da6A59bA4B5C736b229cD` | `0x9C99a28D3d702E6096361Ff31E724b772B5D709e` |
| ETH Base Registrar       | [<img src="https://github.com/fluidicon.png" alt="" data-size="line">ethregistrar/BaseRegistrarImplementation.sol at master · ensdomains/ethregistrar](https://github.com/ensdomains/ethregistrar/blob/master/contracts/BaseRegistrarImplementation.sol) | `0x5630EBDbf41624fF77DcBfC4518c867D93E42E9f` | `0x3BDA3EE55a5b43493BA05468d0AE5A5fF916252f` |
| Public Resolver          | [<img src="https://github.com/fluidicon.png" alt="" data-size="line">resolvers/PublicResolver.sol at master · ensdomains/resolvers](https://github.com/ensdomains/resolvers/blob/master/contracts/PublicResolver.sol)                                    | `0x0a97e07c4Df22e2e31872F20C5BE191D5EFc4680` | `0xA517983Bd4Af4DF0Ed9b52DA4BC405d0A95eE7E2` |
| Reverse Registrar        | [ <img src="https://github.com/fluidicon.png" alt="" data-size="line">ens/ReverseRegistrar.sol at master · ensdomains/ens](https://github.com/ensdomains/ens/blob/master/contracts/ReverseRegistrar.sol)                                                 | `0xff7Befa016689dC5D89165867a65CF26B73e6514` | `0xcB9BCAa8010F51D6484570B99B127e8a26B6B468` |
| Reverse Resolver         | [<img src="https://github.com/fluidicon.png" alt="" data-size="line">resolvers/DefaultReverseResolver.sol at master · ensdomains/resolvers](https://github.com/ensdomains/resolvers/blob/master/contracts/DefaultReverseResolver.sol)                    | `0x775e2a91501cdadeA65BF8eBb94a82529Fc2C34B` | `0x0C12c9087342DafE42b28A93998CEd711DC9a614` |

### Use the [Energy Web ENS Manager app ](https://ens.energyweb.org)

You can use this interface to search for available names in the Energy Web domain and register them to your address. Note that you will need to have sufficient funds in your wallet to do so as there is a fee for name registration.&#x20;

Our management app is forked from the [Ethereum Name Service Manager app](https://app.ens.domains/).&#x20;

### Use a JavaScript library

There are a number of libraries that support ENS. These libraries have methods to configure your registry, and manage and resolve names. The [IAM client library](broken://pages/-Mdw3RbI2NuPE2daUQdp#identity-access-and-management-iam-client-library) and [IAM Cache server](broken://pages/-Mdw3RbI2NuPE2daUQdp#identity-access-and-management-iam-cache-server) both connect to ENS using the ethers library. You can see the Ethers API support for ENS [here](https://docs.ethers.io/v5/api/providers/provider/#Provider--ens-methods). &#x20;

For a full list of libraries that support ENS, see the [ENS documentation here.](https://docs.ens.domains/dapp-developer-guide/ens-libraries)

## Additional Resources

* [Ethereum Name Service (ENS) is now available for the Energy Web](https://medium.com/energy-web-insights/ethereum-name-service-ens-is-now-available-for-the-energy-web-a8d884138790)


# Using Oracles

Incorporate external data sources into your smart contracts

## Blockchain Oracles

By themselves, smart contracts cannot access data outside of the blockchain or send its data to services outside of the blockchain. **To do this, smart contracts use middleware called an oracles**, which are third-party services that fetch and send data to and from smart contracts. Oracles are similar to traditional web-based API services.

&#x20;Smart contracts can contain logic that triggers certain changes or actions based on external data from an Oracle. Without oracles, blockchains and their applications that cater to specific industries that rely on real-time changes such as finance, commodity trading, or IoT, would not have access to the data necessary to react to real-time external factors.&#x20;

It's important to keep in mind that oracles are agnostic of the data they transmit - they are only responsible for fetching, verifying and relaying the data to and from the blockchain.&#x20;

### Inbound vs. Outbound Oracles

**Inbound oracles** send data to the blockchain. This is the most common type of oracle. Like traditional API services, the inbound data that the oracle provides can be anything that your smart contract needs for internal logic that it cannot access from the blockchain or the smart contract itself.&#x20;

For example, you want to send 10 EWT to a friend's address when the price of a specific stock goes above $10 per share. An oracle will provide you with the data about stock price, and the blockchain logic will trigger the send when the oracle delivers data indicating that the price of a stock goes above $10.&#x20;

**Outbound oracles** send data about events that happen on the blockchain to third party applications. For example, an account could receive a payment and trigger an outbound oracle to a mechanism that activates a pv solar panel.&#x20;

### Oracle Data Sources

Oracles can gather data from software and hardware. A **software oracle** interacts with and fetches data available from any web source that exposes its data. Some common examples are weather APIs, real-time stock information and exchange rates.&#x20;

**Hardware oracles** interact with 'physical' data sources like sensors from IoT devices, QR codes or bar codes. Some examples could be reading the temperature from a smart thermostat or fetching data from a flood sensor..&#x20;

### Centralized Vs. Decentralized Oracles

**Centralized oracles** are developed, maintained and controlled by a single entity. One oracle is responsible for fetching data from one or many data sources, and then transmitting that data to the smart contract on the blockchain. You could liken this to using a centralized database for your smart contract's external data sources.&#x20;

**Decentralized oracles** aggregate data from multiple sources using multiple oracle nodes, so that there is no single point of failure for data retrieval, and no single point of failure for the oracle itself. Decentralized oracles are more aligned with the wider community of public blockchain.&#x20;

### Fundamental Oracle Functionality

Regardless of the data source, or if it is centralized or decentralized, all oracles provide three main functionalities:

1. **Listen** to the blockchain network for incoming requests for off-chain data
2. **Fetch** data from the requested off-chain source
3. **Transfer** the data to the blockchain via a signed transaction
4. **Insert** the data into a smart contract’s local storage. Once the data is in the smart contract's storage, it can be used to trigger logic within that smart contract, or it can be available for other smart contract's to use

### Oracle Design Patterns: Communicating Data To Smart Contracts

Depending on the nature of the data itself and how the smart contract uses the data, oracles can be designed to communicate with smart contracts using three main patterns:

1. **Publish-subscribe**: An oracle broadcasts data, and certain smart contracts are polling or "listening to" that oracle for changes in data. An example: "Poll the temperature of region X every 10 minutes. If the temperature is above 70 degrees celsius, turn the smart thermostat to 'on'." &#x20;
2. **Immediate-read**: Oracles hold data in their storage and provide this data on request. Users or devices query the oracle for this data at the same time that it is needed. An example: "Is device X in a list of authorized devices to provide solar power to region Y."&#x20;
3. **Request-response**: External accounts (via decentralized applications) interact with a smart contract and necessitate data from the oracle. The smart contract sends the data parameters to the oracle and performs the third-party data query. When the data is fetched, it sends the result back to the smart contract for the decentralized application to use. Because the decentralized application cannot always wait for the data, this occurs asynchronously. An example: A user selects from a dropdown on a decentralized application a date range to determine the average temperature of each day during the range. The start and end date are sent to the data oracle to fetch the temperatures for the days in the given date range. The data is sent back to the smart contract to perform necessary logic based on the data.&#x20;

## Tutorial: Using Chainlink with the Volta Test Network

[Chainlink](https://chain.link/) provides decentralized oracle networks. [This tutorial](https://medium.com/@aznagy/oracles-with-chainlink-on-ethereum-networks-tutorial-series-338b8a5f1726) covers:&#x20;

* Setting up a Chainlink node and using it from a smart contract on the Volta test network
* Aggregating data from multiple Oracles, and how to use the public [EWT/EUR](https://app.liquid.com/exchange/EWTEUR) Price Pair Oracle infrastructure on Volta
* Design principles of Chainlink oracles
* Scenarios where it makes sense to use Chainlink


# Energy Web X

## Business case

Today worker nodes are implemented as independent off-chain computing nodes that communicate with a smart contract deployed on the Energy Web Chain. This approach is effective, but it is complex and labor-intensive to configure custom business logic, synchronize nodes, and apply appropriate governance such as defining eligibility requirements and service level agreements that worker nodes must adhere to. A more efficient solution is to implement worker nodes within a common environment where they can run independently but follow a unified set of rules. That is where Energy Wb X comes in.

In contrast to the Energy Web Chain, which is Ethereum based, Energy Web X is built with [substrate technology](https://www.parity.io/technology) <https://www.parity.io/technology>. Its sole purpose is to  coordinate, secure and make public the results of work performed by worker node networks.
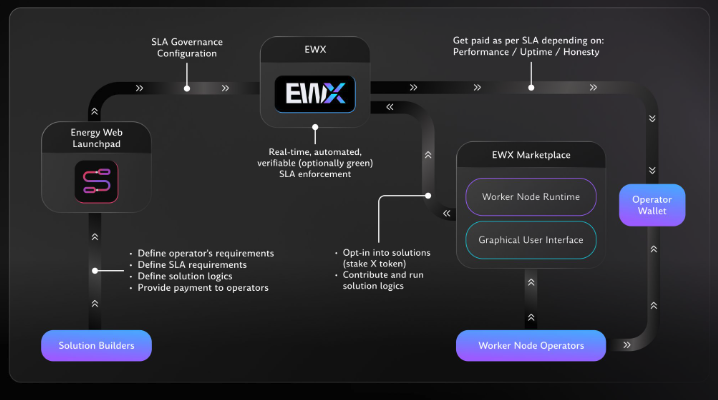
[View the EWX architecture](/ewx-ecosystem/ewx-architecture)

## Current Challenges

Worker nodes in the Energy Web ecosystem today function as independent off-chain computing units. They communicate with smart contracts deployed on the Energy Web Chain (EWC), which uses Ethereum-based technology. While this design has been effective in facilitating off-chain computation, it has significant challenges:

1. **Complexity in Configuration**: Setting up custom business logic for each independent worker node requires substantial effort, making the process cumbersome for enterprises.
2. **Synchronization**: Ensuring consistent operation and data synchronization between worker nodes and the smart contracts is labor-intensive.
3. **Governance Enforcement**: Defining and monitoring adherence to eligibility requirements, service-level agreements (SLAs), and reward mechanisms require careful management, adding to operational overhead.

## Energy Web X as a Unified Solution

Energy Web X addresses these challenges by providing a substrate-based platform that integrates worker nodes into a unified environment. Substrate’s modular framework allows for highly customizable blockchains tailored to specific use cases, making Energy Web X a robust alternative to the Ethereum-based EWC.<br>

**Key Benefits:**

* **Streamlined Governance**: Worker nodes operating under Energy Web X follow predefined governance rules encapsulated in “pallets.” These pallets function like enhanced smart contracts, offering more flexibility and power to manage worker nodes collectively.
* **Enhanced Efficiency**: A common environment reduces the complexity of synchronization and management, enabling easier scalability for enterprises.
* **Interoperability with EWC**: Energy Web X is designed to complement EWC, enabling seamless interaction where worker nodes can migrate (“lift”) to Energy Web X for enhanced capabilities and revert (“lower”) to EWC as needed.

## Worker Nodes in Energy Web X

Worker nodes remain essential as software packages operated by individuals or businesses. Energy Web X introduces features to make this ecosystem more appealing:

* **Reward Systems**: To attract operators, worker nodes are incentivized through rewards in EWT (Energy Web Token). These reward mechanisms can be customized based on performance metrics, such as quality and timeliness of work.
* **Stake-Based Trust**: To run a trusted worker node, operators are required to lock EWT, aligning their incentives with network reliability. This ensures that only committed entities contribute to critical computations.

[More on Worker Nodes](/ewx-ecosystem/worker-nodes)

## Role of Solutions and Solution Groups

Energy Web X structures worker nodes into solutions and solution groups, providing a hierarchical approach to management:

* **Solutions**: Represent specific business applications or use cases powered by worker nodes.
* **Solution Groups**: Group similar solutions together and define shared governance rules, including operational criteria and reward structures.

**Configurable Lifetimes and Rewards**: Solution groups provide flexibility:

* Their **lifetimes** can be predefined but extended based on evolving business needs.
* **Reward mechanisms** can be dynamically adjusted to incentivize participation and ensure the alignment of worker nodes with enterprise objectives.

## On-Chain Consensus for Off-Chain Work

The configurations within solutions and solution groups dictate how worker node outputs are validated on-chain:

* **Eligibility Requirements**: Define who can participate.
* **Service-Level Agreements**: Set performance benchmarks for the worker nodes.
* **Consensus Mechanisms**: Establish thresholds for accepting the results of off-chain computations as correct.

By formalizing these parameters, Energy Web X ensures:

* **Accuracy**: Only valid results from worker nodes are anchored on the blockchain.
* **Trust**: Enterprises and stakeholders can rely on a secure and tamper-resistant consensus process.

This structured and dynamic system makes Energy Web X a powerful platform for managing distributed worker nodes while reducing operational complexity and enhancing enterprise scalability.


# EWX: Architecture

Each set of worker nodes deployed by Energy Web, Energy Web customers of any energy enterprise is governed and anchored to unique pallets on Energy Web X(in traditional Web 3 language a pallet on a substrate-based blockchain is similar to a smart contract on an EVM but more powerful and flexible). Whit this architecture in place, Energy Web has. scalable way to launch worker nodes.

{% hint style="info" %}
In the context of Energy Web X (EWX) and Substrate, a pallet is a modular, reusable component that defines specific blockchain functionality. Pallets are a foundational concept in Substrate, the framework on which EWX is built. They are similar to smart contracts in Ethereum-based systems but are more powerful and flexible due to their deep integration with the blockchain’s runtime. Each pallet is essentially a code module written in Rust that encapsulates logic for particular features such as token transfers, governance, staking, or custom business logic. In EWX, pallets are used to govern and anchor the behavior of worker nodes, manage rewards, enforce rules for participation, and ensure secure, transparent computation results. By leveraging pallets, EWX provides a highly customizable and efficient environment where enterprises can deploy solutions tailored to their unique needs, with strong on-chain governance and interoperability. These pallets form the building blocks of the blockchain runtime, enabling a scalable and robust ecosystem for Energy Web’s use cases.

[Learn more about EWX related pallets](/ewx-ecosystem/pallets)
{% endhint %}

Energy Web X’s purpose is to introduce new technical capabilities, leverage and complement the existing Energy Web Chain. To maximize the security of every Energy Web solution using worker nodes, EWT wis required to interact with worker nodes and Energy Web X that can be “lifted” from EWC to EWX and “lowered” back to EWC from EWX.&#x20;

Worker Nodes are sofware packages that need to be run by individuals and/or businesses. In order to attract entities to run worker nodes, enterprises need to include rewards that pay worker node operator for performing their work. All worker node rewards are paid out in EWT.&#x20;

Worker Nodes are sofware packages that need to be run by individuals and/or businesses. In order to attract entities to run worker nodes, enterprises need to include rewards that pay worker node operator for performing their work. All worker node rewards are paid out in EWT.&#x20;

In order to become a trusted part and run worker nodes, individuals and/or businesses require to lock EWT. Enterprises launching worker node networks can configure different thresholds and award schedules at their discretion.&#x20;

In Energy Web X, solutions represent business applications or use cases that are implemented through worker node networks. These solutions can be grouped into solution groups, which define shared governance parameters, reward structures, and operational criteria. Solution groups are crucial for aligning the behavior of worker nodes across similar or related solutions.&#x20;

The lifetime of a solution group is configurable, allowing enterprises to set specific timeframes during which worker nodes can participate and earn rewards. Solution groups also allow flexibility: their lifetimes can be extended to accommodate ongoing or evolving business needs, and their reward structures can be raised to incentivize higher performance or attract more participants. This dynamic lifetime and reward management ensure that worker nodes are continually aligned with the goals of the enterprises that rely on them.&#x20;

Solutions and solution groups establish the configuration that governs how worker node submissions are evaluated and consensus is reached on-chain. This configuration includes eligibility requirements, service-level expectations, and thresholds for agreeing on the correctness of off-chain computed results. By leveraging these configurable parameters, Energy Web X ensures a robust and secure consensus mechanism that validates and anchors the outputs of decentralized off-chain computations. This process is critical to maintaining trust and accuracy across all solutions powered by worker nodes.

### EnergyWebX SmartFlow: The First Truly Decentralized SLA

SLAs today rely on trust, manual verification, and centralized enforcement—leading to disputes, inefficiencies, and unnecessary costs. Worse, they ignore sustainability.\
\
EnergyWebX SmartFlow is the first truly Decentralized SLA. Enterprises can now automate, enforce, and verify SLAs in a way that is trustless, transparent, and climate-conscious:

* Set performance, uptime, and honesty thresholds—enforced on-chain
* Unlock payments ONLY when SLAs are met
* Eliminate disputes—SLA compliance recorded & validated on-chain
* Define a Carbon SLA—setting a maximum carbon footprint for ESG reporting<br>

With EnergyWebX SmartFlow there is no middlemen, no disputes, no unverifiable claims. Just real-time, automated, and verifiably green SLAs.

<figure><img src="/files/GeThN8nK0tk8ZhYI1B5f" alt=""><figcaption></figcaption></figure>

Enterprises are already integrating SmartFlow worker nodes into their solutions. [See real-world use cases](/ewx-ecosystem/worker-nodes/worker-node-use-cases/sample-enterprise-use-cases).


# Pallets

<table data-view="cards"><thead><tr><th></th><th></th><th data-hidden></th><th data-hidden data-card-target data-type="content-ref"></th></tr></thead><tbody><tr><td><mark style="color:purple;"><strong>Worker Node Pallet</strong></mark></td><td>The <strong>Worker Node Pallet</strong> provides essential functionalities for managing solution groups, solutions, votes and reward distribution mechanisms.</td><td></td><td><a href="/pages/lpArQ2yL6ZS6102CJTeE">/pages/lpArQ2yL6ZS6102CJTeE</a></td></tr><tr><td><mark style="color:purple;"><strong>Balances Pallet</strong></mark></td><td>The <strong>Balances Pallet</strong> responsible for managing token balances, enabling secure transfers, and supporting the blockchain’s economic operations.</td><td></td><td><a href="/pages/CiLaLvCMn98Jf0JHPD5G">/pages/CiLaLvCMn98Jf0JHPD5G</a></td></tr><tr><td><mark style="color:purple;"><strong>Proxy Pallet</strong></mark></td><td>The <strong>Proxy Pallet</strong> enables enhanced account management, operational flexibility, and secure delegation, particularly beneficial in multi-sig setups and automation scenarios.</td><td></td><td><a href="/pages/H0TnGoqDRt2GrNuin7eM">/pages/H0TnGoqDRt2GrNuin7eM</a></td></tr><tr><td><mark style="color:purple;"><strong>XCM Pallet</strong></mark></td><td>The <strong>XCM Pallet</strong> facilitates Cross-Consensus Messaging (XCM), enabling secure and interoperable communication between different chains.</td><td></td><td><a href="/pages/JGJ6vHUXQQr79K19IkZ0">/pages/JGJ6vHUXQQr79K19IkZ0</a></td></tr><tr><td><mark style="color:purple;"><strong>Assets Pallet</strong></mark></td><td>The <strong>Assets Pallet</strong> provides comprehensive tools for managing and interacting with fungible token assets. </td><td></td><td><a href="/pages/TU5OarhX4IUBmz30ldcn">/pages/TU5OarhX4IUBmz30ldcn</a></td></tr><tr><td> <mark style="color:purple;"><strong>Multisig Pallet</strong></mark></td><td>The <strong>Multisig Pallet</strong> is integral for collaborative decision-making and securing high-value operations in decentralized ecosystems.</td><td></td><td><a href="/pages/nfV8cGyaHEHBMSbcOy68">/pages/nfV8cGyaHEHBMSbcOy68</a></td></tr><tr><td><mark style="color:purple;"><strong>Scheduler Pallet</strong></mark></td><td>The <strong>Scheduler Pallet</strong> is integral for automating and orchestrating on-chain operations at specified block heights or based on dynamic triggers.</td><td></td><td><a href="/pages/gTjm1cKVIfVZJdXOFhJV">/pages/gTjm1cKVIfVZJdXOFhJV</a></td></tr><tr><td><mark style="color:purple;"><strong>Preimages Pallet</strong></mark></td><td>The <strong>Preimages Pallet</strong> is a specialized component in the Substrate runtime that facilitates the storage, retrieval, and management of large data blobs (preimages) on-chain.</td><td></td><td><a href="/pages/8gNmRcAym27od6c4QTsl">/pages/8gNmRcAym27od6c4QTsl</a></td></tr><tr><td><mark style="color:purple;"><strong>Offences Pallet</strong></mark></td><td>The <strong>Offences Pallet</strong> is designed to detect, record, and manage misbehavior within the network. It ensures the integrity of the system.</td><td></td><td><a href="/pages/XerFA8eO5pU4HgFpKfkM">/pages/XerFA8eO5pU4HgFpKfkM</a></td></tr><tr><td><mark style="color:purple;"><strong>Eth-Bridge Pallet</strong></mark></td><td>The <strong>Eth-Bridge Pallet</strong> is responsible for facilitating interactions between a Substrate-based blockchain and an Ethereum-based network. </td><td></td><td><a href="/pages/CwqCmEje2Lqm0ZzCj6Sy">/pages/CwqCmEje2Lqm0ZzCj6Sy</a></td></tr><tr><td><mark style="color:purple;"><strong>Token-Manager Pallet</strong></mark></td><td>The <strong>Token-Manager Pallet</strong> is designed for managing tokens and handling token operations within a Substrate-based blockchain. </td><td></td><td><a href="/pages/XcB5ncMMJrMPgWMlcipJ">/pages/XcB5ncMMJrMPgWMlcipJ</a></td></tr><tr><td><mark style="color:purple;"><strong>Ethereum-events pallet</strong></mark></td><td>The <strong>Ethereum-events pallet</strong> supports tracking event submissions, validation, and challenges while providing secure mechanisms for event processing and recording.</td><td></td><td><a href="/pages/pIxAvq5TCbHEtFSNCqHe">/pages/pIxAvq5TCbHEtFSNCqHe</a></td></tr><tr><td><mark style="color:purple;"><strong>Avn Pallet</strong></mark></td><td>The <strong>Avn Pallet</strong> provides functionality that is common for other pallets such as handling offchain worker validations, managing a list of validator accounts and their signing keys.</td><td></td><td><a href="/pages/9k9kSmzrEmbvnPyrylzE">/pages/9k9kSmzrEmbvnPyrylzE</a></td></tr></tbody></table>


# Worker Node Pallet

The Worker Node Pallet provides the core logic for orchestrating a decentralized network of worker nodes, enabling the validation of off-chain computation through on-chain consensus. It manages the registration of solution groups and their associated solutions, coordinates result submissions, and enforces validator consensus and reward distribution on Energy Web X.

## Core Functionalities

* **Worker Node Operator Management**
  * Enables the registration and configuration of worker node operators and their worker nodes and organizes them into solution groups.
  * Enforces the locking of funds required to become a node operator and operational constraints (i.e. an operator can only have one connected worker node at a time).
* **Solution & Solution Group Management**
  * Enables registrars to create, register and deregister solution groups and their constituent solutions, reserving assets in the process to be distributed as worker node rewards.&#x20;
  * Allows registrars to configure operational parameters for each solution including consensus majority threshold (`vote_threshold_percent`), quorum (quorum\_percent), and operator contribution requirements.
  * Voter eligibility determines which workers are eligible to vote on solution results within a solution group. To be eligible to vote a worker must be subscribed to the corresponding solution group. If the registrar enables nominations, the worker must also be nominated.
* **On-chain Voting & Consensus**
  * The pallet enables the initiation of voting rounds (either via workers or registrars), the tracking, storage and collation of vote submissions (results from off-chain computation) from eligible workers, and voting round expiry.&#x20;
  * EWX validators (collators) determine the final result of expired voting rounds through threshold-based consensus mechanism (e.g. >60% of eligible votes are identical), configured per solution.
  * Validators re-submit the final consensus result on-chain and settle the voting round.
* **Reward Calculation & Distribution**
  * Voting rounds conclude and settle within discrete time intervals known as reward periods. At the end of each period, validators determine which worker nodes qualify for active rewards based on whether their performance exceeds the configured SLA (service level agreement) threshold (`sla_voting_threshold`).
  * Validators track each worker’s contributions (correct votes, total eligible voting rounds, and stake) in VoteMetadata. If a worker node surpasses the SLA threshold for correct vote. percentage during the reward period, validators calculate its reward share, weighted by stake and voting accuracy. In this way, rewards are distributed proportionally to the most accurate and economically committed participants.
  * Active rewards are distributed in addition to the base rewards allocated to all actively subscribed nodes.

## Registering Solution Groups and Solutions

The worker node pallet enables the creation and management of Solutions which are mapped to solution groups. Solutions are business units which require the execution of discrete business logics or off-chain computational tasks. Each solution group acts as a collective for managing operator participation, reward distribution and operational parameters.

Registrars define key configurations for each group including:

* Namespace and info
* Subscription (base) rewards and SLA-based (active) rewards
* Asset used for rewards
* Staking requirements for operators
* Majority and quorum
* Operational windows
* Withdrawal delays and eligibility criteria (such as nominations)

### Solution Group Registration and Deregistration Rules

The registration of a new solution group is governed by the following rules:

* The caller must be a registered solution registrar.
* The registrar must provide all required parameters and configurations.
* The registrar must have sufficient balance to reserve the funds required from the solution group’s operation and reward budget.
* Upon successful registration, the registrar becomes the owner of the solution group.

A Solution Group can be deregistered under the following conditions:

* Only the registrar owning the group can initiate the deregistration.
* The group must not have any active solutions associated with it.
* If the group still has subscribers with unclaimed rewards, it enters a virtual removal state preventing any new operations while still allowing users to claim rewards.

### Solution Group Whitelisting

Registrars can enable Solution Group Whitelisting to restrict participation in a group to a curated list of trusted worker node operators. This feature is particularly useful for governance-sensitive applications such as those run by regulated entities or consortiums (e.g. SAFC), where only pre-approved partners are eligible to perform the work.&#x20;

When creating or updating a solution group, the registrar can enable the  `has_operator_allow_list` flag within the group’s OperatorConfig and set to `true`. Setting to `false` allows any operator to subscribe and participate subject to other constraints such as group size, minimum stake or nomination criteria.

## Nominations

Registrars can exert granular control over which worker nodes are eligible to participate in voting rounds for a particular solution.

* Enabling Nominations: A registrar can enable nominations for a solution. When nominations are enabled, only explicitly nominated worker nodes are eligible to vote.
* Nomination Criteria: Registrars may apply custom nomination criteria when selecting eligible workers. For example, they may nominate only nodes within specific geographic regions (e.g., geofencing), or favor nodes with lower environmental impact, leveraging [CarbonAware Nominations.](https://medium.com/energy-web-insights/carbon-aware-nomination-system-for-decentralized-computing-is-now-live-604996982c0f)
* Enforcement: When a voting round is initiated, a snapshot of the nominated worker list is taken. Only nodes within this list can submit valid votes. Any attempt by a non-nominated worker to vote in that round will be rejected by the runtime (unauthorized error).
* Management: All nomination settings are managed via extrinsics and enforced through on-chain logic.

### Worker Node (Operator) Lifecycle

Operators lock tokens, register worker nodes, subscribe to Solution Groups, perform work by executing off-chain solution logic and submit results (votes) on-chain.

Operators register by:

* Locking the requisite EWT tokens
* Subscribing to one or more active Solution Groups by reserving the required stEWT tokens
* Connecting a worker node instance (one per operator account per group)
* Participating in voting rounds for the group’s solutions

Operators receive rewards on the solution group assets based on their voting accuracy, stake, and adherence to performance requirements set by the registrar. Operators may unsubscribe at any time, subject to the configured withdrawal delay.

## Voting Logic

* **Voting round initiation:**&#x20;
  * Voting rounds are configured to be started by either worker nodes or registrars
  * A voting round can only be initiated if it will conclude (determined by its max\_waiting\_threshold) before the expiration of its encompassing reward period.
* **Voting eligibility:**
  * To vote within an active voting round, a worker must be subscribed to the corresponding solution group.
  * If nominations are enabled by the registrar, then only workers within the nominated list are eligible to vote. Nomination means the operator’s account is included in the array of nominated workers at the start of each voting round.
  * Only one vote per worker per voting round is accepted.
* **Voting outcome:**
  * A voting round can be in one of four states: Active, when the round is open and pending processing; OffChainVote, when validators are evaluating and agreeing on the result; Settled, when consensus has been reached; and Unresolved, when consensus could not be reached for various reasons.

## Consensus Logic

The consensus logic is designed to incentivise high performing nodes, protect against malicious actors while optimising scalability and security. Consensus is only calculated on submitted votes for valid voting rounds, and voting rounds are only considered valid if the minimum vote contribution threshold (quorum) is reached.&#x20;

* **Quorum:** quorum\_percent defines the threshold for the minimum percentage of the current Solution Group subscribers (or nominations) which must submit a vote within a given voting round, for the round to be valid and able to reach consensus.&#x20;
* **Majority**: vote\_threshold\_percent defines the minimum percentage of workers within the quorum which must agree on the result for consensus to be declared (i.e. the percentage of the votes submitted which are identical).&#x20;
* **Consensus Calculation:** Consensus is calculated in the reward period after a voting round has finished, and utilises a snapshot of the subscriber list taken at the start of the voting round. If nominations are enabled, the subscriber list is adjusted to include only nominated workers.&#x20;

\
**Worked Example:**

* A solution group has 1000 subscribed workers, of which 800 are nominated.
* The quorum threshold is set to 50%, meaning a minimum of 400 workers must submit a vote within the voting round for it to be valid.
* The consensus threshold is set to 60%, which means of the 400 votes, 240 must be identical submission for consensus to be declared and the result validated.&#x20;

<figure><img src="/files/GZtLnzoY8Nsj8gopl9Uu" alt=""><figcaption></figcaption></figure>

## Reward System

The reward system is designed to only reward high-performing workers who submit consistent and accurate votes, as stipulated by the service level agreement (SLA).

* The SLA threshold (`sla_voting_threshold`) is set by the solution group registrar, and stipulates the minimum percentage of correct (consensus-aligned) votes out of the total number of votes a particular worker was eligible to submit during the reward period.
* Reward share is proportional to the volume of correct votes submitted by a worker during a reward period, and weighted by its stake.&#x20;

`worker_reward = (worker_correct_votes × user_stake) / total_weighted_correct_votes × voting_reward_per_block × active_blocks`

**Where:**

* `worker_reward`: the amount of EWT distributed to the worker node operator as their active reward for participation in eligible voting rounds within the concluded reward period.
* `worker_correct_votes`: The number of correct (consensus aligned) votes submitted by the worker node in the eligible voting rounds within the concluded reward period.&#x20;
* `user_stake`: The amount of tokens locked by the operator upon registration.
* `total_weighted_correct_votes`: Sum of correct votes weighted by stake across all worker nodes ( Σ(correct\_votes\_i \* stake\_i) ).
* `voting_rewards_per_block`: Amount of tokens allocated to voting rewards per block (configured by the solution registrar).
* `active_blocks`: Number of blocks spanning the reward period.&#x20;

**Worked example:**

A Solution Group contains 150 operators. At the end of a reward period, 100 operators submitted sufficient votes to exceed the SLA threshold and are eligible for rewards.

From the eligible 100 operators, the average correct votes during the reward period is 100 and the average user stake is 1000.&#x20;

Therefore: `total_weighted_correct_votes = 100 * 100 * 1000 = 10,000,000`

Worker Node A had 110 correct votes with a stake of 1000. There are 7200 active blocks in a voting round, and the votings rewards per block are set to 1 token.

Therefore: `worker_node_A_reward = (110 * 1000) / 10000000 * 1 * 7200` = 79 tokens

## Withdrawal Delay

The withdrawal delay is the period a user must wait between submitting an unsubscription request and withdrawing their tokens. This mechanism ensures every action (vote) has a consequence, protecting against malicious actors who may otherwise submit false votes and then immediately withdraw their stake to evade penalties. withdrawal delays are measured in reward periods instead of blocks.&#x20;

In practice, after an operator initializes a withdrawal, they must wait a defined (by the registrar) number of additional reward periods before withdrawing their collateral. During this delay period, the node can still participate in voting rounds and continue to earn rewards, except for the final reward period in which the stake is released and voting eligibility ends. This ensures all pending rounds are properly settled and any rewards or penalties processed before a node can exit the network.

## Voting Round Lifecycle

1. **Initiation:** A voting round is initiated via extrinsic from registrar or a worker node vote submission
2. **Voting:** Eligible worker nodes submit votes (solution results) to the worker node pallet
3. **Expiration:** The voting round expires after the configured number of blocks
4. **Consensus:** The collators reach agreement on the consensus result and update vote metadata to track correct submission per worker
5. **Reward distribution:** At the end of the corresponding reward period, worker performance is benchmarked against the SLA threshold, and rewards are calculated and distributed to qualifying workers

### Consensus related Configurable Parameters

Below is a list of configurations which are set by the solution registrar, including the upper and lower bounds.

**Solution Group registration Parameters**

* **Subscription\_reward\_per\_block:** Tokens per block distributed as rewards to eligible worker node operators
* **withdrawal\_delay:** Number of reward periods to wait after withdrawal action
* **sla\_voting\_threshold:** SLA voting threshold as a percent
  * Lower bound: 0
  * Upper bound: 100

**Solution Registration Parameters**

* **expiration\_block:** Block number when the solution expires
* **max\_waiting \_threshold:** sets the number of blocks in which a voting round can remain active and open to receive votes, before it expires and concludes
  * Lower bound: 0
  * Upper bound: <= reward period length
* **vote\_threshold\_percent:** Threshold for majority consensus ruling \[%]
  * Lower bound: 0
  * Upper bound: 100
* **quorum\_percent:** Threshold for the quorum \[%]
  * Lower bound: 0
  * Upper bound: 100
* **voting\_start\_method:** Who can start voting rounds
  * Bound: Enum (e.g., Registrar, Anyone, etc.)

## FAQ

### 1. When are voting rewards distributed to Worker Node Operators?

Rewards are distributed after a reward period has ended and all voting rounds from that period have been processed. At the current stage, the system processes one voting round per block, with a maximum of 128 votes per block. If a round contains more than 128 votes, processing can extend over multiple blocks.\
Because some solutions are triggered on schedule (e.g. periodic rewards) while others are event-driven (e.g. external data triggers like gp4btc), the number of voting rounds can vary each period. Once all rounds in a period are completed, the corresponding rewards are paid out.

### 2. Which factors increase APY% for Worker Nodes?

Reward eligibility is determined by the SLA threshold set by Solution Group Registrars (owners). The SLA threshold is the minimum percentage of correct (consensus-aligned) votes a Worker Node must submit in each reward period.&#x20;

To maximise APY returns, a Worker Node needs to exceed the SLA threshold in each reward period and therefore should aim to vote correctly in every voting round in which  they are eligible to vote.&#x20;

Worker Nodes are always eligible to vote for non-nominated solutions. For nominated ones, they must be first nominated by a mechanism running along with the solution.

You can read up more about the [Reward System](/ewx-ecosystem/pallets/worker-node-pallet) of the Worker Node Pallet.&#x20;

### 3. Which token is required to become an operator?

Becoming a Worker Node operator requires a small amount of EWT to be locked (0.1) and the stake provided by the operators on stEWT. The Operators are getting rewarded based on their performance with the asset configured on the Solution Group they have subscribed to.


# Balances Pallet

The **Balances Pallet** is a core module in the Polkadot SDK, responsible for managing token balances, enabling secure transfers, and supporting the blockchain’s economic operations. It provides robust mechanisms for balance management, transaction fees, and account lifecycle, ensuring a stable and efficient economic framework for Substrate-based blockchains.

Key functionalities:

* **Account Balances Management**: Maintains and tracks balances for all accounts, divided into free balance (spendable) and reserved balance (locked for specific purposes).
* **Token Transfers**: Enables secure token transfers between accounts with features like keep-alive transfers to prevent accounts from being reaped.
* **Locks and Imbalances**:  Introduces runtime locks to temporarily restrict access to balances during specific operations (e.g., governance or staking) and handles imbalances through secure issuance or burning of tokens to maintain economic integrity across the system.<br>


# Proxy Pallet

The **Proxy Pallet** is a versatile module in the Polkadot SDK that facilitates secure delegation of account operations. It allows users to authorize other accounts, called proxies, to perform specific actions on their behalf. This feature enables enhanced account management, operational flexibility, and secure delegation, particularly beneficial in multi-sig setups and automation scenarios.

Key functionalities:

* **Account Delegation**: Enables accounts to delegate specific operations to proxy accounts with configurable levels of permissions and supports use cases such as transaction signing, staking operations, and runtime-specific actions.
* **Proxy Types and Permissions**: Defines distinct proxy types to grant granular permissions, ensuring proxies can only execute authorized actions.
* **Time-Limited and Announced Proxies**: Introduces time-limited proxies that automatically expire after a predefined duration, enhancing security. It also implements delayed announcements for high-risk actions, allowing users to monitor and cancel actions if necessary.
* **Security and Revocation**: Includes mechanisms for account owners to revoke proxy permissions at any time, ensuring full control while it protects against unauthorized actions through runtime checks and adherence to defined proxy types.


# XCM Pallet

The **XCM Pallet** is a critical module in the Polkadot SDK that facilitates Cross-Consensus Messaging (XCM), enabling secure and interoperable communication between different chains. This pallet is fundamental to Polkadot’s interoperability framework, allowing Parachains, relay chains, and other consensus systems to exchange messages and assets seamlessly.

Key functionalities:

* **Cross-Consensus Communication**: Implements a universal messaging protocol for interaction between different consensus systems and allows Parachains and relay chains to send and receive messages reliably, forming the backbone of Polkadot’s interoperability.
* **Asset Transfer and Management**: Supports transferring assets, such as tokens or NFTs, across chains using the XCM protocol.
* **Instruction Execution**: Provides an instruction set for executing operations on remote chains, such as account creation, staking, or governance participation.
* **Fee Payment and Weight Management**: Handles fee payments for executing XCM instructions, ensuring proper incentivization of involved parties.


# Assets Pallet

The **Assets Pallet** is a core component in the Polkadot SDK that provides comprehensive tools for managing and interacting with fungible token assets. This pallet enables the creation, transfer, and governance of assets on-chain, supporting decentralized ecosystems with robust asset functionality.

Key functionalities:

* **Asset Creation and Registration**: Allows users or entities to create new fungible assets with customizable properties such as total supply, name, and metadata. It also enforces administrative roles for managing the lifecycle of assets, including minting and burning.
* **Asset Transfer and Balances Management**: Enables secure and efficient transfer of assets between accounts and tracks account balances for each asset type, with configurable rules for minimum balances and dust handling.
* **Minting and Burning Mechanisms**: Provides authorized administrators the ability to mint new tokens to increase supply or burn tokens to reduce supply. It also ensures precise control over asset supply and its distribution across holders.
* **Permissioned Operations**: Supports a robust permissions system to define administrative roles such as asset owners, issuers, and freezers.


# Multisig Pallet

The **Multisig Pallet** in the Polkadot SDK provides a robust mechanism for multi-signature account management, enabling secure and coordinated actions among multiple participants. This pallet is integral for collaborative decision-making and securing high-value operations in decentralized ecosystems.

Key functionalities:

* **Creation of Multisig Agreements**: Facilitates the creation of multi signature agreements among multiple accounts with a defined threshold of required approvals. Supports both single-use and reusable multi signature setups for flexibility in different use cases.
* **Threshold-Based Execution**: Allows execution of transactions once the required threshold of signatures has been collected and ensures that no action is performed unless the predefined consensus is reached among signatories.
* **Time-Locked Approvals**: Introduces optional time-locks for multisig operations, giving signatories a limited window to approve or reject a proposal and ensures timely decision-making and reduces risks associated with prolonged inactivity.


# Scheduler Pallet

The **Scheduler Pallet** provides a powerful framework for scheduling time-based and event-driven tasks within the runtime. It is integral for automating and orchestrating on-chain operations at specified block heights or based on dynamic triggers.

Key functionalities:

* **Scheduled Task Management**: Enables the scheduling of on-chain calls to execute at a specified block number or recurring intervals and supports delayed execution, enabling precise control over task timing for one-off or periodic operations.
* **Flexible Call Dispatching**: Allows scheduling of any callable extrinsics, making it versatile for automating runtime functionality. It also supports tasks requiring root-level permissions or limited by specific user-defined filters.
* **Priority and Weight Control**: Assigns priorities to scheduled tasks to determine execution order in case of conflicts and manages weight allocation to prevent overloading blocks with scheduled calls.
* **Rescheduling and Cancellation**: Provides mechanisms to modify or cancel scheduled tasks before execution.


# Preimages Pallet

The **Preimages Pallet** is a specialized component in the Substrate runtime that facilitates the storage, retrieval, and management of large data blobs (preimages) on-chain. It is particularly useful for governance and other modules requiring access to detailed proposals or large datasets while minimizing storage costs.

Key functionalities:

* **Efficient Storage of Preimages**: Allows users to submit and store large preimage data off-chain initially, ensuring cost-effective on-chain storage.
* **On-Demand Retrieval**: Enables on-chain modules, such as governance proposals, to reference and retrieve preimages only when they need to be executed or evaluated.
* **Preimage Validation**: Includes a framework to validate and verify the integrity of preimages against hashes before use and ensures that the preimage data corresponds accurately to its referenced hash.
* **Access and Ownership Control**: Supports fine-grained access controls, ensuring only authorized entities can submit or clear preimages and allows multiple modules and users to leverage preimages securely without conflict.


# Offences Pallet

The **Offences Pallet** is a critical component in the Substrate framework designed to detect, record, and manage misbehavior within the network. It ensures the integrity of the system by imposing penalties on validators and other actors who deviate from expected behavior, such as equivocation or inactivity.

Key functionalities:

* **Misbehavior Detection**: Facilitates the detection of offenses, such as double-signing or equivocation, leveraging integrated modules or external monitoring tools while it supports configurable offense types to adapt to specific network requirements and threat models.
* **Offense Reporting and Recording**: Provides a structured mechanism to report misbehavior, with offenses recorded on-chain for transparency and accountability. It also tracks offenders and their associated penalties to discourage repeated violations.
* **Penalty Enforcement**: Imposes penalties on validators or network participants based on the severity and frequency of their offenses. Penalties can include slashing, staking disqualifications, or temporary bans to maintain network integrity.
* **Historical Tracking**: Maintains a history of offenses and their resolutions to enable governance or runtime modules to make informed decisions regarding actors’ reliability. Supports configurable retention policies to manage storage efficiently while preserving essential historical data.


# Eth-Bridge Pallet

The **Eth-Bridge Pallet** is a component responsible for facilitating interactions between a Substrate-based blockchain and an Ethereum-based network. It implements the BridgeInterface and provides functionality for publishing transactions and generating lower proofs. This enables other pallets that implement BridgeInterfaceNotification to execute functions on the Ethereum-based smart contract or request proofs for token operations.

Key functionalities:

* **Transaction Publishing and Management**: Accepts and processes transaction requests from external pallets, handling them sequentially to ensure that they are executed in the order they are received. Publishes transactions by packaging and encoding them to be compatible with Ethereum, complete with timestamps and unique transaction IDs to track and verify their status.
* **Consensus and Confirmation Collection**: Manages the collection of ECDSA confirmations from authors to prove consensus for a transaction, ensuring that all required signatures are gathered before submission. Utilizes a confirmation system where authors can add their confirmations until the required threshold is met, after which the transaction is ready to be dispatched to Ethereum.
* **Dispatching Transactions to Ethereum**: Appoints an author responsible for sending a transaction to Ethereum once sufficient confirmations have been collected.
* **On-Chain and Off-Chain Coordination**: Integrates with off-chain workers (OCWs) to monitor unresolved transactions and prompt authors to act as needed. It also alerts the originating pallet with the outcome of a transaction through the BridgeInterfaceNotification callback, enabling state commitment or rollback based on the results.


# Token-Manager Pallet

The **Token-Manager Pallet** is designed for managing tokens and handling token operations within a Substrate-based blockchain. This pallet facilitates various features, including secure token transfers, scheduling of token “lowering” operations to Ethereum (tier1), and interaction with external token contracts. It also enables the governance of token-related actions through nonces and proofs, ensuring a seamless operation between blockchain tiers.

Key functionalities:

* **Token Balance Management:** Tracks the balances of individual accounts for different tokens. This allows the management and querying of token balances by specifying the token ID and account ID. Each account’s nonce is tracked, representing the number of transfers conducted, ensuring the integrity of transaction sequences.
* **Lowering Operations**: Supports “lowering” tokens from tier2 to tier1, interfacing with an Ethereum contract. This operation can be executed directly or scheduled for later execution. Lowering operations require confirmations and signatures, with proof requirements verified before sending transactions, ensuring secure, authenticated transfers.
* **Proof and Transaction Management**: Handles proofs for token transfers, including the ability to regenerate proofs for pending or failed lower transactions. Stores and retrieves data about lower transactions in various states: ready-to-claim, pending, and failed, providing robust tracking and error recovery mechanisms.


# Ethereum-events pallet

The **Ethereum-events pallet** handles the management of Ethereum events and their processing within the blockchain environment. It supports tracking event submissions, validation, and challenges while providing secure mechanisms for event processing and recording.

Key functionalities:

* **Event Tracking and Management**: Efficiently tracks and manages Ethereum events, including ingress counters, to maintain order and ensure unique identification of events.
* **Event Validation Pipeline**: Handles the lifecycle of Ethereum events from submission to processing, with mechanisms to mark events as unchecked, pending, or processed.
* **Challenge and Validation System**: Allows validators to challenge event validity, enforcing quorum-based decision-making for robust and decentralized validation.
* **Event Integrity Protection**: Ensures that events cannot be processed more than once, maintaining a consistent and secure state in the blockchain’s event records.


# Avn Pallet

The **Avn Pallet** provides functionality that is common for other pallets such as handling offchain worker validations, managing a list of validator accounts and their signing keys.

Key functionalities:

* **Validator List**: Maintains a list of active validators, each represented by an address and a cryptographic key.
* **Bridge Contract Address**: Stores the address of an associated bridge contract on the Ethereum network.
* **Off-Chain Worker Integration**: Provides mechanisms for off-chain workers to run only once per block to avoid duplicate operations. Includes functionality for interacting with external services for retrieving finalized blocks and requesting signatures.
* **Signature Verification**: Offers tools to validate Ethereum ECDSA signatures, ensuring that signatures are produced by known validators.


# The Marketplace App

The Marketplace App is a decentralized desktop application which provides an intuitive interface for the general community having limited technical background to easily participate in running worker nodes on their local machines.

It supports Windows, MacOS, and Ubuntu systems.

## Download and Installation

Download and install the Marketplace app on your machine from the download links provided in the official [EWX Website](https://www.energywebx.com/).


# Operator and Worker Accounts

## Operator account

Marketplace app requires an operator account to make the most of the features it offers. Connect your EWX account, fund your account and sign it up as an operator by following these guides:

<table data-view="cards"><thead><tr><th></th><th data-type="content-ref"></th></tr></thead><tbody><tr><td>Create</td><td><a href="/pages/UqayzPWPofapg7J3S6ir">/pages/UqayzPWPofapg7J3S6ir</a></td></tr><tr><td>Connect</td><td><a href="/pages/sukEcQv1s34t36ekuu6b">/pages/sukEcQv1s34t36ekuu6b</a></td></tr><tr><td>Fund</td><td><a href="/pages/JnY2ovXoOF40jjOQaTXm">/pages/JnY2ovXoOF40jjOQaTXm</a></td></tr><tr><td>Disconnect</td><td><a href="/pages/AOk50vmcdccoJAwOKmWt">/pages/AOk50vmcdccoJAwOKmWt</a></td></tr></tbody></table>

***

## Worker account

A worker node account is used mainly for running worker node logic(s). Though you can earn base rewards by subscribing to a solution group, participating into worker node network allows you to earn extra rewards.&#x20;

{% hint style="success" %}
Worker node accounts do not hold any tokens and cannot access your wallet account tokens. They are only used for computation result submissions
{% endhint %}

#### Discover more guides for this topic:

<table data-view="cards"><thead><tr><th></th><th data-type="content-ref"></th></tr></thead><tbody><tr><td>Create</td><td><a href="/pages/MFWgA2zo6sfdhd9H9in0">/pages/MFWgA2zo6sfdhd9H9in0</a></td></tr><tr><td>Import</td><td><a href="/pages/zTfCdwOTh0vk4ttM5sbk">/pages/zTfCdwOTh0vk4ttM5sbk</a></td></tr><tr><td>Export</td><td><a href="/pages/epAUEiIpObvBOmrtYvOs">/pages/epAUEiIpObvBOmrtYvOs</a></td></tr><tr><td>Link</td><td><a href="/pages/FW9xNudo5TwjV0dYQrnb">/pages/FW9xNudo5TwjV0dYQrnb</a></td></tr><tr><td>Unlink</td><td><a href="/pages/LLykpdheHIaUM0mQp0Aq">/pages/LLykpdheHIaUM0mQp0Aq</a></td></tr></tbody></table>

***

## FAQs

<details>

<summary>What to do when I forgot my worker account seed phrase?</summary>

You can recover your linked worker account's seed phrase using [export](/ewx-ecosystem/the-marketplace-app/operator-and-worker-accounts/exporting-worker-account) feature as long as you have your password.

Unfortunately if you have unlinked or if you lost your password, then the seed phrase recovery process is not possible.

</details>

<details>

<summary>What to do when I forgot my operator account seed phrase?</summary>

As per [SubWallet's basic safety](https://docs.subwallet.app/main/privacy-and-security/basic-safety):&#x20;

> If you lose your secret recovery phrase, you will not be able to access your wallet and its contents will be unrecoverable.

Please keep your seed phrase somewhere safe :pray:

</details>

<details>

<summary>What to do when I forgot my worker account password?</summary>

When the app restarts, you will be prompted to unlock your worker node. Follow the instructions in case you forgot your password:

1. Click  `Forgot your password?`

![](/files/bZpl5babgr7CG7QPVhLP)

2. Paste your worker account's seed phrase and click `Continue`

![](/files/EGD5z7vD3XFuPiOKKR04)

3. Enter your new password and click `Reset Password`

![](/files/Ykpu3qlb0dYvTnn4JLQb)

</details>


# Creating an operator account

## Sign up as an operator

### Prerequisites

* [x] [EWX](/ewx-ecosystem/the-marketplace-app/token-management/creating-an-ewc-account) account that is [connected](/ewx-ecosystem/the-marketplace-app/operator-and-worker-accounts/connecting-to-operator-account) to Marketplace
* [x] Some [funds](/ewx-ecosystem/the-marketplace-app/operator-and-worker-accounts/funding-an-operator-account) in the EWX account for transaction fee

1. Select any of the solution group that is available for subscription and click `Opt-in`

<figure><img src="/files/NEixGKoAIxZ0raFE1NYr" alt=""><figcaption><p>Opt-in to a solution group</p></figcaption></figure>

2. Enter the name you desired for your operator account in the text field, select country of residence and then hit `Continue`

<figure><img src="/files/UwzkDtesrsKWMFAMnByA" alt="" width="375"><figcaption><p>Sign up as operator</p></figcaption></figure>

3. Confirm the transaction in your wallet

<figure><img src="/files/Hanv2ekrmjanTXa5ASdU" alt="" width="375"><figcaption><p>Pending confirmation</p></figcaption></figure>

4. Once approved, wait for the transaction to be executed

<figure><img src="/files/U9SemCwXIdWJ0TyBxAeV" alt="" width="375"><figcaption><p>Executing transaction</p></figcaption></figure>

5. You will see a success message along with the transaction URL to Polkadot explorer. Your operator account is now registered :partying\_face:

<figure><img src="/files/AI105rsFu6YRbhggpby1" alt="" width="375"><figcaption><p>Sign up operator success</p></figcaption></figure>


# Funding an operator account

Funding an operator account requires liquid tokens called $stEWT. To acquire $stEWT, please follow the steps described in the [Liquid stake to get $stEWT](/ewx-ecosystem/staking-on-energy-web-x/liquid-staking-on-energy-web-x/liquid-staking-with-the-energy-web-x-staking-web-app/liquid-stake-to-get-usdstewt)section.

{% hint style="success" %}
Your operator account balance will be displayed on the left panel and also in the popover menu when you click on your operator address
{% endhint %}

<figure><img src="/files/TI3CgQ6a6ZmlmuGd8o24" alt=""><figcaption><p>Operator account balance</p></figcaption></figure>


# Connecting to operator account

The Marketplace app allows you to browse through a list of available solution groups with or without a wallet being connected. Without the connection however, you won't be able to perform token lifting, lowering or subscription. To connect:

1. Click on `Connect` button either on the left-side panel or on top corner of the screen

{% hint style="info" %}
Tip: There's a "Connect" button in the solution group detail page as well
{% endhint %}

<figure><img src="/files/VwdwWaYQBv4WLpEaP2b2" alt=""><figcaption><p>Connect Wallet</p></figcaption></figure>

2. Choose your preferred wallet to connect (SubWallet/Ledger)

<figure><img src="/files/7WyNYiG179MstRwTW1Eb" alt="" width="375"><figcaption><p>Connect to EWX Account</p></figcaption></figure>

### Option 1: Using SubWallet

1\. Scan the displayed QR code using your SubWallet app, select an account that you wish to connect and click on `Approve`

<figure><img src="/files/nSzQCjqm0oLTLhEKgFWn" alt="" width="372"><figcaption><p>WalletConnect QR Code</p></figcaption></figure>

2. You will see "Account connected successfully" message on the Marketplace app screen. Click `Continue` to proceed

<figure><img src="/files/KiOsGds38TplcikVmhdD" alt="" width="375"><figcaption><p>WalletConnect successfully connected</p></figcaption></figure>

***

### Option 2: Using Ledger

Please refer to [How to use Ledger on Marketplace App](/ewx-ecosystem/the-marketplace-app/how-to-use-ledger-on-marketplace-app) for more info.


# Disconnecting an operator account

To disconnect, click on the operator address located on the top-right of the screen and then click on the disconnect icon as highlighted below:

{% hint style="danger" %}
Once disconnected, you will no longer able to use certain features, such as lifting, lowering or subscribing
{% endhint %}

<figure><img src="/files/lUHV4o4pA0lxDT05y1FN" alt="" width="375"><figcaption><p>Disconnect Wallet</p></figcaption></figure>


# Creating a worker account

### Prerequisite

* [x] Connected EWX account

1. Click on `Set Worker Account` on the left panel located under Total EWT Balance in your Dashboard

<figure><img src="/files/cnJ1wBWvo7OM8gQmBqQi" alt="" width="290"><figcaption><p>Set worker account</p></figcaption></figure>

2. Click `Next` (with default to "In this machine") to proceed

<figure><img src="/files/QGX9GAgMCGehWquxUPnZ" alt="" width="375"><figcaption><p>Set worker account on local machine</p></figcaption></figure>

3. Click `Generate account`

<figure><img src="/files/Eg51sm600DeqC50a0mJf" alt="" width="375"><figcaption><p>Generate account</p></figcaption></figure>

4. Click `Confirm`

<figure><img src="/files/axUteJhR1V65UHiQEoLv" alt="" width="375"><figcaption><p>Generate account warning</p></figcaption></figure>

5. Create a password and re-enter it for verification. Click `Create Worker Node Account`. You will be prompted to enter this password during app start up in order to unlock your worker account

<figure><img src="/files/PKNHfo8XiUgBvqHh2k0J" alt="" width="375"><figcaption><p>Create a password</p></figcaption></figure>

6. Click `Backup Mnemonic` and store the file somewhere safe before clicking on `Continue`

<figure><img src="/files/bk8aV0upIR71zhneO03z" alt="" width="375"><figcaption><p>Worker account mnemonic</p></figcaption></figure>

7. Verify the mnemonic based on your backup file in the next screen and click `Continue`

<figure><img src="/files/yA85S246xtq39CBUBnum" alt="" width="375"><figcaption><p>Verify mnemonic</p></figcaption></figure>

8. Congratulations, your worker account is successfully created :tada:

<figure><img src="/files/KrdfNZYKSs5YRo8aNMVQ" alt="" width="375"><figcaption><p>Success message</p></figcaption></figure>


# Importing worker account

### Prerequisites

* [x] Connected EWX account
* [x] Worker account seed phrase

1. Click on `Set Worker Account` on the left panel located under Total EWT Balance in your Dashboard

<figure><img src="/files/cnJ1wBWvo7OM8gQmBqQi" alt="" width="290"><figcaption><p>Set worker account</p></figcaption></figure>

2. Click `Next` (with default to "In this machine") to proceed

<figure><img src="/files/nKKxr9LjkKlaIzXytfjG" alt="" width="375"><figcaption><p>Set worker account on local machine</p></figcaption></figure>

3. Click `Import Seed Phrase`

<figure><img src="/files/4exs9y3Uj87lSyufRFyI" alt="" width="375"><figcaption><p>Import seed phrase</p></figcaption></figure>

4. Open your mnemonic backup file and copy the contents. Then, click on `Paste from clipboard` and click `Continue`

<figure><img src="/files/5sbeFVK571AabuTWgxDk" alt="" width="375"><figcaption><p>Enter worker account mnemonic</p></figcaption></figure>

5. Enter password and re-enter it again for verification before clicking on `Import Worker Node Account`

<figure><img src="/files/Fr5BZPDWv7iCkpacG12r" alt="" width="375"><figcaption><p>Create a password</p></figcaption></figure>

6. Once completed, a success message will be shown

<figure><img src="/files/Qpr8Ro1OKZprr5tc3g9w" alt="" width="375"><figcaption><p>Success message</p></figcaption></figure>


# Exporting worker account

### Prerequisites

* [x] Connected EWX account
* [x] Connected worker account&#x20;

1. Click on `Export Account` located on the left panel of your Dashboard page

<figure><img src="/files/weKHmxoIWt2OMdmYdt04" alt="" width="279"><figcaption><p>Export Account menu</p></figcaption></figure>

2. Click `Confirm` to reveal the worker account mnemonic

<figure><img src="/files/iEvunTuSeZo3aCEnmfW6" alt="" width="375"><figcaption><p>Confirmation message</p></figcaption></figure>

3. Enter your password and click `Continue`

<figure><img src="/files/02XE7F1KHch6CXjSXdEb" alt="" width="375"><figcaption><p>Enter password</p></figcaption></figure>

4. Click on `Backup Mnemonic` to backup as file or `Close` to close the pop-up

<figure><img src="/files/GnBaO8dAQHTZopPDdtR0" alt="" width="375"><figcaption><p>Worker account mnemonic</p></figcaption></figure>


# Linking a worker account to an operator account

Before your worker node is able to cast votes, your worker account needs to be linked to an operator account first. This is a one-time step only and you will not be prompted to link again in the future (unless it's being unlinked).

### Prerequisites

* [x] Connected EWX account
* [x] Connected worker account
* [x] [Subscribed](/ewx-ecosystem/the-marketplace-app/subscriptions/subscribing-to-a-solution-group) solution group

1. Click `Enable Solution Group` either from Dashboard or Manage Subscription page

<figure><img src="/files/mraxtW0JL1vL3MggQyLg" alt=""><figcaption><p>Enable Solution Group in Dashboard</p></figcaption></figure>

<figure><img src="/files/DeaPyTBHNYzNsVVB2iqX" alt=""><figcaption><p>Enable Solution Group in Manage Subscription</p></figcaption></figure>

2. Read through the important information regarding participating into a worker node network. Click `Continue` to proceed or `Dashboard` to cancel

<figure><img src="/files/LFBZgTF0riCYg1MKooZe" alt="" width="375"><figcaption><p>Participate into worker node network message</p></figcaption></figure>

3. Click `Continue` to proceed

<figure><img src="/files/H1rsKgmBiJvDRowtFOvO" alt="" width="375"><figcaption><p>Proceed to connect worker account</p></figcaption></figure>

4. Approve the transaction in your wallet

<figure><img src="/files/cRyLO2G4t738unLaFDey" alt="" width="375"><figcaption><p>Pending confirmation</p></figcaption></figure>

5. Wait for the transaction to finish execution

<figure><img src="/files/thL5JgCZpPA7MM9GjBLD" alt="" width="375"><figcaption><p>Executing transaction</p></figcaption></figure>

6. Once you see the transaction successful message, your worker account and operator account are now linked :link:

<figure><img src="/files/NvQmHfBno3WQlyfw99w4" alt="" width="375"><figcaption><p>Link worker transaction successful</p></figcaption></figure>


# Unlinking a worker account from an operator account

An operator account is only allowed to link with a single worker account at a time. Unlinking allows you to generate a new worker account or import another worker account that can be linked with the same operator.

{% hint style="danger" %}
Unlinking will stop your worker node from casting votes
{% endhint %}

### Prerequisites

* [x] Connected EWX account
* [x] Linked worker account

1. Click on `Unlink` menu on the left panel of the Dashboard

<figure><img src="/files/j3rlCOPTNG4IyXHMq2DB" alt=""><figcaption><p>Unlink menu</p></figcaption></figure>

2. Click `Unlink` to proceed or `Cancel`

<figure><img src="/files/Tn4cEKfn5GVJUhBG8dXF" alt="" width="375"><figcaption><p>Unlink confirmation</p></figcaption></figure>

3. Approve the transaction in your wallet

<figure><img src="/files/AghjhpgAXbRbYevTYJEe" alt="" width="375"><figcaption><p>Pending confirmation</p></figcaption></figure>

4. Wait for the transaction to finish execution

<figure><img src="/files/3hJVt42P9qla0dh7yUdv" alt="" width="375"><figcaption><p>Executing transaction</p></figcaption></figure>

5. A successful message with transaction URL will be displayed when unlinking is successful

<figure><img src="/files/DKsKUsA38Tf3bQH46J6V" alt="" width="375"><figcaption><p>Unlink worker success message</p></figcaption></figure>


# How to use Ledger on Marketplace App

## Prerequisites

Before using Ledger on the Marketplace App, the Polkadot app needs to be installed in the hardware wallet device. To do so, open the Ledger Live application in your computer and go to "My Ledger" section of the sidebar. Make sure your Ledger device is connected to the computer and unlocked when doing this.

<figure><img src="https://lh7-rt.googleusercontent.com/docsz/AD_4nXfxwpbYAQg48sRnyCinQ68iNwwGI6qvLp2QKhd-SyD3BI_QMpe5mxljpPceGNu5SSSavJvOgFwglKexixjLyCjINpus2wEUmy156H5-Q5DB0bMbJRYMTtoyy6QdDqSB3oWoYQkyID_kK3C7AQ8PgHU28w?key=6uTk2iU5dbUdZVbnd9_1pQ" alt="" width="188"><figcaption></figcaption></figure>

In the "App Catalog" section, search for the Polkadot app and install it.

<figure><img src="https://lh7-rt.googleusercontent.com/docsz/AD_4nXd5goyo5G8AsiKgzx9Q8qW0SfEXXnwYrkBudignsBZnmHKNExgsFJC0B09uw6x6kbMl4f5u2tKquPZIfvn24CSchRJrqnRO9GMmSVtAh1JQkDW0OuhK36jOYtUr_Uo7bDbH0L3Lcddo-IpUsvce5dcnxAw?key=6uTk2iU5dbUdZVbnd9_1pQ" alt=""><figcaption></figcaption></figure>

Confirm that the Polkadot app is correctly installed.

<figure><img src="https://lh7-rt.googleusercontent.com/docsz/AD_4nXcXIHMxLSNlislM67C8UN0HHWPfGpyaQYe31XDO01-QquGN9GLqB_9OfXLwa4rpLACIHJncyXFaNFLlc3rWCkKc8uTRKFfK--DhpCsRlRcERLLqUhFyz8cb82_s22lYnJOF9wS-Q4bQ4jBtaZM-w9W7t3Y?key=6uTk2iU5dbUdZVbnd9_1pQ" alt=""><figcaption></figcaption></figure>

Now the device is ready to interact with the Polkadot chain, including the EWX chain.

## :warning: Things to Keep in Mind before using Ledger in the Marketplace App

Ledger Live app does not display EWX account and its balance as it is not yet supported. EWF is already including this in the roadmap.

The Marketplace App directly communicates with your Ledger device without the need to use Ledger Live as long as Polkadot is installed.

## Connect Operator Account using Ledger Device

The first step to use Ledger with the EWX Marketplace application is to connect your hardware wallet. In this case, the process is very similar to connecting any other browser or mobile-based wallet. The user needs to click on the “Connect” button that appears both in the top-right corner of the screen.

<figure><img src="/files/K6Hyl5mXrYiWFBADE1tX" alt=""><figcaption></figcaption></figure>

A dialog will pop up, and the user can choose its preferred method to connect the wallet - in this case, choose Ledger.

<figure><img src="/files/HX8paoPbLRwm9agQMCfr" alt="" width="424"><figcaption></figcaption></figure>

The user will be prompted to continue the connection process in the hardware device.

<figure><img src="/files/YjbbBtTihzlt3PE3ALj8" alt="" width="421"><figcaption></figcaption></figure>

By default, the Ledger device will look like this when unlocked:

After starting the connection process, the user needs to open the Polkadot application on the Ledger device.

<figure><img src="/files/t8dHMIxpyXlrDkEP7QcO" alt="" width="563"><figcaption></figcaption></figure>

After opening the Polkadot app (pressing both buttons at the same time), this will appear on the device:

<figure><img src="/files/MeHCIdNsdD5Sw3ux2eT4" alt="" width="563"><figcaption></figcaption></figure>

That means there is an ongoing operation that needs to approve. To do that, press the right button until the “Approve” screen is displayed.

<figure><img src="/files/knGyic2G9Y9VT81uJxzr" alt="" width="563"><figcaption></figcaption></figure>

After approval, below shows the confirmation that the user is connected to the Ledger account successfully.

<figure><img src="/files/ztcszlBfHdEE589BjKrz" alt="" width="422"><figcaption></figcaption></figure>

After successful connection, the EWX Account will be displayed on the upper right corner of the screen.

{% hint style="success" %}
A new EWX address will be generated for first time users. The connected address is derived from the account which seed phrase is automatically generated and stored in the Ledger device.&#x20;
{% endhint %}

{% hint style="warning" %}
One Ledger device can only represent a single EWX operator account.
{% endhint %}

<figure><img src="/files/ucMnFOMVEe14MOJ0kKkL" alt=""><figcaption></figcaption></figure>

## Funding the EWX Account

To fund an EWX Account, the user can lift tokens from their existing EWC account or by creating a new one. EWC accounts can easily be created and funded using exchanges offering EWT such as [Kraken](https://www.kraken.com) or [KuCoin](https://www.kucoin.com).

<figure><img src="/files/76U37Ug4KWZTt5MkdIA1" alt=""><figcaption></figcaption></figure>

## Executing a transaction

The process is very similar to the browser-based wallet, and applies to all the different transactions available on the app: lowering, sign up as operator, subscribe, link worker account, unsubscribe, top-up stake and claim rewards. After initiating a transaction, for example - lowering, the user will see a ‘Pending confirmation’ screen. The user needs to confirm the operation using the same method used to connect to the wallet.

<figure><img src="https://lh7-rt.googleusercontent.com/docsz/AD_4nXcgQoR3U0dYKzYJcu3Dd56xR18Efs1mBQDg3HESANA7AhjEnV7saJdkJPfYEZp0cPaHC6D8bOBwNHLV07ZxoUH5rbLLsDN6ktCE7p3wtjk1MXNQVVL68Ry-dgFLNbEJCA7Orop-xmFXV4u6kXX0_SI8rXE?key=6uTk2iU5dbUdZVbnd9_1pQ" alt="" width="375"><figcaption></figcaption></figure>

When this screen appears, open the Polkadot account on the Ledger device, just like before.

<figure><img src="/files/ifvclSnSfRjs9vADBGGS" alt="" width="330"><figcaption></figcaption></figure>

After opening the app, review and approve the operation.

<figure><img src="/files/mG50SmVTwoj6NNY36Elo" alt="" width="371"><figcaption></figcaption></figure>

The details of the transaction are displayed on the device just like on the next sample screens.

<figure><img src="/files/96QnEmIQGsJWoWeW0DNz" alt="" width="369"><figcaption></figcaption></figure>

Proceed to approve the operation.

<figure><img src="/files/6YENuW2rNXpXfCg2vD5K" alt="" width="375"><figcaption></figcaption></figure>

The progress screen on the app immediately changes, displaying the “Executing transaction” title. At this point, the transaction has been sent and is being processed on the blockchain.

<figure><img src="https://lh7-rt.googleusercontent.com/docsz/AD_4nXcb6uRU-jtcUpTROzErg8D1unQegoOlZklI2GfMx5GfwaLRg2Yl3qe8K5uwKAkZ2u9G3vkzmbqDjnxI9wnsB2ISmZEeMymcsIc23BPbFo8YX4Dp0X8waSu9RykL3I5DiUygN2LD_zAGLCG9n2bpDUks4Ok?key=6uTk2iU5dbUdZVbnd9_1pQ" alt="" width="375"><figcaption></figcaption></figure>

If the transaction finished successfully, the success screen and the corresponding tx hash are displayed. This concludes the entire transaction process.

<figure><img src="https://lh7-rt.googleusercontent.com/docsz/AD_4nXc8SKYosnJh3aEd2EDyCloO4l7vDwaSmWfBCy_kc9WIlu-JR9UWo2OQ6gS-hSrwbWm5gBYfYBzeZpN8SbJm5FbCdxf6Etpgg5_gzSiwM3Jeep8gmlma-Rmx1nyxDNXRYfiZ-0jSvlRJU2xT50KKaS56w64?key=6uTk2iU5dbUdZVbnd9_1pQ" alt="" width="375"><figcaption></figcaption></figure>


# Token Management

The Marketplace app supports $EWT and $stEWT tokens. Below are the guides in acquiring them.

#### Guides available for token management:

<table data-view="cards"><thead><tr><th></th><th data-type="content-ref"></th></tr></thead><tbody><tr><td>Create EWC Account</td><td><a href="/pages/sx40rgmFbkl7fqTRXWCN">/pages/sx40rgmFbkl7fqTRXWCN</a></td></tr><tr><td>Acquire $stEWT</td><td><a href="/pages/WPrCG649yissBb23Ylmi">/pages/WPrCG649yissBb23Ylmi</a></td></tr><tr><td>Check $stEWT balance</td><td><a href="/pages/bkEWm8KJAw0iORpa1XQa">/pages/bkEWm8KJAw0iORpa1XQa</a></td></tr><tr><td>Acquire $EWT in Marketplace App</td><td><a href="/pages/ABo92YeXdqhMSI3yH6kv">/pages/ABo92YeXdqhMSI3yH6kv</a></td></tr></tbody></table>

## FAQs

<details>

<summary>How long will it take for my balance to appear in my operator account after liquid staking?</summary>

It takes around less than 5 minutes to reflect the amount of $stEWT in your account depending on the amount of requests being processed by the EWX pallet.

</details>


# Creating an EWC account

To create an EWC account, first choose your preferred wallet by either downloading the [SubWallet](https://www.subwallet.app/) app or using Ledger (via [LedgerLive](https://www.ledger.com/ledger-live)). Alternatively, you also may refer to our interactive guide [here](https://www.energywebx.com/setup-your-worker-node).

{% tabs %}
{% tab title="Using Subwallet" %}

1. Create a new account with seed phrase
2. Save the seed phrase somewhere safe and verify
3. Toggle Energy Web X and EWC network in Manage networks
4. Toggle EWT in Manage tokens
   {% endtab %}

{% tab title="Using Ledger (LedgerLive)" %}

1. Search for EWC in App Catalog, since EWC requires Ethereum, you'll have to install it as well
2. Search for Polkadot in App Catalog and install
   {% endtab %}
   {% endtabs %}

{% hint style="info" %}
Two accounts will be created by default. Substrate "EWX" account public address starts with `5` while EVM "EWC" account starts with `0x`
{% endhint %}


# Acquiring $stEWT

To acquire $stEWT, please follow the steps described in the [Liquid stake to get $stEWT](/ewx-ecosystem/staking-on-energy-web-x/liquid-staking-on-energy-web-x/liquid-staking-with-the-energy-web-x-staking-web-app/liquid-stake-to-get-usdstewt)section.


# Checking $stEWT balance

Your total $stEWT balance of the currently connected EWX account is available on the left panel of the Marketplace app or at the account dialog on the upper right corner of the screen.

<figure><img src="/files/wOdNeJItWWyXr1DohVZP" alt=""><figcaption><p>Total $stEWT balance</p></figcaption></figure>


# Acquiring $EWT for Marketplace App

The Marketplace App requires some $EWT on EWX chain. To acquire it, simply bridge $EWT either from EWC or ETH chains to EWX chain. Follow the steps described in [Bridging $EWT using the Energy Web X Bridging Web App](/ewx-ecosystem/bridging-usdewt/bridging-usdewt-using-the-energy-web-x-bridging-web-app).


# Managing EWC accounts (deprecated)

### Prerequisite

* [x] Connected EWX account

## Adding an EWC account

1. Click on `Add EWC Account +` button that is available on the left panel

<figure><img src="/files/zap1WEiuDe05mk6t32ig" alt=""><figcaption><p>Add EWC account menu</p></figcaption></figure>

2. Enter a valid EWC account address and press `+`. You may add multiple accounts and they will appear as a list

<figure><img src="/files/aJU5jEZaYJrs12YSqBtf" alt="" width="375"><figcaption><p>Add EWC Account</p></figcaption></figure>

## Removing an EWC account

1. Click on `⋮` icon next to the EWC account balance, and choose `Manage Accounts`

<figure><img src="/files/W91FDf6kIrRcM8s4YVII" alt=""><figcaption><p>Manage accounts menu</p></figcaption></figure>

2. There's a `-` icon right next to each of the added accounts. Click on it to remove

<figure><img src="/files/UkzYfwFtmwuZspH0Et9u" alt="" width="375"><figcaption><p>Manage account</p></figcaption></figure>


# Lifting tokens (deprecated)

### Prerequisites

* [x] Connected EWX account
* [x] Minimum balance of 10 EWT (not including gas fee) in EWC account

1. Find the `Lift` menu in the account popover menu on top-right of the screen. Or, if you have added an EWC account previously you may also click on `⋮` icon then `Lift Tokens`

<figure><img src="/files/zrvnyb3OejZcIJCntyT9" alt="" width="375"><figcaption><p>Lift tokens (account menu)</p></figcaption></figure>

<figure><img src="/files/rkfVYPsxFSue25RhVBef" alt="" width="330"><figcaption><p>Lift tokens (EWT Balance)</p></figcaption></figure>

2. Select your preferred EWC Wallet (WalletConnect/Ledger)

<figure><img src="/files/30aTfvFg3xz62wMENkb8" alt="" width="375"><figcaption><p>Connect to EWC account</p></figcaption></figure>

3. Check your wallet and select an account to connect

<figure><img src="/files/s0N1qCgiRyqLo9WpvwzS" alt="" width="375"><figcaption><p>Check wallet</p></figcaption></figure>

4. Enter lifting amount, click `Approve`

{% hint style="success" %}
You may also use the slider or pre-defined buttons that will calculate based on your account balance
{% endhint %}

{% hint style="warning" %}
The minimum amount for lifting is 10 EWT
{% endhint %}

<figure><img src="/files/lR1d7j2YgoytzsxA9pt3" alt="" width="375"><figcaption><p>Enter lifting amount</p></figcaption></figure>

5. Review the transaction and click `Confirm`

<figure><img src="/files/Cy6GDtQZRHcWQNje54mj" alt="" width="375"><figcaption><p>Confirm transaction</p></figcaption></figure>

6. Approve the transaction in your wallet & wait for the transaction being executed
7. You will see a "Transaction scheduled" message along with the transaction URL to Polkadot explorer

{% hint style="warning" %}
Lifting operation will take approximately 30 minutes to succeed
{% endhint %}

<figure><img src="/files/p2gd16iqO63UvLZSrG52" alt="" width="375"><figcaption><p>Lifting transaction scheduled</p></figcaption></figure>


# Lowering Tokens (deprecated)

### Prerequisites

* [x] Connected EWX account with a minimum balance of 1 EWT
* [x] Any ETH Account with sufficient native ETH balance

### Overview

Lowering tokens is the process of bridging EWT from EWX to ETH. This process has two steps:

1. Schedule a token lower

{% embed url="<https://drive.google.com/file/d/1EuySjFXVRomPd3LLK8sCBHkrfFjuvdEz/view?usp=drive_link>" %}

2. Claim lowered amount

{% embed url="<https://drive.google.com/file/d/1EmX000Ou17wQtdP1LNCXQKxuGZ3Ubrdg/view?usp=drive_link>" %}

#### STEP 1: Schedule a token lower

1. Find the `Lower` menu in the account popover menu on top-right of the screen. You may also click on `⋮` icon located next to your EWX balance then click `Lower Tokens`

<figure><img src="/files/GQHVfvC7PfIWShHrai7a" alt="" width="375"><figcaption><p>Loewr tokens (account menu)</p></figcaption></figure>

<figure><img src="/files/9jhoQK2oRblLV9HyZqRM" alt="" width="359"><figcaption><p>Lower tokens (EWT balance)</p></figcaption></figure>

2. Enter lowering amount and click `Approve`

{% hint style="success" %}
You may also use the slider or pre-defined buttons that will calculate based on your account balance
{% endhint %}

{% hint style="warning" %}
The minimum amount for lowering is 1 EWT
{% endhint %}

<figure><img src="/files/wnWdDYu5TLU2UKrM90oL" alt="" width="375"><figcaption><p>Enter lowering amount</p></figcaption></figure>

3. Enter an ETH address and/or select an ETH account for which the lowering amount will go to. Make sure that the chosen account is highlighted before clicking `Next`

<figure><img src="/files/Qsm7vAyeu74HUCRn893K" alt="" width="375"><figcaption><p>Add/select EWC account</p></figcaption></figure>

4. Review the transaction and click `Confirm`

<figure><img src="/files/gKkzIznmmI9o9Lci41Dc" alt="" width="375"><figcaption><p>Confirm transaction</p></figcaption></figure>

5. Approve the transaction in your wallet

<figure><img src="/files/DMmgPF3uYSQ8eaIVLh3i" alt="" width="375"><figcaption><p>Pending confirmation</p></figcaption></figure>

6. Wait for the transaction being executed

<figure><img src="/files/5IuqNBCSBC24cTwZDxX0" alt="" width="375"><figcaption><p>Executing transaction</p></figcaption></figure>

7. You will see a "Transaction scheduled" message along with the transaction URL to Polkadot explorer

{% hint style="warning" %}
Lowering operation will take approximately 24 hours to succeed
{% endhint %}

<figure><img src="/files/dqXaqVqB2MKsaHjjDMc5" alt="" width="375"><figcaption><p>Lowering transaction scheduled</p></figcaption></figure>

8. To check the status of the scheduled lower, click on the `Transactions` icon on the upper section of the screen

<figure><img src="/files/RTeyssLPYQuUXZnuDlIC" alt="" width="375"><figcaption><p>Transaction icon</p></figcaption></figure>

8. Newly scheduled lowers will be in `Pending` status while those which are ready to be claimed will display the `Claim` button

<figure><img src="/files/p5GfHcUq7onxlIfP0vMp" alt="" width="563"><figcaption></figcaption></figure>

#### STEP 2: Claim lowered amount

1. In the Transactions page, simply click on the `Claim` button

<figure><img src="/files/66DOwhs1kTZXOwKkOHLO" alt="" width="563"><figcaption><p>Transactions list showing a ready to be claimed item</p></figcaption></figure>

2. Connect your ETH account

{% hint style="success" %}
Ensure that the ETH account has enough ETH native tokens to be used as gas fees in the claim lower transactions.
{% endhint %}

<figure><img src="/files/7oPu3Du85vPrIhKYbpAC" alt="" width="375"><figcaption><p>Connect ETH account</p></figcaption></figure>

3. Review the claim lower transaction and confirm

<figure><img src="/files/ayqYiXKSrOlhjnFZbaoi" alt="" width="375"><figcaption><p>Confirm transaction</p></figcaption></figure>

4. Approve the transaction in your wallet

<figure><img src="/files/gTuwrIHg1WzCUUa5BOPi" alt="" width="375"><figcaption><p>Pending for wallet approval</p></figcaption></figure>

5. Wait for the transaction to be executed and you will see a success message

<figure><img src="/files/X5vMc9HpBrmvKsq6tkSk" alt="" width="375"><figcaption><p>Successfully executed lower claim</p></figcaption></figure>

6. Newly executed lower claim status will be displayed as `Claiming`

{% hint style="warning" %}
It takes approximately 5 - 10 minutes for the claim transaction to complete. The status will automatically display `Success` once lower claim is completed.
{% endhint %}

<figure><img src="/files/301IwPuFa5O1gSE5HwL1" alt="" width="563"><figcaption></figcaption></figure>

7. Lower claim is successfully executed

{% hint style="success" %}
The lowered amount will automatically reflect in your wallet. Please use the following token configuration in your wallet:

* Network - Ethereum
* Contract Address - 0xB66a5D30D04f076E78ffB0d045C55846Fdcde928
* Symbol - EWT
* Token Name - Energy Web Token
  {% endhint %}

<figure><img src="/files/GsS9SAuIe0mCl2xZiKFT" alt="" width="563"><figcaption></figcaption></figure>


# Lowering tokens (deprecated)

### Prerequisites

* [x] Connected EWX account
* [x] Minimum balance of 1 EWT (not including gas fee) in EWX account

1. Find the `Lower` menu in the account popover menu on top-right of the screen. You may also click on `⋮` icon located next to your EWX balance then click `Lower Tokens`

<figure><img src="/files/cj1Fnx3Whx6ZrSNLvHqG" alt="" width="375"><figcaption><p>Lower tokens (account menu)</p></figcaption></figure>

<figure><img src="/files/ndp0Q1y8vpjubIR2e0eB" alt="" width="310"><figcaption><p>Lower tokens (EWT balance)</p></figcaption></figure>

2. Enter lowering amount and click `Approve`

{% hint style="success" %}
You may also use the slider or pre-defined buttons that will calculate based on your account balance
{% endhint %}

{% hint style="warning" %}
The minimum amount for lowering is 1 EWT
{% endhint %}

<figure><img src="/files/CZn3iu84VeZPESLCyysL" alt="" width="375"><figcaption><p>Enter lowering amount</p></figcaption></figure>

3. Enter an EWC address and/or select an EWC account for which the lowering amount will go to. Make sure that the chosen account is highlighted before clicking `Next`

<figure><img src="/files/gL8fYjW7X8Xv9wpD18OW" alt="" width="375"><figcaption><p>Add/select EWC account</p></figcaption></figure>

4. Review the transaction and click `Confirm`

<figure><img src="/files/OTSC7YPmw2dTsGEow0lx" alt="" width="375"><figcaption><p>Confirm transaction</p></figcaption></figure>

5. Approve the transaction in your wallet

<figure><img src="/files/xTO6cfVv8AiNM9LlYSKC" alt="" width="375"><figcaption><p>Pending confirmation</p></figcaption></figure>

5. Wait for the transaction being executed

<figure><img src="/files/ss30K8l8IZ48DBMKYHze" alt="" width="375"><figcaption><p>Executing transaction</p></figcaption></figure>

5. You will see a "Transaction scheduled" message along with the transaction URL to Polkadot explorer

{% hint style="warning" %}
Lowering operation will take approximately 24 hours to succeed
{% endhint %}

<figure><img src="/files/bPMTZHCMXo2fjrCVG7vv" alt="" width="375"><figcaption><p>Lowering transaction scheduled</p></figcaption></figure>


# Tracking lifting and lowering transactions (deprecated)

All of your lifting and lowering transactions can be tracked in the Transactions list. Its menu is located at the top of the page, next to notifications.

<figure><img src="/files/RGBpWwdZpQmj9Djoa5zg" alt=""><figcaption><p>Transactions menu</p></figcaption></figure>

There are 3 tabs for viewing namely All, Lifting and Lowering. You may search for a specific transaction by using the search feature. Some useful transaction information available are:

* Date and time
* Type (Lifting/Lowering)
* From and to addresses with EWX and EWC indicators
* Token amount lifted/lowered
* Status
* Transaction hash
* Explorer url

{% hint style="warning" %}
It might take some time for the transactions to appear on the list after you performed lifting and/or lowering
{% endhint %}

<figure><img src="/files/1Ou5nUCRAiK1ZfOqxmRa" alt=""><figcaption><p>Lifting and lowering transactions</p></figcaption></figure>


# KYC Verification

Some solution groups published in the Energy Web X ecosystem require operators to submit KYC details for verification before they are allowed to subscribe.

This section provides step by step processes in the KYC verification.

<table data-view="cards"><thead><tr><th></th><th data-type="content-ref"></th></tr></thead><tbody><tr><td>Initiate KYC Verification</td><td><a href="/pages/Z0f2Fddcoc4YkTqs6dIy">/pages/Z0f2Fddcoc4YkTqs6dIy</a></td></tr><tr><td>Submit KYC Details</td><td><a href="/pages/su933GdtRnCEVGMBAMID">/pages/su933GdtRnCEVGMBAMID</a></td></tr><tr><td>After Submitting KYC Details</td><td><a href="/pages/lX4t1iXokXd7sfmEnuT5">/pages/lX4t1iXokXd7sfmEnuT5</a></td></tr></tbody></table>


# Initiating KYC Verification

Solution groups requiring KYC verification can be identified with the KYC required marker.

<figure><img src="/files/JQ8r4Y071AZilxX9YSLG" alt=""><figcaption><p>KYC Required marker</p></figcaption></figure>

To initiate for KYC verification, please follow below simple steps:

1. Connect your operator account to the EWX Marketplace app
2. Click on the solution to request for KYC verification<br>

   <figure><img src="/files/7YDRKCOZwlyivLR0pDFT" alt=""><figcaption><p>Target solution requiring KYC</p></figcaption></figure>
3. Click on the "Initiate KYC" button<br>

   <figure><img src="/files/WwBUTZndwPxsWkwxfwiA" alt=""><figcaption><p>Button to initiate KYC</p></figcaption></figure>
4. Sign the KYC initiation request then the EWX KYC page will open.\
   &#x20;

   <figure><img src="/files/F6tSaSpYeo4NJKRveZGS" alt="" width="375"><figcaption><p>KYC request signing</p></figcaption></figure>
5. To continue, follow the instructions as described in [Submit KYC Details](/ewx-ecosystem/the-marketplace-app/kyc-verification/submit-kyc-details).


# Submit KYC Details

## Complete Your KYC Verification - Step by Step Guide

Welcome! This guide will help you complete your KYC (Know Your Customer) verification. Don't worry - we'll walk you through every step.

**What is KYC?** KYC is a simple identity check that helps keep the platform safe for everyone. It's quick and easy to complete.

***

### How Did You Get Here?

There are two ways you might have arrived at this page. Don't worry - we'll show you exactly what to do for both!

#### Option 1: You Came Here Directly

You typed in the website address yourself or clicked a direct link.

**What you'll need to do:**

* Choose your solution group
* Enter your email
* Connect your wallet
* Submit your information

#### Option 2: You Came from a Marketplace

You clicked a link from another app (like a Marketplace).

**Good news!** Some information is already filled in for you, and you **don't need to connect your wallet** - it's already done!

**What you'll need to do:**

* Enter your email
* Submit your information

That's it! Much simpler, right?

***

### If You Came Here Directly

Follow these simple steps:

#### Step 1: Open the Page

When the page loads, you'll see a form that says "Add your details".

<figure><img src="/files/pJU8XilvicRVAsr6u96q" alt=""><figcaption></figcaption></figure>

**You'll see:**

* A form with the title "Add your details"
* A dropdown menu for "Solution Group" (it will be empty)
* A box for your email (it will be empty)
* A button at the bottom that says "Connect Wallet"

#### Step 2: Choose Your Solution Group

Click on the "Solution Group" dropdown menu. A list will appear.

<figure><img src="/files/0HBb9CQLIFKYzFfwoV1Z" alt=""><figcaption></figcaption></figure>

**What to do:**

* Look through the list
* Click on the option that matches your situation
* The list will close and your choice will appear in the box

#### Step 3: Enter Your Email Address

Click in the "Email" box and type your email address.

<figure><img src="/files/zixvHMIQuIvjbiv5knd2" alt=""><figcaption></figcaption></figure>

**Important tips:**

* Make sure you type it correctly - you'll need to receive emails at this address
* Double-check for typos before moving on
* Use an email address you check regularly

#### Step 4: Connect Your Wallet

Click the "Connect Wallet" button at the bottom of the form.

<figure><img src="/files/wY44czUG02th8ARYn39v" alt=""><figcaption></figcaption></figure>

**What happens:** A popup window will appear showing different wallet options. You'll see wallets like:

* Polkadot{.js}
* SubWallet
* Talisman
* WalletConnect
* Nova
* And more!

**How to connect:**

1. Look through the list and find your wallet
2. If you don't see it, scroll down - there are more options under "More"
3. Click on your wallet
4. Your wallet app will ask you to approve the connection - click "Approve" or "Connect"
5. Once connected, the button will change to say "Submit"

**Don't have a wallet?** You'll need to install one first. Look for wallet extensions in your browser's extension store.

#### Step 5: Submit Your Information

After your wallet is connected, you'll see a "Submit" button. Click it!

**What happens:**

* You'll see a message that says "Submitting Details..."
* You need to sign a message (your EWX address) - as an ownership challenge&#x20;
* Please wait - this usually takes just a few seconds
* Don't close the page while it's processing

#### Step 6: See Your Results

You'll see one of two messages:

**✅ If it worked:**

* You'll see: "Details Submitted Successfully"
* The message will tell you to check your email for the next steps
* Click "Back to Home" when you're ready
* **Important:** Check your email inbox right away - you'll receive an email with a link to continue

**❌ If something went wrong:**

* You'll see an error message explaining what happened
* Click "Retry" to try again
* If you see "Verification Already Ongoing", click "Resend Link" to get a new email

***

### If You Came from a Marketplace

Great news - this is even easier! Follow these steps:

#### Step 1: Check the Form

When you arrive, some information is already filled in for you.

<figure><img src="/files/Q7gPLHu5BTo1MYhqxUed" alt=""><figcaption></figcaption></figure>

**You'll see:**

* The "Solution Group" is already filled in (you can't change it - that's normal!)
* The "Email" box is empty - you need to fill this in
* The button at the bottom says "Submit" (not "Connect Wallet")

**Remember:** You don't need to connect your wallet - it's already done for you!

#### Step 2: Enter Your Email

Click in the "Email" box and type your email address.

<figure><img src="/files/XNyinfwgseyQnEXpzYSx" alt=""><figcaption></figcaption></figure>

**Make sure:**

* You type it correctly
* You use an email address you check regularly
* You double-check for any typos

#### Step 3: Submit Your Information

Click the "Submit" button.

**What happens:**

* You'll see "Submitting Details..."
* Wait a few seconds - don't close the page
* You'll see a success message when it's done

#### Step 4: See Your Results

You'll see one of two messages:

**✅ If it worked:**

* You'll see: "Details Submitted Successfully"
* Click "Back to Home" when you're ready
* **Important:** Check your email inbox - you'll receive an email with a link to continue

**❌ If something went wrong:**

* You'll see an error message
* Click "Retry" to try again
* If you see "Verification Already Ongoing", click "Resend Link"

***

### What Happens Next?

After you successfully submit your information, here's what happens:

#### Step 1: Check Your Email

Within a few minutes, you'll receive an email with a link to continue your verification.

**What to do:**

1. Open your email inbox
2. Check your spam or junk folder if you don't see it right away
3. Look for an email about KYC verification
4. Click the link in the email

**Can't find the email?** Don't worry - sometimes emails take a few minutes to arrive. Check again in 5-10 minutes.

#### Step 2: Complete Your Identity Verification

When you click the link, you'll go to a verification website called SumSub.

**What you'll need to do:**

1. Follow the instructions on the screen
2. You'll need to take photos of:
   * Your government ID (like a driver's license or passport)
   * A selfie (a photo of yourself)
3. You might need to provide other documents - just follow the prompts
4. Submit everything and wait for approval

**How long does this take?**

* Taking the photos: Just a few minutes
* Getting approved: Usually a few hours to a few days (they need to check your documents)

**Don't worry if it takes a while** - this is normal! They're making sure everything is correct.

#### Step 3: Get Your Approval Email

Once your verification is approved, you'll receive another email.

**This email will tell you:**

* That your verification was successful
* Important information about your account
* A link to go back to the marketplace

**What to do:**

* Click the link in the email
* You'll return to the marketplace
* You're all set! You can now use the marketplace with your verified account

***

### Messages You Might See

Here are some messages you might see and what they mean:

**"Submitting Details..."**

* This means your information is being sent
* Please wait - don't close the page
* This usually takes just a few seconds

**"Details Submitted Successfully"**

* Great! Everything worked
* Check your email for the next step
* You're doing great!

**"Submission Failed"**

* Something went wrong, but don't worry
* Read the message - it will tell you what happened
* You can try again by clicking "Retry"

**"Resending Verification Link..."**

* A new email is being sent to you
* Check your inbox in a few minutes

**"Verification Link Resent"**

* Your new email has been sent
* Check your inbox (and spam folder)

**Wallet Connection Messages**

* Your wallet might ask you to sign something
* This is normal and safe
* Just follow the prompts in your wallet

***

### Common Questions

#### Why can't I change the Solution Group?

If you came from a marketplace, the Solution Group is automatically set for you. This makes sure you're using the right settings. You can't change it, and that's okay - it's supposed to be that way!

#### Do I need to connect my wallet?

**It depends how you got here:**

* **Came from a marketplace?** No! Your wallet is already connected. Just enter your email and submit.
* **Came here directly?** Yes, you need to connect your wallet. Click "Connect Wallet" and choose your wallet from the list.

#### Why is the Submit button grayed out?

The Submit button only works when everything is ready:

* You've chosen a Solution Group (or it's already filled in)
* You've entered your email address
* Your wallet is connected (only if you came here directly)

Make sure all the boxes are filled in correctly!

#### What happens after I submit?

Here's the simple version:

1. **You submit your information** ✅
2. **You get an email** with a link to verify your identity 📧
3. **You click the link** and take photos of your ID and yourself 📸
4. **You wait for approval** (usually a few hours to a few days) ⏳
5. **You get another email** saying you're approved 🎉
6. **You click the link** to go back to the marketplace 🏪

That's it! The whole process usually takes a few days from start to finish.

***

### Having Problems? We Can Help!

#### The form won't submit

**Try these things:**

1. **Check your email** - Is it typed correctly? It should look like: <yourname@example.com>
2. **Check the Solution Group** - Did you choose one? (Or is it already filled in?)
3. **Check your wallet** - Is it connected? (Only needed if you came here directly)
4. **Try refreshing** - Sometimes refreshing the page helps

#### I can't connect my wallet

**Try these solutions:**

1. **Do you have a wallet?** You need to install a wallet extension first
2. **Is your wallet unlocked?** Make sure your wallet is open and unlocked
3. **Try refreshing the page** - Sometimes this helps
4. **Check your browser** - Make sure you're using Chrome, Firefox, or Edge

#### I see an error message

**Don't panic!** Here's what to do:

1. **Read the message** - It will tell you what went wrong
2. **Look for a "Retry" button** - Click it to try again
3. **Look for a "Resend Link" button** - Click it to get a new email
4. **Still having trouble?** Contact support - they're there to help!

#### I didn't receive the email

**Try these steps:**

1. **Check your spam folder** - Sometimes emails end up there
2. **Wait a few minutes** - Emails can be delayed
3. **Check your email address** - Did you type it correctly?
4. **Look for "Resend Link"** - Click it to get a new email
5. **Still nothing?** You might need to start over with a different email address

#### I made a mistake in my email address

**No problem!** Here's what to do:

1. **Go back to the form** (either directly or from the marketplace)
2. **Fill everything out again** with the correct email:
   * Choose your Solution Group (or it will be pre-filled)
   * Type your **correct** email address
   * Connect your wallet (if you came here directly)
3. **Click Submit** with the correct information
4. **Check your email** - You should receive the verification link at the correct address

**Tip:** Double-check your email address before clicking Submit to avoid this!

#### Can I change my email after submitting?

Unfortunately, no. Once you submit, you can't change your email. If you need to use a different email, you'll need to start the process over with the correct email address.

#### I don't see the SumSub verification email

**Try these steps:**

1. **Check your spam folder** - It might be there
2. **Wait 5-10 minutes** - Emails can be delayed
3. **Check your email address** - Make sure you typed it correctly
4. **Still nothing?** You might need to start over or contact support

#### I don't see the approval email after completing SumSub

**Don't worry - this is normal!**

1. **Check your spam folder**
2. **Be patient** - Approval can take a few business days
3. **Make sure you finished** the SumSub verification completely
4. **Been more than a few days?** Contact support for help

#### How long does everything take?

**Here's a realistic timeline:**

* **Submitting the form:** Just a few seconds
* **Getting the first email:** Usually within a few minutes
* **Completing SumSub verification:** About 5-10 minutes to take the photos
* **Getting approved:** Usually a few hours to a few business days
* **Getting the approval email:** Right after you're approved

**Total time:** Usually 1-3 business days from start to finish.

#### What if my SumSub verification gets rejected?

**Don't worry!** This happens sometimes. Here's what to do:

1. **Check your email** - You'll get an email explaining why
2. **Read the reason** - It will tell you what went wrong
3. **Fix the problem** - Maybe your photo wasn't clear, or your ID wasn't readable
4. **Start over** - Go back to the beginning and try again

#### Can I use the same email more than once?

Yes! You can use the same email address, but each time you submit, it creates a new verification process. If you need to start over, you can submit again with the same email.

#### Do I have to finish everything in one sitting?

**Good news:** No, you don't!

* **The form:** Try to complete this in one go
* **SumSub verification:** Do this when you get the email (the link might expire after a while)
* **Returning to marketplace:** Do this when you get the approval email

You can take breaks between steps - just don't wait too long!

#### I came from a marketplace but don't see the Submit button

**Try these things:**

1. **Did you enter your email?** Make sure the email box has your address in it
2. **Is the Solution Group filled in?** It should be - if not, try refreshing
3. **Try refreshing the page** - Sometimes this fixes it
4. **Still not working?** Contact support

***

### Still Need Help?

If you're stuck, try these steps:

1. **Read through this guide again** - You might have missed a step
2. **Check any error messages** - They usually tell you what's wrong
3. **Try refreshing the page** and starting over
4. **Contact support** - They're friendly and ready to help!

**Remember:** Everyone needs help sometimes. Don't be afraid to ask!

***

### You've Got This! 💪

The KYC process might seem complicated at first, but it's really just a few simple steps:

1. Fill out the form
2. Check your email
3. Take some photos
4. Wait for approval
5. You're done!

This process helps keep everyone safe on the platform. Thank you for taking the time to complete it!

**Good luck, and don't hesitate to reach out if you need help!** 😊


# After Submitting KYC Details

The KYC Verification comes with three (3) statuses:

1. [#kyc-verification-in-progress](#kyc-verification-in-progress "mention")
2. [#kyc-verification-successful](#kyc-verification-successful "mention")
3. [#kyc-verification-rejected](#kyc-verification-rejected "mention")

#### KYC Verification In-Progress

When KYC verification is in processing phase, the Marketplace app shows the respective status on the screen.

<figure><img src="/files/bGbFrE2EtSwOSM0Ie6n0" alt=""><figcaption></figcaption></figure>

#### KYC Verification Successful

When KYC verification succeeds, the operator will be whitelisted in the target solution group and will be allowed to subscribe to it. The screen will display the KYC status as "KYC Verified".

To proceed with the subscription process, please refer to [Subscriptions](/ewx-ecosystem/the-marketplace-app/subscriptions)page.

<figure><img src="/files/xeq2aTDKXwjtpotWJv6r" alt=""><figcaption></figcaption></figure>

For solution groups that enable KYC verification, not everyone is eligible to participate in submitting solution results as votes. In such case, an info icon will be shown in the Dashboard to provide such detail:<br>

<figure><img src="/files/Xv2X0kWZUj0VQ05KmYvr" alt=""><figcaption><p>Solution group that has 0 votes which the operator is not eligible to submit results</p></figcaption></figure>

<figure><img src="/files/NtgzUxZHyHSwPILAucFa" alt=""><figcaption><p>A particular solution informing that the operator is not eligible to submit votes</p></figcaption></figure>

#### KYC Verification Rejected

When KYC verification is rejected, the operator is no longer allowed to subscribe to the target solution group.<br>

<figure><img src="/files/eX4baFhKbzqvn54p2A7f" alt=""><figcaption></figcaption></figure>


# Subscriptions

Start earning rewards by subscribing to any of the solution group available on Marketplace. Browse through the solution group list on the Discover page, and pick on a solution group of your interest to see its details such as minimum/maximum subscription amount, base reward, active solution group reward and more.

<figure><img src="/files/ABwo0fgeWD1KwZrOkc5S" alt=""><figcaption><p>Solution group requirements</p></figcaption></figure>

#### Guides available for subscriptions:

<table data-view="cards"><thead><tr><th></th><th data-type="content-ref"></th></tr></thead><tbody><tr><td>Subscribe</td><td><a href="/pages/rdYlidJcrL62R7sJR7W2">/pages/rdYlidJcrL62R7sJR7W2</a></td></tr><tr><td>Top-up</td><td><a href="/pages/KSSGsSskEzo55dUjvtd0">/pages/KSSGsSskEzo55dUjvtd0</a></td></tr><tr><td>Manage</td><td><a href="/pages/zAkoCqz151n92BsMGnJV">/pages/zAkoCqz151n92BsMGnJV</a></td></tr><tr><td>Unsubscribe</td><td><a href="/pages/8MdBmf1csTpbQtcUQl32">/pages/8MdBmf1csTpbQtcUQl32</a></td></tr></tbody></table>

## FAQs

<details>

<summary>What does subscription with withdrawal delay means?</summary>

Withdrawal delay means that unsubscription will only take place after a certain number of blocks are processed. During that delay, your worker node will continue running. Read more here: [Unsubscribing delay](/ewx-ecosystem/the-marketplace-app/subscriptions/unsubscribing-delay)

</details>

<details>

<summary>I want to subscribe to a solution group but it’s showing “expired”. What does “expired” means?</summary>

It means that the the subscription period has ended. If you've subscribed to a solution group that is expired, then you will see `Expired` status displayed next to its name in the Dashboard.

</details>

<details>

<summary>I want to subscribe to a solution group but it’s showing “private”. What does “private” means?</summary>

It means that the solution group only allow whitelisted operators to subscribe.&#x20;

</details>

<details>

<summary>Is there any limit for subscription and top up token amount?</summary>

Yes, you can check the limit in the solution group's requirements.

![](/files/oz1yJLv2EYjLIzY7psNm)

</details>


# Subscribing to a solution group

### Prerequisite

* [x] Operator account with funds more than the minimum subscription amount

1. Click `Opt-in` to subscribe to a solution group

{% hint style="success" %}
If no operator account is connected then "Connect" button will be displayed instead
{% endhint %}

<figure><img src="/files/Vo09Fay7mK4tDau6m0gj" alt=""><figcaption><p>Opt-in to a solution group</p></figcaption></figure>

2. A pop-up will appear for you to enter your subscription amount. Once you're satisfied with the value, click `Continue`

{% hint style="success" %}
You may also use the slider, click on the percentage buttons or "Max" where the app will calculate the amount based on your account balance
{% endhint %}

{% hint style="warning" %}
Subscription amount must be within min/max subscription amount
{% endhint %}

<figure><img src="/files/NvTryfYNilYTe7dQq8jq" alt="" width="375"><figcaption><p>Enter subscription amount</p></figcaption></figure>

3. Review your subscription amount and click `Confirm`

<figure><img src="/files/ECjSWpnutBvBdR4Wu8S5" alt="" width="375"><figcaption><p>Confirm transaction</p></figcaption></figure>

4. Approve the transaction in your wallet

<figure><img src="/files/TVGc5dOSpuKv3hgcBMav" alt="" width="375"><figcaption><p>Pending confirmation</p></figcaption></figure>

5. Wait for the transaction being executed

<figure><img src="/files/MVC8PUUcF4oBlBnx3c5Z" alt="" width="375"><figcaption><p>Executing transaction</p></figcaption></figure>

6. You will see a success message along with the transaction URL to Polkadot explorer

<figure><img src="/files/TZ26tOMvhmGefT4KCTNJ" alt="" width="375"><figcaption><p>Transaction successful</p></figcaption></figure>

7. Go to the Dashboard page to view or [manage your subscriptions](/ewx-ecosystem/the-marketplace-app/subscriptions/managing-subscriptions)

{% hint style="warning" %}
For new subscriptions, the worker nodes will only start voting in the next reward period
{% endhint %}

<figure><img src="/files/SkdBtJhMnpv2K7QmsnrO" alt=""><figcaption><p>Marketplace dashboard</p></figcaption></figure>


# Topping-up subscription amount

### Prerequisites

* [x] Connected EWX account
* [x] Subscribed to a solution group
* [x] Maximum subscription limit have not reached

1. Find the `Top-up` button either in Dashboard or Manage subscription

<figure><img src="/files/j2H5HFHWPDxGso9oKEgK" alt=""><figcaption><p>Top-up from Dashboard</p></figcaption></figure>

<figure><img src="/files/BQLyMYxZP15EkFWndJgS" alt=""><figcaption><p>Top-up from Manage Subscription</p></figcaption></figure>

2. A pop-up will appear, enter your top-up amount in the text field

{% hint style="success" %}
You may also use the slider or pre-defined buttons that will calculate based on your account balance
{% endhint %}

<figure><img src="/files/uLbsZYrIbBPGV7BXP5Hy" alt="" width="375"><figcaption><p>Enter top-up amount</p></figcaption></figure>

3. Review your top-up amount before clicking on `Confirm`

<figure><img src="/files/3lIqIgYKlXiQm3D7SCUD" alt="" width="375"><figcaption><p>Confirm top-up amount</p></figcaption></figure>

4. Approve the transaction in your wallet

<figure><img src="/files/ptWeOPTANAY7eJIZtBQJ" alt="" width="375"><figcaption><p>Pending confirmation</p></figcaption></figure>

5. Wait for the transaction being executed

<figure><img src="/files/cZVnTxD3qS5l8m2grUfL" alt="" width="375"><figcaption><p>Executing transaction</p></figcaption></figure>

6. You will see a success message along with the transaction URL to Polkadot explorer

<figure><img src="/files/5HY2edAP6VuoqZ69qYd8" alt="" width="375"><figcaption><p>Transaction successful</p></figcaption></figure>

7. Your subscription amount will be displayed as `+ <value>` as an indicator that the top-up amount will be added to the total subscription in the next reward period

<figure><img src="/files/QLKZm9SqaK3YQ9I1HPys" alt="" width="375"><figcaption><p>Top-up amount indicator</p></figcaption></figure>


# Managing subscriptions

## Dashboard

You can manage your subscriptions from Marketplace app's Dashboard. Here you are able to view list of solution groups that you've subscribed and unsubscribed (with unclaimed rewards only).

#### What you can do in Dashboard:

* Check subscription amount, [pending rewards](/ewx-ecosystem/the-marketplace-app/worker-node-and-rewards/checking-rewards), current reward period and [votes casted](/ewx-ecosystem/the-marketplace-app/worker-node-and-rewards/votes-casted-per-period) at a glance
* [Top-up](/ewx-ecosystem/the-marketplace-app/subscriptions/topping-up-subscription-amount) subscription amount
* [Claim pending rewards](/ewx-ecosystem/the-marketplace-app/worker-node-and-rewards/claiming-rewards)
* Enable/pause/resume solution group
* [Manage subscription](#manage-subscription)

<figure><img src="/files/BG6nbOOskpOobHy6UmDg" alt=""><figcaption><p>Marketplace Dashboard - subscribed list</p></figcaption></figure>

***

## Manage Subscription

The features in Manage Subscription page are pretty much the same as Dashboard except for `Unsubscribe` and infos related to voting.  Read more:&#x20;

* [Unsubscribing from a solution group](/ewx-ecosystem/the-marketplace-app/subscriptions/unsubscribing-from-a-solution-group)
* [Votes casted per Period](/ewx-ecosystem/the-marketplace-app/worker-node-and-rewards/votes-casted-per-period)

<figure><img src="/files/K0osE7moF7YCKOG0TX7F" alt=""><figcaption><p>Manage subscription</p></figcaption></figure>


# Unsubscribing from a solution group

### Prerequisites

* [x] Connected EWX account
* [x] Subscribed to a solution group

1. Click on `Unsubscribe` button in the Manage Subscription page

<figure><img src="/files/EkHJ4fXwEewhVScfgBnG" alt=""><figcaption><p>Unsubscribe</p></figcaption></figure>

{% hint style="info" %}
If you have pending rewards, you will be prompted to choose if you want to claim the rewards first: [Claiming rewards](/ewx-ecosystem/the-marketplace-app/worker-node-and-rewards/claiming-rewards)

<img src="/files/FJbytVc6aJdcKwFki8sG" alt="" data-size="original">
{% endhint %}

2. A pop-up will appear, click `Continue` to proceed

<figure><img src="/files/ItShRDAQLLBFtfHd42RE" alt="" width="375"><figcaption><p>Unsubscribe information</p></figcaption></figure>

3. Click `Confirm` to submit a transaction

<figure><img src="/files/AVa6E8jyb7ScWuPZ9d1Y" alt="" width="375"><figcaption><p>Unsubscribe confirmation</p></figcaption></figure>

4. Approve the transaction in your wallet and wait for the transaction to be executed

<figure><img src="/files/S0b0ZUdQ63zxrYu07Bht" alt="" width="375"><figcaption><p>Pending confirmation</p></figcaption></figure>

5. You will see a success message along with the transaction URL to Polkadot explorer

<figure><img src="/files/N7FTI4WfRh6XFAw9fGvC" alt="" width="375"><figcaption><p>Transaction successful</p></figcaption></figure>


# Unsubscribing delay

Some of the solution groups have `Unsubscription Delay` enabled. This means that unsubscription will only take place after a certain reward period(s).

<figure><img src="/files/ku2TDO2P0eXBh84qxRtZ" alt=""><figcaption><p>Solution group with unsubscription delay</p></figcaption></figure>

You will see the information related to unsubscription delay when you click `Opt-in`.

<figure><img src="/files/RUWt1e5DJzGUmVDCAgyg" alt="" width="375"><figcaption><p>Unsubscription delay info</p></figcaption></figure>


# Worker Node and Rewards

There are 2 locations which you can choose to run your worker node: in your local machine or remotely. As the name suggests, remote worker will not download and run the worker node logic in your local machine. Since logs and votes history are being stored locally, these information won't be available when you are using the remote worker option.

#### Guides available for Worker Nodes and Rewards:

<table data-view="cards"><thead><tr><th></th><th data-type="content-ref"></th></tr></thead><tbody><tr><td>Configure Remote Worker</td><td><a href="/pages/N4hAiG6rxEmAvV8tMO0c">/pages/N4hAiG6rxEmAvV8tMO0c</a></td></tr><tr><td>Switch to Remote Worker</td><td><a href="/pages/aNFkvFsEAVcZOJqaBsfp">/pages/aNFkvFsEAVcZOJqaBsfp</a></td></tr><tr><td>Participate to Worker Node Network</td><td><a href="/pages/1eVSGNh3b2NBamC169XH">/pages/1eVSGNh3b2NBamC169XH</a></td></tr><tr><td>Votes Casted per Period</td><td><a href="/pages/Iv1rS15kS7nVPUVfgmtM">/pages/Iv1rS15kS7nVPUVfgmtM</a></td></tr><tr><td>Reward Period</td><td><a href="/pages/fFIJfIWrPyjWArqZidtd">/pages/fFIJfIWrPyjWArqZidtd</a></td></tr><tr><td>Check Rewards</td><td><a href="/pages/1DgHB5nE2aOw8QkSqZf5">/pages/1DgHB5nE2aOw8QkSqZf5</a></td></tr><tr><td>Claim Rewards</td><td><a href="/pages/19NKomNQhEFemxCKIMKo">/pages/19NKomNQhEFemxCKIMKo</a></td></tr></tbody></table>

## FAQs

<details>

<summary>When will I start earning rewards?</summary>

Rewards will be awarded each time a reward period ends

</details>

<details>

<summary>How to claim rewards from a solution group that I have unsubscribed?</summary>

If you have pending rewards for any unsubscribed solution groups, you can view them in the Dashboard under `Unsubscribed` tab. Click `Claim Rewards` button to claim it

![](/files/R6FLejzYulWKhvk7AaE7)

</details>

<details>

<summary>Can I earn rewards without setting up a worker node account?</summary>

Yes, the operator can still earn rewards without setting-up a worker node account. This can be achieved if the subscribed solution group explicitly specifies that it provides base rewards to its subscribers.

</details>

<details>

<summary>What are the difference between base, active solution group and top performance rewards?</summary>

Base rewards are earned simply by subscribing to a solution group. Active solution group rewards are gained by running workers to actively participate in processing business logic and submitting votes. Top performance rewards are given to operators whose workers did exemplary participation in processing business logic and submitting votes, depending on the criteria set by the solution group. Whether these three types of rewards are supported by a solution group or not can be explicitly known in advance by simply looking at the solution group details.

</details>


# Configuring remote worker node

### Prerequisites

* [x] Connected EWX account
* [x] Worker account

1. Click `Set Worker Account` in the Dashboard's left panel

<figure><img src="/files/y8gPiaPjERMiJHN1eFzm" alt=""><figcaption><p>Set worker account</p></figcaption></figure>

2. Choose `Remote Server`

<figure><img src="/files/xwHm4afFBabtvqVYzCUo" alt="" width="375"><figcaption><p>Select location</p></figcaption></figure>

3. Enter a valid worker node address and click `Accept`

<figure><img src="/files/Psk7mNOU4KAslM9GjyW9" alt="" width="375"><figcaption><p>Set worker node account</p></figcaption></figure>

4. Click `Continue` to link the remote worker with operator account

<figure><img src="/files/AB0Ztn177MaeyYPhKDbU" alt="" width="375"><figcaption><p>Connect worker account</p></figcaption></figure>

5. Approve the transaction in your wallet

<figure><img src="/files/gBVK3p4dIOYQH0YC9ccT" alt="" width="375"><figcaption><p>Pending confirmation</p></figcaption></figure>

6. Wait for the transaction being executed

<figure><img src="/files/FDmUKkGRmQO60KXI97IR" alt="" width="375"><figcaption><p>Executing transaction</p></figcaption></figure>

7. You will see a success message along with the transaction URL to Polkadot explorer followed by another message indicating that remote worker is successfully set

<figure><img src="/files/akKWDnMFx79etlSjiCUZ" alt="" width="375"><figcaption><p>Transaction successful</p></figcaption></figure>

<figure><img src="/files/gGAwEEeewNIM9sXvX1my" alt="" width="375"><figcaption><p>Remote worker set successfully</p></figcaption></figure>


# Switching worker node location to remote

### Prerequisites

* [x] Connected EWX account
* [x] Worker node account set up locally

1. In Dashboard page, look for `Select Where to Run Worker Node` that is located on the left panel of the screen and click on the switch button to change worker node location from `In this machine` to a remote location

<figure><img src="/files/BWawdOCFMYteFbCL43ro" alt=""><figcaption><p>Switch worker node location</p></figcaption></figure>

2. Click `Continue` to proceed with switching worker node location

<figure><img src="/files/MJho5Ea6KVwjsLzpadHt" alt="" width="375"><figcaption><p>Set remote worker node</p></figcaption></figure>

3. Confirm your currently linked worker account address, click `Accept`&#x20;

{% hint style="warning" %}
If you have not link your operator account yet, then you will have to enter the remote worker address
{% endhint %}

<figure><img src="/files/VWHb6bybTp2aRo4wXNtB" alt="" width="375"><figcaption><p>Configure remote worker node</p></figcaption></figure>

4. A success message will be displayed

<figure><img src="/files/IXC7gCp5kbtWoNzu80qo" alt="" width="375"><figcaption><p>Successfully set remote worker</p></figcaption></figure>


# Participating into worker node network

### Prerequisites

* [x] Connected EWX account
* [x] Worker node account set up locally

1. Go to Dashboard, choose any of the subscribed solution group and click on `Enable Solution Group.` You can also find the same menu in Manage Subscription page

<figure><img src="/files/PQCP1pA7IoZPpg9vACsu" alt=""><figcaption><p>Enable solution group in Dashboard</p></figcaption></figure>

2. A prompt will appear. Click `Continue` to proceed or `Dashboard` to cancel

<figure><img src="/files/mjA5fU9FvB9RihD0yVL3" alt="" width="375"><figcaption><p>Participate into worker node network</p></figcaption></figure>

3. System will check if you have linked the accounts. If yes, you'll be prompted to download the solution group node logic. Click `Download` to proceed

<figure><img src="/files/wTQTTN1B4ihfhYC3JFid" alt="" width="375"><figcaption><p>Download solution group node logic</p></figcaption></figure>

4. Check download and installation progress displayed next to the solution group name

<figure><img src="/files/J6l6iekjF3z5EIWqgCLc" alt="" width="375"><figcaption><p>Solution group status</p></figcaption></figure>

{% hint style="warning" %}
For a newly subscribed solution group, `Auto-Installation Scheduled` will be displayed since node will start voting in the next reward period
{% endhint %}

5. Once the status changed to Running, node will start voting. You may pause and resume the solution group and the status will update accordingly

<figure><img src="/files/Yde5e2mZINE89X615RiW" alt="" width="563"><figcaption><p>Pause solution group</p></figcaption></figure>


# Votes casted per Period

Votes count per period will be displayed on Dashboard and in manage subscription pages.

<figure><img src="/files/JO1sfizbxvMJFN0o2Pu8" alt=""><figcaption><p>Votes count</p></figcaption></figure>

## Voting transactions and logs

In manage subscription page, there are list of both active and inactive solution group nodes that allow you to access their respective transactions and logs across reward periods. There are also status (Active/Inactive) and health status indicators for each of the solution group nodes.

{% hint style="warning" %}
Logs and transactions are not available for remote worker node and they will be disabled
{% endhint %}

<figure><img src="/files/xp7ycmEdDLTnSNzCMREh" alt=""><figcaption><p>Manage subscription</p></figcaption></figure>

### Voting transactions

`Transactions` will list all of the transaction records grouped by reward period. You may change the reward period number to view past data or search the logs and even filter the log type (All/Info/Success/Error)

<figure><img src="/files/LRFLcU2Y10tBkHgXFw4I" alt=""><figcaption><p>Transactions table</p></figcaption></figure>

For graphical representation of votes per reward period, you may switch to `Graph` tab. Hover on any of the reward periods to view the infos displayed at the top of the graph.

<figure><img src="/files/bOuQgTn3Ulxp90qyLjoR" alt=""><figcaption><p>Transactions graph</p></figcaption></figure>

### Voting logs

Similarly, worker node logs can also be searched, filtered by status and switched to historical data based on their reward period.

<figure><img src="/files/G4otRpSRk9xn6DAySJBe" alt=""><figcaption><p>Logs</p></figcaption></figure>


# Reward Period

{% hint style="info" %}
Read about Reward Period [here](/core-concepts/reward-period)
{% endhint %}

Current reward period is being displayed in Dashboard and manage subscription page.

<figure><img src="/files/njpspY7MJHGtDZKhwu9K" alt=""><figcaption><p>Current reward period in Dashboard</p></figcaption></figure>


# Checking rewards

Pending rewards can be found in Dashboard and manage subscription page.

{% hint style="warning" %}
If the value of pending rewards is small, we'll display it as `< 0.0001` instead
{% endhint %}

<figure><img src="/files/OxqgwdmmW0fp5bIKDoPe" alt=""><figcaption><p>Pending rewards</p></figcaption></figure>


---

[Next Page](/llms-full.txt/1)